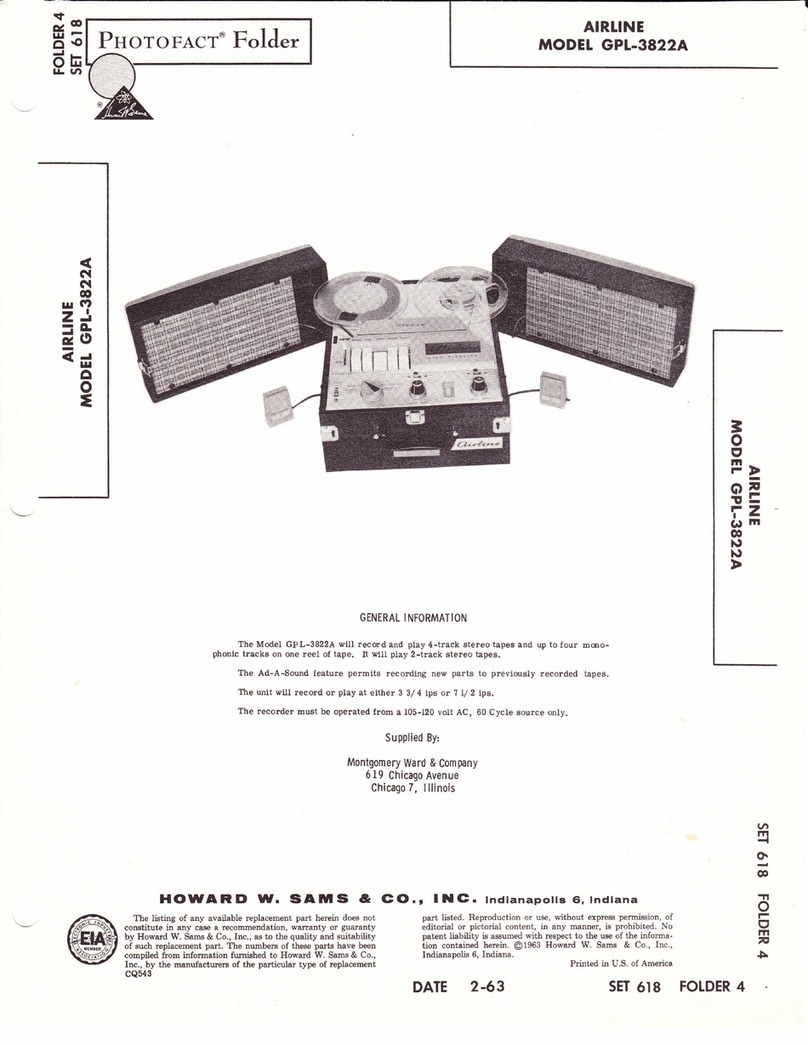
Airline GTL-3829A User manual

E?'
Eet
HE
-l l-
et r.rl
rCA
J
ltt
tr
=$
lrl(?
zj
-F
EO
=
t
o!
-l :-
lz
CJln
S=
eo
Dcl
tn
F
GENERAL INFORMATION
Airline Model 3829A tape recorder records and plays back two tracks of material on
standard-width recording tape, thus doubling playing time of a 3", 5" or ?" reel with no loss
of f requency response or quallty. The Model 3829A has two speeds, 3 3/ 4 and 7 L/ 2 ips.
A jack is provided on the dress plate for an amplified speaker to reproduce 2-track and
4-track stereo tapes.
Using both tracks of tape, recording times are as follows:
? /2" Speed
1rl 4 hour
i/ 2 hour
I hour
G |o.r I Il (C. lndlanapolls €i, tndlana
HOWARD W. SA|[S &
The liating of any available replacement part herein does
not conetitute in any case a recommendation, warranty or
guarantyby Howard W. Sams & Co. , Inc. , as to the quality
and suitability of such replacement part. The numbers of
these parts have been compiled from inlormatlon furnished
to Howard W. Sams & Co. , Inc. , by the manufacturere of
cQ438
Reel Size
3" (300 ft. )
5" (600 ft. )
?" (1200 ft. )
3 3/ 4" Speed
/2 hour
I hour
2 hours
Connect this recorder to an outlet supplying li0-120 volts, 60 cycles AC only. Before
connecting to line supply, be certain it agrees with these specifications.
Supplied By:
Mohtgomery Ward & Co.
619 Chicago Avenue
Chicago 7, lllinois
the particular type of replacement part listed. Repro-
duction or use, without express permission, of edltorial or
pictorial content, in any manner, ls prohlbited. No patent
liability is assumed wlth respect to the use of the informa-
tion contained herein. @ 1SOO Howard W. Sams & Co. , Inc. ,
a
l+t
-l
cJl
e
-l
et
E
1-l
-
ctt
Indianapolis 6, Indiana.
DATE 12 - 60
Printed in U.S. of Amerlca
sET 510 TOTDER
AIRTINE 'YTODEt
GTt-3829A

t. Open cover and remove power cord, microphone,
empty reel, and reel oftape from storage space
at rear of unit.
Remove cover by sliding hinges apart. Place
unit so that controlg are accesgible and at a
convenient height.
PREPARING FOR OPERATION
FUNCTION OF CONTROLS
O PERAT ING INSTRUCT ION S
PIug power cord into any ^AC outlet having proper
frequency and power requirements.
Recorder is now ready for use. Before oper-
atlng, the operator should familiarize himself
with the function of the controls.
3.
4.
4.
Function Control
Idle is neutral, or stationary, tape position.
Turn knob to the left for Play. To reeord, depress
Record button andhold while turning lunction selector
knob to the right.
IMPORTANT: When recorder is not in use,
function selector knob must be in Idle po-
sition.
Wind-Rewind Control
Turn control to the right for fast wind; to the
Ieft for fast rewind. Before operating Wind-Rewind
knob, function selector knob must be placed in IdIe
position.
Speed Change Control
tot 7 L/ 2 ips, put speed change control in down
position; for 3 3/ 4 ips, in up poeition. Do not change
speeds unless function selector knob is in Idle posi.tion.
Threading Tape
l. Pl.ace a reel of tape on t}re left (supply) spindle
and anempty reel onthe right (take-up) spindle,
making sure the reel slots engage the spindle
pins.
2. Unwindapproximately12inches of tape from left
(supply) ree1. Ilold a section of tape taut and
insert intape slot, making sure dull coated side
of tape faces rear of recorder.
3. Insert free end of tape into one of three radial
slots in hub of empty reel. Turn reel several
turns counterclockwise until tape is secured to
reel and atrI slack is taken up between reels.
To Record
Plug line cord into a convenient wall receptacle
and insert microphone into input jack on top of re-
corder. Turn On-Off-Volume control clockwise until
a cliek is heard and allow sufficient time for unit to
warm up. Thread tape as described under"Threading
Tape". Turn function selectorknob to Record. Adjust
Volume controluntil recording level indicator flashes
on high peaks only. To record from radio, phono-
graph, or television, follow this same procedure,
keeping recorder volume at a normal level. To stop
tape, turn function selector knob to the Idle position.
To Wind or Rewind Tape
l. Turn function selector knob to ldle.
2. To wind tape onto reel, turn Wind-Rewind con-
trol to right and hold. Release the control when
the desired section of the tape is reached.
Page 2
3. To rewind tape, turn Wind-Rewind control to
the left. The control need notbe held asit locks
into position. To stop rewind, return the Wind-
Rewind knob to its center position.
To Play a Recorded Tape
l. Follow instructions under "Threading Tape".
2. Turn On-Off-Volume control clockwise until a
click is heard and allow sulficient time for unit
to warm up.
3. Turn function selector knob to Play.
4. Adjust Volume control for desired Iistening
Ievel.
5. Turn function selector knob to Idle to stop tape.
CAUTI0N: Do not set function selector knob to
Record when Play is desired, as previously
recorded portion of tape will be automati-
cally erased.
Erasing Recorded Material
Any recording on tape is automatically erased
before a new recording is put on tape when it is in
Record. To erase a recording without putting anytling
on tape, follow normal reeording procedure, but leave
Volume control at its extreme counterclockwise po -
sition.
To Edit and Splice Tape
NOTE: Since one track cannot be edited and
splieed without affecting the other track,
recordings to be edited should be limited

w
',t
\;
F IG. 1 TOP V IEW OF MECHAN ISM W ITH D RESS PLATE REMOVED
t
9E
lz
Gt trl
3=
90
Dcl
rll
F
to one track only.
l. Tape may be edited by cutting out unwanted
portions or by rejoining selections into another
sequency. Announcements may be inserted be-
tween selections etc. Unused sections can be
spliced for re-use.
2. For best results, cut tape at a slight diagonal,
join ends with splicing tape on glossy side, and
trim any excess width.
Dual-Track Recording
One-haU of the tape width is recorded at a time,
thereby resulting in two-track recording. This two-
track recording is accomplished in the following
manner:
l. After a reel of tape has been recorded and all
tape wound onto the right (takeup) reel, turn
function selector knob to Idle.
2. Remove reels from recorderl turn full reel
over and place it on left spindle. Place empty
reel on right spindle.
3. Properly threadtape and proceedwith reeording.
4. After second track has been recorded, first
traek can be played without rewinding by rever-
sing reel as described in step 2.
D ISASSEMBLY
To Remove Recorder f rom Cabinet
Remove four screws on bottom of cabinet.
Remove four screws (two on each side) on sides
of cabinet.
Lift up unit and disconnect speakers.
4. Remove unit from cabinet.
To Remove Amplif ier From Tape Transport
t. Disconnect head leads.
2. Disconnect speaker jack.
3. Disconnect external amplifier jack.
1.
2.
3.
O
(7
rrl
n
\tl
Page 3

i
iW "tu-;
' -'" r.?"s rsiql
, -a,
*ffi!
'di{#id#i s
F IG.2 BOTTOM V IEW OF MECHAN ISM
Disconnect microphone input.
Disconnect sound lever indicator.
Disconnect rnotor leads.
CLEAN iNG
Capstan roller assembly (29), capstan shaft,
and recording head (40) rnay accumulate tape oxide
eoating, whi.ch wearsoff tape as itpasses these parts.
This aeaumul,ation wi.Il cause poor pertormance and
should be removed with a soft cloth dipped in alcohol.
7. Remove three rnounting bolts holding amplifier
to tape transport.
tU BRICATION
AII rnoving parts have seU-Iubricated oilite
bearingsl therefore, in normal. use no i.ubrication is
necessary. When unit is disassembled, clean ail
bearings with a clean, soft cloth and apply a thin film
of oil on bearing sur{aces.
4.
h"
MECHAN I CAL ADJ I.J STMENTS
Play-Record Head
The recording head (40) must be aligned with the
tape. If it is not, low output, loss of high frequencies,
or track overlap may result.
CAUTION: The play-record head was adjusted
andsealed inplace at the factory. Further
adjustment is unnecessary unless head be-
comesfautty andneeds replacing. The two
adjustrnents are made as f ollows:
i. I{ead height should be adjusted so that top edge
of tape aligns evenly with top edge of record
head Lamination. To adjust, loosen nuts (38)
Page 4
and slightly raise or lower recording head (40).
2. To adjust headfor maximumf requency response,
head adjustment screw (34) should be turned to
the left or right. This moves the head from
side to side slightly until maximum highfrequen-
cies are obtained. After adjustment, head height
should be checked.
Erase l-lead
Erase head assembly (45) should be adjusted so
that the erase magnet affects the top half of recorded
tape. This adjustment should be made in the Record
position. Loosen erase head adjusting screw (44) in

{ trift'
*5&##
lqdg Hv
BOTTOM VIEW OF MECHANISM WITH MOTOR
F lG.3 BOTTOM V IEW OF MECHAN I5
erase head (45). Erase head assembly (45) is then
rnoved up or down till only the top half of the tape is
affected. When properly adjusted, only the top haU
of the tape will be erased.
Brake Release Bracket
Brake release bracket (80) can be adjusted by
Iooseni.ng serew (81) and moving bracket forward or
backward. When bracket (80) is moved to rear of re-
corder, wind-rewind lever assembly (83) contaets
BOARD SUB PLATE REMOVTD
release bracket (80), giving bral<e cord (9I) rnore
slack. For less slack in brake cord (91), reverse the
foregoing adjustment.
Spindle End Play
Spindles should have L/ 32" to L/ L6,, up and down
movement. Loosen set screw (60) in upper pulley
assembly (61) and move pulleys up or down until cor-
rect annount of end play is obtained.
P
9E
TZ
(.) lll
B=
so
DU
tn
F
TROU BLE CHART
Symptom Cause Remedy
Fails to erase. I.
2.
Erase head adjusting screw (44)
in erase head assembly (45)
Ioose, causing erase head to
remain in Play or Idle position.
Interlock shaft assembly (84)
fails to go down far enough to
let interlock slide (90) move to
one side. Function selector
knob will notgo into Recordpo-
sition when this occurs.
l. See "Erase Head Adjustment"
2. Check for binding.
No Drive on record or play-
back. Rubber drive belt (58) loose or
broken.
Take-up belt (?8) loose or bro-
ken.
t. Replace drive belt (58).
2. Replace take-up belt (?8).
1. O
0
n
\rr
2.
Page 5

A PHOTOFACT "EXPLODED' VIEW
oHoward W. Srms & Co., lnc. 1960
Page 6
FIG"4A EXPLODED VIEW OF PARTS ABOVE BASEPLATE

li.
*r$-ffi
A PHOTOFACT "EXPLODED" VIEW
o Howard W, Scms & Co., lnc. 1960
E
e=
rz
(d) rrt
SB
so
Dcl
lTt
F
'Tr
O
t-
g
Fl
n
\tt
F IG "48 EXPLODED V lEW OF PARTS BELOW BASEPLATE
Page 7

TROU BLE CHART (CON'T. }
Symptom Cause Remedy
3.
4.
5.
6.
Defective motor (?2).
Connecting Ieads fouling fan
assembly (73).
Flywheel and capstan shaJt
binding.
Takeup spring (85) disconnected
or defective.
3. Replace rnotor (72).
4. Dress leads sothey will, not con-
tact fan assembly (?3).
5. Clean and lubricate flywheel and
capstan shaft.
6. Reconnect or replace spring (85).
Speed variation or wow. l. Dirty or oily capstan sleeve
assembly (25), capstan roller
assembly (29), or motor pulley
(63).
l. Clean withsoft cloth and alcohol.
No wind or rewind. Drive belt (58) loose or broken.
Take-up belt(78) or rewind belt
(?9) loose or broken.
Oil or grease on driving sur-
faces.
Replace drive belt (58).
Replace take-up belt (?8) or re-
wind belt (79).
Clean with softcloth and alcohol.
t.
2.
3.
l.
2.
3.
Function control does not
operate. L Brale spring (88) broken or
disconnected. l. Replace or connect brake spring
(88).
MECHANICAL PARTS LIST
I
2
3
I
5
6
I
I
I
IO
1l
L2
i3
14
r5
l6
l?
l8
l9
20
2L
22
23
24
25
26
27
28
29
TA-1930
TK-256-r
TA-143r
TK-251
TE -279-1
TA-r432
TK-249
TA.1433
TP -1242-T
TS-2152
TB-809
TB-2i40
5r03-25
TP -983
TS-1854
TA-1204
TA-1002
TG-4i4
TB-200?
TL-344
TS-1755
TP-1150
TB-2028
TH-494
TE-4?9
TP-863
TA-IT23
TS-1659
TA-1441
TA-[86
TS-1931
TT-7r2
TB-6I9
TB-878
TB-635
TF-304
TO-l7l*
6-32 x 3/ 4FL. Phil. Hd. M. Scr.
Brass Pl.
Function Selector Knob
Sound Head Lifting Knob
Record Knob
Wind-Rewind Knob
Rear Escutcheon
Volume Control Knob
Tone Control Knob
6-32 x r l/8 Fl. Phil. rld. M.
Scr. Stl. Brass Pl.
Front Escutcheon
6-32 x 5/16 Lg. Truss Phil. Hd.
M. Scr, Stl. Brass Pl.
Motor Board Dress Plate
Spindles
. 3I5 I. D. x 9/ 16 O. D. . 010 Washer
Bali Bearing Race
Base Plate
Amplified Speaker Jack Bracket
ttC" Washer
. 255 I. D. x L/ 2 O.D. x . 010 Su.
Washer
6-32 Hex Nut
Hex Sha.ft
6-32 x 3/i6 Screw
No. 6 Lock Washer
Spring
Capstan Sleeve Assembly
ttC" Washer
Head Adjustment Screw 2-56 x 5/16
ttCtt Washef
Capstan Roller Assembly
30
3l
32
33
34
35
36
37
38
39
40
4L
42
43
44
45
46
47
48
49
50
5l
52
53
54
55
56
57
58*
59
Screw No. 6 x I/ a Lg. Hex. Slotted
Sht. Metal Type Z
Tape Guide, Upright
Tape Guide Bracket
Wind-Rewind Latch
Head Adjustment Screw 2-56 x 7/ L6
No. 2 Flat Washer
Record Ilead Spring
Sound Head Lifting Plate
No. 2 Hex Nut
Recording Head Mounting Bracket
Recording Head
Screw 440 x3/ 16 Phil.
Tape Release Guide
Record llead Pressure pad
Erase Head Adj. Screw
Eraqe Head Assembly
Erase Head Spring
Pressure Pad Bracket Assembly
Capstan Roller Plate Assembly
.315I.D. xl/ 2O.D. x.032Thk.
Fibre Washer
.3i5 I.D. x 9/16 O.D. x .010 Flat
Steel Washer
ttCt'Washer
Pressure Pad Spring
Tape Guide Post
Exeursion Limit Bracket r
Bearing Motor Pivot Bracket
Bearing Motor Pivot
Flywheel
*Linear "O" Ring Drive Belt
.3L5 x L/ 2 O. D. x . 062 Washer
Page 8

* Linear "O" Ring Drive Belt
Walsco Part No. i4l0-i4
* Rewind BeIt, Walsco Part
No. 1409-04
?2AX7 12AX7 32AX7
AMPLIFIER CHASSIS . TOP VIEW
=
ol
-l :-
rz
0o ill
S=
90
Dcl
llt
!-
TI
o
€
v
\tr
MECHAN I CAL PA RTS L IST (CON'T. i
Description
TA-265
TA-tl83
TS-1630
TA-1205
TB-879
TH-515
TB.IO6I
TM.4O?
TS-1942
TA-1448
TA-1206
TS-1270
TB-859
TA-1128
TB-998
Set Screw 6-32 x 3/16 Round
Upper Pulley Assembly
Lower Pulley Assembly
Part of Motor Assembly
Spacer
Motor Board Sub Plate
Rewind Stop tsracket
Excursion Limit Hook
Motor Mounting Bracket
Motor Shock Mount
No. 6 Washer, FIat
Motor Spacer
Motor Assembly
Fan Assembly
8-32 x 3/ 16 Slotted Set Screw
Drop Spacing Stud
Brake Rod Guide Bracket
Brake Rod Sub Assembly
Takeup BeIt
87
88
89
90
91
92
93
94
TB-999*
TB-858
TS-1658
TA-u21
TA-1207
TS-2022
TA-U22
TA-1004
TS-1657
TS-1681
TS-1625
TB-i004
TS-I905
TA*lltg
*Rewind Belt
Brake Release Bracket
No. 6 x I/ 4 Sheet Metal Screw
Type Z
Brake Spring
Wind-Rewind Lever Assembly
Interlock Shaft Assembly
Takeup Spring
Capstan Roller Plate Cam
Lever Assembly
Switch Detent Lever Assembly
Brake Rod Return Spring
Capstan Roller Plate Lever Spring
Interlock Slide
Brake Cord (25" Long)
Switch Detent Lever Spring
Switch Shaft and Cam Assembly
No. 6 Flat Washer
Page 9

=
t&!
=
o
F
F
O
6
I
2
VI
(t,
J-
C-)
o-
=
Page l0

P
on
'{ :;
T"z
@Et
S=
90
Ds
m
F
-1n
()
r
(3
rrl
n
\*rr
J
IrI
o<
Oo
E$
sr€
ql
tLJ
-l-
Etp
a
IJ
F
trl
I
tlt
zB
o9
Fd
<l
F
9r
.[
o-
e.E
<( &a
2>
{r
F-.
(/, 3
o
FT
\,1 5
r
o
F
o
I
CL
E,
o
F
o
=
t!
&.
cl
z
o
F
c)
u
z.
z.
o
(.)
O
z.
C.)
.2.
o
U
F
z.
(9
t/)
u
a
t!
lt',
=
t
U
I
F
O
tn.
v)
U
J
z.
=
z
o
=
oz
o- c)
:L
>-- .
< trrF
o- du
=_o
Z 6r
-Ez
u-=
o 5o-
<u-
E =oF
? -&.
2=n
u ^a
EEU
oa ==
= tfra/7
(n <<
Ess
-J
)
{ l+
U
(-)
e,
J
o
ttl
o
\o
l
7=i
vfE
;96
\Z \Z
(JO
UU
OO
v7 u',
UU
JJ
zz.
OO
FF
oo
o- o-
>-a
<d
o--i
vt*
Fr
=P
sk
,=
o89
U
(.)
e.
o
vl
o
o.)
o{
lt
-X
si€
E@
u
(-)
e.
)
o
a
o
^t
./t
C9
z.
a
U
d.
u
c)
z
F
vl
a
ul
d.
u
C)
<a
eo oa
>O
<c)
JU
a- e.
tt
6G
EE
oo
sf (n
u
z
o
o-
o
d
I
=
f6
-o-G
E. Ed; E i
;E AEE'E : E
EE'E::EB 5 H
====H'SEE :
fifil |
qr\c,
-
-Jlvl
*r i
a L--------------J
d.
<)
(-)
U
e.
J
Lll
z
z
!
(J
$
@
:Z
C)
-
.t
z
z
fr.l
F
tt1
J
J
z
d.
U
F
x
.l!
Za'
T<
lo
J
Ers)
o\-/
HI
l=l
c
=
L!
o-
=
fiJ
E
o-
@
I
e; ;E€; *: t= ie
€EEI;;EE Eg dF
EEEE?FES 7I; E;
;fie[EEs= ;e;E;*
E
E/4,-
:LAJ ^
\/
€
Tow
o.rl .
C lo
ol
.c1 t-f
E
-1t
G
\s,
(
@l
EgEEE€EE ;i i.6Z
;;;EEEE: ;;2i 6? F
@
F
t_
I
'l' I
g$k
9A:
\Jl
sl
=- I
ol
ol
-lFI
g,n
)=
Frfi
iFii€
@
o
@fr:
o
(\l
G\
dl
e,/
e
.E
o
N"l=
o.;ri-,ri .d d 15 3* Xg
6...Jts&
= HS 89 t
(9
;i <@
( )--z
\-/ =
Jfr l-
=
:i'
EI
-E ol
-o dl
3 olor-
@8,.ry
t=l
\Z
,o(\l
'N
/3'\
E/
o
o
E
.f,-
A
\y
SZ
o
oo-=
@*e v
IE
l^
li= @
fi LYir-i*- F
6:lGL+
lur
i=- @
I JO
- loR
,"=-Ji.-Jt,
@+g@ K :
| - \A/.' -.c
!l= @
:'{ilH-
e)Fl*5
iE-^1^-
@+5 @
-F
o{@
I
#"'
)t.t
E@[
'=Ei b6
=6 il
F=!
<-4
**-ltr,
\-/ crr r'
E
-in-B
@G{
\
Li*;
5l'- o
R
----+AA'--.llr'
HE@+
'+.|
r@
@i
N
xl
=S lz.
.< - lcr./ I
L a[ I
< co \-.1
eF
@:
z
o
C)
F_-
==3
^1n o
z.>= E
ooQoo->-
l.;5HPl
ZaHEt..to_
=50a
L=: dNd\
E
-E v.
rER ts
l_-\AA-S
@
I\-
il i."
lU-Jr,, -
lcr ll' 9
E
lo
IH
*,,
ls= @
lc)t
ld
6X
F #r'A^rrJlt'
s i6l i
ut .l
=
\Z
o
Nffi'lllrI
ffi
f-13*'L---:
NIRA
Il= @
:Kis)-*"
E/ *l l-
>l I
3 I r--lp
+ ___r_____-L-___
-5i----Tg I i
iEi.o, Loolml i
3ll
- ____l_______t
- = l----l- g---T---t
= F ia' LoFooo-J i
F
=
o-
z
Fage 11

z
a
o
:_!.9., 5
i !ra i a
Ootoio^
2 q oa O Or-
qEES>tsB
o
z
FqTqrq*q
<<lt<lo
tsFITtsFtsF
=
zo
ooonoa-E
lkvlvvu
o
z
o
FE
\tr
d-a
' Ed
o E!;
OEE}
a2
z
i!< q4 gqq
<E <<>
FF tstsK
z
A
.d
-6-@ 8.5
f;fl;EEE
>d >>E5
F
o
o
z
d
=
at
:)
o
trJ
z
trl
t4
c.
tll
\z
tll
o-
IA
F
D
o-
f
o
I
o
f
S
t
tl,t
=
4,
o
t!
a/,
z
e,
d,
Lu
=
o
A
d.
LU
=
4
o
tt
z
d,
T
lr
e,
v,
6
U
o
o
u
od
3
I
r,/l *.
d,n
s:
rt
lr|P
lo*
E9
q-d
ul o
odj
,rr 3
i! ad
zt
co .E
<f
(Je.5
o
o
o
E
=
rt
z
I
F
g
4
(,
la
ut
a
o
z
F
I
J
la
l-
d
4
=
o
zxxSx:xF !t
NXN6N= . F
N=N-N:s:
{. orNss@@r-
&tr ddddcld
=
o
z;>
v 3 v E E div d
oodoF Fd F
NNNT .:N:
NNNss=N=
E:
?ci
acd t
"i o?
6l E o
dd 2!
ad uJ;
== J.!
ili < E
cqaF > 9
E =E
I ofi
o = lJF
o -. O"i
<o
g 3Lr.
-E 9q6
-Nv=
Y@E
E Sur=
ie I e{
:-C AH
=) ; \) q
-r ,-i F 9
g* S t^ E'
9E E (^S
vg -- u >
.-i i e.=
6h;
.it
ze o
oZS
=u- 6
v,
o
E
z
o
l.)
E
z
j
z
o
dd
d9
L'o
oo
;o
JU
q
.s'E
vlo 9
g:a
o;e
9E'
<:9
<i'
L)! 6
o
o*i
ul.= E
Xc E
l!.:.:
tlla
6C
3o
69
>6
>.:
go
ao
o(J
u
r^
e,
o
=
(J
6-
(J
I
o
e,
(J
l.l,t
rlt
r^
UI
o
f
o
z
o
F
z
:
az
o?
2z
JF
eZ
ad i<F
F
=
U
t
o>E
qA
N
:: AA
o
z
o
F
z
:
F? x
oci
TE
o< @
3z
6<
2.4
ZZ
5< Fr
t<
U
z
o
:
fr: H
F
o
z
lo
9<
3z
2*
-9
z'
c< F,I
ti
o
z
tr
@
F
Odtr
>s-
@
{;
P; F
F
o
z
3
:
z
{
gz
i;<
o
=F
2z
.-_ z
=t
oj
Et
?L o
F
-o
o
o
{: I
:
z
Fvc E^^
=r
tsz &.(c tr d,d
F
z
z
o
tr
I
z
o
oo
EI
!>a
62
==
E
D
T
b{
c
o
F
<;
FJ
OF
<^
z< \1;
-NP(
O
F
tYl
tt-
t<
ol>
zll
trl
{ lpu
r'\
F: <lao
d
o
d
o
I
.c
E
o
o
I
o
E
o
tE
E
6
F
:
I
=:
oz RooRo-R-33R?3RR
e44'i44?4tellct?
FvrEvvE*8E222e8,
tsEEFTIFE!F!!FIH
6<6=6==o=6
t: a+
E??E;;A;$;$EEHE
()rqEocqEc)cqrauu()o()(,
o.
=g
ooox:-
Iqqlq+IqFiFq:q:
o. e o d. a a ri a a ri o a.,: a ci
e33eE8Q88333834
ie
y=)
)or gHHg?igHAHrnf;sH
PF>P>>D>lD::>=5
oAcqocqaUorqojJoja
<(
=o
U. fi+q++qfrqqHqqHqF
aoAoooooo;oo;oo
aOOOAoooO6iioooa
!;
8i s 3 s €Es Eqs
>oo-oo;oo;o^;o;
6,{ I A'l .l 6.1,r, A -r 65,r g
SEE$EESE;SH]*T3
AtrtrAaQEAcqtrAFaoqtrA
tz
o
zo o o o s6
-9q-qq-q - !-
qEEqEEqEHEREERq
T;
;z gh@F6o9=I:?199=9
OOUOOOOOOOOOOUO
F
z
gd
o1
fi t a;\
I y=
Ei Er tr
od
=z
{r 6 E>
xi
3F g Ex
s EA
B i.i.
dvt 3 --
tr =;
tr Jl
a zz
X,i
9l
U<
<d tr Eits
A AA
q
2o
CF 39
AO
FF{
O
F
o
5: jao^-
o oo
z
o
I
F
d
&.
F
o
J
J
E
z
o
E!
do
oc
o
Table of contents
Other Airline Voice Recorder manuals