Airlinkplus ATVPCI883 User manual

Model # ATVPCI883
User’s Manual

1
Table of Contents
CHAPTER 1 INSTALLING HARDWARE......................................................................................................2
1.1 Package Contents .................................................................................................................................2
1.2 Minimum System Requirements..........................................................................................................2
1.3 Hardware Installation...........................................................................................................................2
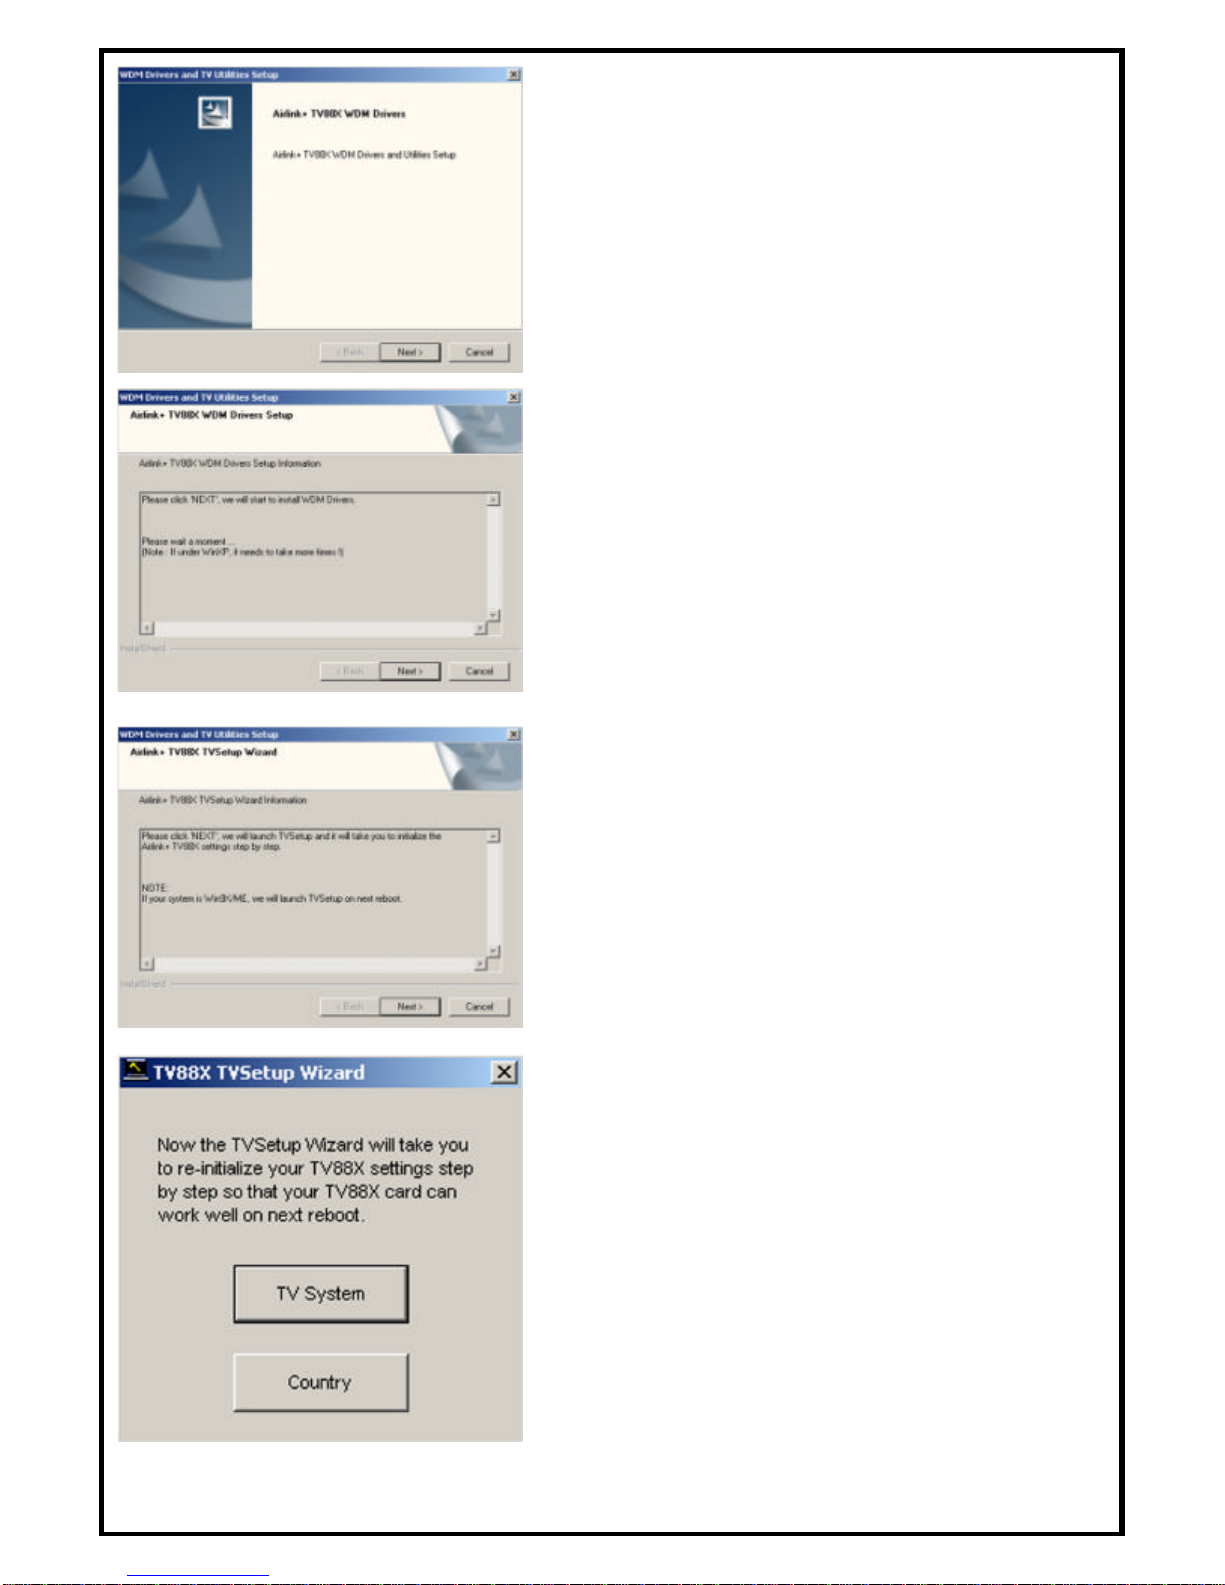
CHAPTER 2 INSTALLING VISION+ TV CARD DRIVER...........................................................................3
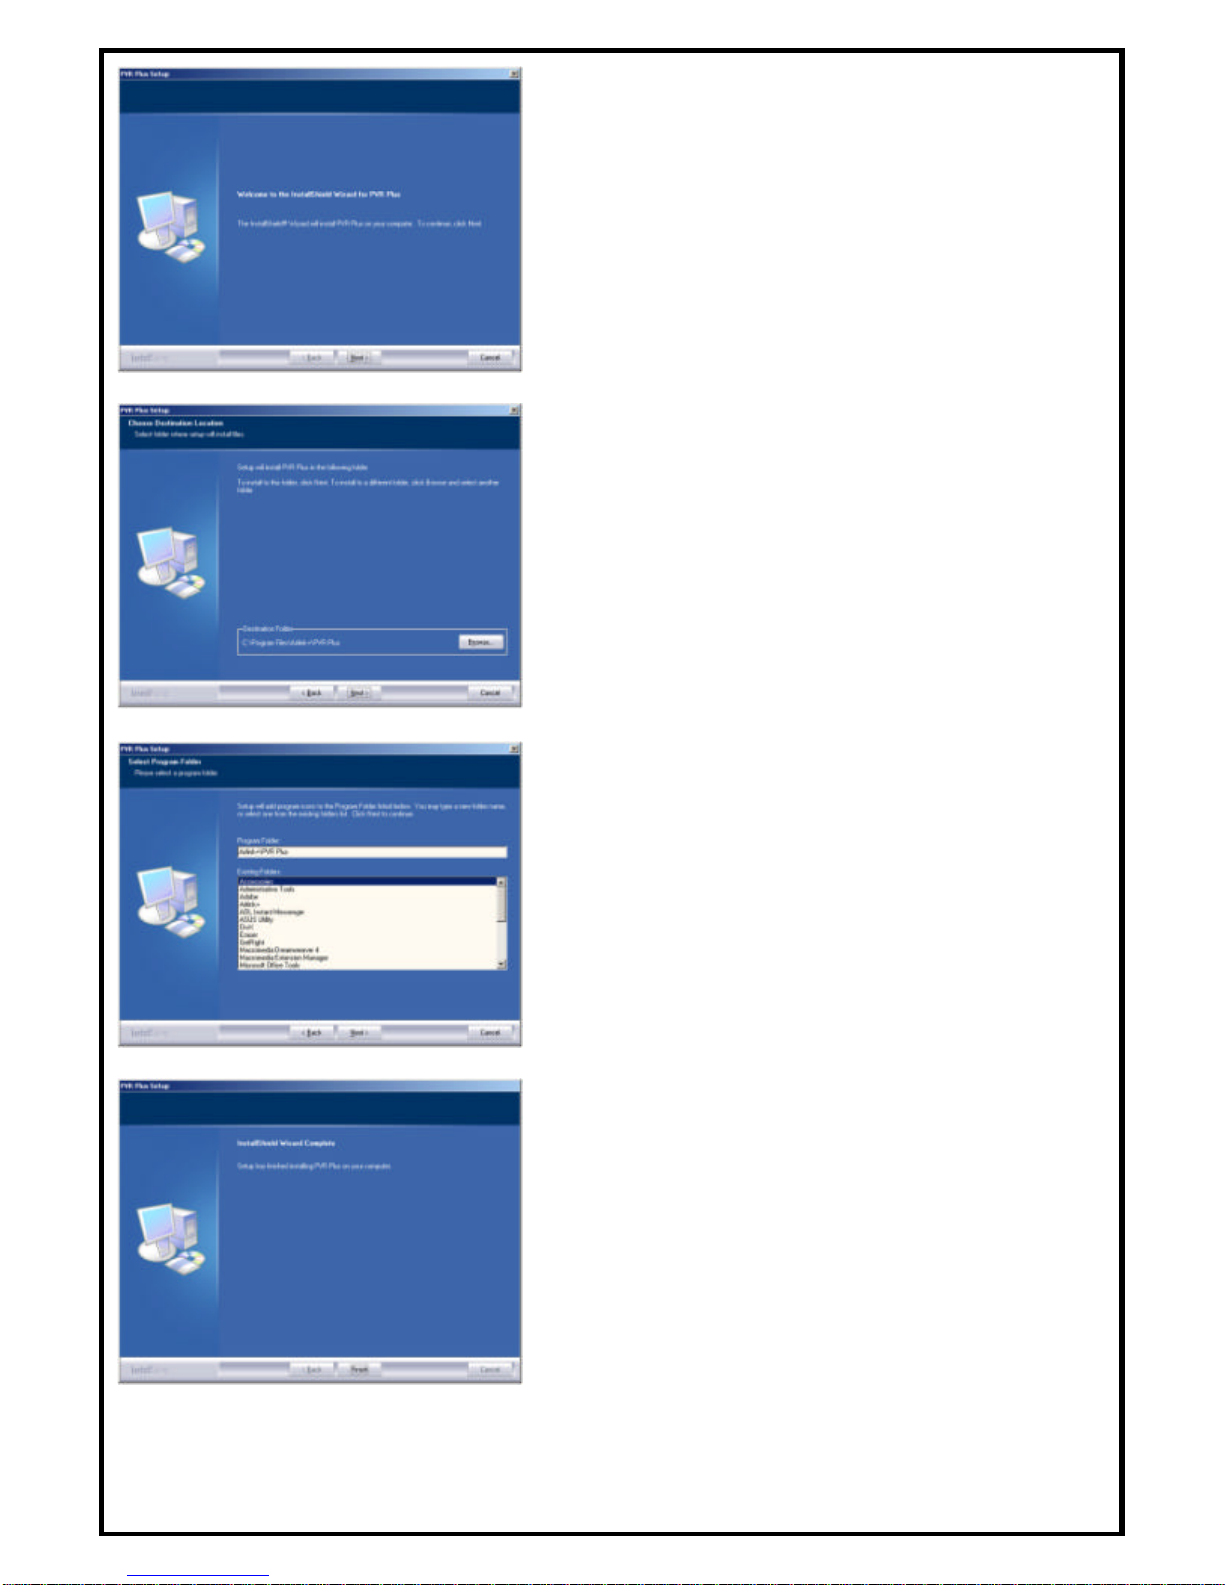
CHAPTER 3 INTSTALLING PVR-PLUS........................................................................................................5
CHAPTER 4 USING PVR-PLUS......................................................................................................................7
CHAPTER 5 USING TVR ................................................................................................................................8
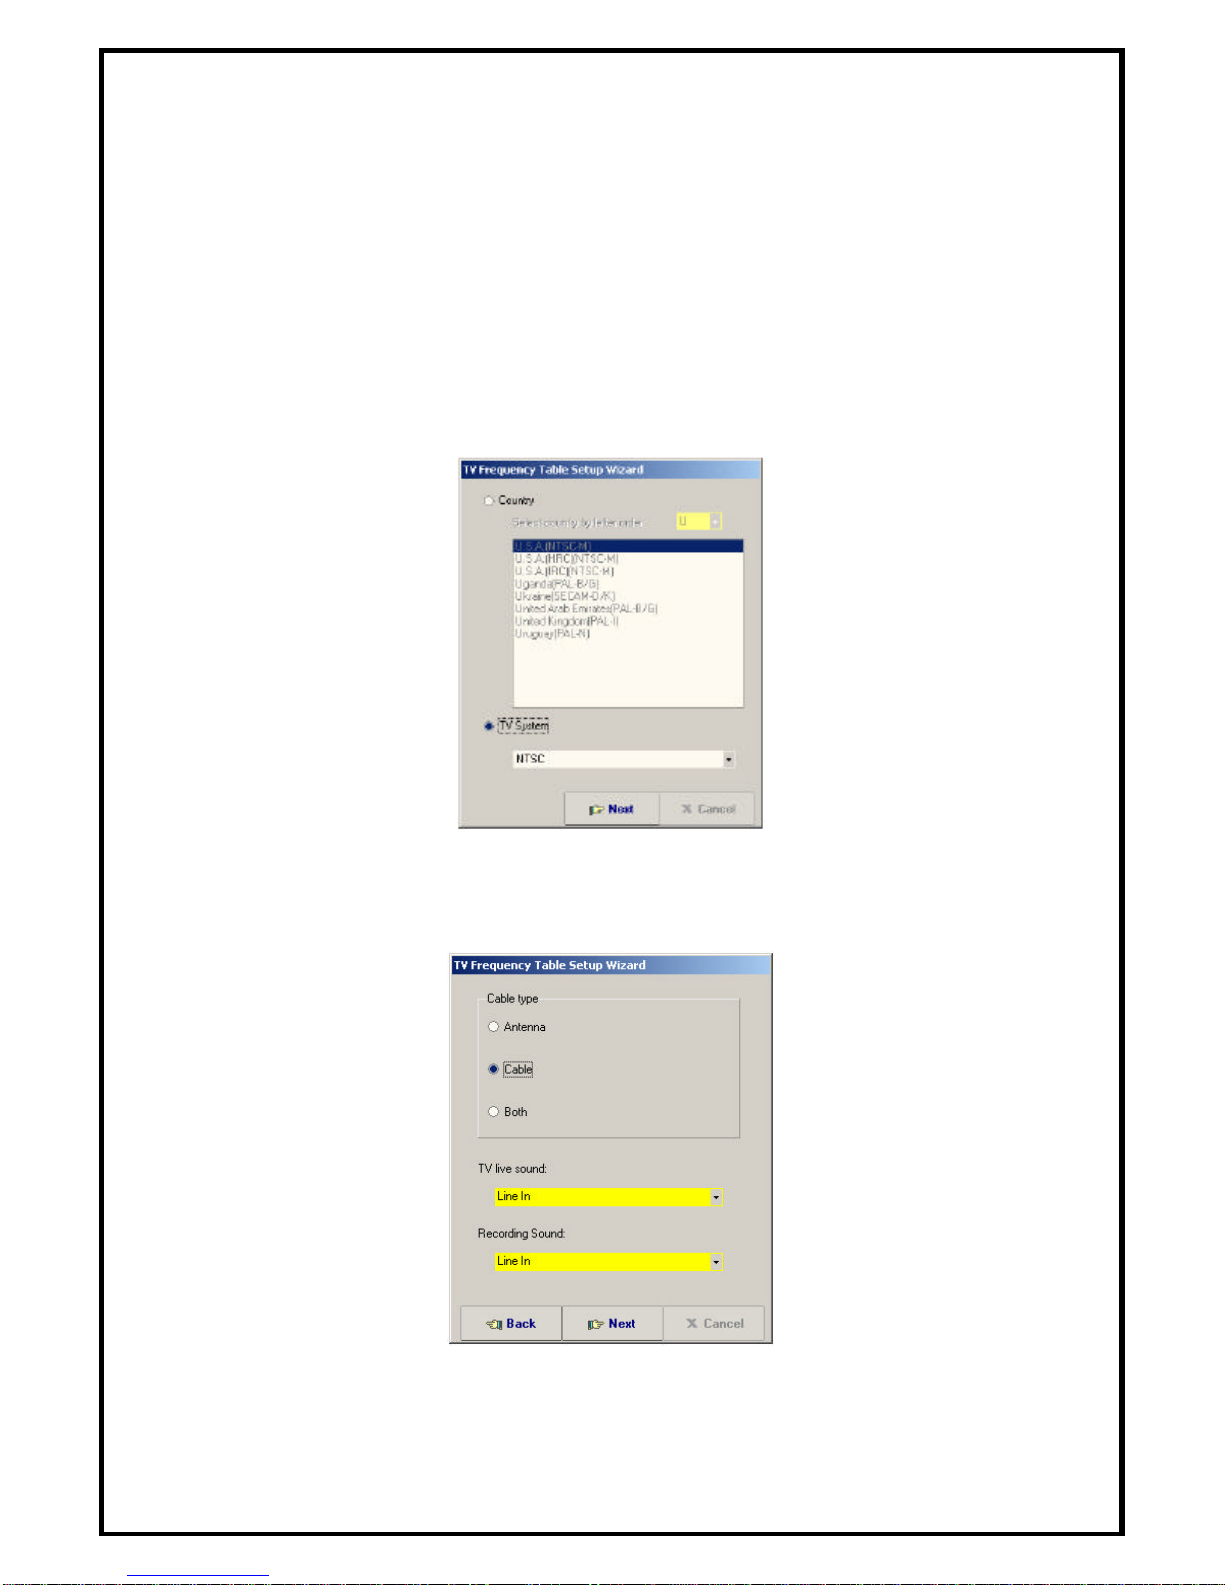
5.1 Setting TV system and scanning channels...........................................................................................8
5.2 Main Panel Functions..........................................................................................................................10
5.3 Schedule Function ...............................................................................................................................13
5.4 Setup Utility ........................................................................................................................................15
5.5 Channel Preview .................................................................................................................................18
5.6 Snapshot..............................................................................................................................................18
5.7 Sleeping Timer ....................................................................................................................................18
5.8 FM Mode.............................................................................................................................................19
CHAPTER 6 USING MPEG ENCODER........................................................................................................21
6.1 Interface Explanation..........................................................................................................................21
6.2 Streaming Video Translation ...............................................................................................................22
6.3 Translation Option Dialog...................................................................................................................23
CHAPTER 7 USING VIDEO EDITOR ...........................................................................................................26
7.1 Menu Area...........................................................................................................................................27
7.2 Display Area ........................................................................................................................................28
7.3 Original and Staging Clips..................................................................................................................28
7.4 Frame Edit Mode.................................................................................................................................30
CHAPTER 8 USING DVD MAKER ...............................................................................................................31
8.1 Adding Files ........................................................................................................................................31
8.2 Burning................................................................................................................................................32
8.3 Video Specifications............................................................................................................................33
Appendix A .......................................................................................................................................................35
Product Specifications ...............................................................................................................................35
Appendix B .......................................................................................................................................................36
Technical Support......................................................................................................................................36

2
CHAPTER 1 INSTALLING HARDWARE
1.1 Package Contents
Unpack yourVision+TV card and make sure that all the items are intact. The following
items should be included in your package:
lVision+ TV Card
lAudio Cable
lA/V ConverterCable
lQuick Installation Guide
lInstallation CD-ROM
lRemote Control [requires two AAA batteries (not included)]
lRemote Sensor
lFM Radio Antenna
1.2 Minimum System Requirements
lOne available PCI Slot
lPentium III -1GHz MMX or above CPU
l256 MB RAM
lCD-ROM drive
l16 MB VGA card with 800x600 16-bit resolution (DirectX 8.1 supported)
lAC 97 compatible sound card
lWindows 98SE/ME/2000/XP
1.3 Hardware Installation
Note: Be sure to turn off your computer before installing the TV card.

3
1. Insert the TV card into an available PCI sloton your computer.
2. Connect the coaxial cable for the TV antenna/cable to the TV port of the TV card.
3. Connect one end ofthe A/V converter cable to the A/V port of theTV card,andconnect
theComposite(or S-Videoinput), andaudioinputsto the corresponding outputcables
of your video/audio source.
4. Connect one end of theprovided Audio Cable to the AudioOutconnector of the A/V
converter cable, and connect the other endof the Audio Cable to the Line In port of
your sound card.
5. Connect the FM Radio Antenna to theFM port of the TV card.
6. Connect the Remote Sensorto the Remote port of the TV card.
7. Connect your speakers to the Audio Out/Line Out port of your sound card.
CHAPTER 2INSTALLING VISION+ TV CARDDRIVER
Before installation, it is highly recommended that all background applications such as
antivirus software and system monitoring programs be disabled first.
1. Turn on your computer.The Found New Hardware Wizard will appear. ClickCancelto
quit the wizard and insert the provided Installation CD-ROM.
2. The setup menu will automatically appear. Select Driver_Install to start the driver
installation.
Note: If the setup menu does not appear automatically, go to Start, Run, and type
D:\ksetup.exe (where Dis the letter of your CD-ROM drive) and click OK.

4
3. Click Nextto install the driver for the Remote
Control.
4. Click Nextto install the driver for the TV card.
5. Click Nextto launch the TVSetup utility.
6. Click TV System to configure the setting.

5
7. For U.S.A., select NTSC as your TV System and click
OK.
8. Select Yes, I want to restart my computer now
and click Finish to restart your computer.
Note:If you want to re-configure the TV system, you
can run the “TVSetup” utility to change the setting.
Click Start,Programs,Airlink+, TV88X,TVSetup
to execute the program.
CHAPTER 3INTSTALLING PVR-PLUS
PVR-PLUS is a set of utilitiesthatallowyou to watch TV on your computer, edit video clips,
burn DVDs, and more. Before installation, it is highly recommended that all background
applications such as antivirus software and system monitoring programs be disabled first.
1. Insert the provided Installation CD-ROM.
2. Select PVR-PLUSat the setup menu. If the setup menu does not appear automatically, go
to Start, Run, and type D:\ksetup.exe (where Dis the letter of your CD-ROMdrive)
and click OK.

6
3. Click Next to begin installation.
4. Click Next to accept the default Destination
Location or click Browse to choose a new
location.
5. Click Next to accept the default Program Folder.
6. Click Finish to complete the installation.

7
CHAPTER 4USING PVR-PLUS
Double-click the PVR Plus icon on your desktop to run PVR-PLUS. After you started
PVR-PLUS, you can select the application you want to use. Click on each icon to start the
application.
•TVR: TVR turns your PC into a
full-featured video recorder. (For detailed
instructions, please refer to chapter 5).
•MPEG Encoder: MPEG Encoder
converts DV/AVI files into MPEG/DVD format.
(For detailed instructions, please refer to chapter
6).
•Video Editor: Video Editor allows you to
edit MPEG/DVD videos.(For detailed
instructions, please refer to chapter 7).
•DVD Maker: DVD Maker lets you create
VCD, SVCD,and DVD that can be playedona
PC or DVD player. (For detailed instructions,
please refer to chapter 8).
Note: You can also view and edit pictures using PVR-Plus.For detailed information about
how to view/edit the pictures, click the ?button on the PVR-Plus console.

8
CHAPTER 5USING TVR
TVR is a powerful and easy-to-use TV application that provides feature-rich video/audio
entertainment. TVR allows you to watch and record TV or video on your computer and
playback the recordings as well.You can also listen to FM radio in the FM mode.
5.1 Setting TV system and scanning channels
Note: The first time you start TVR, it will run the TV Frequency Table Setup Wizard.
1. For U.S.A., select TV System, NTSC,and click Next.
2. Select the cable type and audio source for your TV and Recording sound and click
Next. For example, if you connect the provided audio cable to Line In of your sound
card, then you would choose Line In as your audio source.

9
3. Click Start to auto-scan for all available channels.
4. Click Finish to complete the TV Frequency Table Setup Wizard.
Note:
1. TVR depends on current country codes provided byWindows OS togive you adefault
value of each country. However, this may not work in some cases soyou should check
and select a valid option for yourTV system; otherwise you will not be able to view all
TV programs.
2. When you want to reconfigure your current TV frequency table, you can choose Reset
TV Optionon the popup menu of the display window.

10
5.2 Main Panel Functions
The display window shows live TV or recorded videos. You can drag it anywhere on the
screen or adjust its size by double-clicking it to switch to full-screen and double -clicking the
screen again to return to its original size.The TVR has six major parts.
5.2.1 Information Window
The Information Window displaysthe current status of the TVR, including video status,
(Live, REC, Playback, Time Shifting) sound status, (Mono, Stereo,or SAP), recording time,
recording file size,and the current time.
5.2.2 Basic Tool Part
The Basic Tool has eightbuttons. You can click on each button for more specific functions.
For detailed instructions on each button, please refer to the following sub-sections.
: Video source switch: click on this button to switch your video source
: Scheduling: schedules recording date/time
: Setup: opens the TV Setup Utility
: Channel preview: previews all available channels
: Snapshot: takes a snapshot of the current image in the display window
: Sleeping timer: configures the sleeping timer
: TV sound switching: select from Mono, Stereo, or SAP (for TV only)
: FM Mode: switches to FM Mode for FM Radio listening

11
5.2.3 Channel Adjust Part
You can select the channels by clicking the number keys, or on your computer’s
keyboard when the video source is set to Antenna, Cable,or Memory.You can also select
the channels with the remote control.
Note: The remote control requires two AAA batteries (not included).
Channel Up: Goes to previous channel
Channel Down : Goes to next channel
Note:You must first set the channels by auto-scanning for them as described in section 5.1
before you can switch the channels.
Recall Channel : Returns to the last selected channel
5.2.4 Input Source Part
There are five video input sources to choose from: Antenna, Cable, Memory, Composite,and
S-Video. You can change the video source by clicking on thevideo source switch button
(like or ), or choose Switch Video Source from the popup menu of the
display window. When the video source is changed successfully, theInput Source Switch
will show the corresponding source.
5.2.5 Volume Adjust Part
Volume adjusting:
: Increase volume
: Decrease volume
: Mute or restore sound
5.2.6 Record, Playback, TimeShifting Part
1. Record

12
At Live mode,you can start recording the current broadcast by clicking on the capture button
. Once you are capturing, click the stop button to stop recording. You can
review your recorded files in the Play list after recording.
2. Playback
You can playback the recorded files by clicking on the play button . A playback
dialog box will appear, showing all the captured files and recently played files. Select the
files you want to playback and click Add to add them to the Play list. You can add more
than one file at a time, and you can also import files from other locations.Once you have
added all the files to the Play list, click OK to begin playback.
While playing, you can use following functions:
•Play button : If the video is paused, resume playback
•Pause button : If the video is playing, pause it
•Stop button : Stop current playback and go to Live mode
•Backward button :Go backward
•Forward button : Go forward

13
3. Time Shifting Function
The Time Shifting function allows you to record and playback videos at the same time. At
Live mode, you can perform time shifting by clicking on the time-shifting button . Once
you are in time-shiftingmode,you need to waitat least 10seconds before you can playback
the recorded video by clicking on the play button .If you want to stop time-shifting,
click the stop button . During time-shifting, you can switch between the current
video and the recorded video by selectingReal Screenfromthe popup menu of the display
window.
5.3 Schedule Function
Click on the Schedule button to configure the Scheduled Recording Agent. Click OK
when you are done configuring.
Capture
Capture Source:Select the video input
source (Antenna, Cable, Memory,
Composite, S-Video, or FM memory).
Channel:Select the channel that you want
to record.
Capture format (profile): Select the
video format you want to use.Note: If you
want to burn your captured videos to DVD,
be sure to set the capture format to DVD
(NTSC) and not MPEG 2.
Capture size:Set the video capture size.
Bit rate (Kbps): Set the capture bit rate.
Capture quality:Set the capture quality.
Frame rate: Select the frame rate.
Capture audio option:Select from “Capture audio”, “Captureaudioonly,Novideo”, or
“No audio”.

14
File name option:You can use the date/time as your capture file name or assign a name
yourself.
Time option
Current time:Showsthe current time.
Starting time: Enter the date and time when you want to start recording.
Duration:Enter the length thatyou want to record.
Recording rule: Select the recording rule you want to use. The default is "Once only.”
When you enter a record schedule, it will be added to
the Open tab of the ScheduledRecording Agent.
Insert:Insert a new record schedule.
Edit:Edit the record schedule.
Delete:Delete a record schedule.
Delete All:Delete all record schedules.
Execute TVR: Starts the TVR program.
Today To-do List: displays all of today’s record
schedules. Click Refresh to update the list.
Log:If your record schedule has failed, the error
message will be recorded in the Log. You can check
for any message in the Log. ClickClearto clear the
log.

15
Setup:
Output folder: Assign a destination folder to
store your scheduled recorded files.
Auto-execute at start up: Allows the Scheduled
Recording Agent to start at Windows start up.
Default is enabled.
5.4 Setup Utility
Click on the Setup button to enter the Setup Utility.
5.4.1 TV Tuner
The TV Tuner tab allows you to customize and configure your TV channels or edit your
favorite memory channels. You can auto scanyour cable or antenna signalsfor anyavailable
channels,or you can label andidentify your favorite channels as well as include or exclude
channels from the channel list. In the channel list, you can double-click on each column to
change channel settings, like video standard, MTS option, channel name,and frequency fine
tune.
Normal Group:Switch TV source to Antenna or
Cable.
Memory Group: In Memory mode, you can assign
each channel with a memory number and exclude the
channels you don’t want to watch.
Auto Scan:Startsto auto scan for all available
channels.

16
5.4.2 Preview
The Preview tab allows you to customize and
configure yourpreview settings.
Standard: Follows the standard channel order
Custom: Allows you to set the video source of each
channel. Click on the numbers below and set your
video source.
Preview dimension:Select from 2x2, 3x3, 4x4,
and 5x5.
Preview time interval: Set the time interval
between each preview.
5.4.3 Capture
Video capture device: Select your video capture
device.
Video input format: Select your video input
format (UYVY, YUY2, RGB24).
Capture format (profile):Select the video format
you want to record as.Note: If you want to burn
your captured videos to DVD, be sure to set the
capture format to DVD (NTSC) and notMPEG 2.
Capture Size:Set the video capture size.
Bit Rate (Kbps): Set the capture bit rate.
Capture quality: Set the video capture quality.
Frame Rate: Set the capture frame rate.
Capture location: Set the folder to store your
captured videos.
Capture filename:Setthecapture file name format.
Choose either to name the files with date/time oras
a custom name defined by you.
Enable time limit:Check this box to set a time limit for the video capture.
Capture audio option: Select from “Capture audio”, “Capture audioonly, NoVideo”,or
“No audio”.
Audio capture device: Select the audio capture device you want to use.

17
Audio Source: Select the audio input source. (Recommended using Line In)
Audio format: Select the audio format. For DVD, be sure to select 48000 Hertz.
Recording level: Adjust the audio recording level.
5.4.4 Video
Color: Move the slide bar to adjust the
Brightness, Contrast, Hue, and
Saturation of the video. Click Default to
reset the settings to factory default.
Video System:Select the video system for
your Composite and S-Video inputs.
Always on Top:The preview window will
always be displayed on top of other
windows.
Enable high quality preview:Enableshigh
quality preview mode.
Don't use overlay as display surface: If
your VGA card doesn't support Overlay
mode, click on this option.
Display Aspect Ration: Set the display
aspect ratio to 4:3, 16:9,or free mode.
5.4.5 Other
Multi language option: Select the language for the
user interface.
Enable PIP playback: Enables Picture-In-Picture
function when you playback recorded videos.
MPEG4 Codec: Select the appropriate MPEG4 codec
to use while capturing videos in the MPEG4 format.
(Choose from DivX, Microsoft MPEG4 Codec V1, V2,
and V3).

18
5.5 Channel Preview
You can preview all the channels by clicking on the Channel Preview button .
While previewing, you can select each
channel sub-window with the 4 arrow
keys (left, right, up, down),or directly
clicking on it with the mouse. When
you want to finish previewing,you
can double-click on the sub-window
you want to watch.
5.6 Snapshot
You can take a snapshot (still image capture) of thecurrent image in the display windowby
clicking on the Snapshot button . When the image is taken, the snapshot window will
appear. Click on the thumbnail to select the image. You can view, save, and delete the
images.
Note:The save image option supports Bitmap and JPEG formats. You can select which
format to save the image as when you click Save or Save All.
5.7 Sleeping Timer
Activate the sleeping timer by clicking on the Sleeping
Timer button .
Use the slide bar to adjust the time before auto
shutdown, click OK to start, Cancelto exit.

19
5.8 FM Mode
The FM Mode allows you to listen and record FM radios. Click on FM
in the Basic Tool part to switch to FM mode. There are 50 memory
channels that can be assigned, and you can schedule recordings for
specific memory channels.
Use the FM control panel to operate the FM radio.
Information Window:
Displaysthe current status: (FM, REC, Playback), audio volume, speaker state, recording
time, recording file size,and current time.
Tuning Frequency Adjustment:
Click or drag the frequency slide bar to set new frequency.
Basic Tool:
: Switch to TV
: Schedule recording
: Setup
: Add current frequency to memory channel list
: Increase 0.05MHz to current frequency value
: Decrease 0.05MHz to current frequency value
: Go to next channel
: Back to previous channel
Other manuals for ATVPCI883
1
Table of contents
Other Airlinkplus Computer Hardware manuals