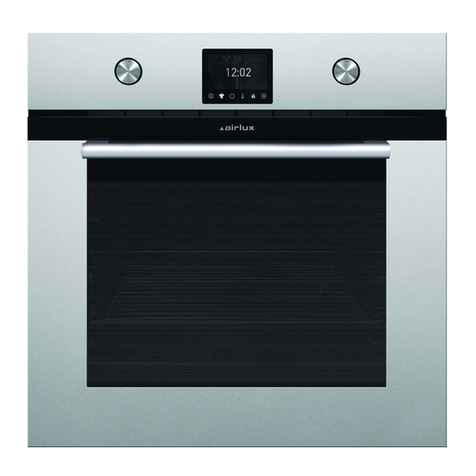
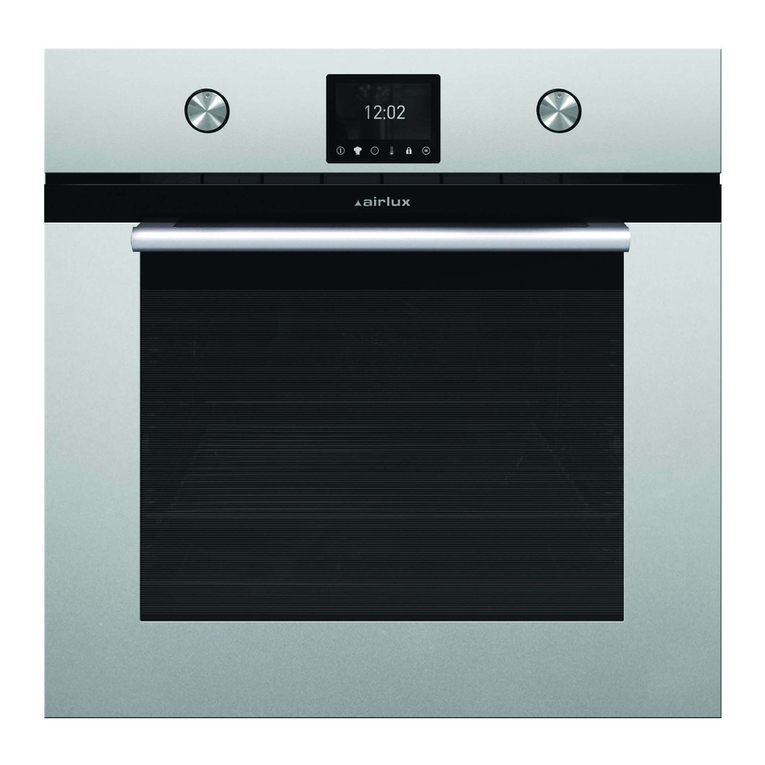
AIRLUX AFCM96BK User manual

AFCM96BK
manuale uso
operating
instructions pour l’usage
instroções de uso
manual de uso
3172917-000 ItIFPE 06/07/15 08:14 Página 1

2
11Funzioni di cottura
12Indicatore di temperatura
13Orologio elettronico
14Sensore di temperatura
15Sensore orologio elettronico
16Sensore
17Sensore / Funzione di sicurezza per i
bambini
18Accensione / Spegnimento
19Luce interna
Modello AFCM96BK
Pannello di comando
Funzioni del forno
Pizza
Apposita funzione per la cottura di pizze, torte
salate o dolci ripieni di frutta.
Standard
Si utilizza per dolci e torte in cui il calore ricevu-
to deve essere uniforme al fine di ottenere una
consistenza morbida e spugnosa.
Grill e Inferiore
Particolarmente adatta agli arrosti. Si utilizza per
qualsiasi pezzo di carne, indipendentemente dalle
sue dimensioni.
Grill
Gratinatura e cottura arrosto superficiale.
Consente di dorare lo strato esterno degli ali-
menti senza modificarne la parte interna.
Indicato per alimenti piatti come bistecca, cos-
tine, pesce, pane tostato.
MaxiGrill ventilato
Consente una cottura arrosto uniforme e nel
contempo effettua una doratura superficiale.
Ideale per le grigliate. Adatto in particolar modo
a porzioni di alimenti di grandi dimensioni come
pollame, cacciagione… Si consiglia di collocare il
pezzo di carne sulla griglia del forno e il vassoio
al di sotto, per raccogliere il liquido o i grassi di
cottura.
Attenzione
Durante l’uso della funzione Grill o Maxigrill ven-
tilato, mantenere chiuso lo sportello.
Turbo
La ventola distribuisce il calore proveniente da
una resistenza situata nella parte posteriore del
forno. Grazie all'uniformità di temperatura
prodotta, consente di cucinare gli alimenti su
due altezze contemporaneamente.
1 4 5 6 7
89
2 3
3172917-000 ItIFPE 06/07/15 08:14 Página 2

3
ITALIANO
Standard ventilato
Adatto per arrosti e pasticceria. La ventola dis-
tribuisce uniformemente il calore all'interno del
forno riducendo il tempo e la temperatura di cot-
tura.
Inferiore
Il calore proviene solo dalla parte inferiore del
forno. Adatto per riscaldare piatti o far lievitare
impasti.
Scongelamento
Raccomandazioni per scongelare gli alimenti
La funzione di scongelamento funziona con un
sistema di aria calda su due livelli, il livello HI
per la carne in generale e il livello LO per pesce,
impasti vari e pane. Quando viene selezionata
la funzione Scongelamento, impostare HI o LO
sull’indicatore di temperatura premendo il pul-
sante della temperatura.
• Gli alimenti non dotati di contenitore dovranno
essere collocati sopra il vassoio del forno o su
un piatto.
• Per scongelare pezzi grandi di carne o pesce,
sistemarli sopra la griglia con un vassoio al di
sotto per raccogliere il liquido.
• La carne e il pesce non hanno bisogno di esse-
re completamente scongelati per iniziare la
cottura. Basta che la superficie sia morbida
per poter aggiungere il condimento.
• Una volta scongelati, cucinare sempre gli ali-
menti.
• Non ricongelare un alimento scongelato.
Per i tempi di scongelamento e il livello da selezionare, fare riferimento alla tabella seguente:
I tempi riportati nella tabella hanno carattere indicativo; il tempo di scongelamento dipenderà dalla
temperatura ambiente, dal peso dell’alimento e dal suo livello di congelamento.
ALIMENTO LIVELLO LO
Peso Tempo Peso Tempo
LIVELLO HI
Pane 1
/
2Kg
1
/
2Kg
1
/
2Kg
1Kg
35 min
25 min
30 min
40 min
1Kg
1,5 Kg
1
/
2Kg
1
/
2Kg
1Kg
75 min
90 min
40 min
60 min
120 min
Torta
Pesce
Pesce
Pollo
Pollo
Braciola grande
Spezzatino
Spezzatino
3172917-000 ItIFPE 06/07/15 08:14 Página 3

4
Comandi del forno
4La parte superiore del forno inizierà a riscal-
darsi. Nelle funzioni si
attiverà la funzione di preriscaldamento rapi-
do per alcuni minuti. Una volta raggiunta la
temperatura selezionata, il forno emetterà un
segnale sonoro.
Attenzione: questa funzione di preriscaldamen-
to attiva il motore turbo situato sul retro della
parte superiore del forno.
5Durante il riscaldamento, l’indicatore o lam-
peggia indicando la trasmissione di calore
all’alimento.
6Per interrompere la cottura, basterà toccare il
sensore di spegnimento .
Attenzione
Al termine della cottura, si noterà che la funzione
di raffreddamento del forno continua a essere atti-
va fino a quando l’interno del forno avrà ridotto la
temperatura.
Illuminazione del forno
La lampadina interna del forno si accende
–Quando si apre la porta del forno. Dopo un
tempo determinato in cui lo sportello del forno
resta aperto, la luce si spegnerà per ridurre il
consumo di elettricità.
–Quando si seleziona una qualsiasi funzione di
cottura. Trascorso un tempo determinato la
luce si spegnerà.
Se si desidera accendere la luce durante la cottu-
ra basterà toccare il sensore dell’illuminazione
interna . Se si tocca il sensore per un tempo
prolungato, la luce resterà accesa durante tutta la
cottura.
Funzioni dell'orologio elettronico
Durata di cottura: consente di cuocere per il
tempo impostato, trascorso il quale il forno si
spegnerà automaticamente.
Ora di fine cottura: consente di cuocere fino a
un orario definito, trascorso il quale il forno si
spegnerà automaticamente.
Attenzione
L’orologio elettronico dispone di tecnologia
Touch-Control. Per impostarlo basta toccare i
simboli sul vetro con il dito.
La sensibilità del Touch-Control si adatta conti-
nuamente alle condizioni ambientali. Quando si
collega il forno all'alimentazione, verificare che
la superficie del vetro della parte frontale con-
tenente i comandi sia pulita e libera da qualsia-
si ostacolo.
Se toccando il vetro con il dito, l'orologio non ris-
ponde correttamente, scollegare il forno dall'ali-
mentazione elettrica e dopo un istante ricolle-
garlo. In tal modo i sensori si regoleranno in
modo automatico e reagiranno nuovamente al
tocco del dito.
Regolazione dell'orologio elettronico
Quando si collega il forno all'alimentazione, si
osserverà che sull'orologio appare 12:00 lam-
peggiante e . Toccando il sensore o
sarà possibile regolare l’orologio; quindi si sen-
tiranno due beep di seguito a conferma dell'ora
selezionata.
Per modificare l’ora, toccare più volte il sensore
dell’orologio fino a quando lampeggerà l’in-
dicatore . Toccando il sensore o
sarà possibile modificare l’ora. Infine,
verranno emessi due beep di seguito che con-
fermerrano l’avvenuta modifica.
Funzionamento manuale
Una volta regolato l'orologio, il forno è pronto
per essere utilizzato:
1Toccare il sensore di accensione .
2Toccare il simbolo della funzione di cottura
selezionata.
3L’indicatore di temperatura mostrerà una
temperatura predefinita per il tipo di cottura
scelto. Se si desidera modificarla, basterà toc-
care il sensore di temperatura e poi i sen-
sori o per selezionare la temperatura
desiderata.
3172917-000 ItIFPE 06/07/15 08:14 Página 4

5
ITALIANO
Tempo di cottura e fine cottura: consente di
programmare il tempo e l'ora di fine cottura. Con
questa funzione il forno si accenderà automati-
camente all'ora necessaria per cuocere per il
tempo impostato (Tempo di cottura) e terminare
la cottura in modo automatico all'ora indicata
(Fine cottura).
Allarme acustico: genera un segnale acustico al
termine del tempo impostato, indipendentemen-
te dal fatto che il forno sia acceso o spento.
Funzione di sicurezza per i bambini: blocca il
forno evitando che possa essere messo in fun-
zione da parte di bambini piccoli.
Programmazione dell'allarme acustico
1Toccare più volte il sensore dell’orologio
fino a quando il simbolo si illuminerà.
2Selezionare il tempo dopo il quale si desidera
che l'orologio emetta l'allarme acustico toc-
cando i sensori o .
3Saranno emessi due beep di seguito, sarà
visualizzato il tempo rimanente fino all'emis-
sione dell'allarme acustico da parte dell'orolo-
gio e il simbolo lampeggerà lentamente
per indicare che l’allarme acustico è già pro-
grammato.
4Trascorso il tempo impostato, il forno emetterà
un allarme acustico e il simbolo lampeg-
gerà più rapidamente.
5Toccare qualsiasi sensore della parte frontale
dei comandi per bloccare il segnale acustico.
In qualsiasi momento è possibile modificare il
tempo impostato toccando più volte il sensore
dell’orologio fino a quando il simbolo
lampeggerà e poi toccando i sensori o
. Si sentiranno due beep di seguito a confer-
ma della modifica.
Programmazione del tempo di cottura
1Toccare il sensore dell’orologio , il simbolo
si illuminerà.
2Selezionare il tempo di cottura toccando i sen-
sori o .
3Saranno emessi due beep di seguito, sarà
visualizzato il tempo di cottura rimanente e il
simbolo lampeggerà lentamente per indi-
care che il forno si spegnerà automaticamen-
te.
4Selezionare una funzione e una temperatura
di cottura.
5Trascorso il tempo di cottura, il forno si speg-
nerà, sarà emesso un segnale acustico e il
simbolo lampeggerà più rapidamente.
6Toccare qualsiasi sensore della parte frontale
dei comandi per bloccare il segnale acustico.
In qualsiasi momento è possibile modificare il
tempo impostato toccando il sensore dell’orolo-
gio e poi toccando i sensori o . Si sen-
tiranno due beep di seguito a conferma della
modifica.
Programmazione dell'ora di fine cottura
1Toccare più volte il sensore dell’orologio
fino a quando il simbolo si illuminerà.
2Selezionare l’ora di fine cottura toccando i
sensori o .
3Saranno emessi due beep di seguito, sarà
visualizzato il tempo di cottura rimanente e il
simbolo lampeggerà lentamente per indi-
care che il forno si spegnerà automaticamen-
te.
4Selezionare una funzione e una temperatura
di cottura.
5Raggiunta l’ora impostata il forno si spegnerà,
sarà emesso un segnale acustico e il simbolo
lampeggerà più rapidamente.
6Toccare qualsiasi simbolo della parte frontale
dei comandi per bloccare il segnale acustico.
In qualsiasi momento è possibile modificare
l’ora di fine cottura impostata toccando più volte
il sensore dell’orologio fino a quando il sim-
bolo lampeggerà e poi toccando i sensori
o . Si sentiranno due beep di seguito a
conferma della modifica.
Questa funzione può essere utilizzata anche se
il forno è già in funzione. A tal fine seguire le
istruzioni indicate a eccezione della numero 4.
3172917-000 ItIFPE 06/07/15 08:14 Página 5

6
Programmazione del tempo di cottura e dell'o-
ra di fine cottura
11Toccare il sensore dell’orologio , il simbo-
lo si illuminerà.
12Selezionare il tempo di cottura toccando i
sensori o .
13Si sentiranno due beep di seguito, sarà
visualizzato il tempo di cottura rimanente e il
simbolo lampeggerà lentamente.
14Toccare più volte il sensore dell’orologio
fino a quando il simbolo si illuminerà.
15Selezionare l’ora di fine cottura toccando i
sensori o .
16Si sentiranno due beep di seguito, sarà
visualizzata l'ora corrente e il simbolo
resterà illuminato.
17Selezionare una funzione e una temperatura
di cottura.
18Il forno resterà spento e il simbolo rimarrà
illuminato mentre il simbolo lampegge-
rà lentamente ). L’orologio mostrerà l’ora
corrente e la luce interna resterà spenta. Il
forno adesso è programmato.
19Quando si raggiunge l'ora di inizio cottura, il
forno si accenderà e resterà in funzione per
il tempo impostato. Nel display dell’orologio
sarà visualizzato il tempo di cottura rima-
nente.
10 Raggiunta l’ora impostata il forno si spegne-
rà, sarà emesso un segnale acustico e i sim-
boli e lampeggeranno.
11 Toccare qualsiasi sensore della parte fronta-
le dei comandi per bloccare il segnale acus-
tico.
Se durante la cottura si desidera modificare
l’ora di fine cottura, toccare più volte il sensore
dell’orologio fino a quando il simbolo
lampeggerà. A questo punto è possibile modifi-
care l'ora impostata toccando i sensori
o . Si sentiranno due beep di seguito a
conferma della modifica.
Funzione di sicurezza per i bambini
Blocca il forno evitando che possa essere
messo in funzione da parte di bambini piccoli.
Per attivare questa funzione, toccare il simbolo
din modo prolungato, si sentirà un beep pro-
lungato e saranno visualizzati dei punti intermit-
tenti intercalati tra le cifre dell’indicatore di tem-
peratura . Il forno a questo punto è bloccato.
Per disattivare la funzione di sicurezza per i
bambini, toccare in modo prolungato il simbolo
fino a quando si sentirà un beep lungo.
Attenzione
In caso di interruzione dell'alimentazione elettri-
ca, la programmazione dell'orologio elettronico
sarà cancellata e sull'orologio sarà visualizzata
l'indicazione 12:00. Sarà quindi necessario pro-
cedere a una nuova regolazione e programma-
zione.
3172917-000 ItIFPE 06/07/15 08:14 Página 6

7
11Cooking Functions
12Temperature Indicator
13Electric Clock
14Temperature Sensor
15Electric Clock Sensor
16Sensor
17Sensor / Child Safety Function
18On / Off
19Inside Light
Model AFCM96BK
Control Panel
Oven Functions
Pizza
Special for cooking pizzas, pasty and fruit
cakes.
Conventional
It is used for sponges and cakes where the heat
received must be uniform to achieve a spongy
texture.
Grill and Lower element
Special for roasts. It can be used for any piece,
whatever its size.
Grill
For preparing dishes with superficial roasting. It
allows the outer layer to be browned without
affecting the inside of the food. Ideal for flat
food, such as steaks, ribs, fish, toast.
MaxiGrill with fan
Allows uniform roasting at the same time as
surface browning. Ideal for grills. Special for
large volume pieces, such as poultry, game etc.
It is recommended to put the item on a rack with
a tray beneath to collect the stock and juices.
Caution
While using the Grill or MaxiGrill with fan, the
door must be kept closed.
Turbo
The fan distributes the heat produced by an
element located at the rear of the oven. Due to
the uniform heat distribution, it allows roasting
and baking to take place at two heights at the
same time.
1 4 5 6 7
89
2 3
ENGLISH
3172917-000 ItIFPE 06/07/15 08:14 Página 7

8
Conventional with fan
Appropriate for roasts and cakes. The fan
spreads the heat uniformly inside the oven.
Lower element
Heats only from beneath. Suitable for heating
dishes and raising pastry and similar.
Defrosting
Recommendations for thawing out frozen food
Frozen food can be thawed out using a system
of hot air with two power levels: HI for all kinds
of meat and LO for fish, pastry and bread. When
the thawing function has been chosen, the HI
and LO levels can be selected with the tempera-
ture selection control. The level chosen appears
on the temperature display.
• Unpacked food should be placed on the oven
tray or in a receptacle suitable for use in
ovens.
• Large pieces of meat or fish should be thawed
out on an oven rack, placing the oven tray
underneath to collect the resulting liquid.
• Meat and fish do not need to be thawed out
completely before cooking, and can be coo-
ked when the surface is soft enough for sea-
soning.
• Once thawed out, food should always be coo-
ked.
Consult the following table for thawing times and the required thawing level:
The times given above are only an indication. Thawing times depend on room temperature, the
weight of the frozen food and the degree to which it is frozen.
FOOD LO LEVEL
Weight Time Weight Time
HI LEVEL
Bread 1 lb
1 lb
1 lb
2 lb
35 min
25 min
30 min
40 min
2 lb
3 lb
1 lb
1 lb
2 lb
75 min
90 min
40 min
60 min
120 min
Cakes
Fish
Fish
Chicken
Chicken
T-bone steak
Minced meat
Minced meat
3172917-000 ItIFPE 06/07/15 08:14 Página 8

9
ENGLISH
Using the oven
Caution
The electronic clock features Touch-Control
technology. To operate, simply touch the glass
control symbols with your fingertip.
The touch control sensitivity continuously adapts
to changing conditions. Ensure that the glass front
of the control panel is clean and free of any obs-
tacles when turning on the oven.
If the clock does not respond correctly when you
touch the glass, you will need to turn off the
oven for a few seconds and then turn it back on.
By doing this, the sensors adjust automatically
and will react once more to
fingertip control.
Setting the Electronic Clock
When turning your oven on, you will see the
clock flashing 12:00 . Set the clock by
touching the or symbols on the glass.
You will hear 2 beeps confirming the time has
been set.
If you want to change the time, touch the clock
sensor until the indicator flashes . Change
the time by touching the or
sensors. The two beeps you hear after that will
confirm the new time has been set.
Manual Operation
After setting the clock, the oven is ready for use:
1Press the On sensor .
2Press on the desired cooking function symbol.
3The temperature display will show the
preset temperature for that cooking
function. Press on the temperature sensor
to change it. Select the desired
temperature by pressing on the or sen-
sors.
4The top oven cavity will start to heat up.
Functions and)will start
the fast preheating function for a few
minutes. The oven will beep when it reaches
the selected temperature.
Caution: this preheating function turns on the
turbo motor at the back of the top oven cavity.
5During oven heating, the odisplay will flash to
show that the food is being heated.
6Press on the Off sensor to stop cooking.
Caution
When cooking has finished, you will notice that
oven cooling feature will work until the temperatu-
re inside the oven has been suitably lowered.
Oven Lighting
The inside light will go on:
–When the oven door is open. If the door is not clo-
sed after a certain time, the light will turn off to
reduce power consumption.
–When any cooking function is selected. The light
will turn off after a certain time.
If you want to turn the light on during cooking, just
touch the Oven Light sensor . If you keep your
finger on this sensor for a few seconds, the light
will stay on throughout cooking.
Electronic Clock Functions
Cooking Time: This function allows you to
programme cooking time length, after which the
oven will turn off automatically.
Cooking Stop Time: This function allows you to
programme the time for cooking to stop, after
which the oven will turn off automatically.
Cooking Time and Cooking Stop Time: This
function allows both cooking time length and the
stop time to be programmed. With this function,
the oven switches on automatically at the set time
and operates for the cooking time it has been pro-
grammed for. It switches itself off
automatically at the entered stop time.
Timer Alarm: A beep will go sound when the set
time has finished, whether the oven is on or off.
Child safety: This function locks the oven,
preventing small children from playing with it.
Programming the Timer Alarm
1Press on the clock sensor several times
3172917-000 ItIFPE 06/07/15 08:14 Página 9

10
until the symbol lights up.
2Select the length of time after which you want
the alarm to sound by pressing on the or
sensors.
3You will then hear two beeps, the display will
show the time left before the alarm sounds
and the symbol (A) will flash slowly,
indicating that the timer has been set.
4Once the programmed time has passed, an
alarm will sound and the symbol will begin
to flash more quickly.
5Press on any sensor on the control panel to
stop the alarm.
You can change the programmed time
whenever you want by touching the clock
sensor until the symbol flashes, and then
touching the or sensors. The two beeps
you hear after that will confirm the new time has
been set.
Programming Cooking Time
1Press on the clock sensor . The symbol
will light up.
2Select the cooking time by pressing the or
sensors.
3Two consecutive beeps will then sound and
the display will show the remaining cooking
time. The symbol will flash slowly to indica-
te that the oven will switch itself
automatically.
4Select a cooking function and temperature.
5Once the cooking time is complete, the oven
will turn off, an alarm will sound and the
symbol will flash more quickly.
6Press on any sensor on the control panel to
stop the alarm.
You can change the programmed time
whenever you want by touching the clock
sensor and then on the or sensors.
The two beeps you hear after that will confirm
the new time has been set.
Programming the Cooking Stop Time
1Press on the clock sensor several times
until the symbol lights up.
2Select the cooking stop time by pressing the
or sensors.
3Two consecutive beeps will then sound and
the display will show the remaining cooking
time. The symbol will flash slowly to indica-
te that the oven will switch itself
automatically.
4Select a cooking function and temperature.
5Once it is the set time, the oven will turn off, an
alarm will sound and the symbol will flash
more quickly.
6Press on any sensor on the control panel to
stop the alarm.
You can change the programmed cooking stop
time at any moment by pressing on the clock
sensor until the symbol flashes and then
by pressing on the or sensors. The two
beeps you hear after that will confirm the new
time has been set.
You can use this function even if you are
already cooking with the oven. If this is the case,
follow all of the above instructions except No. 4.
Programming Cooking Time and Cooking Stop
Time
11Press on the clock sensor . The symbol
will light up.
12Select the cooking time by pressing the
or sensors.
13Two consecutive beeps will then sound, and
the display will show the remaining cooking
time. The symbol will flash slowly.
14Press on the clock sensor several times
until the symbol lights up.
15Select the cooking stop time by pressing the
or sensors.
16This will be confirmed by two beeps. The
current time will show on the display and the
symbol will remain lit.
17Select a cooking function and temperature.
18The oven will remain off, with the symbol
lit and the symbol flashing slowly. The
clock will show the current time and the insi-
3172917-000 ItIFPE 06/07/15 08:14 Página 10

11
ENGLISH
de light will remain off. The oven is now pro-
grammed.
19When it is time to start cooking, the oven will
switch on and will operate for the
programmed cooking time. The clock
display will show the remaining cooking
time.
10 Once the set time is reached, the oven will
turn off, an alarm will sound and the and
symbols will flash.
11 Press on any sensor on the control panel to
stop the alarm.
If you wish to change the cooking stop time
while cooking is in progress, press on the clock
sensor until the symbol flashes. You can
then change the cooking stop time by pressing
on the or sensors. The two
beeps you hear after that will confirm the new
time has been set.
Child Safety Function
This function locks the oven, preventing small
children from playing with it. To turn on the func-
tion, press on the symbol until you hear a
long beep and see several flashing dots betwe-
en the digits of the temperature display . The
oven is now locked.
To turn off the child lock, keep the symbol
pressed until a long beep sounds.
Caution
In the event of power failure, your electronic
clock timer settings will be erased and 12:00
will flash on the clock display. Reset the clock
and programme again.
3172917-000 ItIFPE 06/07/15 08:14 Página 11

12
11Fonctions de cuisson
12Indicateur de température
13Horloge électronique
14Sélecteur de température
15Symbole horloge électronique
16Symbole
17Symbole / Fonction sécurité enfants
18Mise en marche / Arrêt
19Lumière intérieure
Panneau frontal de commandes
Fonctions du Four
Pizza
Special pour la misson des pizzas, pâte en
croûte et tartes avec des fruits.
Conventionnel
Utiliser pour les gâteaux et les tartes qui doivent
recevoir une chaleur uniforme et pour obtenir
une texture moelleuse.
Grill et résistance inférieure
Spécial pour les rôtis. Peut être utilisé pour
toutes sortes de pièces, indépendamment de
leur volume.
Grill
Pour gratiner et rôtir superficiellement. Permet
de dorer la couche extérieure sans affecter l’in-
térieur de l’aliment. Indiqué pour les piéces
plates telles que les beefsteaks, les côtelettes, les
poissons, les toasts.
MaxiGrill avec turbine
Permet en même temps de rôtir de façon uni-
forme et de dorer superficiellement. Idéal pour
les grillades. Spécial pour les pièces volu-
mineuses telles que les volailles, le gibier.
Il est recommandé de placer la pièce de viande
sur la grille du four et la lèchefrite endessous
pour recueillir les jus de cuisson ou la graisse.
Attention
Quand on utilise la fonction Grill ou MaxiGrill avec
Turbine, la porte doit rester fermée.
Turbo
La turbine répartit la chaleur qui provient d’une
résistance située à la partie arrière du four.
Grâce à l’uniformité de la chaleur produite, on
peut cuisiner à 2 hauteurs en même temps.
Conventionnel avec turbine
Modèle AFCM96BK
1 4 5 6 7
89
2 3
3172917-000 ItIFPE 06/07/15 08:14 Página 12

13
FRANÇAIS
Recommandé pour les rôtis et la pâtisserie. Le
ventilateur répartit la chaleur de façon uniforme
á l’intérieur du four.
Résistance inférieure
La chaleur provient seulement de la partie
inférieure. Approprié pour réchauffer des plats
ou faire lever des pâtes pour pâtisseries et ana-
logues.
Décongélation
Recommandations pour la Décongélation des Aliments
La décongélation se fait au moyen d’un système
d’air chaud à 2 niveaux, le niveau HI pour les
viandes en général et le niveau LO pour les pois-
sons, la pâtisserie et le pain. Au moment de
sélectionner la fonction de décongélation, on
pourra sélectionner les niveaux HI ou LO sur l’af-
ficheur de température au moyen de la com-
mande de température.
• Les aliments doivent être placés sans leur
emballage sur la lèchefrite du four ou sur un
plat.
• Pour décongeler de grandes pièces de viande
ou de poisson, les placer sur une grille avec la
lèchefrite en dessous pour recueillir les liqui-
des.
• Il n’est pas nécessaire de décongeler totale-
ment les viandes et les poissons avant de les
cuisiner. Il suffit que la surface soit molle
pour pouvoir ajouter les condiments.
• Il faut toujours cuisiner l’aliment après qu’il
ait été décongelé.
• Ne pas congeler de nouveau un aliment qui a
déjà été décongelé.
Les temps indiqués sur le tableau servent d’orientation; le temps de décongélation dépendra de la
température ambiante, du poids de l’aliment et du degré de congélation de l’aliment.
ALIMENT NIVEAU LO
Poids Temps Poids Temps
NIVEAU HI
Pain 1
/
2Kg
1
/
2Kg
1
/
2Kg
1Kg
35 min
25 min
30 min
40 min
1Kg
1,5 Kg
1
/
2Kg
1
/
2Kg
1Kg
75 min
90 min
40 min
60 min
120 min
Tarte
Poisson
Poisson
Poulet
Poulet
Côte
Viande hachée
Viande hachée
3172917-000 ItIFPE 06/07/15 08:14 Página 13

14
Manipulation du four
3L’indicateur de température indiquera une
température préréglée pour cette cuisson. Si
vous souhaitez la modifier, il suffit d'appuyer sur
le symbole de température puis
d'appuyer sur les symboles ou pour
sélectionner la température désirée.
4La cavité supérieure du four commencera à
chauffer. Avec les fonctions
, la fonction de préchauffage rapide sera
activée pendant quelques minutes. Lorsque
la température sélectionnée est atteinte, le
four émettra un signal sonore.
Attention : avec cette fonction de préchauffage,
le moteur turbo situé au fond de la cavité supé-
rieure du four s'active.
5Pendant le chauffage, l'indicateur oclignote
pour indiquer la transmission de chaleur à l'a-
liment.
6Pour interrompre la cuisson, il faut appuyer
sur le symbole Arrêt .
Attention
À la fin de la cuisson, vous verrez que le refroidis-
sement du four continue à fonctionner
jusqu'à ce que l'intérieur du four réduise sa
température de manière appropriée.
Éclairage du four
La lumière à l’intérieur du four s’allumera
–Lorsque l'on ouvre la porte du four. Au bout
d'un certain temps sans fermer la porte du
four, la lumière s'éteindra pour réduire la
consommation électrique.
–Lorsque l'on sélectionne une fonction de
cuisson. Au bout d'un moment, la lumière
s'éteindra.
Si vous souhaitez allumer la lumière pendant la
cuisson, il suffit d'appuyer sur le symbole de lumiè-
re intérieure . Si vous appuyez sur
le symbole de manière prolongée, la lumière
restera allumée pendant toute la cuisson.
Attention
Cette horloge électronique est équipée de la
technologie Touch-Control. Pour l’utiliser, il suffit
d’appuyer sur les symboles représentés sur la
vitre.
La sensibilité du panneau tactile s’adapte cons-
tamment aux conditions ambiantes. Lorsque
vous branchez le four au réseau
électrique, veillez à ce que la surface vitrée de
la façade soit propre et ne présente aucun obs-
tacle.
Si l’horloge ne répond pas correctement
lorsque vous touchez la vitre avec le doigt, il faut
alors débrancher le four du réseau électrique
puis le rebrancher après un court
instant. Le réglage des capteurs se fait
automatiquement et ces derniers réagiront lors-
que vous toucherez les commandes
tactiles.
Réglage de l'heure sur l'horloge électronique
En allumant le four, vous pourrez voir que l'hor-
loge clignote sur 12:00 et . Appuyez sur les
symboles ou pour mettre
l'horloge à l'heure. Vous entendrez ensuite deux
bips confirmant le réglage.
Si vous voulez modifier l'heure, appuyez
plusieurs fois sur le symbole de l'horloge jus-
qu'à ce que le témoin clignote. En
appuyant sur les symboles ou vous
pourrez modifier l'heure. Vous entendrez ensui-
te deux bips consécutifs confirmant la modifica-
tion effectuée.
Fonctionnement manuel
Une fois l'horloge réglée, votre four est prêt à
fonctionner :
1Appuyez sur le symbole de Mise en Marche
.
2Appuyez sur le symbole de la fonction de cuis-
son sélectionnée.
3172917-000 ItIFPE 06/07/15 08:14 Página 14

15
FRANÇAIS
Fonctions de l’horloge électronique
Durée de cuisson : permet de cuisiner durant un
temps sélectionné, puis, le four s’éteint
automatiquement.
Heure de fin de cuisson : permet de cuisiner
jusqu’à une heure établie, puis, le four s’éteint
automatiquement.
Durée et fin de cuisson : permet de programmer
la durée et l’heure de fin de cuisson. Cette
fonction permet une mise en marche
automatique du four à l'heure choisie, et pour
la durée de cuisson sélectionnée (durée). Le four
s'éteindra automatiquement à l'heure
programmée (fin de cuisson).
Avertisseur : Une fois la durée programmée écou-
lée, un signal sonore retentit, que le four soit allu-
mé ou éteint.
Sécurité enfants : Cette fonction verrouille le four,
ce qui évite que les enfants en bas âge le manipu-
lent.
Programmation de l'avertisseur
1Appuyez à plusieurs reprises sur le symbole de
l'horloge jusqu'à ce que le symbole s'a-
llume.
2Sélectionnez le temps après lequel vous sou-
haitez que l'horloge sonne en appuyant sur les
symboles ou .
3Il y aura ensuite 2 bips consécutifs indiquant le
temps restant avant que l'horloge ne sonne et le
symbole clignotera lentement, indiquant que
l'avertisseur est bien programmé.
4Une fois la durée programmée écoulée, un sig-
nal sonore retentira et le symbole
clignotera plus rapidement.
5Appuyez sur n'importe quel symbole de la
façade pour arrêter le signal sonore.
Vous pouvez modifier le temps sélectionné à
tout moment, en appuyant à plusieurs reprises
sur le symbole de l'horloge jusqu'à ce que le
symbole clignote, puis en appuyant
sur les symboles ou . Vous entendrez
ensuite deux bips consécutifs confirmant la
modification effectuée.
Programmation de la durée de cuisson
1Appuyez sur le symbole de l'horloge , le
symbole s'allumera.
2Sélectionnez la durée de cuisson, en appuyant
sur ou .
3Il y aura ensuite 2 bips consécutifs, indiquant le
temps de cuisson restant, et le symbole clig-
notera lentement, indiquant que votre four s'é-
teindra automatiquement.
4Sélectionnez une fonction et une température
de cuisson.
5Une fois la durée de cuisson écoulée, le four
s’éteindra, l’avertisseur sonore retentira et le
symbole clignotera plus rapidement.
6Appuyez sur n'importe quel symbole de la
façade pour arrêter le signal sonore.
À tout moment, vous pouvez modifier le temps
sélectionné en appuyant sur le symbole
de l’horloge , et en appuyant ensuite sur
les symboles ou . Vous entendrez ensuite
deux bips consécutifs confirmant la modification
effectuée.
Programmation de l'heure de fin de cuisson
1Appuyez à plusieurs reprises sur le symbole de
l'horloge jusqu'à ce que le symbole s'a-
llume.
2Sélectionnez l'heure de fin de la cuisson, en
appuyant sur les symboles ou .
3Il y aura ensuite 2 bips consécutifs,
indiquant le temps de cuisson restant, et
le symbole clignotera lentement,
indiquant que votre four s'éteindra
automatiquement.
4Sélectionnez une fonction et une température
de cuisson.
5Une fois l'heure sélectionnée atteinte, le four
s'éteindra, l'avertisseur sonore retentira, et le
symbole clignotera plus rapidement.
6Appuyez sur n'importe quel symbole de la
façade pour arrêter le signal sonore.
3172917-000 ItIFPE 06/07/15 08:14 Página 15

16
façade pour arrêter le signal sonore.
Si au cours de la cuisson, vous voulez
modifier l'heure de fin, appuyez à plusieurs
reprises sur le symbole de l'horloge jusqu'à
ce que le symbole clignote. À ce moment,
vous pouvez modifier l'heure de fin en appuyant
sur les symboles ou .
Vous entendrez ensuite 2 bips confirmant la
modification effectuée.
Fonction sécurité enfants
Cette fonction verrouille le four, ce qui évite que
les enfants en bas âge le manipulent. Pour acti-
ver cette fonction, appuyez sur le symbole
de manière prolongée, un long bip retentira et
des points clignotants
apparaîtront entre les chiffres de l'indicateur de
température . Votre four est verrouillé.
Pour désactiver la fonction de sécurité enfants,
il faut appuyer de manière prolongée sur le
symbole et entendre un bip
prolongé.
Attention
En cas de coupure de courant, toute la
programmation de l’horloge électronique sera
effacée et l'indication 12:00 clignotera sur l’af-
ficheur de l’horloge. Il vous faudra alors remet-
tre l'horloge à l’heure et procéder à une nouve-
lle programmation.
À tout moment, vous pouvez modifier l’heure de
fin sélectionnée, en appuyant à plusieurs repri-
ses sur le symbole de l'horloge jusqu'à ce
que le symbole()clignote, puis en appuyant
sur les symboles ou .
Vous entendrez ensuite deux bips consécutifs
confirmant la modification effectuée.
Vous pouvez utiliser cette fonction même en cours
de cuisson. Il suffit alors de suivre ces mêmes ins-
tructions, à l’exception de l’étape 4.
Programmation de la durée et de la fin de
cuisson
11Appuyez sur le symbole de l'horloge , le
symbole s'allumera.
12Sélectionnez la durée, en appuyant sur
ou .
13Il y aura ensuite 2 bips consécutifs, le temps
de cuisson restant s'affichera et le symbole
clignotera lentement.
14Appuyez à plusieurs reprises sur le symbole de
l'horloge jusqu'à ce que le symbole s'a-
llume.
15Sélectionnez l'heure de fin de la cuisson, en
appuyant sur les symboles ou .
16Il y aura ensuite 2 bips consécutifs, l’heure
actuelle s’affichera et le symbole restera
allumé.
17Sélectionnez une fonction et une température
de cuisson.
18Le four restera éteint, le symbole allumé,
et le symbole clignotera
lentement. L'afficheur de l'horloge
indiquera l'heure actuelle et la lumière inté-
rieure restera éteinte. Votre four est pro-
grammé.
19Lorsqu’il est l’heure de lancer la cuisson, le
four se mettra en marche et la cuisson
s’effectuera pendant la durée sélectionnée.
L'afficheur de l'horloge indiquera le temps de
cuisson restant.
10 Une fois l'heure sélectionnée atteinte,
le four s'éteindra, l'avertisseur sonore retenti-
ra, et les symboles et(clignoteront.
11 Appuyez sur n'importe quel symbole de la
3172917-000 ItIFPE 06/07/15 08:14 Página 16

17
PORTUGUÉS
11Funções de cozinhado
12Indicador de temperatura
13Relógio electrónico
14Sensor de temperatura
15Sensor relógio electrónico
16Sensor
17Sensor / Função segurança crianças
18Pôr em funcionamento / Desligado
19Luz interior
Painel de Comandos
Funções do Forno
Pizza
Indicado para cozinhar pizzas, empadas e bis-
coitos ou tartes recheadas de frutas.
Convencional
Usado em bolos e tartes nos quais o calor rece-
bido deve ser uniforme para que adquiram uma
textura esponjosa.
Grill e Resistência Inferior
Especial para assados. Pode ser usado para
qualquer porção, independente do seu tamanho.
Grill
Gratina e assa superficialmente. Permite alourar
a camada exterior sem afectar o interior do ali-
mento. Indicado para pedaços planos como
filetes, costelas, peixe, tostas.
MaxiGrill com Turbina
Permite assar de modo uniforme ao mesmo
tempo que aloura superficialmente. Ideal para
churrascos. Especial para pedaços com grande
volume como aves, caça… Recomenda-se colo-
car a porção de carne sobre a grelha do forno
com a bandeja por baixo, para recolher os mol-
hos ou gorduras.
Atenção
Durante o uso da função Grill ou MaxiGrill com
Turbina deve-se manter a porta fechada.
Turbo
A Turbina reparte o calor que provém de uma
resistência situada na parte de atrás do forno.
Devido à uniformidade da temperatura produ-
zida permite cozinhar em 2 alturas ao mesmo
tempo.
Modelo AFCM96BK
1 4 5 6 7
89
2 3
3172917-000 ItIFPE 06/07/15 08:14 Página 17

18
Convencional com Turbina
Adequado para assados e pastelaria. O ventilador
reparte de forma uniforme o calor no interior do
forno.
Resistência Inferior
Calor somente na parte inferior. Apropriado para
aquecer pratos ou levantar massas de con-
feitaria e semelhantes.
Descongelação
Recomendações para a Descongelação de Alimentos
A descongelação é realizada através de um sis-
tema de ar quente com 2 níveis: o nível HI para
carnes em geral e o nível LO para peixes,
bolos e pão. Quando seleccionar a função
descongelação, poderá seleccionar os níveis HI
ou LO no visor de temperatura com o comando
selector de temperatura.
• Os alimentos sem embalagem devem ser
colocados sobre a bandeja do forno ou sobre
uma travessa.
• Para descongelar peças grandes de carne ou
peixe, deve colocá-las sobre uma grelha com
uma bandeja por baixo para recolher os líqui-
dos.
• As carnes e os peixes não precisam de estar
totalmente descongelados para cozinhar. É
suficiente que a superfície esteja levemente
descongelada para poder acrescentar os con-
dimentos.
• O alimento deve ser sempre cozinhado
depois da descongelação.
• Não congelar de novo um alimento já des-
congelado.
Na seguinte tabela, observe os tempos de descongelação e qual o nível a seleccionar:
Os tempos indicados na tabela servem apenas de orientação, pois o tempo de descongelação
dependerá da temperatura ambiente, do peso do alimento e do grau de congelação do mesmo.
ALIMENTO NÍVEL LO
Peso Tempo Peso Tempo
NÍVEL HI
Pão 1
/
2Kg
1
/
2Kg
1
/
2Kg
1Kg
35 min
25 min
30 min
40 min
1Kg
1,5 Kg
1
/
2Kg
1
/
2Kg
1Kg
75 min
90 min
40 min
60 min
120 min
Tarte
Peixe
Peixe
Frango
Frango
Costeleta
Carne picada
Carne picada
3172917-000 ItIFPE 06/07/15 08:14 Página 18

19
PORTUGUÉS
Utilizaçao do Forno
4A cavidade superior do forno começara a
aquecer. Nas funções ,
activar-se-á a função de pré-aquecimento
rápido durante uns minutos. Quando
chegue à temperatura seleccionada, o forno
emitirá um sinal sonoro.
Atenção: com esta função de pré-aquecimento
acende-se o motor turbo situado no fundo da
cavidade superior do forno.
5Durante o aquecimento, o indicador º
piscará indicando a transmissão de calor ao
alimento.
6Para parar o cozinhado deve tocar no
sensor de Desligado .
Atenção
Quando finalize o cozinhado, observará que
a refrigeração do seu forno continua a funcionar
até que o interior do forno reduza a sua
temperatura de forma apropriada.
Iluminação do forno
A luz interior do forno acender-se-á,
–Ao abrir a porta do forno. Decorrido um certo
tempo sem fechar a porta do forno, a luz
apagar-se-á para reduzir o consumo eléctrico.
–Quando se selecciona qualquer função de
cozinhado. Decorrido um certo tempo a luz
apagar-se-á.
Se deseja acender a luz durante o cozinhado
basta tocar no sensor de Luz Interior . Se
se premir este sensor durante um tempo
prolongado, a luz manter-se-á acesa durante todo
o cozinhado.
Funções do Relógio Electrónico
Duração do Cozinhado: Permite cozinhar
durante um tempo seleccionado, acabado esse
tempo o forno desligar-se-á automaticamente.
Hora de Finalização do Cozinhado: Permite
cozinhar até uma hora estabelecida, em
seguida o forno desligar-se-á de forma
automática.
Atenção
O seu relógio electrónico incorpora tecnologia
Touch-Control. Para manuseá-lo é suficiente
tocar nos símbolos do vidro com o seu dedo.
A sensibilidade do touch-control adapta-se con-
tinuamente às condições ambientais. Ao ligar o
seu forno à rede tenha a precaução de verificar
que a superfície do vidro do painel de coman-
dos está limpa e livre de qualquer
obstáculo.
Se ao tocar o vidro com o dedo, o relógio não
responde correctamente então é necessário
que desligue o forno da rede eléctrica e após
um instante volte a ligá-lo. Desta forma os sen-
sores ajustar-se-ão automaticamente e respon-
derão de novo ao toque com o dedo.
Colocar a Hora no Relógio Electrónico
Ao ligar o seu forno, observará que no relógio
aparecem a piscar as indicações 12:00 e .
Tocando nos sensores ou colocará o
relógio na hora certa; em seguida escutará dois
beep seguidos como confirmação da hora
escolhida.
Se deseja modificar a hora, toque várias vezes
no sensor do relógio até que pisque o indi-
cador . Tocando nos sensores ou
poderá modificar a hora. Finalmente
escutará dois beep seguidos como
confirmação da alteração realizada.
Funcionamento Manual
Após colocar o relógio na hora certa, o seu forno
está pronto para cozinhar:
1Toque no sensor de Pôr em Funcionamento
.
2Toque no símbolo da função de cozinhado
seleccionada.
3O indicador de temperatura mostrará
uma temperatura prefixada para esse
cozinhado. Se deseja modificá-la basta tocar
no sensor de temperatura e
depois tocar nos sensores ou para
seleccionar a temperatura desejada.
3172917-000 ItIFPE 06/07/15 08:14 Página 19

20
Duração e Fim do Cozinhado: Permite
programar a duração e a hora de finalização do
cozinhado. Com esta função o forno
pôr-se-á em funcionamento de forma
automática à hora necessária para cozinhar
durante o tempo seleccionado (Duração) e fina-
lizando de forma automática à hora que lhe ten-
hamos indicado (Fim do Cozinhado).
Avisador: Gera um sinal sonoro no final do
tempo, para isso não é necessário que o forno
esteja a funcionar.
Segurança para Crianças: Bloqueia o forno, evi-
tando a manipulação por parte de crianças
pequenas.
Programação do Avisador
1Toque várias vezes no sensor do relógio
até que o símbolo se ilumine.
2Seleccione o tempo após o qual deseja que o
relógio avise, tocando nos sensores ou
.
3Posteriormente soarão 2 beep seguidos, mos-
trar-se-á o tempo restante até que o relógio
avise e o símbolo piscará
lentamente, indicando que o avisador já está
programado.
4Decorrido o tempo programado, soará um
sinal sonoro e o símbolo piscará mais
depressa.
5Toque qualquer sensor do painel de
comandos para parar o sinal sonoro.
Em qualquer momento pode modificar o tempo
seleccionado, tocando várias vezes no sensor
do relógio até que o símbolo pisque e
posteriormente tocando nos sensores ou
. Em seguida escutará dois beep seguidos
como confirmação da alteração.
Programação da Duração do Cozinhado
1Toque no sensor do relógio , o símbolo
iluminar-se-á.
2Seleccione a duração do cozinhado, tocando
nos sensores ou .
3Posteriormente soarão 2 beep seguidos, mos-
trar-se-á o tempo restante de cozinhado e o
símbolo piscará lentamente,
indicando que o seu forno se apagará de
forma automática.
4Seleccione uma função e uma temperatura de
cozinhado.
5Decorrida a duração do cozinhado, o forno
desligar-se-á, soará um sinal sonoro e o
símbolo piscará mais depressa.
6Toque em qualquer sensor do painel de
comandos para parar o sinal sonoro.
Em qualquer momento pode modificar a
hora de finalização seleccionada, tocando várias
vezes no sensor do relógio e
posteriormente tocando nos sensores ou
. Em seguida escutará dois beep seguidos
como confirmação da alteração.
Programação da Hora de Finalização do
Cozinhado
1Toque várias vezes no sensor do relógio até
que o símbolo se ilumine.
2Seleccione a hora de finalização do
cozinhado, tocando nos sensores ou .
3Posteriormente soarão 2 beep seguidos, mos-
trar-se-á o tempo restante de cozinhado e o
símbolo piscará lentamente,
indicando que o seu forno se apagará de
forma automática.
4Seleccione uma função e uma temperatura de
cozinhado.
5Alcançada a hora seleccionada o forno
desligar-se-á, soará um sinal sonoro e o sím-
bolo piscará mais depressa.
6Toque em qualquer símbolo do painel de
comandos para parar o sinal sonoro.
Em qualquer momento pode modificar a hora de
finalização seleccionada, tocando várias vezes
no sensor do relógio até que o
símbolo pisque e posteriormente
tocando nos sensores ou . Em seguida
escutará dois beep seguidos como
confirmação da alteração.
3172917-000 ItIFPE 06/07/15 08:14 Página 20
Table of contents
Languages:
Other AIRLUX Oven manuals