4
-Children shall not play with the appliance.
Cleaning and user maintenance shall not be
made by children without supervision.
-Before cleaning or performing any periodic or
urgent maintenance to the hood, isolate the
mains supply and turn the main switch off.
-Do not connect the hood to any piping used for
combustion appliances, such as burners, boilers
or fire places.
-Check that the main power supply corresponds
to the voltage required by the hood, which is
given on the silver label stuck inside the hood.
Ensure that the electric system is correctly
earthed and that the earth discharge works
correctly.
-When cooking do not use any materials that
could form high or unusual flames. Oil that has
been used twice and fats are very dangerous
and could easily catch fire. Do not prepare
flambé dishes under the hood.
-Once the specialised technician has completed
the installation of the hood equipped with a
remote motor, all the leads, connectors, ground
connections and the remote motor must not be
accessible to the user. Only the installer is
granted access by removing screwed on panel.
-Respect local legislation and regulations issued
by the relative authorities regarding the exhaust
air when the suction is operating. Failure to
respect and perform all maintenance and
cleaning operations described in this handbook
could cause a fire hazard.
ATTENTION: Accessible parts may become hot when
the hood is used with cooking appliance.
3. Installation
The minimum safety distance between the bottom of
the hood and the top of the cooking hob must be
650mm, smaller distances must be previously
authorised by the manufacturer. The maximum is
1.6m.
The hood can be used for both filtering and suction.
When the filtering function is operating, i.e. with air
recycle, carbon filters must be used (refer to the
paragraph on Carbon Filters page 10).
When the suction function is operating i.e. exhausting
the filtered air on the outside, a suitable
compensation system must be used according to
current standards in force. The diameter of the fume
exhaust pipe must be the same or greater than the
diameter of the hood pipe union.
There must be sufficient ventilation in the room where
the hood is installed, to allow simultaneous use of
other appliances that use gas or other fuels.
Ø150mm round or 220x90mm rectangular ducting
must be used. Ducting with a smaller diameter could
cause airflow issues.
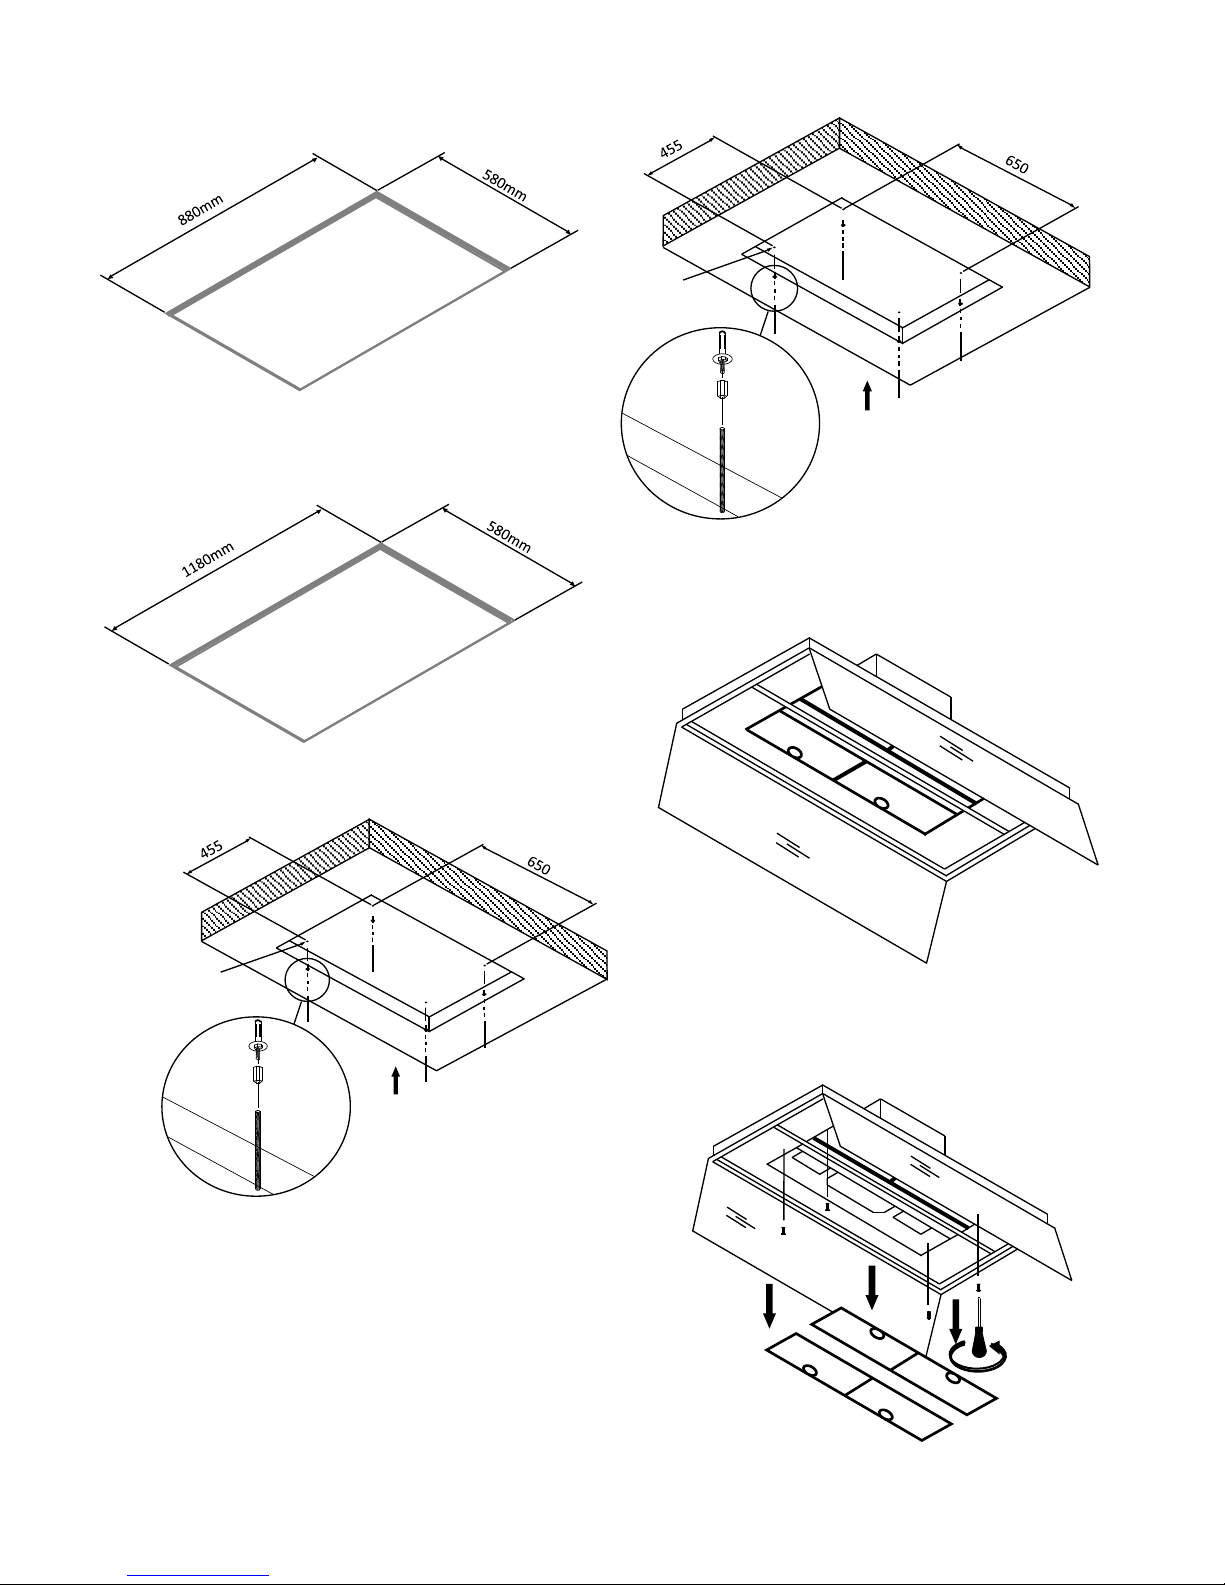
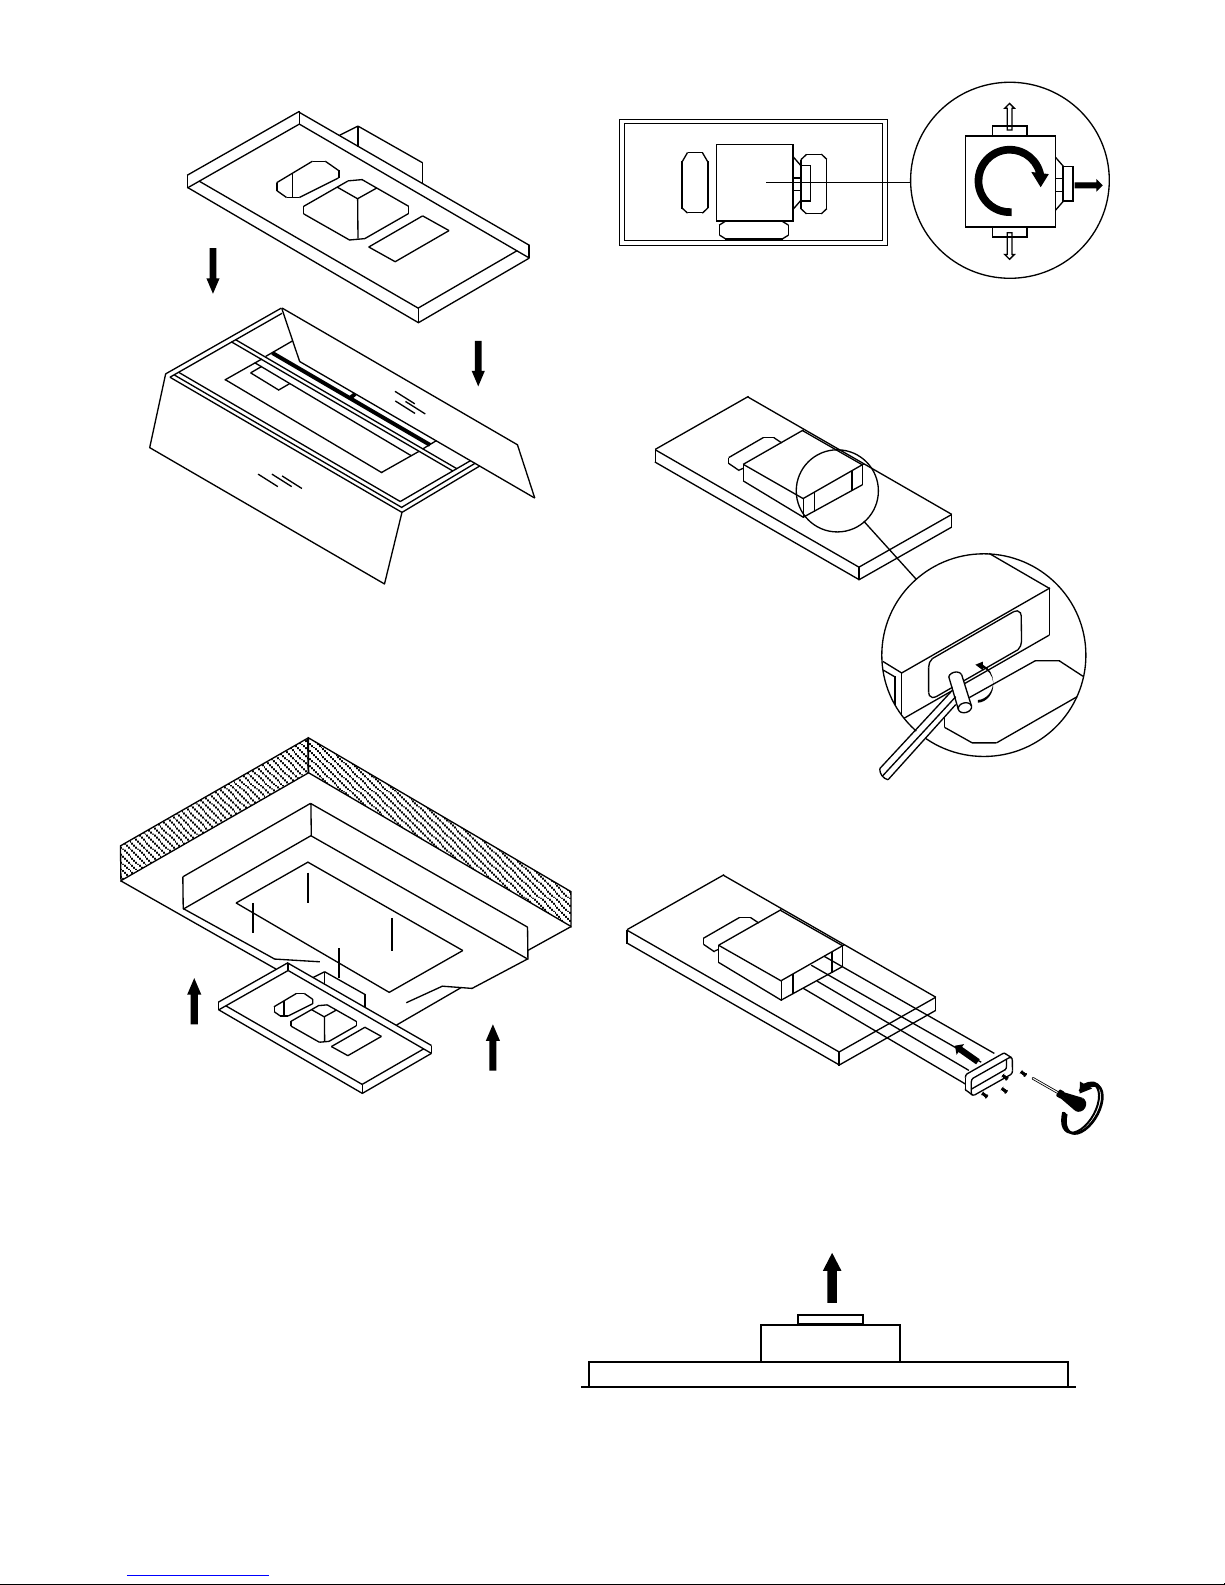
3.1 Assembly Instructions
Attention: Before proceeding with the installation,
make sure that the screws and the anchors already
supplied, are suitable for the type of wall the hood
must be fixed to.
To assemble the hood use the accessories that are
supplied and follow the instructions given in the
enclosed hand book.
Screw hole dimensions and cut out dimensions
Salieri 90 with & without motor
Fig 1
Salieri 120 with & without motor
Fig 2