Airush Starboard Freewing Air 2 User manual

2021
FREEWING
USER GUIDE
Alvaro Onieva wingfoiling in Tarifa.
Rider: Alvaro Onieva Photographer: Samuel Cárdenas

CONTENT
1. THE FREEWING
2. WIND CHART & RECOMMENDED PRESSURE
3. HOW TO INFLATE THE WING
4. HOW TO TIE THE HARNESS LINES
5. HOW TO DEFLATE THE WING
6. SAFETY
RULE No.1: SAFETY FIRST
RULE No.2: SECURITY SYSTEMS
RULE No.3: RESPECT OTHERS
7. MAINTENANCE
BEFORE SESSION
DURING SESSION
AFTER SESSION
8. REPAIRS
9. STARBOARD/AIRUSH WARRANTY
03
04
05
07
10
12
12
14
14
15
15
15
15
16
18

- 3 -
THE
FREEWING
THE FREEWING
01. Leading edge - Front side of the wing
02. Trailing edge - Back side of the wing
03. Wingtips
04. Central strut
05. Neutral handle
06. Leash attachment
07. Diagonal handles
08. Front handles
09. Back handles
10. Leading edge valve
11. Central strut valve (Only with size 5,6,7,
and 8)
12. Hose clamp
ACCESSORIES
13. Harness line (Not included
in the package)
• 1 x Wing bag
• 1 x Repair kit
• 1 x Wrist leash
1
7
4
2
3
8
13
9
6
5
10
11
12
Close for inflation
Open for deflation

- 4 -
WIND CHART &
RECOMMENDED
PRESSURE
SPECIFICATION
Size: Area: Wind Range: Recommended
Inflating Pressure:
2 m228-50+knots 7 psi
3 m220-40 knots 6 psi
4 m213-35 knots 6 psi
5 m211-28 knots 5 psi
6 m29-24 knots 4 psi
7 m28-20 knots 4 psi
Our wings are made for all weather conditions. They are powerful, maneuverable and
stable at full speed. The chart specifies the wind ranges and the recommended
inflation pressure. Too much inflation may result in the wing exploding.
Note: Chart relating to a 75 kg rider.
* Always be aware and responsible during your practice. Avoid extreme wind/wave
conditions and keep away from possible obstacles.
* Choose your wing size according to the windspeed .
* To our beloved scientist customers, the pressure you need to inflate the wing increases
unevenly with the size of the wing. This is due to the fact that the force applied on the
surface can be approximately defined by F=P.S where F is the force, P the Pressure and
S the Surface.
8 m25-15 knots 4 psi

- 5 -
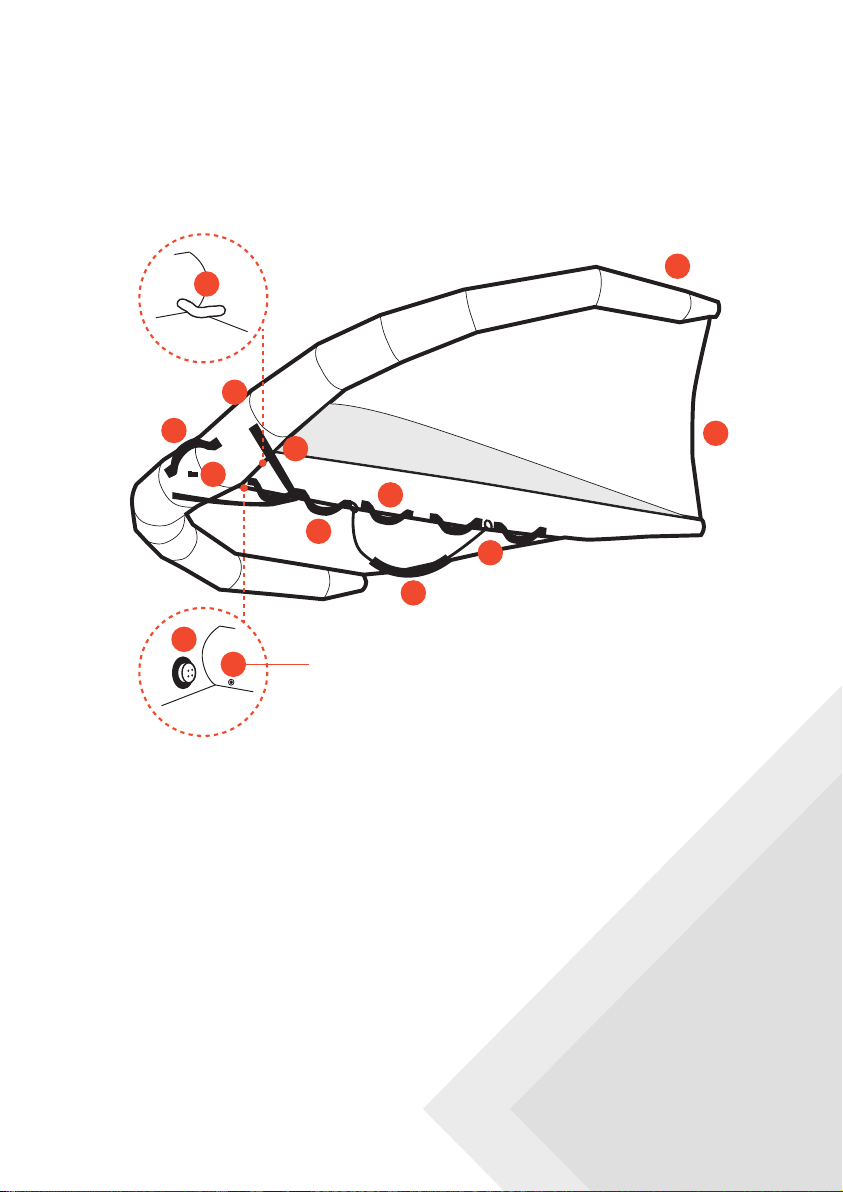
7. Attach the hook connector from
the pump to the leash knot.
HOW TO
INFLATE THE WING
1. Make sure the area where you want to pump the wing is free of sharp objects,
like rocks and fences.
2. Look for some windshade while pumping up the wing. In case you can’t find an
area with less wind, ask a friend to hold the wing while you pump.
3. Find out the wind direction, unfold your wing by laying it on the ground, struts
facing up with the wind blowing from your back.
4. Make sure the hose clamp on the hose connecting the leading edge to the strut
is open.
5. Make sure the air valve on the central strut is closed.
6. Spread the wing on the floor, make sure it does not have any creases. This allows
the air to flow in without deteriorating the wingtips.
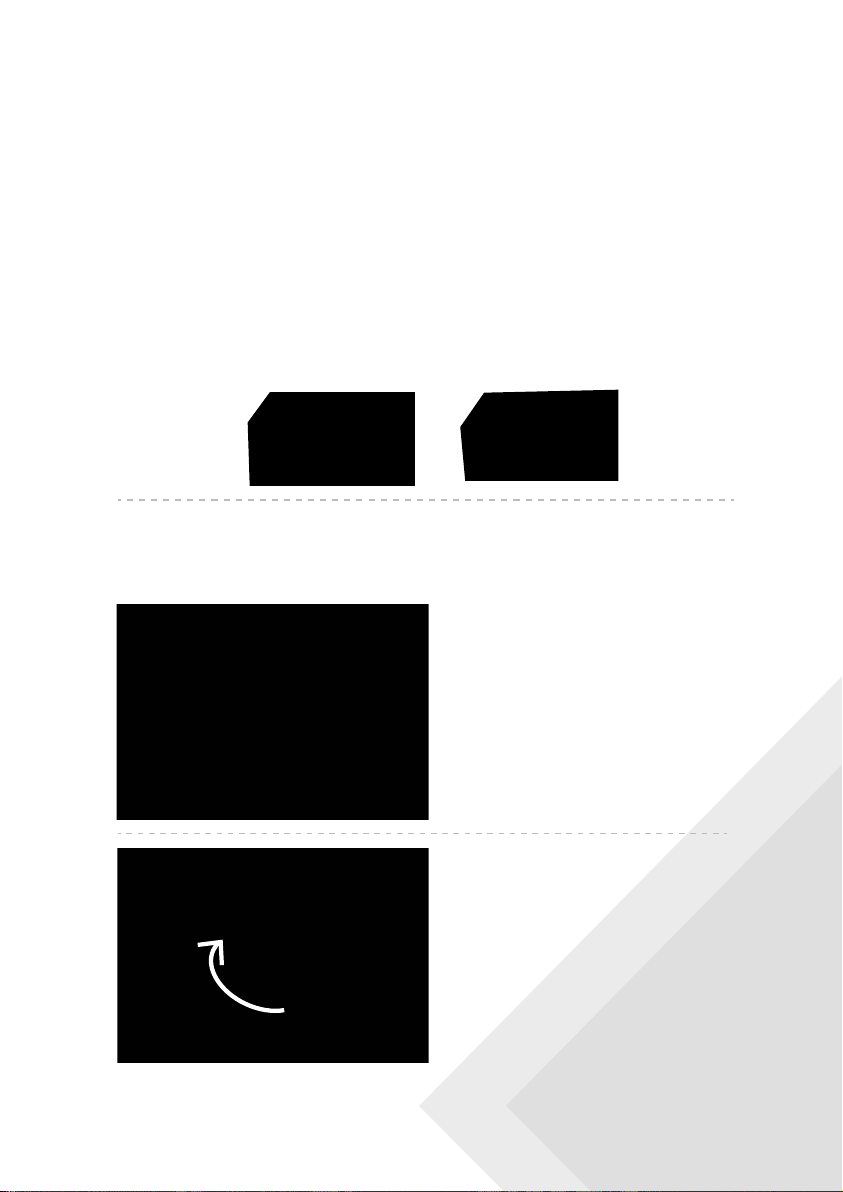
8. Screw the base of the valve clockwise
into the thread on the Leading edge.
Open Close

- 6 -
9. Connect the pump nozzle into the
valve of the wing. Turn clockwise
for a better insertion.
10. Inflate to the recommended pressure.
11. Close the hose clamp.
12. Put the harness lines in place using the ties made for this purpose – see
section “How To Tie The Harness Lines”, page 7.
13. Once you have put the leash on, the set up is ready! You can then use the leash
to keep the wing attached to a heavy and secure object while you go to set up
your board and put on your water clothes. Right on!
To close the valve, squeeze the clamp
together while feeling the teeth
ratchet until clamp feels tight.
(Secure floatation in case of leakage)

- 7 -
HOW TO TIE
THE HARNESS LINE
We have designed our wings to offer you the best comfort while riding.
Harness lines make your navigation easier. Allowing you to put all your energy
into tricks and stay longer on the water!
How to correctly tie the lines
The harness line consists of two pieces, (a) shorter rope with different knots and
(b), longer rope with the black PVC attached.
There are two loops on the central strut, (A) and (B). Close to the Leading edge
stands loop (A), and loop (B) stands closer to the Trailing edge.

- 8 -
1. Insert the rope (a) into the loop (A).
2. Thread the end knot through the
loop (a).
3. Tighten it up and make sure that
loop (A) is being squeezed by the
knot.
4. Take piece (b) and do the same as
step “1” using the (B) loop instead.

- 9 -
5. Thread the end of the loop (the
shortest side) through the other
loop (longer side).
6. Tighten it up and make sure the
loop (B) is being squeezed by the
knot.
7. Connect the loop of piece (b) into
the knots of piece (a).
8. Adjust the length according to
your body structure using the
different knots.

- 10 -
3. Start from one of the wingtips.
4. Use your hands to press down to deflate the leading edge.
HOW TO
DEFLATE THE WING
2. Unscrew the valve counterclockwise letting all the air out. On larger sizes; 5, 6, 7
and 8 m you have an additional valve below the strut for a quicker deflation.
1. Open the hose clamp.
Place the wing on an area without any objects that can harm the wing. Stay away
from small rocks, broken glass, and other sharp materials.
To open the valve, push away on the lever, allowing
the clamp to open.
Central strut valveLeading edge valve

- 11 -
5. Roll the other side to deflate the full leading edge.
6. Use your hands to press down and deflate the middle strut while rolling.
7. Use the leash as a way to wrap it up.

- 12 -
SAFETY
• Check the water depth of your launching spot.
Walk out until the foil is above the seabed . Pay attention to rocks or reefs.
• Choose an easy access point to enter the ocean or lake.
Always avoid entering in big shore breaks. Carrying the gear out in very big shore
breaks can be dangerous not only for your equipment but for yourself.
Carefully read these safety rules before you fly with your wing, and keep
it stored for future reading.
Large windows, hose clamp, and a leash are important safety factors. Constant
care and caution remain the best way to avoid any problems.
A few safety tips to know and follow.
RULE No.1: SAFETY FIRST
Wing-Foiling is a safe sport but should still be considered as an extreme sport and can
become very dangerous if played without respecting a few rules.
• Always be in control of carrying your board.
Pointing the foil where the wind comes from (windward) and carry the wing with the
other hand maintaining the wing in a neutral position where the wind goes (leeward).
A foil set up is sharp and can damage the wing so, don’t hold the wing close to the foil.
WIND
WIND

- 13 -
• Stay away from rocks, cliffs and piers.
Always ride in areas where you can come back to the beach easily. Stay away from
areas where sailing is not allowed.
• Ride share.
It is strongly recommended to practice within the company of other riders who could
eventually call for assistance in case of emergency.
• Avoid riding in very extreme conditions of wind and waves.
Stay away from + 40 knots windspeed or/and waves over 5 feet.
• Never go out in Off-shore conditions.
Unless you have a support boat keeping an eye on you constantly.
WINDOW WINDOW
WINDOW WINDOW
WINDOW WINDOW
WIND
WIND
WIND
WIND
WINDOW WINDOW
WINDOW WINDOW
WINDOW WINDOW
WINDOW WINDOW
WINDOW WINDOW

- 14 -
RULE No.2: SECURITY SYSTEM
It’s highly recommended to use the following accessories for your security.
HELMET
It’s strongly recommended to wear a helmet to protect you from your board in case of a crash or
any other unexpected situations.
WETSUIT
Choose a wetsuit length and thickness depending on the water temperature. Use a full wetsuit
when the water is colder than 190c, a shorty when water temperatures more than 190c.
LIFE JACKET / IMPACT VEST
A life jacket / impact vest can help absorb possible impacts. It will also help you float, if you have
to swim back to the shore.
WING LEASH
Attach the wrist leash for the Wing onto the leash attachment point in order not to lose your
wing. Attach the leash tight enough so it does not slip.
BOARD LEASH
Attach the board leash to the ankle. When wearing a board leash, a helmet is strongly
recommended.
THE BOARD
Choose a board with enough volume to float you comfortably.
HARNESS LINE (OPTIONAL)
You can attach a harness line to the attachment points located on the strut. This allows you to
ride for longer periods of time.
THE HOSE CLAMP
It is used to isolate the air pressure in the strut. When opened the air goes through the leading
edge to the central strut. After pumping up the Freewing, the clamp should be squeezed shut.
If the the bladder leaks, the clamp ensures that some air pressure remains, ensuring floatation.
RULE No.3: RESPECT OTHERS
1. RESPECT THE PRIORITY ON THE WATER
When two riders come from opposite directions, the rider on Starboard tack* has priority over
the rider on port tack*. The rider on Starboard tack* should maintain the direction and the one
port tack* point downwind to avoid collision. Before any jumps or direction changes, make sure
there is enough room and that you are not going to cross anyone’s path.
2. RESPECT ALL PEOPLE ON LAND
Make it a priority to be responsible and keep away from all people on land during rigging,
launching and resting.
* Starboard tack, right hand close to the front of the wing. Port tack, left hand close the front of the wing.
A) To close the valve, squeeze the clamp
together while feeling the teeth ratchet until
clamp is tight.
B) To open the valve, push away on the lever,
allowing the clamp to open.

- 15 -
MAINTENANCE
1. BEFORE SESSION
• Always pump the wing at the recommended pressure level (see page 4).
• Don’t drag the wing on the ground on the way to the beach.
• Don’t leave the wing under sun exposure more than 15 minutes.
• Check that the main air valve and the little central strut valve are closed and
that there are no scratches or holes on the struts.
• Close the hose clamp blocking the air of the central strut, keeping the air
inside the strut, allowing flotation in case leading edge or central strut leaks.
2. DURING SESSION
• Always avoid any contact with the foil.
• Avoid falling onto the wing.
• Do not use a board with anti-slip as it can scratch the wing. Our boards are
made to provide the safest combination.
• Remove accessories that could damage the wing: watches, bracelets etc.
• Hold the wing with the neutral position handle each time you go in/out of
the water.
• Generally always keep the front hand on the wing, and use the back hand for
depower.
3. AFTER SESSION
• Wash the wing with fresh water.
• Let it dry for 10 minutes.
• Open the hose clamp on the pipe connecting the leading edge to the strut.
• Open the 2 air valves before starting to roll. Make sure your pack up area is
clean. For example: small rocks, broken glass, or any other sharp materials.
• Follow the method described on pages 10 - 11 to roll up the wing.
• Put it straight into the bag with your pump and other accessories so you will
not lose anything.

- 16 -
REPAIRS
You will be able to use the repair kit enclosed in the wing bag.
Note: If the leak is too big, please contact a kite repair professional.
Before proceeding with any kind of repair, it’s important to follow the
following steps:
• Repair it in a place that is sheltered from sand, water and wind. Use a clean and flat
surface to work on.
• Surfaces will need to be cleaned with freshwater or preferably alcohol.
• You will need the repair kit supplied and a marker.
REPAIR ON THE LEADING EDGE
When you have a leak on the leading edge or central strut, it’s important to follow
the next steps; taking out the bladder from the wing, locate the leak on the
bladder and mark it, repair with the rubber patch and finally put the bladder
inside again. Pump it softly until the bladder is perfectly mounted.
1. LOCATE THE LEAK WITH THE BLADDER MOUNTED:
Pump the wing and try to hear where the leak is located, pay special attention
around the valve area. In case you cannot hear the leak, you can spray water onto
the leading edge and strut. You will see bubbles popping out where the leak is. We
do this step first before dismounting the bladder as sometimes the leak may occur
very next to the tips or the zipper. In this case, the repair can be completed with
the bladder mounted on the wing, you can skip steps 2 and 4 if this is your
situation. If the leak is not close to these areas or we simply don’t detect the leak
then we need to remove the bladder.
WINDOW WINDOW

- 17 -
2. TAKING OUT THE BLADDER:
Disconnect the pipe from the strut, take off the valve if the wing is fitted with it. Tie
one line on each side of the leading edge (wingtips), and take the leading edge
bladder from the zipper.
3. LOCATE THE LEAK AND REPAIR:
Use a water spray or sink the bladder into a pool or a bath tub. Once you locate
the leak, dry up the area, make a circle around it with a pen, sand the area, then
stick the repair patch (enclosed with the repair kit).
4. INSERT THE BLADDER INTO THE WING USING BOTH LINES:
Pump it softly and make sure there are no wrinkles when the bladder reaches
some pressure. Do not pump fully at the psi recommendation until the bladder is
perfectly inserted.
WINDOW WINDOW
WINDOW WINDOW
WINDOW WINDOW
WINDOW WINDOW
x

- 18 -
STARBOARD/AIRUSH
WARRANTY
Starboards/Airush warrantees this product to be free of major manufacturing defects in materials
or workmanship to the original purchaser for a period of 1 year from the date of purchase. This
excludes any wear components that have been subjected to normal wear and tear.
The following are not covered by this warranty:
• Damage due to crashing on land or water.
• Damage due to crashing on your wing.
• Damage due to improper care or storage.
All warranty claims must be submitted through the retailer where the product was purchased.
The retailer will contact the distributor in the respective country and provide a decision in a
timely manner.
No warranty claims are to be lodged through Starboard & Airush International.
The warranty is subject to the following conditions:
1. The warranty is valid ONLY when the warranty item has been purchased from an authorized
dealer or distributor.
2. The warranty is valid only when the product is used for normal recreational activities.
3. The warranty is valid only when the proper Starboard/Airush warranty procedure has been
followed as defined in the Starboard/Airush Warranty Protocol.
4. Starboard/Airush will make the warranty determination only after inspection and/or
analysis of photos of the product clearly showing the defect.
5. If a product is deemed to be defective by Starboard/Airush, the warranty covers the repair
or replacement of the defective product only. Starboard/Airush is not responsible for any
cost, losses, or damages incurred as a result of loss of use of the product.
6. The warranty does not cover damage caused by misuse, abuse, neglect of normal wear and
tear including but not limited to, punctures, rigging with other than Starboard/Airush
components, damage due to excessive sun or wind exposure or seam failure due to over-in-
flation, damage caused by improper handling and storage, damages caused by crashing in
waves or shore break and damage caused by anything other than defects in materials and
workmanship.
7. The warranty is void if any unauthorized repair, change or modification, has been made to
any part of the equipment.
8. The warranty for any repair or replacement equipment is good from only the date of the
original purchase.
9. The original purchase receipt must accompany all warranty claims. The name of the retailer
and date of purchase must be clear and legible.
10. There are no warranties that extend beyond what has been specified here.
Starboard / Airush Warranty Protocol
For all warranty claims you must provide the following at the request of the retailer where the
product was purchased:
1. Completed warranty form that includes a detailed explanation of the damage/fault and full
description of how it happened.
2. Proof of purchase.
3. Pictures showing the detail of the fault.
4. Pictures showing the serial number of the wing.

Rider: Alvaro Onieva Photographer: Samuel Cárdenas

FOR EVERY FREEWING SOLD
We plant a mangrove to absorb 1 ton of CO2over
20 years and collect 1.1 kg of beach/ocean plastic
trash. Equivalent to the amount of plastic trash
entering the ocean, per person, per year.
This manual suits for next models
6
Table of contents
Popular Aircraft manuals by other brands

Gin Gliders
Gin Gliders Safari Passenger owner's manual

Royal-model
Royal-model ASH-26 Building instructions

Niviuk
Niviuk Arktik user manual

Aviation Artur Trendak
Aviation Artur Trendak TERCEL Pilot operating handbook

Tuff Birds
Tuff Birds Micro BEE Instructional manual

SOL paragliders
SOL paragliders Flexus LOTUSOne manual