Airvital AP200 User manual


Nederlands........................................................................................................................................................................ 1
English ...............................................................................................................................................................................9
Français ...........................................................................................................................................................................17
Deutsch ...........................................................................................................................................................................25

1
NL
Airvital Luchtreiniger AP200
Om mogelijke schade aan jou of jouw eigendom te voorkomen, moet je de volgende handleiding zorgvuldig lezen
voordat je het apparaat gebruikt. Bewaar deze handleiding op een handige plaats als latere referentie.
1. Waarschuwingen en Voorzorgsmaatregelen
•Raak het apparaat niet aan met natte handen.
•Gebruik dit apparaat niet in een natte omgeving, zoals een badkamer.
•Modificeer of open het apparaat niet.
•De garantie vervalt als de machine incorrect wordt geopend of wordt aagepast.
•Trek altijd aan de stekker in plaats van het snoer om schade te voorkomen.
•Reinigingsmiddelen mogen niet worden gebruikt om het apparaat te reinigen.
•Plaats het apparaat altijd op een stabiel en vlak oppervlak.
•Plaats niets op het apparaat. Ga niet op het apparaat zitten of staan.
•Schakel het apparaat uit en verwijder de stekker uit het stopcontact als u de filters vervangt
•Schakel het apparaat uit en verwijder de stekker uit het stopcontact als je de voorfilter reinigt.
•Maak de voorfilter regelmatig schoon om het luchtdebiet te verbeteren.
•Maak het apparaat niet schoon met water.
•Kinderen mogen niet met, of in de buurt van het apparaat spelen.
•Plaats het apparaat niet onder een airco waar condens op het apparaat kan druppelen.
•Gebruik alleen de originele vervangingsfilters van Airvital.
Verpakkingsinhoud
•1x Airvital luchtreiniger
•1x Voorfilter
•1x Actieve koolstoffilter
•1x HEPA-filter
•1x Handleiding

2
NL
2. Product Overzicht
1. Luchtuitlaat
2. Luchtkwaliteits display
3. Vergrendeling voor het verwijderen van het luchtinlaatpaneel
4. Luchtkwaliteitssensor
5. Luchtinlaat
6. Luchtinlaatpaneel
7. Netsnoer
8. Licht-sterkte sensor
9. Actieve koolstoffilter
10. HEPA-filter
11. Voorfilter
12. Luchtinlaatpaneel

3
NL
3. Ingebruikname
Verwijder plastic van de filters.
De luchtfilters zijn verpakt in een plastic zak. Om het apparaat te kunnen gebruiken, moet je de plastic zakken van
beide filters verwijderen. Je doet dit door het luchtinlaatpaneel aan de achterkant te openen. Trek het paneel naar jou
toe om het te verwijderen.
Verwijder vervolgens de voorfilter. In het midden van de voorfilter bevinden zich twee kunststof ribben. Houd deze
ribben met beide handen vast en trek ze naar je toe. Hierdoor wordt de voorfilter verwijderd. Nu heb je toegang tot
beide filters en kan je ze uit de plastic zak halen. Zet de filters in dezelfde volgorde terug:
1. Actieve koolstoffilter (zwart)
2. HEPA-filter (wit)
3. Voorfilter
4. Luchtinlaatpaneel
Zorg ervoor dat de voorfilter en het luchtinlaatpaneel correct op hun plaats zitten. Als de voorfilter en
luchtinlaatpaneel niet goed zitten, kan het toestel een trillend geluid maken. De machine start niet als het
luchtinlaatpaneel niet op de juiste plaats zit. Dit is om te voorkomen dat het apparaat start of nog draait tijdens
onderhoud. Als je het achterpaneel verwijderd terwijl de machine draait, stopt de motor.
Er kan een plastic geur zijn bij de eerste keer dat het apparaat wordt opgestart. Dit is te verwachten met nieuwe filters.

4
NL
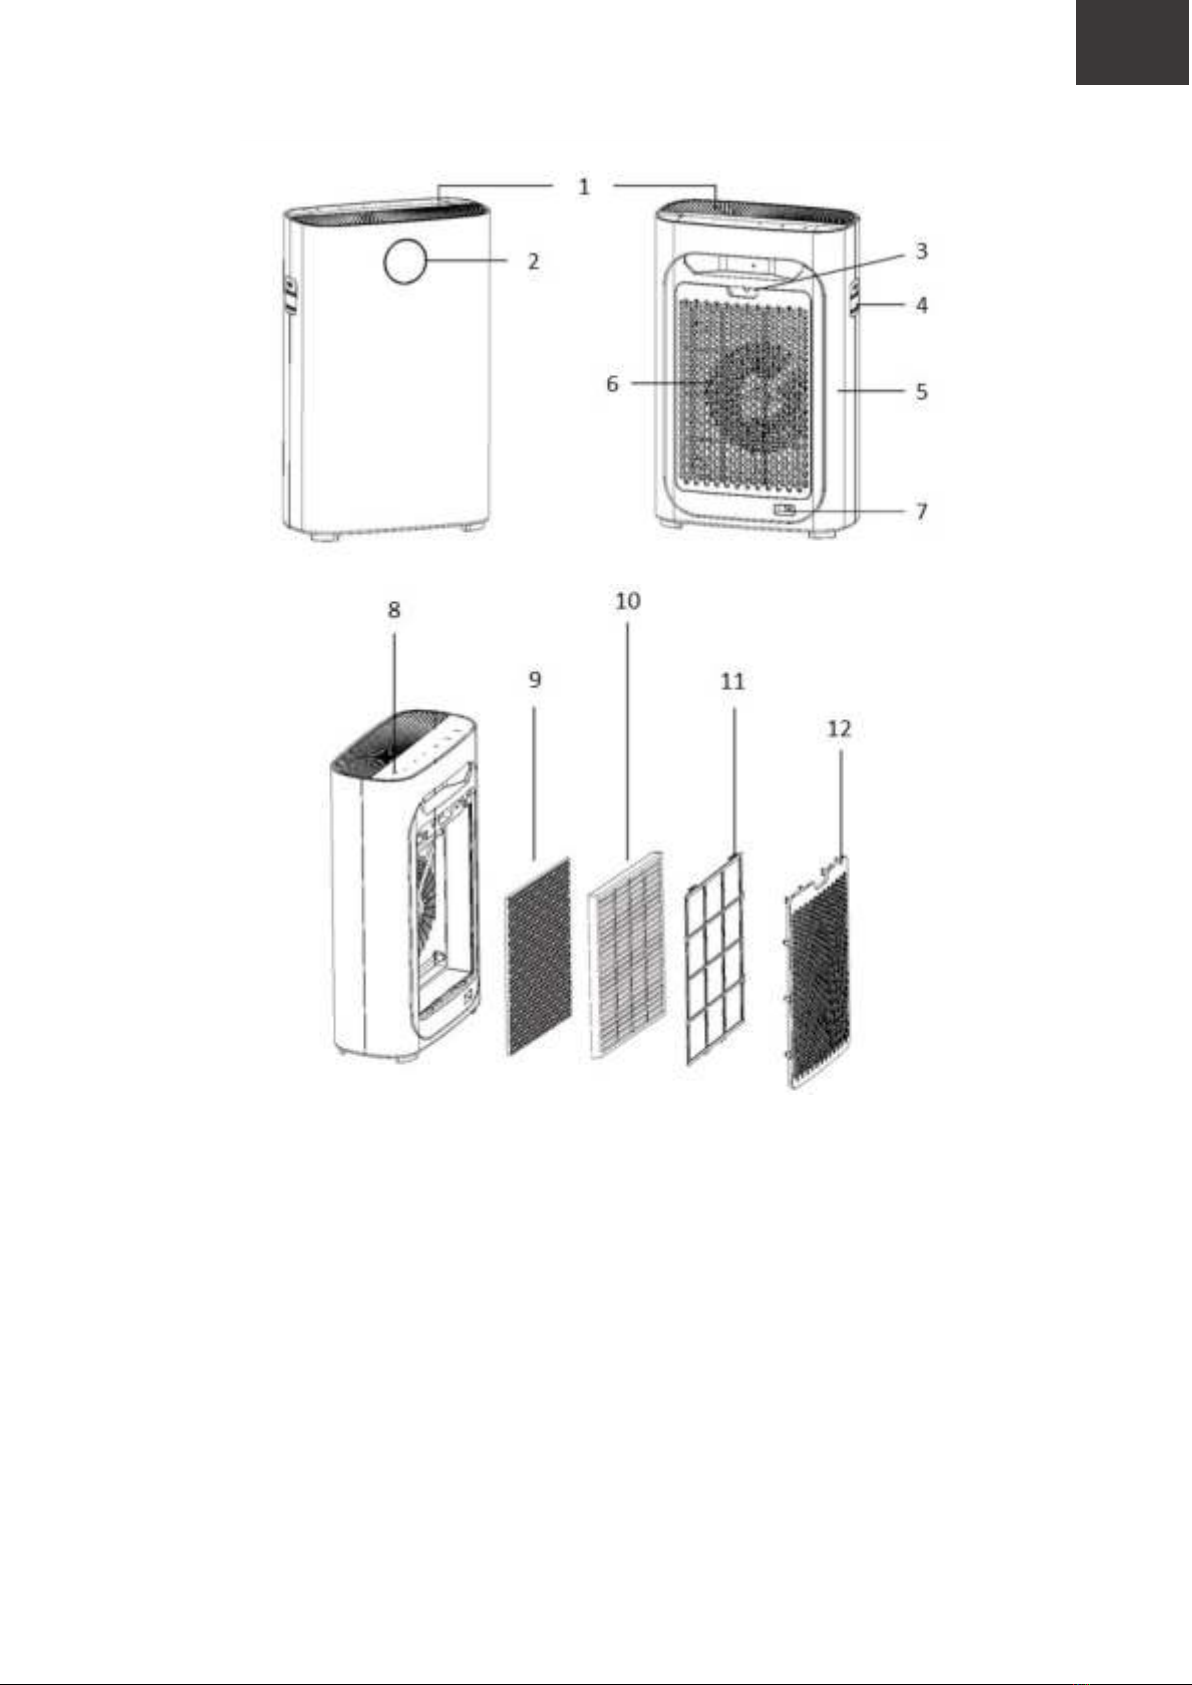
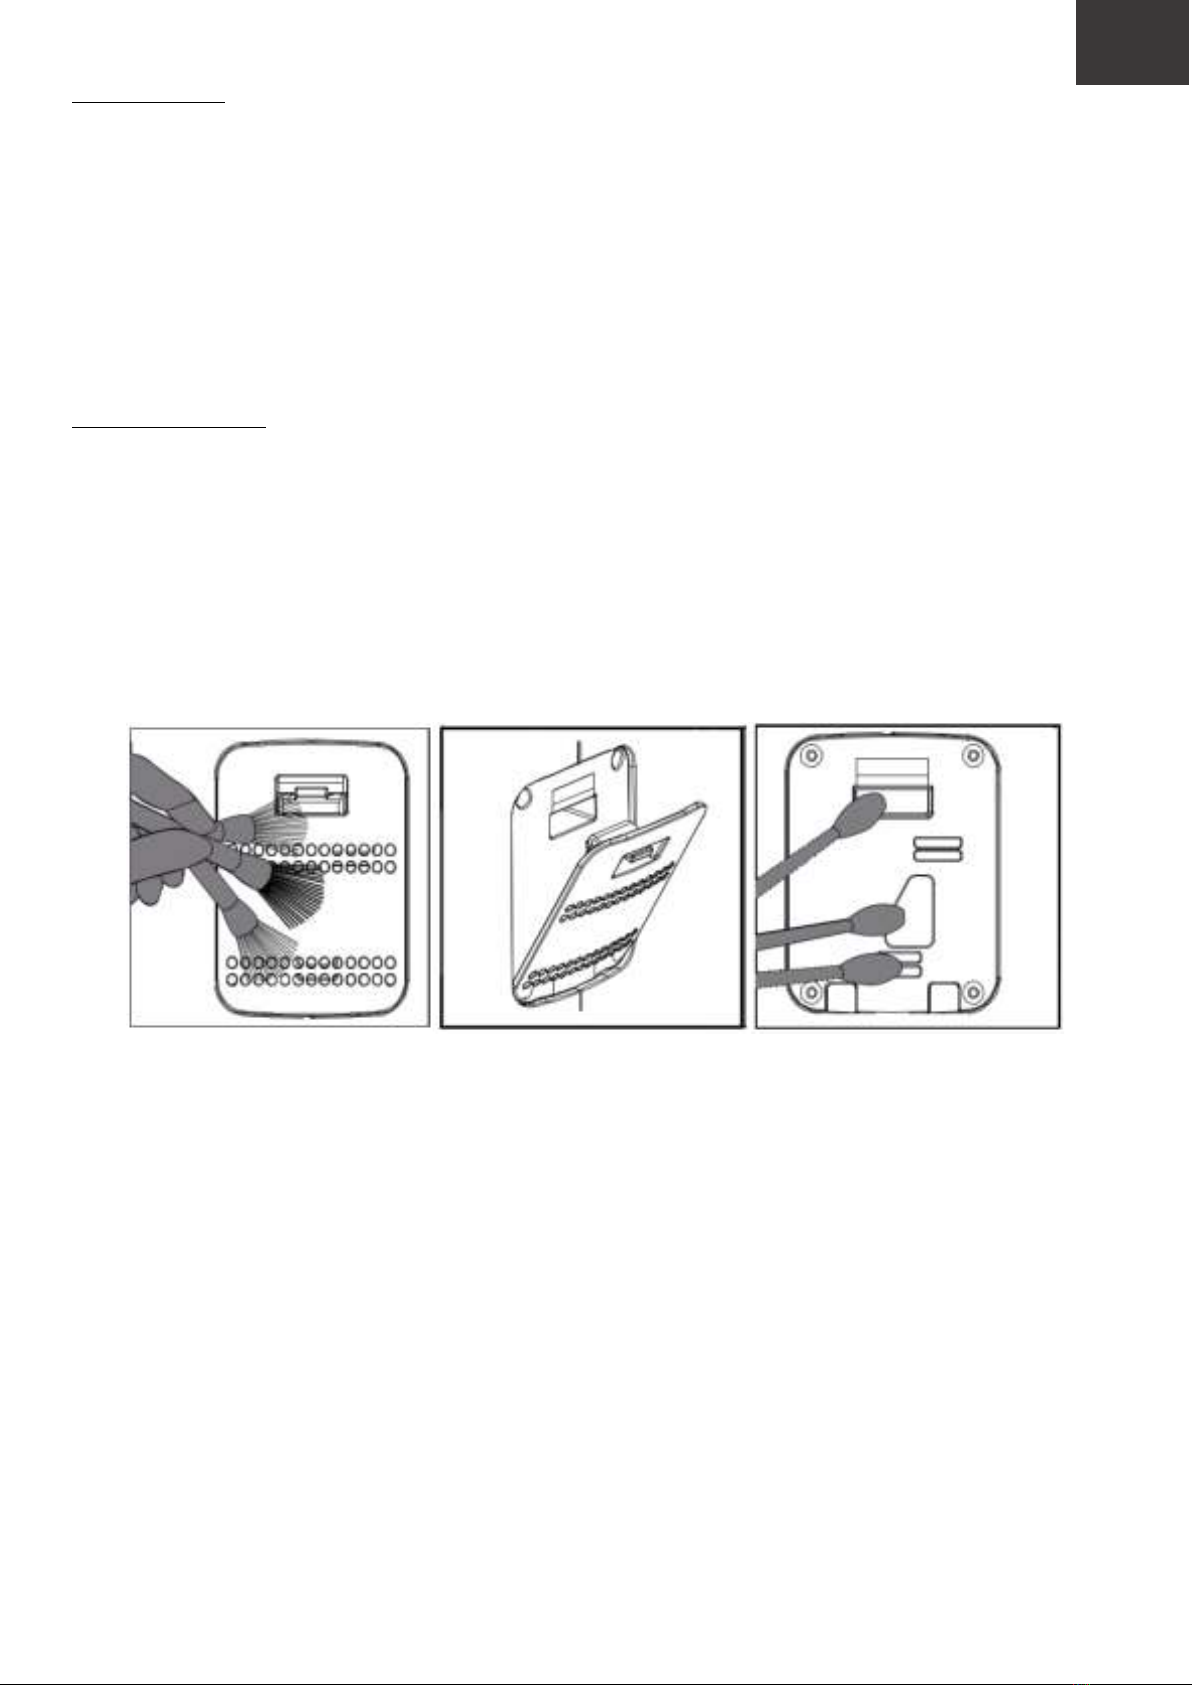
Functie van de filters
Voorfilter: maakt gebruik van een micron mesh-filter. Deze blokkeert deeltjes groter dan 2,5mm. De voorfilter
blokkeert haar van huisdieren, huidschilfers, grote pollen en stof. De voorfilter verlengt de levensduur van de HEPA-
filter en verbetert de luchtstroom wanneer deze regelmatig wordt schoongemaakt.
HEPA-filter: de HEPA-filter verwijdert deeltjes tot 0,3 micron (0.0003mm). Hierdoor worden fijne stofdeeltjes zoals
PM10, PM2.5 en PM1 verwijderd. Het verwijdert ook kleine pollen, bacteriën, schimmels en de meeste delen van
smog.
Actief koolstoffilter: Deze filter verwijdert vluchtige organische stoffen zoals formaldehyde en benzeen. De filter
verwijdert ook verfdampen, geurtjes van huisdieren, passieve rook en kookluchtjes.
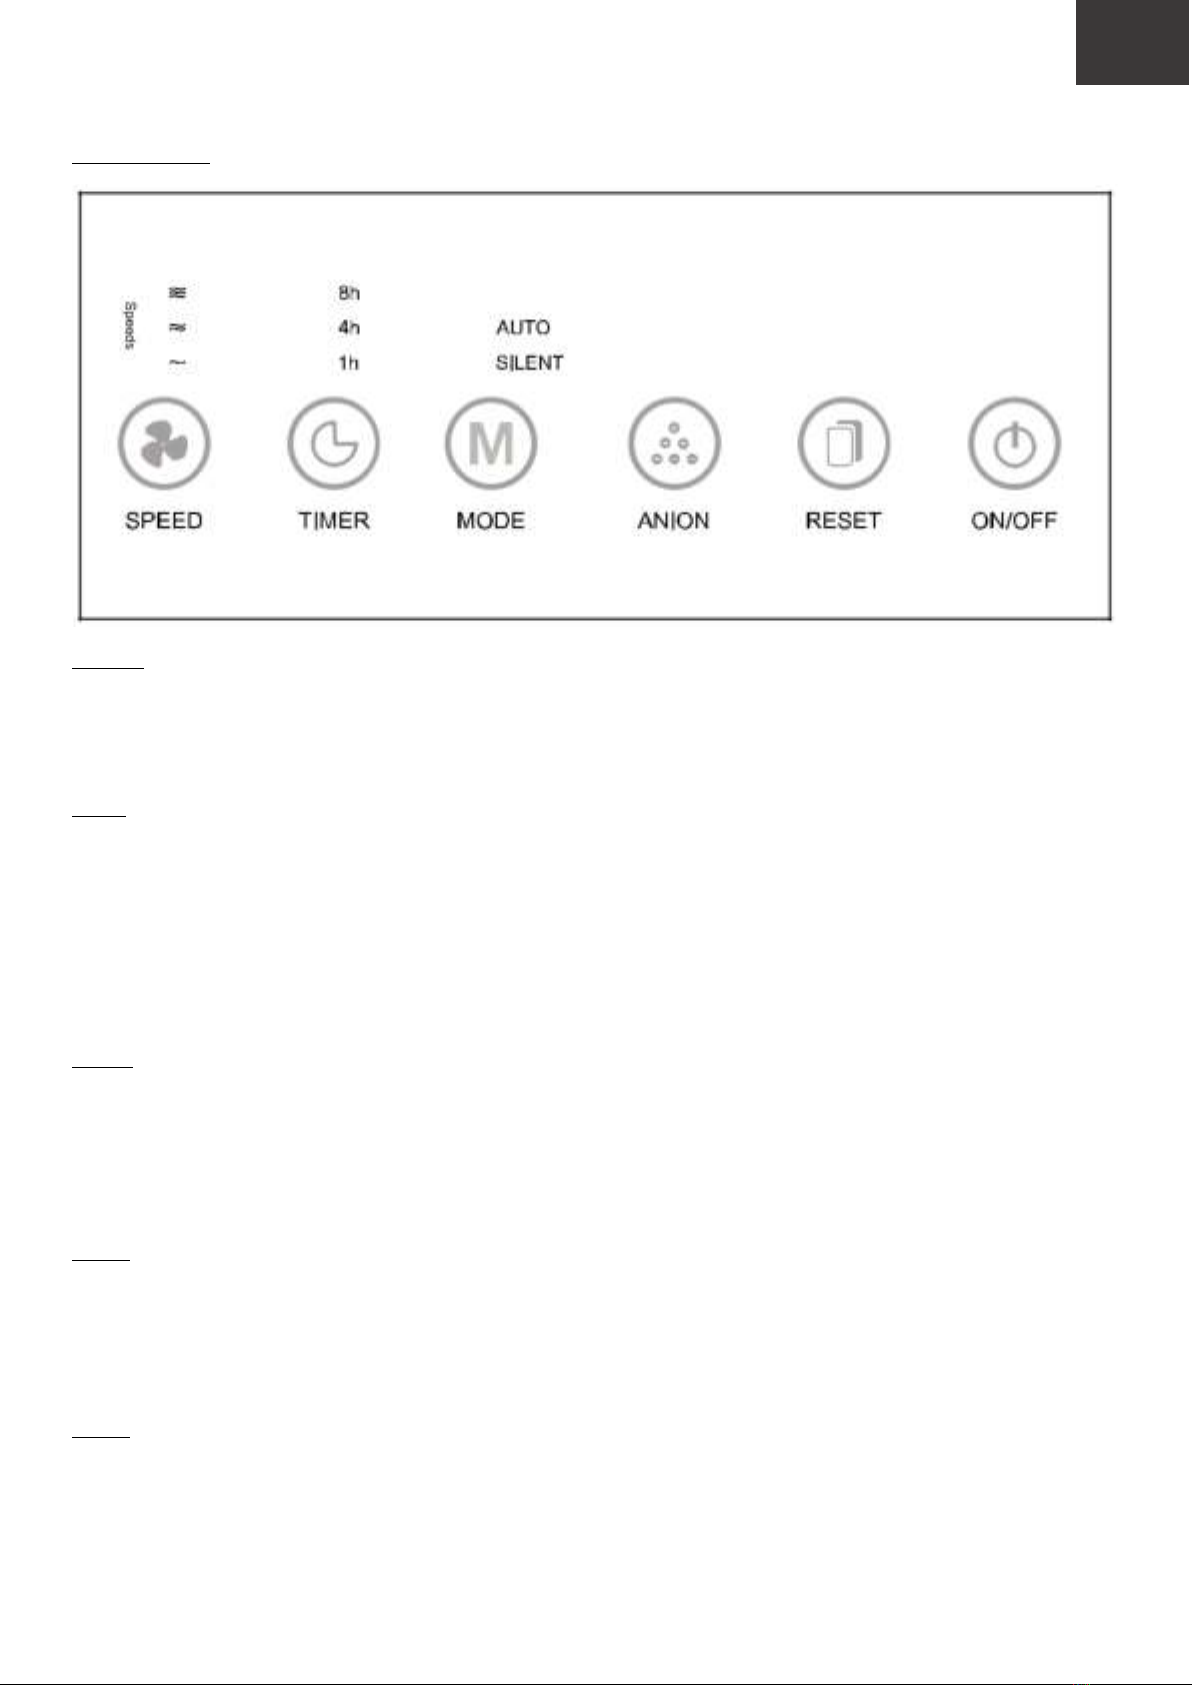
Ionisator: de ionisator wordt op het bedieningspaneel aangegeven als ION. Indien geactiveerd, laat de machine
negatief geladen deeltjes in de lucht vrij. Deze negatief geladen deeltjes hechten zich vast aan stofdeeltjes. Nu zijn de
stofdeeltjes zwaarder en vallen ze neer op de grond. De fijne stofdeeltjes worden niet verwijderd of geneutraliseerd
door de ionenfunctie. Ze worden alleen verwijderd als je een stofzuiger gebruikt (met HEPA filter). Deze functie kan
gebruikt worden als er grote hoeveelheden fijn stof in de ruimte aanwezig zijn.
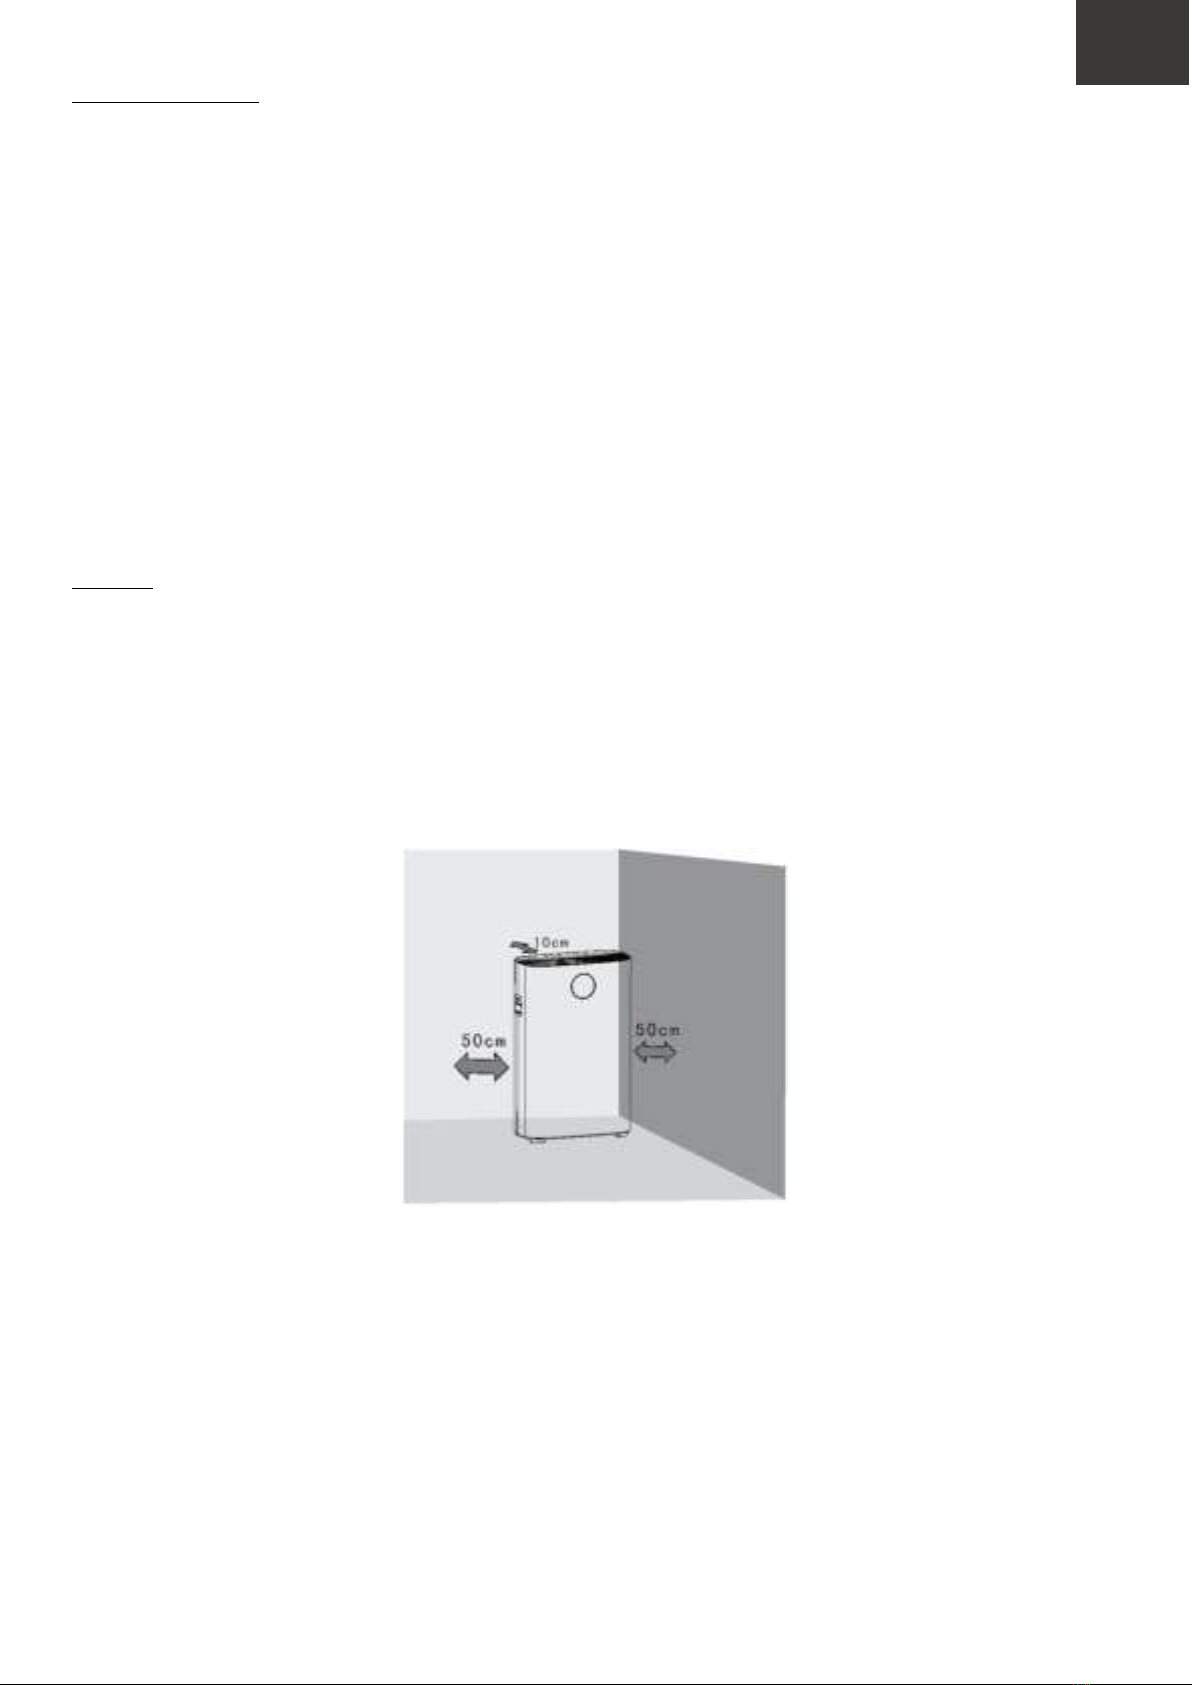
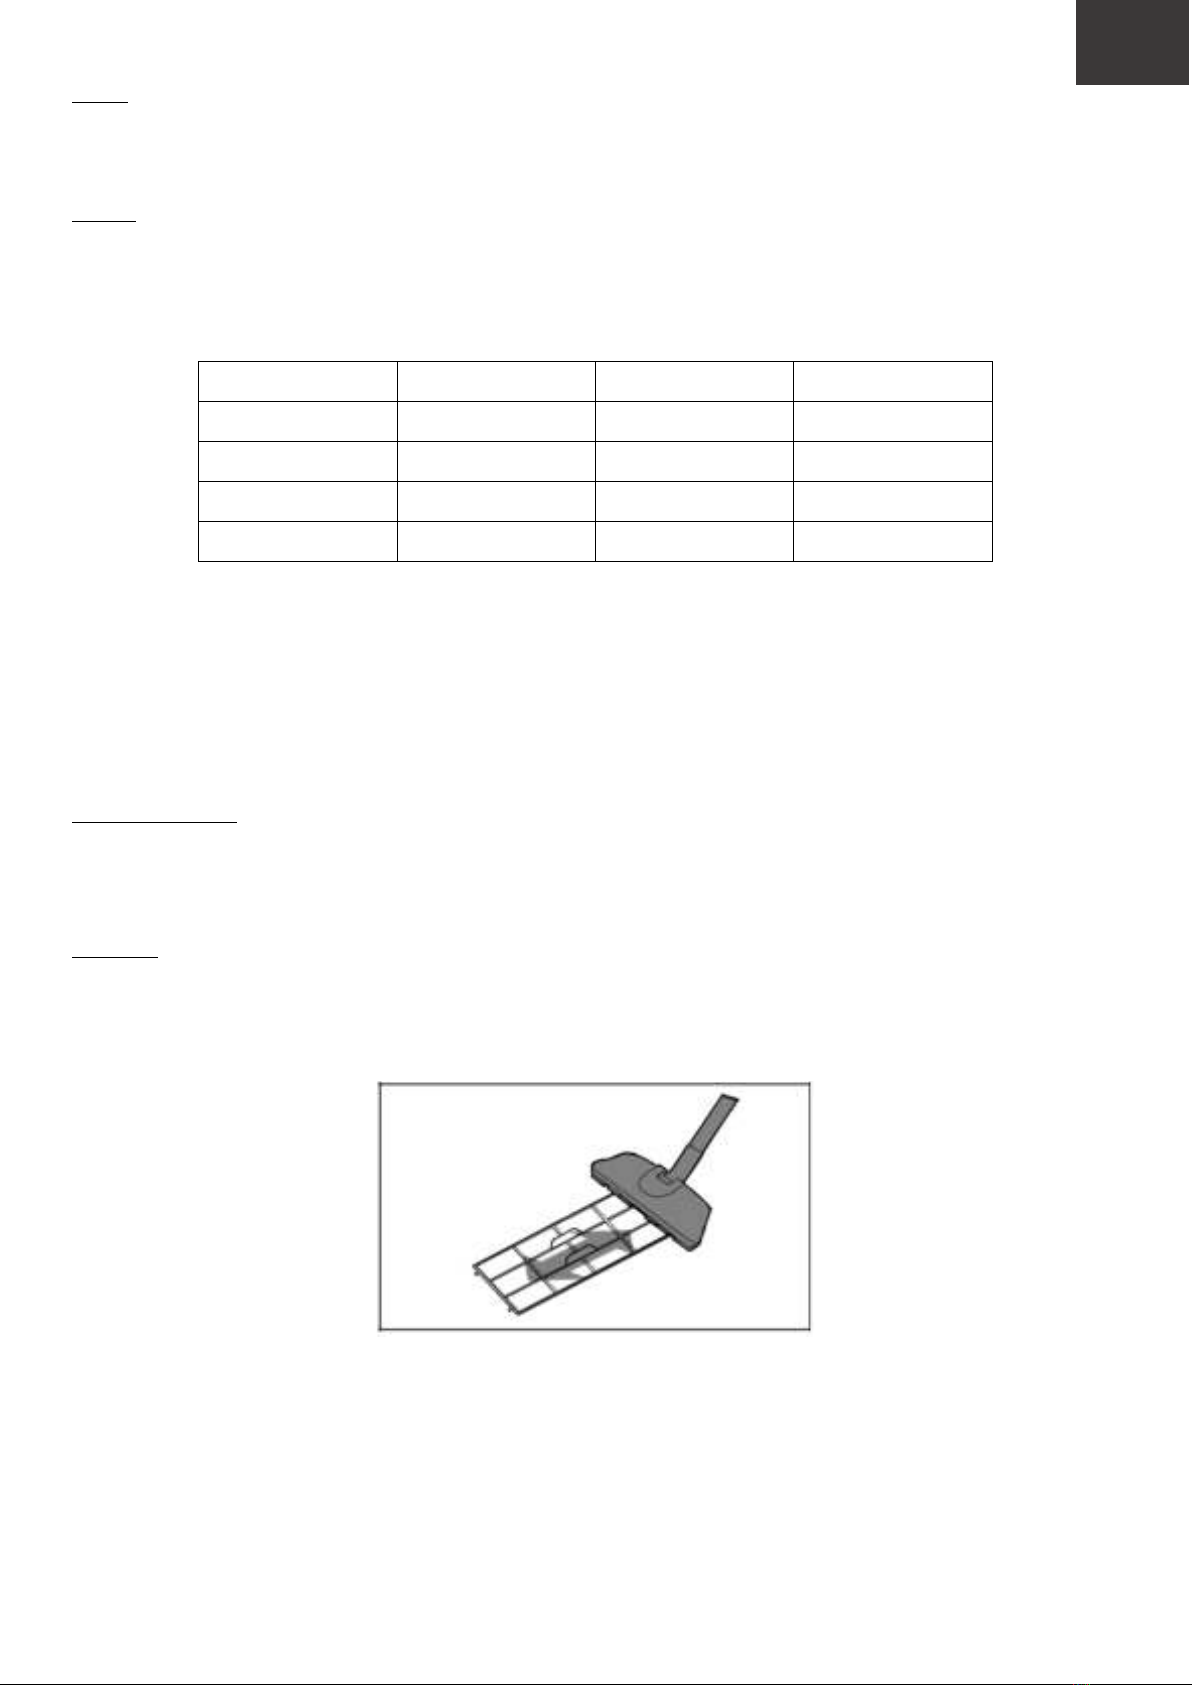
Plaatsing
Om de luchtreiniger efficient te laten werken, is de plaatsing van de luchtreiniger in de ruimte essentieel. De afstand
tot de muur en de zijkant van het apparaat moet minimaal 50 cm bedragen. Laat minimaal 10 cm ruimte tussen de
achterkant van de luchtreiniger en de muur.
Plaats de luchtreiniger op minimaal één meter afstand van televisie- en radioapparatuur. Gebruik niet detzelfde
stekkerblok als de televisie of radio. Het statische ruis van omringende apparaten kan interferentie met de DC-motor
veroorzaken.

5
NL
4. Instructies
Controlepaneel
ON/OFF
Start de luchtreiniger door op de AAN/UIT-knop te drukken. Het apparaat start in de AUTO-modus. Het duurt 15
seconden om het huidige luchtvervuiling te detecteren. Na 15 seconden schakelt het toestel over naar de
automatische snelheid.
RESET
Na 1600 uur bedrijfstijd begint deze knop te knipperen. Deze melding herinnert je om de filters te controleren of te
vervangen. Als de filters niet vervuild zijn, kan je ze terugplaatsen en blijven gebruiken. Druk 5 seconden op de knop
om de bedrijfstijd terug te resetten op nul uur.
Deze knop wordt ook gebruikt om de display in of uit te schakelen. Raak de knop eenmaal aan om de display uit te
schakelen. Raak nogmaals aan om de display weer in te schakelen. Het toestel blijft normaal werken als de display is
uitgeschakeld.
ANION
Dit is de negatieve ionenfunctie. Wanneer je deze activeert, geeft het apparaat negatieve ionen af.
Als je de ionenknop vijf seconden ingedrukt houdt, wordt de kinderslotfunctie geactiveerd. Als de kinderslotfunctie is
geactiveerd, kunnen er geen knoppen worden ingedrukt. Om het kinderslot uit te schakelen, houd je de knop vijf
seconden ingedrukt.
MODE
Kies tussen automatische en stille modus. Wanneer je de automatische modus selecteert, gebruikt het apparaat de
gedetecteerde PM2.5-deeltjes die in de lucht aanwezig zijn en past het de snelheid van de ventilator automatisch aan.
Kies je voor de stille modus, dan draait deze alleen in de eerste snelheid, en houdt het scherm rekening met het licht
van de kamer om zo de display te dimmen.
TIMER
Deze functie wordt gebruikt om de werktijd af te tellen. Je kan kiezen tussen 1 uur, 4 uur of 8 uur. Het toestel telt de
geselecteerde tijd af en wordt daarna automatisch uitgeschakeld.

6
NL
SPEED
Met deze knop selecteer je handmatig de snelheid. Er zijn vier snelheden. Als het toestel in de automatische modus
staat, dan kiest het de juiste snelheid voor het huidige vervuilingsniveau.
Display
De display toont de huidige luchtvervuiling (PM2.5), temperatuur (°C), en relatieve luchtvochtigheid.
De kleur van de ring komt overeen met de luchtvervuiling dat de fijnstofsensor detecteert. Raak de resetknop eenmaal
aan om de display uit te schakelen.
Kleur
PM2.5 waarde
Luchtkwaliteit
Snelheid
Groen
0-20
Goed
1
Geel
21-35
Ok
2
Paars
36-50
Slecht
3
Rood
>51
Zeer slecht
4
5. Reiniging en Onderhoud
Trek de stekker uit het stopcontact als je het apparaat reinigt. Alleen de voorfilter kan met water worden
schoongemaakt. De HEPA- en actieve koolstoffilter niet.
!Schakel het apparaat uit en trek de stekker uit het stopcontact voordat je reinigings- of onderhoudswerkzaamheden
uitvoert.
Apparaat Reinigen
Gebruik een droge doek om het stof van het apparaat te verwijderen. Gebruik geen natte doek.
!Gebruik geen water om het apparaat schoon te maken. Dit kan kortsluiting of brand veroorzaken.
Voorfilter
De voorfilter verlengt de levensduur van de filters. Reinig de voorfilter elke twee maanden. Maak de voorfilter schoon
met een stofzuiger. Als er vetten op de voorfilter kleven kan deze gereinigd worden met zeep. Zorg ervoor dat de
voorfilter altijd droog is voordat je het terugplaatst.

7
NL
Filters vervangen
Na verloop van tijd moeten de HEPA-filter en koolstoffilter vervangen worden. Dit is afhankelijk van de aanwezige
vervuiling in de ruimte. We raden aan om beide filters om de zes maanden te vervangen. We raden aan om steeds de
HEPA-filter te inspecteren wanneer je de voorfilter reinigt.
Als de vervuiling erg is, moet je de filters vaker vervangen. Als de HEPA filter donker begint te worden, is het tijd om
deze te vervangen. Als je de filters langer gebruikt dan aangeraden zullen ze niet meer efficient zijn. Als de koolstoffilter
verzadigd is kan deze ook geen schadelijke gassen meer opnemen.
!Alleen de voorfilter is wasbaar. De HEPA- en koolstoffilter is niet wasbaar en kan niet worden schoongemaakt met
een stofzuiger.
Luchtkwaliteitssensor
De luchtkwaliteitssensor moet regelmatig worden schoongemaakt om efficiënt te blijven werken. Als de
luchtvochtigheid in de kamer hoog is, kan er binnenin condensatie ontstaan, wat een onregelmatige meting kan
veroorzaken. Stof kan zich ophopen in de kamer van de sensor. Daarom is het essentieel om de sensor om de twee
maanden te inspecteren en te reinigen.
Gebruik een zacht borsteltje om de inlaat van de sensor te reinigen. Verwijder vervolgens het klepje en gebruik een
droog wattenstaafje om de sensor te reinigen. Als de luchtreiniger in de automatische modus staat, kan de
ventilatorsnelheid tijdelijk worden verhoogd.

8
NL
6. Probleemoplossing
Conditie
Redenen
Oplossing
De machine gaat niet aan.
Het achterpaneel is mogelijks niet
correct geïnstalleerd.
Verwijder het paneel en installeer het
correct.
De stekker zit niet in het stopcontact.
Steek de stekker correct in het
stopcontact.
De zekering is kapot.
Probeer een ander stopcontact.
De ventilator doet het niet.
De machine is niet ingeschakeld.
Controleer de stroombron en druk op
de aan/uit knop.
De machine staat niet waterpas.
Zet de machine op een vlakke
ondergrond.
De plastic verpakking van de filters is
niet verwijderd.
Open de achterklep en verwijder de
verpakking van de filters.
Slechte prestatie.
De voorfilter is vuil.
Reinig de voorfilter.
Filters zijn niet vervangen.
Vervang de filters elke zes maanden.
De plastic verpakking van de filters is
niet verwijderd.
Open de achterklep en verwijder de
verpakking van de filters.
De afstand rondom de machine is niet
correct.
Vergroot de afstand tussen de machine
en de muur.
De machine maakt veel lawaai.
Snelheid is te hoog.
Gebruik de automatische modus of
verlaag de snelheid handmatig.
Elektronische storing.
Zet de machine op minstens één meter
afstand van andere elektrische
apparaten.
De voorfilter en achterpaneel zijn niet
correct geïnstalleerd.
Installeer de voorfilter en het
achterpaneel correct in de
overeenkomstige sleuven totdat u een
paar klikken hoort.
Vloer is niet stabiel.
Gebruik viltjes onder de machine om de
trillingen te dempen.
7. Opslag
Schakel de luchtreiniger uit en maak de voorfilter schoon. Zorg ervoor dat de filters droog zijn voordat je ze opbergt.
Bewaar de luchtreiniger op een droge en koele plaats in de originele verpakking.
8. Garantie
Als je aanvullende informatie of onderdelen nodig hebt, neem dan contact op met onze klantenservice via
9. Recycleren
Het apparaat mag niet bij het gewone huisvuil worden gedeponeerd. Het moet naar een recyclingcentrum worden
gebracht waar je jouw elektrische apparatuur kan inleveren.

9
EN
Airvital Air Purifier AP200
To avoid possible damage to you or your property, make sure to read the following manual carefully before using the
device. Keep this manual stored in a convenient place for future reference.
1. Warnings and Precautions
•Do not touch the device with wet hands.
•Do not use this device in a wet environment, such as a bathroom.
•Do not disassemble the device for risk of electric shock.
•Warranty will be voided if the machine is opened inappropriately.
•Always pull on the plug instead of the wire to avoid damage.
•Benzene, thinner, or similar cleaning solvents may not be used to clean the device.
•Always place the device on a stable and flat surface.
•Do not place anything on top of the device. Do not sit or stand on the device.
•Switch off and unplug the device when you replace the filters or clean the pre-filter.
•Clean the pre-filter regularly to improve airflow.
•Do not clean the device with water.
•Children are not allowed to play with or around the device.
•Do not place the device under an air cooler where condensation can drip onto the device.
•Only use the original Airvital replacement filters.
Package contents
•1x Airvital air purifier
•1x pre-filter
•1x activated carbon filter
•1x HEPA filter
•1x manual

10
EN
2. Product Overview
1. Air outlet
2. Air quality display
3. Latch for removing the back panel
4. Air quality sensor
5. Air inlet
6. Back cover
7. Power cord
8. Light sensor
9. Activated carbon filter
10. HEPA filter
11. Pre-filter
12. Air inlet panel

11
EN
3. Before use
Remove the plastic from the filters.
The air filters are wrapped in plastic bags. To start using the device, you need to remove the plastic from the filters.
You can do this by removing the back panel. Put your thumb in the top latch and pull towards you.
Next, remove the pre-filter. In the middle of the pre-filter, there are two plastic ribs. Hold these ribs with both hands
and pull towards you. This will remove the pre-filter. Now you can access both filters and remove them from the plastic
bag. Put the filters back in the same order:
1. Activated carbon filter (black)
2. HEPA filter (white)
3. Pre-filter
4. Air inlet cover
Make sure that the pre-filter and the air inlet panel is placed in its position correctly. If not set correctly, the device
will make a vibrating noise. The air inlet panel needs to be put back in the right position to start the machine. The
machine will not start if the air inlet panel is not in its proper place. This is to protect the device from starting during
maintenance. If you remove the back panel while the machine is running, the motor will stop.
There might be a plastic smell at the initial startup of the machine. This is to be expected with new filters.

12
EN
Filters and their functions
Pre-filter: uses a micron mesh filter. This blocks particles larger than 2.5mm. The pre-filter will block pet hair, dander,
big pollen and coarse dust. The pre-filter will extend the life of your HEPA filter and improve airflow when cleaned
regularly.
HEPA-filter: the HEPA filter removes particles as small as 0.3micron. This removes fine dust particles like PM10, PM2.5
and PM1. It also removes small pollen, bacteria, mould, and most parts of smog.
Activated carbon filter: We use a granular carbon filter because it has a longer lifespan than spray-on filters. This filter
removes volatile organic compounds like formaldehyde and benzene. The filter also removes paint fumes, secondhand
smoke, and cooking smells.
Ionizer: the ionizer is indicated as ION on the control panel. If activated, the machine releases negatively charged
particles in the air. These negatively charged particles attach themselves to dust particles which fall to on the ground.
The fine dust particles are not removed or neutralized by the ion function. They are only removed when you use a
vacuum. This feature can be useful if large amounts of fine dust are in the room.
Placement
For the air purifier to achieve maximal efficiency, the air purifier's placement in the room is essential. The distance to
the wall should be at least 50cm at the sides. Allow at least 10cm between the back of the air purifier and the wall.
Place the air purifier at least one meter away from television and radio devices. Do not use the same socket as the
television or radio. The static interference of surrounding devices may cause interference with the DC motor and cause
jitter and noise.

13
EN
4. Instructions
Control panel
ON/OFF
Start the air purifier by pressing the ON/OFF button. The device will start in AUTO mode. It will take 15 seconds to
detect the current air pollution level. It will then switch to its corresponding speed setting.
RESET
After 1600 hours of runtime, this button will start flashing. It reminds you that the filters need to be checked and
replaced. If the filters are not contaminated, you can put them back and continue using them. Press the button for 5
seconds to reset the runtime back to zero hours.
This button also is used for turning the display on or off. Touch the button once to turn off the display. Touch again to
turn the display back on. This can be useful if you don't want light in the room.
ANION
This is the negative ion function. When pressed, the device will release negative ions.
If you hold the anion button for five seconds, the child lock function will be activated. If the child lock function is
activated, no buttons can be pressed. To disable child lock, press the button again for five seconds.
MODE
Choose between auto and silent. When selecting the auto mode, the device will use the detected PM2.5 particles in
the air and adjust the airflow accordingly. If you choose the mode silent, it will only run in the first speed, and the
screen will take the light of the room into account and dim the display.
TIMER
This function is used to count down the working time. You can choose between 1 hour, 4 hours, or 8 hours. The
machine will count down the amount of time you selected and will shut down automatically.

14
EN
SPEED
Using this button, you select the speed manually. In total there are four speeds: 1, 2, 3 and 4. If the machine is in
automatic mode, it will choose the appropriate speed for the current pollution level.
Indicator panel
This panel shows the current level of pollution, temperature (°C), and relative humidity.
The colour of the ring corresponds with the pollution level the dust sensor detects. The light colour will indicate the
speed at which the device runs if put in automatic mode. To turn off the indicator panel touch the reset button once.
Colour
PM2.5 level
Air Quality
Speed
Green
0-20
Good
1
Yellow
21-35
Ok
2
Purple
36-50
Bad
3
Red
>51
Very bad
4
5. Cleaning and Maintenance
Pull out the plug before performing any cleaning or maintenance on the device. Only the pre-filter can be cleaned with
water. The HEPA and activated carbon filter cannot.
!switch off and unplug the device before performing cleaning or maintenance.
Device
Use a dry cloth to remove the accumulated dust on the device. Do not use a wet cloth for cleaning the machine.
!Do not use water to clean the device. This can cause a short circuit or cause a fire.
Pre-filter
The pre-filter extends the life of the filters. Clean the pre-filter every two months, depending on dust accumulation.
Clean with a vacuum or by using water. Make sure the pre-filter is always dry before you place it back.

15
EN
Replacing filters
Over time, the HEPA filter and carbon filter must be replaced. This depends on the pollution present in the room. We
recommend replacing the HEPA and carbon filter every six months for everyday use. We recommend that you always
inspect the HEPA filter when cleaning the pre-filter.
If the pollution is bad, you need to replace the filters more frequently. Always check the HEPA filter when you clean
the pre-filter. If the filter begins to darken, it's time to replace it. Put the filter directly in the appropriate waste disposal
in your local area.
! Only the pre-filter is washable. The HEPA and carbon filter is not washable and cannot be cleaned with a vacuum
cleaner.
Air quality sensor
The air quality sensor needs periodic cleaning to keep running efficiently. If the humidity in the room is high,
condensation may form inside and cause irregular air quality readings. Dust can also accumulate inside the sensor.
Therefore it's essential to inspect and clean the sensor periodically. The air quality sensor is located on the left side of
the device.
Use a soft brush to clean the inlet of the sensor. Next, remove the protective cover and use a dry cotton swab to clean
the sensor surroundings. If the air purifier is placed into auto mode, it might increase the fan speed temporarily after
starting the air purifier again.

16
EN
6. Troubleshooting
Condition
Reason
Solution
The machine doesn't turn on.
The back panel may not be installed
correctly.
Remove the panel and install it
correctly.
The power plug is not inserted in the
socket.
Take the power plug and insert in a
socket.
The fuse is broken.
Try another socket.
The fan doesn't work.
The machine is not turned on.
Check the power source and press the
on/off button.
The machine is not level.
Put the machine on a level surface.
The plastic packaging of the filters is not
removed.
Open the back cover and remove the
packaging.
Poor performance.
The pre-filter is dirty.
Clean the pre-filter.
Filters are not replaced.
Replace the filters every six months,
depending on pollution levels.
The plastic packaging of the filters is not
removed.
Open the back cover and remove the
packaging.
The spacing around the machine is not
correct.
Increase the spacing between the
machine and the wall.
The machine is noisy.
Speed is too high.
Use the automatic mode or decrease
the speed manually.
Electrical interference.
Put the machine at least one meter
away from other electrical devices.
The pre-filter and back panel is not
installed correctly.
Install the pre-filter and back panel
correctly in the corresponding slots
until you hear several clicks.
Flooring is not stable.
Use felt pads under the machine to
dampen the vibrations.
7. Storage
Turn off the air purifier and clean the pre-filter. Make sure the filters are dry before storage. Store the air purifier is a
dry and cool location in its original packaging.
8. Warranty
If you need additional information or parts, please contact our customer service at [email protected].
9. Recycling
The device shall not be disposed of as general household waste. It needs to be brought to a recycling centre where
you can dispose of your electrical equipment.

17
FR
Airvital Purificateur d'air AP200
Pour éviter tout dommage éventuel à vous ou à vos biens, veillez à lire attentivement le manuel suivant avant d'utiliser
l'appareil. Conservez ce manuel dans un endroit pratique pour pouvoir vous y référer ultérieurement.
1. Avertissements et Précautions
•Ne touchez pas l'appareil avec des doigts mouillés.
•N'utilisez pas cet appareil dans un environnement humide, comme une salle de bain.
•Ne démontez pas l'appareil pour éviter tout risque de choc électrique.
•La garantie sera annulée si la machine est ouverte de manière inappropriée.
•Tirez toujours sur la fiche plutôt que sur le fil pour éviter de l'endommager.
•Le benzène, les diluants ou les solvants de nettoyage similaires ne peuvent pas être utilisés pour nettoyer
l'appareil.
•Placez toujours l'appareil sur une surface stable et plane.
•Ne placez rien sur le dessus de l'appareil. Ne vous asseyez pas et ne vous mettez pas debout sur l'appareil.
•Éteignez et débranchez l'appareil lorsque vous remplacez les filtres ou nettoyez le pré-filtre.
•Nettoyer régulièrement le pré-filtre pour améliorer la circulation de l'air.
•Ne pas nettoyer l'appareil à l'eau.
•Les enfants ne sont pas autorisés à jouer avec ou autour de l'appareil.
•Ne placez pas l'appareil sous un refroidisseur d'air où la condensation peut s'écouler sur l'appareil.
•N'utilisez que les filtres de rechange Airvital d'origine.
Contenu de l'emballage
•1 purificateur d'air Airvital
•1 pré-filtre
•1 filtre à charbon actif
•1 filtre HEPA
•1 manuel de l'utilisateur
Table of contents
Languages:
Popular Air Cleaner manuals by other brands

Kenmore
Kenmore PlasmaWave 85150 brochure

Beko Technologies
Beko Technologies BEKOMAT 20 Instructions for installation and operation

Trion
Trion IAQ 1400 Installation, operation and instruction manual

Heylo
Heylo FT 1000 user manual

Aprilaire
Aprilaire 2275 owner's manual

Amaircare
Amaircare Roomaid instruction manual

Conair
Conair GL-2106 manual

Arm & Hammer
Arm & Hammer Pet Fresh AOR100PF Owner’s guide owner's guide

HoMedics
HoMedics Pet Plus ATPET02AU Instruction manual and warranty information

Purafil
Purafil PuraShield MINI user manual

Oreck
Oreck OptiMax AIR94 user guide

Stratasys
Stratasys ProAero Installation and user manual