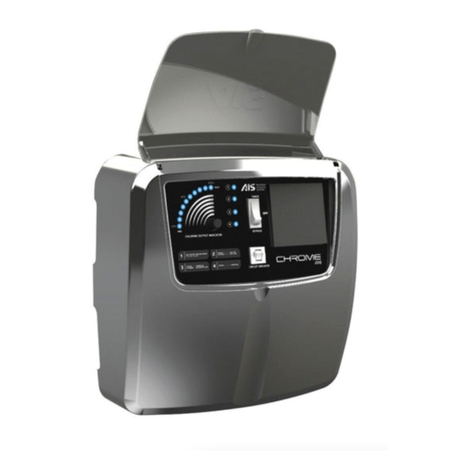
AIS AutoChlor Classic Series User manual

RESIDENTIAL SALT WATER CHLORINE GENERATOR
Classic Series
INSTRUCTION MANUAL
This manual is for:
CLASSIC RP MODEL RANGE
FEATURING REVERSE POLARITY TECHNOLOGY
RP-15, RP-20, RP-25, RP-36, RP-50, RP-64, RP-80
CLASSIC LS MODEL RANGE
(RP20-3500ppm, RP25-3500ppm, RP35-3500ppm)
MIDI RANGE
(RP-100, RP-150)
Includes:
TIME CLOCK MODELS (battery backup optional)
POOL LIGHT MODELS (where fitted)

Version: SHPACRPIM V20a
DISCLAIMER
• While every eort has been made to ensure that the information contained in this guide
is accurate and complete, no liability can be accepted for any errors or omissions.
• Australian Innovative Systems Pty Ltd (AIS Water) reserves the right to change the specifications of the
hardware and software described herein at any time without prior notice.
• No part of this guide may be reproduced, transmitted, transcribed, stored in a retrieval system,
or translated into any language in any form, by any means, without the prior written permission
of Australian Innovative Systems Pty Ltd.
• Australian Innovative Systems Pty Ltd makes no warranties for damages resulting from lack of supply of
chlorine due to a mistaken operation or malfunction of the chlorine generator or use
of non-genuine replacement parts.
TRADEMARK ACKNOWLEDGEMENTS
AutoChlor® is a trademark of Australian Innovative Systems Pty Ltd.
USE OF GENUINE REPLACEMENT PARTS IS RECOMMENDED
This product is designed to perform optimally when used with genuine Australian Innovative Systems
replacement parts. Australian Innovative Systems Pty Ltd shall not be liable for any damages to this product
caused by the use of non-genuine replacement parts (e.g. electrode.). Please note that this warranty does
not apply to repairs arising out of the malfunction of non-genuine replacement parts, although you may
request such repairs on a chargeable basis.
PURCHASED FROM:
PURCHASED DATE:
NOTE: Proof of purchase / installation is required for warranty claims. Please keep your records in a safe place.

3
1. High Salt Light
If the light is on or flashing see
Warning Indicator Lights, page 12.
2. Low Salt / Cell Off Light
If the light on or flashing see
Warning Indicator Lights, page 12.
3. Power ON / Water Flow Light
If light flashes see
Warning Indicator Lights, page 12.
4. Overload / Normal Operation Light
When light is ON/Steady and machine is
beeping the chlorine generator power
supply is on standby due to failure. Con-
tact manufacturer for service.
When flashing, machine is working in
reverse cycle (normal operation).
5. Chlorine Controller
Turn clockwise to increase the chlorine
output and anti-clockwise to reduce the
chlorine output.
(Note: When production lights are o,
‘power on’ and ‘cell o ’ lights are on,
chlorine production is in standby mode).
6. Chlorine Output Indicator
Each light on represents 10% of chlorine
output (e.g. 5 lights on = 50% output).
7. Circuit Breaker
If tripped, press to reset.
Refer to page 11.
8. Time Clock (Timer models only)
See page 14 for operation.
9. Time Clock Bypass (Timer models only)
See page 15 for operation.
1 2
4
7
8
9
5
6
3Fig. 1

4
THE AutoChlor® SALT WATER CHLORINATION SYSTEM
Congratulations on your choice of an AutoChlor® salt water chlorinator system for your swim-
ming pool. The AutoChlor® salt water chlorinator you have purchased is designed for easy and
simplistic operation and maintenance. By following these instructions you are assured years of
trouble free operation.
These instructions have been compiled and produced to help you get the maximum results from
your unit and to assist you to fully understand and correctly operate your AutoChlor® salt water
chlorinator.
Please take the time to read these instructions thoroughly before attempting to operate your
unit. Should you require additional information or further assistance, please do not hesitate to
contact your local AutoChlor® representative or visit our website www.aiswater.com.au.
ADDITION OF SALT
For best results the salt concentration in the pool water is required to be within an average
range of approximately 4,500 to 5,500 parts per million (ppm). These figures are temperature
dependant. In summer time, as water temperatures rise, salt levels may require slight reduction
while in winter time the reverse may be true to allow optimum performance of your unit.
The amount of salt required to achieve the desired level is determined by the capacity of the
pool. By measuring your pool and multiplying the average length by the average width by the
average depth you can easily establish this. This will give you your pool’s water capacity in
cubic metres. Multiply this by 4.2 and you will get the amount of salt (in kilograms) needed to
adequately achieve the required dosage for your pool capacity.
SPECIAL NOTE:
Please remember that your salt water chlorinator is not designed to chemically maintain
your pool water and keep it balanced, but rather to produce chlorine from a mild salt solu-
tion within the water.
We encourage regular water testing, balancing and correction if & when required to main-
tain the recommended stability levels of your pool water. This is a vital part of a complete
maintenance program and will ensure trouble free chlorinator performance as well as a
healthy and sparkling clean pool.
For example: Pool size = 9 metres by 4.5 metres by 1.6 metres in depth
Multiply 9 x 4.5 x 1.6 = 64.8 (cubic metres of water)
Multiply 64.8 x 4.2 = 272.16 (salt required in kilograms)

5
Using only refined swimming pool salt add the desired quantity to the swimming pool water.
To assist in the rapid dissolving and mixing, sweep or brush the solids until they are fully dis-
solved. Undissolved salt may result in staining your pool finish.
As salt is heavier than water it will continue to lie at the deepest point of your pool, even
though the salt granules themselves have fully dissolved. In order to ensure adequate and
permanent distribution of salt throughout the pool water, we recommend additional sweeping
and filter operation over a 12 – 24 hour period.
Whilst adding the original salt and prior to commissioning your AutoChlor® unit, and when
adding future salt supplies to your pool, please ensure that your chlorinator power supply
is switched o to prevent overload situations and/or damage to the cell electrode plates or
power supply.
WATER BALANCE
As previously advised, for best performance and operation of your AutoChlor® salt water
chlorination system, certain water balances must be maintained within your swimming
pool. Please check your pool water and ensure that your chemical balances are within the
following guidelines.
· Chlorine 1.5ppm-2.0ppm
· pH 7.2-7.4
· TA (Total Alkalinity) 80ppm -120ppm
· Hardness, 150-350ppm;
· Cyanuric acid, 30ppm-50ppm;
· Phosphate, 0-500ppb;
· Salt 5,000 ppm for Classic RP models
· Salt 3,500 ppm for Classic LS models
Adjust your pool water balance to achieve the above levels. Your local pool shop can assist
here to give you accurate readings and aid in correct dosages as necessary.
SPECIAL NOTE:
Contrary to popular belief, the action of your AutoChlor® salt water chlorinator does not
use up the salt content of your pool water. In eect as the water is passed over the cell
plates, the salt is electrolysed and converted into sodium hypochlorite (chlorine).
This sanitises your pool water and converts back into salt - basically a never-ending
cycle. However salt loss will occur through swimmer action, filter back washing and wet
weather conditions.
This salt needs to be replaced periodically for your chlorinator to operate at maximum ca-
pacity. Your local pool shop can advise you the correct salt dosage required to maintain
saline levels at recommended guidelines.

6
SPECIAL NOTE ON CHLORINE:
Your salt water chlorinator is not designed to bring your pool from a zero chlorine read-
ing to an acceptable level but rather to maintain acceptable levels. Should it become
necessary due to unforeseen circumstances (such as the unlikely event of chlorinator
malfunction, severe weather patterns, or massive use of the swimming pool) that you
find your pool requires additional chlorine then chlorine should be manually added rather
than running your filter and chlorinator excessively to replace the lost chlorine. Doing this
could put your chlorinator and cell under unnecessary strain which could shorten their
lives.
In situations such as this we recommend the use of liquid chlorine (sodium hypochlorite)
to supplement and maintain chlorine levels. The use of dry stabilised chlorine (calcium
hypochlorite) is not recommended unless liquid chlorine is unavailable and even then
only in limited amounts.
CHLORINE PRODUCTION IN VARIOUS CLIMATES
Environmental factors such as rainfall, temperature and sunlight will all have an eect on the
chlorine demand in your pool, and it is important to understand how this aects the treatment
of your pool, at your individual location.
The table below has been provided as a recommended guideline to the ratio of chlorine pro-
duction to typical water volume, treated in dierent climate conditions.
EXAMPLE: If living in a tropical climate, expect the AutoChlor chlorinator to treat 1500l with 1 g/
hr production.
Therefore, as a rule of thumb, an AutoChlor RP25 in summer would typically be capable of
treating 37,500l of pool water.
Climate Type AVG Temperature in
summer (oC)
Chlorine Production
(g/hr)
Typical water
volume treated in
climate conditions (l)
Mild 15-22 3000
Temperate 21-30 1 2000
Tropical 26-33+ 1500

7
FITTING THE CHLORINATOR CELL HOUSING
The AutoChlor® salt water cell housing must be plumbed into the return line of the pool filter
system after the filter and any diversion valves. Please refer to the installation diagram and
plumbing outline for the correct method of installation (Fig. 2).
In situations where a heater is incorporated, the AutoChlor® housing must be installed after the
heater. Should a solar heating system be installed, the housing must be plumbed after the solar
diverters and after the water exits the solar system and rejoins the main stream pool return
line.
Please note that your cell housing has been manufactured so that 40 mm PVC pipe will fit both
inlet and outlet ports internally, and 50 mm couplings will fit externally. This allows the use of
either 40 mm or 50 mm PVC pipes in the pool return line.
GAS TRAP
NO GAS TRAP
OK
Fig. 2

8

9
Convenient, automatic
inline salt-water chlorination

10
INSTALLING THE POWER SUPPLY
The AutoChlor® power supply is mounted on a wall using the mounting bracket and fittings
supplied. After securing the bracket in the appropriate position relative to your needs, the
power supply is hung on the bracket and locked into position by ensuring that the unit slips
into the slots provided on the mounting bracket.
It is preferable that the power supply is mounted in a location where it is protected from
accidental water spray and inclement weather. It is strongly recommended that the unit is also
protected and screened from the harsh sun, but in such a way that air flows freely through the
structure and does not impede the natural airflow through the power supply.
You should also ensure that the power supply is not used as a shelf to store or pack objects,
as this can also impede the air flow, causing overheating and/or damage to the unit that is not
covered by warranty.
Mount the power supply so that you can see and reach the various controls and so that the cell
lead has a comfortable margin to reach the cell terminal posts. Our recommendation is that the
power supply is mounted slightly higher and to one side of the filter plant to allow easy access
(refer to Fig. 3).
1. Pump
2. Filter
3. Water heater
4. Power supply
for chlorine
generator
5. Chlorine
generator
electrode
1
2
4
5
3
Fig. 3

11
CIRCUIT BREAKER
The circuit breaker is designed to trip out in the event of a power surge or power overload.
When tripped the centre button will pop out shutting down the unit to prevent damage. To
reset, depress circuit breaker until a click is heard.
PUMP OUTPUT SOCKET
A 240 volt pump output power socket is supplied and located on the right hand underside of
the power supply. Your pool pump power supply lead should be plugged into this socket so
that when the time clock switches at your designated times both the salt water chlorinator and
pool pump will activate in unison.
Do not attempt to operate the chlorinator power supply with the pool pump lead disconnect-
ed as this will lead to a gas build-up inside the cell housing causing it to overheat resulting in
damage to your chlorinator equipment that is not covered by warranty. In extreme cases gas
build-up may also cause the cell housing to rupture and explode, as it is not built to withstand
this type of pressure, possibly resulting in personal injury.
The pump socket is designed to operate a single pool pump of maximum 8A only. Do not at-
tempt to operate any equipment other than your pool pump from this socket as damage might
occur to the power supply unit that is not covered under warranty.
ON/OFF SWITCH - NON TIMER MODELS ONLY
The on/o switch is located on the front panel and has been incorporated to allow you to
switch o the chlorinator function should you so desire. Please note that this switch will only
shut down the chlorinator operation. It will not aect the normal filter functions.
POWER SUPPLY CONTROL FUNCTIONS
Your AutoChlor® salt water chlorination system has been designed for simplistic operation and
control. The functions and controls (both standard and optional) and their various operations
will give you a greater understanding and knowledge of the control and maintenance of both
your AutoChlor® unit and your pool (refer to Fig. 3 for controls).

12
WARNING INDICATOR LIGHTS
(FIG. 1, ITEMS 1, 2, 3 & 4)
There are four (4) warning indicator lights located on the front of your chlorinator. These advise
at a glance the status of the chlorinator power supply and, when illuminated they indicate and
advise about the situation that the chlorinator’s electronic monitoring system
has detected. The lights and their functions are listed below.
1. ORANGE LIGHT: SALT HIGHER THAN NECESSARY
no action required
When illuminated this indicates that you have exceeded recommended salt levels. As long
as this is not causing your chlorinator to overload no further action or reduction of salt
concentration is required at this point. No further salt should be added if this light is illuminated.
2. ORANGE LIGHT: STEADY CELL OFF
chlorinator on standby
FLASHING SALT LOW
add salt and/or clean cell
STEADY – When illuminated in a STEADY continuous light your chlorine production has been
switched o by turning the chlorine controller anti clockwise and your chlorinator power supply
is now in a standby mode. Turn the chlorine controller clockwise to resume normal operation.
FLASHING – If the light is illuminated and FLASHING the monitoring system has detected low
salt levels and this will need to be adjusted for the chlorinator to operate at maximum capacity.
This light will also flash if the cell has reached a point where its output is below the normal
operating output. Please refer to the section detailing the addition of salt to your pool.
3. RED LIGHT: STEADY POWER ON
FLASHING NO WATER FLOW
chlorinator on standby
STEADY – During normal operation this light will remain STEADY, indicating that power is on
and the chlorinator is operating correctly.
FLASHING – When FLASHING the monitoring system has detected a water flow problem and
has shut down to prevent damage. It will also be accompanied by a beeping alarm alerting you
of this situation. When problem is rectified normal operation will resume.

13
SPECIAL NOTE ON WARNING INDICATOR LIGHTS (RP MODELS
ONLY):
When your chlorinator is operating in forward polarity cycle, light number 3 (Fig. 1, item 3)
is on and steady while light number 4 (Fig. 1, item 4) is o.
When your chlorinator is operating in reverse polarity cycle, light number 3 remains on
and steady while light number 4 will flash.
At the end of each cell operational cycle (or cell reverse), the power on/no water flow
light & overload light (Fig. 1, Items 3 & 4) will ALTERNATE by flashing in a slow fashion for
approximately thirty (30) seconds. This is the cell rinse procedure and is part of the nor-
mal operation, which occurs at each reverse cycle change of your AutoChlor® REVERSE
POLARITY chlorinator. On completion normal operations in the next cycle will begin.
Contrary to popular belief, during both normal and reverse cycle modes the chlorinator
continues to manufacture chlorine, whilst at the same time the opposite polarity cell
plates are being automatically cleaned.
4. RED LIGHT: STEADY OVERLOAD
OFF NORMAL OPERATION
in forward cycle
FLASHING NORMAL OPERATION (RP MODEL ONLY)
in reverse cycle
STEADY – When this light is illuminated and STEADY it will also be accompanied by a beeping
alarm alerting you of this situation. The chlorinator has overloaded and shut down to prevent
any damage. A direct short between two of the electrode plates coming into contact with
each other could cause this, or a foreign object could be shorting out two or more plates. It
can also be caused by a massively high concentration of salt in the pool water. Depending
on the problem and rectification required, normal operations can proceed. Please note that
the chlorinator power supply must be switched o and then on again to reset the electronic
circuitry and resume operations.
OFF – When this light is o, the chlorinator is operating correctly in forward cycle mode.
FLASHING – When illuminated and FLASHING the chlorinator is operating correctly in reverse
cycle mode.

14
TIME CLOCK OPERATIONS (TIMER MODELS ONLY)
(FIG. 1, ITEM 8)
The standard timer (Grässlin model FM/1 Stuz) is designed to switch your equipment on and o
at the nominated times.
Your timer has a standard clock face and hands set in the centre section, whilst the outer grey
bezel shows the hours in military style (24 hour) time. To set the clock to present time, place
your finger on the outer grey bezel and slowly turn it clockwise to the desired time.
Start and stop times are set by pushing the black pins out for on and inward for o. For exam-
ple, to turn the chlorinator on between 6 pm and 10 pm, push all the pins outwards between
18 and 22. The remainder of the pins should be pushed inwards. With the elements pushed
outwards the timer will turn your equipment on when they reach the black indicators. With the
elements pushed in the timer will turn your equipment o during those times.
If you switch o the unit and pump during its timer cycle by interrupting the supply of power via
the power point or isolation switch, please remember to reset the time clock to present time
when you reconnect unit to power (models without quartz battery backup only).
CHLORINE CONTROLLER
(FIG. 1, ITEM 5)
The chlorine controller regulates the amount of chlorine production relevant to the position it
has been set to. By adjusting the chlorine controller clockwise you increase chlorine manufac-
ture and by turning anti clockwise you reduce production. Do not attempt to turn the controller
beyond its stops as this could cause damage to your unit that is not covered by warranty.
CHLORINE OUTPUT INDICATOR
(FIG. 1, ITEM 6)
Your power supply is fitted with ten green indicator lights set in a crescent shaped formation.
During operation of your chlorinator these lights will illuminate relevant to the degree at which
the chlorine controls have been adjusted. Working in conjunction with the chlorine controller
you can increase or decrease chlorine output to suit your pool’s requirements. As you increase
the output, (by turning the control knob clockwise), the corresponding lights will illuminate
progressively to 100% (ten lights).
You have full control of chlorine production merely by adjusting the chlorine controller and
illuminating the number of lights to satisfy your chlorine demand. Each light represents 10%
(one light) of capable chlorine production up to its maximum output of 100% (ten lights).

15
SPECIAL NOTE ON TIMERS (TIMER MODELS ONLY):
If you require your AutoChlor® salt water chlorinator to be connected to a cheaper o
peak tari we recommend the use of an appropriate quartz time clock for that purpose.
The unit may also be hard wired in however, in case of incorrect wiring or damage
caused by modifications warranty will be void.
We suggest that an appropriate quartz time clock (with battery backup) be fitted in lieu of
the standard model to allow time of day to be maintained when power supply is inter-
rupted.
Quartz time clocks can be fitted at factory stage, or later at extra cost. Please see your
AutoChlor® representative if you wish to have this done.
TIMER BY-PASS SWITCH (TIMER MODELS ONLY)
(FIG. 1, ITEM 9)
AutoChlor® models fitted with a timer, a timer bypass switch will be found on the right-hand
side of the time clock. This switch allows you to bypass timer functions.
Three functions are available:
TIMER:
The time clock will automatically switch your pool equipment on or o at your designated
times.
OFF:
The time clock will not switch, but normal time will be maintained.
BYPASS:
The clock has bypassed all designated functions and will operate pool equipment indefinitely.
PLEASE NOTE: Return switch to ‘timer’ position after using the ‘o’ or ‘by-pass’ functions.

16
UNDER WATER POOL LIGHTS (POOL LIGHT MODELS ONLY)
Where requested, and as an optional extra, some AutoChlor® models have swimming pool
under water light transformers fitted. This special transformer allows you to connect your pool
light lead to the special connection supplied and operate them from the chlorinator power
supply.
The under water light lead is connected directly into the special light connector strip which
is located on the underside of the chlorinator power supply. Connect the lead from your pool
lights to the connector strip terminals by use of the two locating screws.
The on/o switch (Fig. 1, item 7) for the pool lights is located on the left hand side of the time
clock. The pool light circuitry is protected by its own circuit breaker, which is located adjacent
to the main circuit breaker at the rear of the unit.
Operation of your pool lights is only through the on/o switch provided. Your chlorinator time
clock will not switch your pool lights on or o at the designated pool filtration times.
Pool light transformers are available in 12, 24 and 32 volt models. Please check to ensure that
you have matched your pool light voltage to that supplied with your AutoChlor® chlorinator
GENERAL CHLORINATOR OPERATION
Before switching on your AutoChlor® salt water chlorination system please ensure that you
have added the correct amount of pool salt, it has fully dissolved and is distributed throughout
the pool water. (see Addition of Salt Section). Ensure that the base pool chemistry is at the
recommended levels and the pool water is clean and crystal clear.
Switch on the pool filter system and the AutoChlor® unit. At this point the AutoChlor® electronic
display may register a water flow fault as the cell housing fills with water and an alarm (beep-
ing) may activate. This is normal start up procedure and will cease as soon as the unit registers
full and correct water flow throughout the electrodes. (see Water Balance Section)
With the chlorine controller knob (Fig. 1, item 5) now turned fully clockwise to the maximum
position the green chlorine output indicator lights will illuminate one after the other. With the
correct amount of salt added to the pool water you should achieve a 100% (ten lights) reading.
In this position the AutoChlor® chlorinator is producing maximum chlorine output.
As previously stated, chlorine demand will dier from pool to pool due to bather load, water
temperature or weather conditions and this must be taken into consideration. By testing for
chlorine residuals on a regular basis you will quickly determine the chlorine state of your pool
and what action you need to take to adjust it if required.
After determining your particular pool’s chlorine needs, you can set the controller to the
desired setting to achieve your chlorine requirements and/or adjust your daily running times.

17
IMPORTANT SPECIAL NOTE FOR RP MODEL ONLY
Your AutoChlor® reverse polarity monitoring system is factory pre set to reverse cycle at
the completion of each 8 hours operational period. The circuitry is fitted with a microchip
that measures the actual operating hours of the electrodes. When the chlorinator has op-
erated for the total factory designated hours in one direction it will then change (reverse)
cycle and operate in the opposite direction for the same operational time. This ensures
that the electrode plates (+ and -) each receive the same operational time, therefore
equalising and extending cell life, and ensuring adequate cleaning for each cycle.
By maintaining a watch on the indicator and warning lights, keeping the cells in a clean
state and chemically balancing your pool water regularly you are ensuring trouble free
operation of your AutoChlor® chlorination unit with the least amount of eort.
Normally once set, these controls do not require further adjustment except perhaps for the
seasonal ones suggested earlier.
Set your chlorine controller to achieve maximum and optimum results for your pool situation.
Please remember that an over chlorinated pool is not a healthy pool, so it may not be nec-
essary for you to run your chlorinator at maximum output to maintain recommended chlorine
levels.
Your AutoChlor® salt water chlorinator is fitted with a sophisticated electronic circuit board
which is designed to minimise the need for manual operations and maximise cell life by con-
stantly managing the correct operation of the power supply and electrolytic cells. In addition
to the four warning lights, a warning alarm (beeper) has been installed to alert you of any
problems that the electronic monitoring system has interpreted. The alarm will activate to alert
you to any problems that have been detected, and once rectified the unit will resume normal
operations.

18
CHLORINATOR RUNNING TIMES
Chlorinator running times will vary from pool to pool, and are dependent upon the situation
they are installed into, pool size and the overall usage of the pool in general.
Several factors will determine the operational time of the chlorinator to be able to produce
sucient chlorine for your pools requirements:
TIME:
The longer you run your filter plant and chlorinator, the more chlorine you will produce.
RATE:
The higher the chlorine output indicator lights up, the more chlorine is being produced.
CELL CLEANLINESS:
The cleaner the cell, the better the chlorine production rate.
BASIC POOL CHEMISTRY:
The more correctly maintained, the less chlorine waste.

19
Step 1 Step 2 Step 3
MAINTENANCE
ELECTRODE INSPECTION:
AutoChlor® has a reverse polarity feature which reduces electrode cleaning. Regular inspection
of the electrode is recommended. We recommend inspecting and cleaning the electrode once
or twice a year, subject to your pool’s application, location, and electrode condition.
Note that if water hardness (calcium) in your area exceeds our guidelines of 150 - 350ppm
(see page 5), increased frequency of inspection and cell cleaning must be carried out. Higher
than recommended calcium hardness will result in a greater frequency of calcium buildup on
electrodes. Therefore, inspection and cleaning outside of the recommended once/twice a year
must be carried out.
For related warranty purposes a water sample may be requested by AIS.
ELECTRODE REMOVAL:
Ensure the power to the chlorine generator is switched o.
Step 1. Unplug the electrode lead from the electrode.
Step 2. Unscrew (anticlockwise) the large threaded locking nut.
Step 3. Remove the electrode from the housing. Look inside the electrode for
signs of calcium build up (a white chalk like substance). If there is calcium
build up the electrode will require cleaning. If cleaning is not required
reassemble the electrode. Cleaning and reassembly are described on
page 20.

20
ELECTRODE CLEANING:
Mix up a solution of 1-part hydrochloric acid to 8 parts water. Submerse the electrode in this
solution. Do not submerse brass terminals.
There will be a reaction as the calcium is dissolved. When the reaction ceases (about 10 min-
utes) rinse the electrode in clean water, wipe the brass terminals dry and check that all calcium
has been dissolved. If not, repeat the process with a new solution.
ELECTRODE REASSEMBLY:
Ensure the silicon seal is still in place on the inside circumference of the electrode cap. Insert
the electrode back into the housing and screw on (clockwise) the locking nut. Plug the elec-
trode lead back on to the electrode terminals and turn on the power to the chlorine generator.
POWER SUPPLY REPAIR/MAINTENANCE:
Do not open, no user serviceable parts inside.
The power supply module and cords attached are to be serviced and/or repaired/replaced only
by qualified electrician or the manufacturer.
If the supply cord is damaged, it shall only be replaced by the manufacturer or its service agent
or similarly qualified person in order to avoid a hazard.
CAUTION:
• When working with acid the use of eye protec-
tion, respirator, and rubber gloves are strongly
recommended.
• Always refer to MSDS when dealing with haz-
ardous chemicals.
• When mixing, add acid to water, but NEVER
water to acid.
This manual suits for next models
15
Table of contents
Other AIS Water Filtration System manuals
Popular Water Filtration System manuals by other brands

Graco
Graco Sharpe B Series Instructions - parts

Berbel
Berbel BUR 125 DL installation instructions

Everpure
Everpure CG5-10 Replacement Cartridge DEV9108-15 Specification sheet

Watts Industries
Watts Industries FMRO5-MT-AG installation instructions

Nipro
Nipro PHOENIX ONE DS Operator's manual

ECO Zero
ECO Zero Aqua Angel Instructions for use