AISPEECH AIMIC-M6 Pro User manual

AI Conference Speakerphone
User Manual

Product introduction
AIMIC-M6 Pro is an intelligent conference microphone speaker launched
by AISPEECH. It’s specially designed for small collaboration rooms, small
meeting rooms, open spaces, and remote oce scenarios. This product
integrates audio collection, amplication capabilities. It adopts a 6-unit
omnidirectional microphone array and proprieta audio algorithms to
achieve functions such as omnidirectional pickup within 4 meter radius,
directional pickup, AI noise reduction, echo cancellation and two-way
communication. It solves common pain points in meetings, such as un-
clear remote communication and dicult meeting summa preparation.
The directional pickup function of this product provides users with ex-
clusive pickup zones, eectively blocking all sound inteerence from
other angles,and improving remote communication eciency.
Applicable scenarios: small collaboration rooms, small meeting rooms,
open spaces, and remote oce.
Product introduction
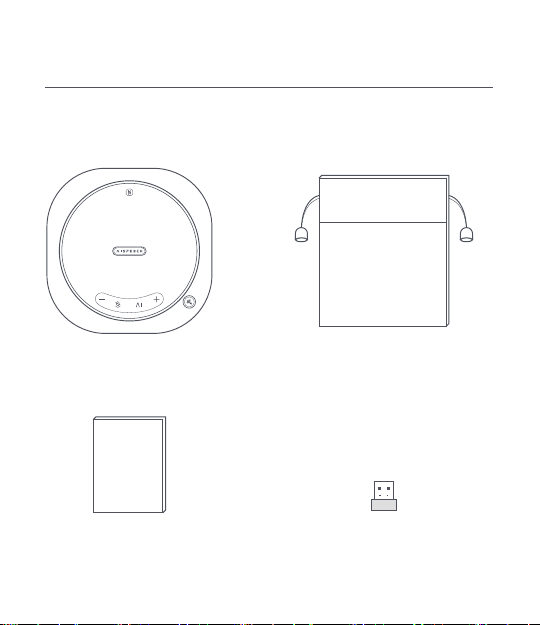
Speakerphone Storage Bag
User Manual Bluetooth dongle
Accessories List

Product introduction
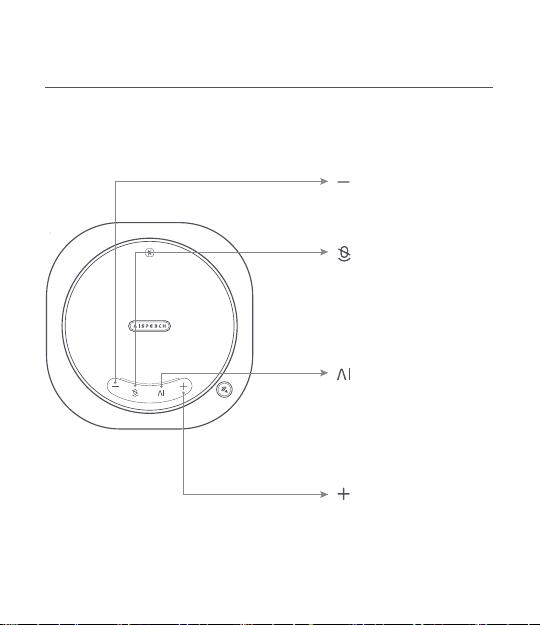
Buttons and indicator lights instructions
Volume/Batte indicator
Maximum volume
Minimum volume
on o
Batte>90%
Batte
Volume indicator
Batte indicator
(sho press power button)
≤ 20%
Directional Voice Pickup
Press to enable/disable
Status indicator light
Light on: enabled
Light o: disabled
1 meter
90°
Product introduction
Buttons and indicator lights instructions
Vlume down
Press to reduce volume
Volume up
Press to increase volume
Microphone Mute
Press to switch microphone
status
AI Button
Click to sta or end AI tra-
n
scription
Tip:AI transcription function needs to be used with the Mile Memo soft-
ware while the device is connected to the computer via USB.

Product introduction
Buttons and indicator lights instructions
Bluetooth
Press and hold 2 seconds to pair
or disconnected
Power
Press and hold 3 seconds to power
on or power o
Status indicator light
Red light breathing:bette low
White light breathing:charging
White light on:bette full or not charging
*The indicator light stays on when the
batte is fully charged.
Status indicator light
Blue light ashing:bluetooth pairing
Blue light on:Bluetooth connected
Headphone jack
When headphone is plugged in, the device
will switch audio
output from the speaker
to the headphone

Instruction for use
Ligth color instructions
Status Light color
Paial green light on
Power on
Powen o Light o
Muted Red light on
Sta/End AI Paial green light ashing
Upgrading Green light breathing
1.Device connection
1)Mobile phone connection
The device's initial Bluetooth name is“AIMIC-M6 Pro****(the last four
gures of S/N)”
* Bluetooth connection
After powering on device and activating Bluetooth, then turn on the
Bluetooth function on your mobile phone and search for Bluetooth
device named "AIMIC-M6 Pro****" for pairing and connection. Or you
can enable the NFC function on your phone and tap the NFC logo

area on the device to connect. The Bluetooth indicator light staying
on indicates a successful connection.
Instruction for use
* USB connection
Connect the device to computer via type-C USB data cable and you will
hear a prompt tone when connected.Choose “AIMIC-M6 Pro” as input
/output audio device in system setting or in the online meeting software.
Tip:This device does not suppo direct connection to the phone using an
OTG data cable.
2)Computer connection
After powering on device and activating Bluetooth, then open the
Bluetooth settings page on your computer system. Select this device
to pair and connect. The device's Bluetooth indicator light staying on
indicates a successful connection.
3)Bluetooth Dongle connection
Plug in the Bluetooth dongle into the PC, conference host, or con-
ference display. After powering on the device activating Bluetooth
function,then open the Bluetooth settings page on the computer
system. Select this device for pairing. The Bluetooth indicator light
staying on indicates a successful connection.

≤
Instruction for use
3.Charging Instructions
2.Directional Pickup
Note: Output power of the power supply adapter should be less than
15W.It is recommended to charge the device one hour before using
it for the rst time to ensure sucient batte power.
* Charging
1)
When connected to computer via USB cable, the device enters
charging mode regardless of whether it is powered on or o.
2)
If consumers use a power adapter for power supply, please
purchase one which has obtained corresponding ceication.
* Batte Level Check
While the device is powered on, press the power button sholy to
check the current batte level.
1)Batte<20%,the power button indicator light breath in red.
2)Batte 20%,the power button indicator light remain in white.
1)Press the "Directional Pickup" button to enable this function
and status light will turn to green. Point the directional pickup
button towards the speaker, and it will suppress all sounds out-
side the directional pickup fan-shaped area
, prioritizing the voice
within the area. The directional pickup area has an angle of +/-
45° with the button as the center and 1meter radius.
2)
Press the "Directional Pickup" button to disable this function.
The light will turn o, indicating function is deactivated.

Basic parameter
AI Conference SpeakerphoneProduct name
5W*2Speaker
6 omnidirectional microphonesMicrophone
5000mAhBatte capacity
Charging input 5V 2A
Inteace Headphone jack
Bluetooth V5.1Bluetooth
125mm*125mm*35.5mmProduct dimensions
4 metersVoice pickup distance
AIMIC-M6 ProProduct model
2)消费者若使用电源适配器供电,则应购买配套使用获得CCC认证并
满足标准要求的电源适配器。
Table of contents


