manuals.online logo
Brands
  1. Home
  2. •
  3. Brands
  4. •
  5. EyeSpyPro
  6. •
  7. Telephone
  8. •
  9. EyeSpyPro MISER User manual

EyeSpyPro MISER User manual

MISER
telephone scrambling
system
OPERATION MANUAL
** PRECAUTIONS **
•Operate the unit only on 9 VDC.
•For AC operation, use the supplied AC power
adapter with unit. Do not use any other AC
power adapter. For battery operation, use the 9
VDC battery recommended for this unit only.
•Disconnect the AC power adapter from the wall
outlet when it is not to be used for an extended
period of time.
•When the device is not to be used for a long
period of time or is to be operated extensively
on AC current, remove the battery to avoid
device damage from battery leakage.
•Do not place the device in a location near heat
sources such as radiators or in a place subject
to direct sunlight.
Should any liquid or solid object fall into the
device, unplug the device and remove the
battery, and have the device checked by
qualified personnel before operating it any
further.
Page 2 of 15
Package Checklist
Accessories
1. An Operating Manual.
2. A 110 Volts AC Power adapter (Figure 1).
3. A Telephone Line cord with both sides phone
jack (Figure 2).
4. A special off-line secure code setting cable
(Figure 3).
Figure 1
Figure 2
Figure 3
Page 3 of 15
Installation Instructions
Installation procedure
1. Plug the AC adapter to AC power outlet
(Figure 4).
2. Connect the other adapter end to Miser DC 9V
jack (Figure 4).
Figure 4
Page 4 of 15
3. Remove the handset cord from the phone set
base jack. Place one end of the line cord
(Figure 5) to the Miser jack labeled BASE.
Plug the other end of the line cord to the
phone set base jack. (Figure 5).
Figure 5
Page 5 of 15
4. Connect the handset line cord to the Miser
jack labeled HANDSET (Figure 6).
Figure 6
5. Pick up the handset to check the telephone
set. If you cannot hear the tone sound, means
that the telephone set cannot fit the unit.
Please replace it.
Page 6 of 15
6. Turn the Miser ON/OFF switch to the ON
position. Verify the SYS LED is lit in GREEN
color (Figure 7).
Figure 7
Note: For portable use, connect a 9V DC battery
(not included) in the battery compartment
(rear of unit). When Miser is not in use set the
ON/OFF switch to the OFF position to extend
the battery’s life.
Page 7 of 15
** PROGRAMMINGS **
1. Programming the Access Code
The Access Code consists of two parts: a
Location Code and a Security Code.
The Access Code must be the same for both
parties.
The Location Code consists of a single digit
entry. A total of 10 Location Codes are
available from 0 to 9 (Keypad numbers).
The Security Code consists of a minimum of
two (2) digits, to a maximum of five (5) digits,
where the range is from 00 to 99,999.
Example: An Access Code of 1256
indicates Location Code of 1 and
Security Code of 256.
Page 8 of 15
iHouse phone operation
1. Remove bottom cover. Place thumbs on cover
removal arrows and press down and out. Install
a 9V DC battery (Figure 8).
2. Replace bottom cover.
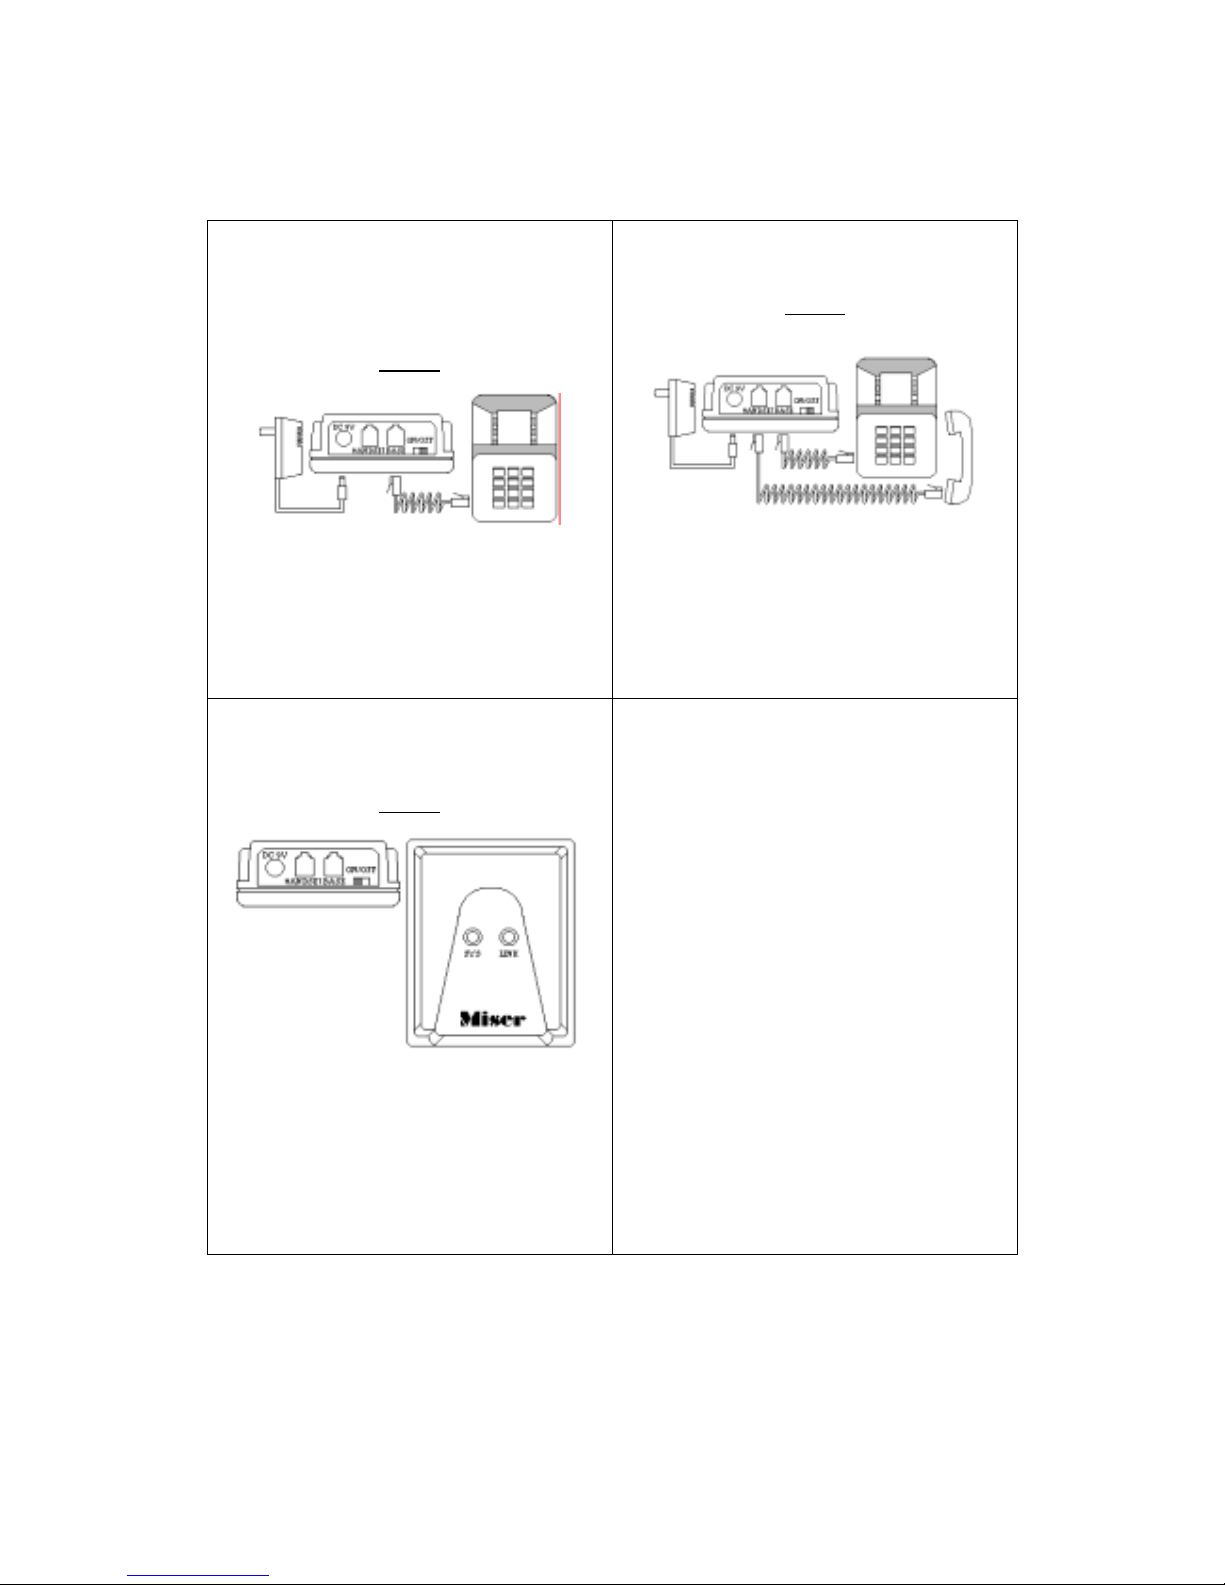
Figure 8
Page 9 of 15
3. Disconnect the telephone line from the phone
BASE. Insert the special phone line cable to the
phone base RJ11 jack (Figure 9). Connect the
other end to the Miser jack labeled DC 9V. Note
that if the phone is the extension phone of a
Key Telephone System, it cannot be used for
programming. Please replace it by an ordinary
telephone set.
4. Now your are ready to program the Access
Codes.
Figure 9
Page 10 of 15
5. Remove the handset for the phone base. Push
the “#” sign. The Miser SYS LED changes to
RED color and LINK LED changes to YELLOW
color.
6. Enter the Location Code, for example: “1”.
7. Enter the Security Code (00-99999), within 15
seconds of entering the Location Code,
example: “256”.
8. Enter “#” for terminating the Access Code entry.
The SYS LED will change to GREEN color. The
LINK LED will turn OFF.
9. If the Access Code is entered wrong, wait for
the SYS LED to change to GREEN color then
repeat step 5 and enter the Access Code.
10. If multiple Access Codes are to be entered,
repeat steps 3 through 8. (A maximum of ten
(10) Access Codes are allowed).
11. Replace the phone handset.
12. Disconnect the special Access Code phone line
cable.
13. Connect the telephone line to the base.
14. The Access Code programming is complete.
Page 11 of 15
iOffice phone operation
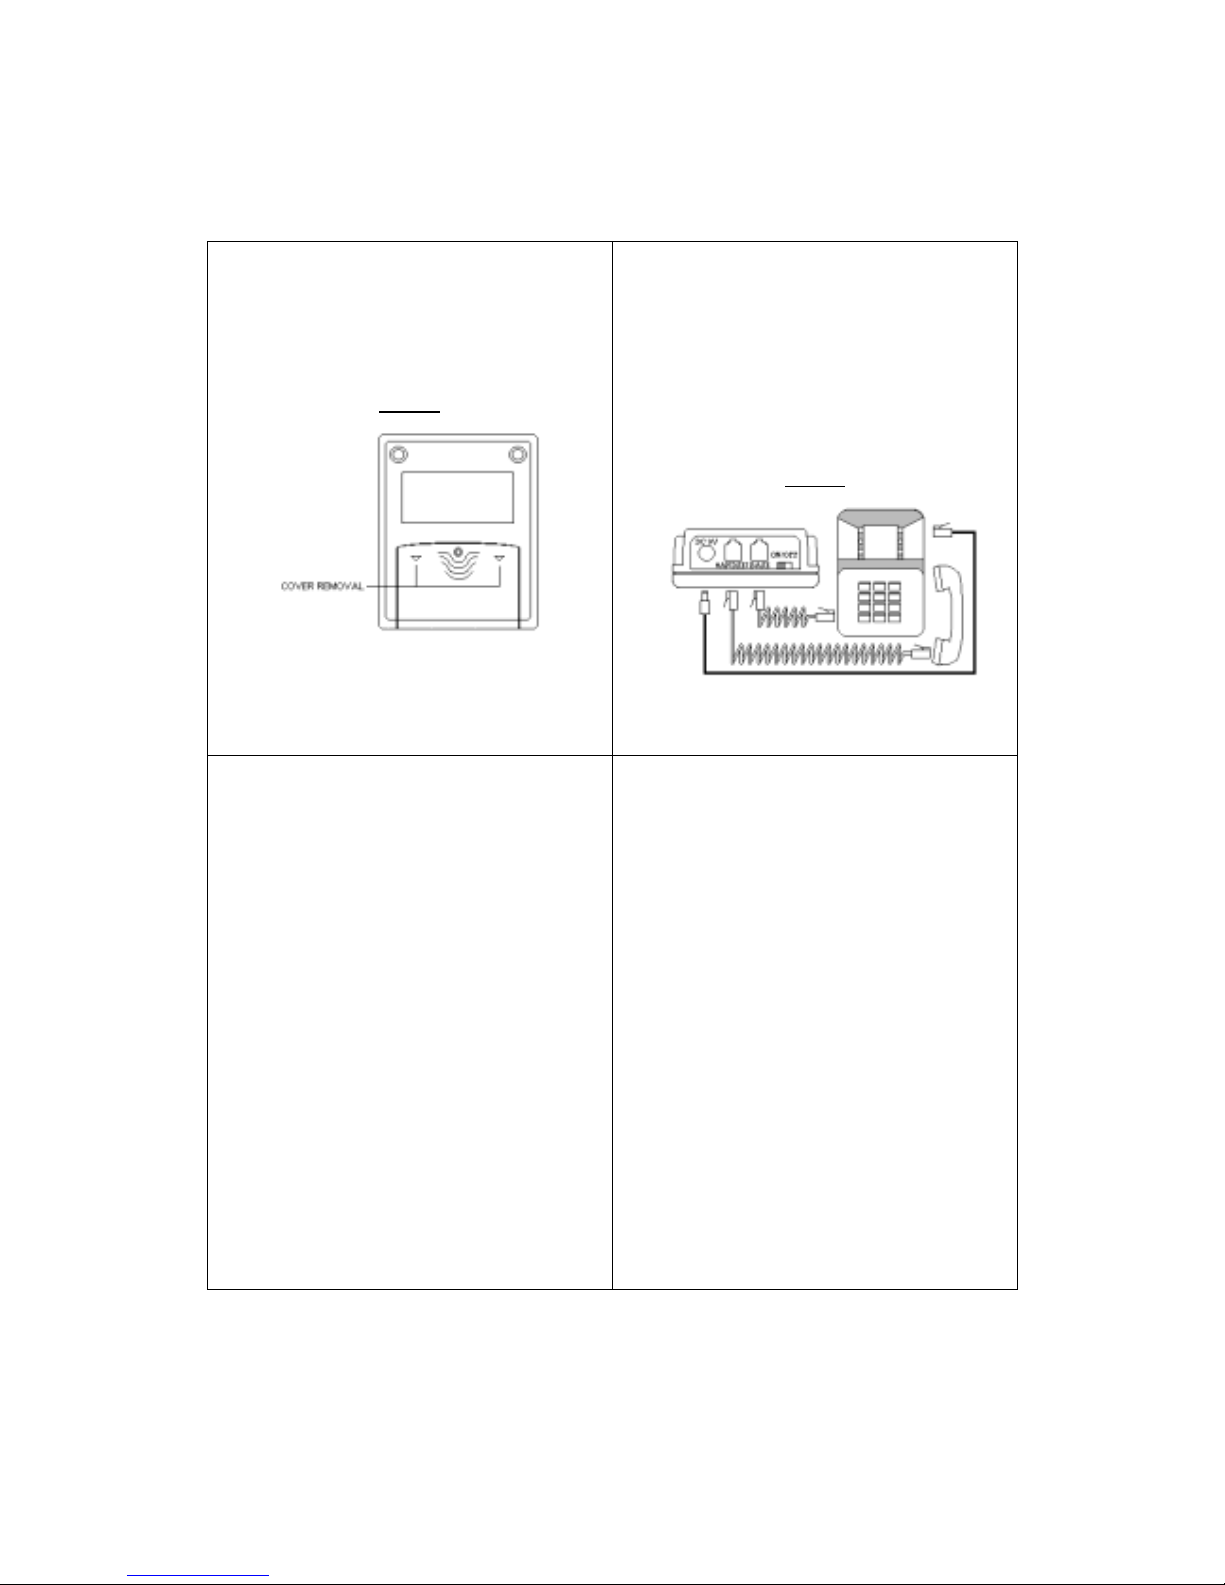
1. Remove the handset for the phone base. Push
the “#” sign. The Miser SYS LED changes to
RED color and LINK LED changes to YELLOW
color.
2. Enter the Location Code, for example: “1”.
3. Enter the Security Code (00-99999), within 15
seconds of entering the Location Code,
example: “256”.
4. Enter “#” for terminating the Access Code entry.
The SYS LED will change to GREEN color. The
LINK LED will turn OFF.
5. If the Access Code is entered wrong, wait for
the SYS LED to change to GREEN color then
repeat step 1 and enter the Access Code.
6. If multiple Access Codes are to be entered,
repeat steps 1 through 4. (A maximum of ten
(10) Access Codes are allowed).
7. Replace the phone handset.
8. Disconnect the special Access Code phone line
cable.
9. Connect the telephone line to the base.
10. The Access Code programming is complete.
Page 12 of 15
2. Amplifying the handset microphone
1. Remove the handset from the phone base,
listen for dial tone, push the “*” key twice.
2. This procedure will amplify the microphone level
not the speaker level. If the receiver end is too
loud, hang-up the telephone, then amplify the
microphone, repeat the call.
3. Do not amplify the microphone level, during
conversation. Both microphones on the link will
be amplified.
4. If handset has a high pitch noise immediately
disable the microphone amplifier by pushing the
“*” key twice.
5. Power on the Miser by placing the ON/OFF
switch to the ON position. When the LINK LED
blinks in YELLOW color three times, the
microphone amplifier is enabled. The
microphone amplifier can be disabled by
depressing the “*” key twice.
Page 13 of 15
2. Activate the Secure Link
1. Place the ON/OFF switch to the ON position.
Verify the SYS LED is GREEN color.
2. For an international long distance call, first push
the “*” key and the “#” key then follow the next
step for setting the secure link.
3. After the phone link is established. Depress the
“*” key. The LINK LED will change to YELLOW
color.
4. Within 5 seconds, enter the Location Code, for
example:”1”. The LINK LED will be GREEN
color. The link is in secure mode.
5. If the LINK LED is not in GREEN color, repeat
steps 3 and 4.
6. The Security Code must be the same for both
parties for the Secure Link to function properly.
7. While the Secure Link function is active, the
background has a Ping-Pong tone for
guaranteeing that the Secure Link function is
active.
Page 14 of 15
3 Terminate the Secure Link
To terminate the Secure Link function, depress
the “*” key. The LINK LED will be OFF and the
SYS LED will be GREEN color. If the LINK LED
is still on, depress the “*” key to disable again.
Page 15 of 15

Popular Telephone manuals by other brands

Jabra SPEAK 410 datasheet

Jabra

Jabra SPEAK 410 datasheet

Panasonic KX-NS300 Programming manual

Panasonic

Panasonic KX-NS300 Programming manual

EMPORIA KFT19-SOS quick start guide

EMPORIA

EMPORIA KFT19-SOS quick start guide

Siemens Gigaset A580 user guide

Siemens

Siemens Gigaset A580 user guide

comfortel D-100 Advanced information

comfortel

comfortel D-100 Advanced information

Siemens HIPATH 2000 user guide

Siemens

Siemens HIPATH 2000 user guide

Phoenix Audio Technologies DUET user manual

Phoenix Audio Technologies

Phoenix Audio Technologies DUET user manual

Proximus Forum 500 Series user guide

Proximus

Proximus Forum 500 Series user guide

BinTec elmeg CS290 operating instructions

BinTec

BinTec elmeg CS290 operating instructions

ACN IRIS X quick start guide

ACN

ACN IRIS X quick start guide

Alcatel onetouch pixi pulsar 991A quick start guide

Alcatel

Alcatel onetouch pixi pulsar 991A quick start guide

Sony IT-M 704 operating instructions

Sony

Sony IT-M 704 operating instructions

Zayo Analog Phone user guide

Zayo

Zayo Analog Phone user guide

i-mobile TV620 user manual

i-mobile

i-mobile TV620 user manual

Fanvil X1S Quick installation guide

Fanvil

Fanvil X1S Quick installation guide

LG LDP-7024 Quick reference user guide

LG

LG LDP-7024 Quick reference user guide

Japan Radio Co. JSB-196GM instruction manual

Japan Radio Co.

Japan Radio Co. JSB-196GM instruction manual

Philips WelcomeEye Lite user manual

Philips

Philips WelcomeEye Lite user manual

manuals.online logo
manuals.online logoBrands
  • About & Mission
  • Contact us
  • Privacy Policy
  • Terms and Conditions

Copyright 2025 Manuals.Online. All Rights Reserved.