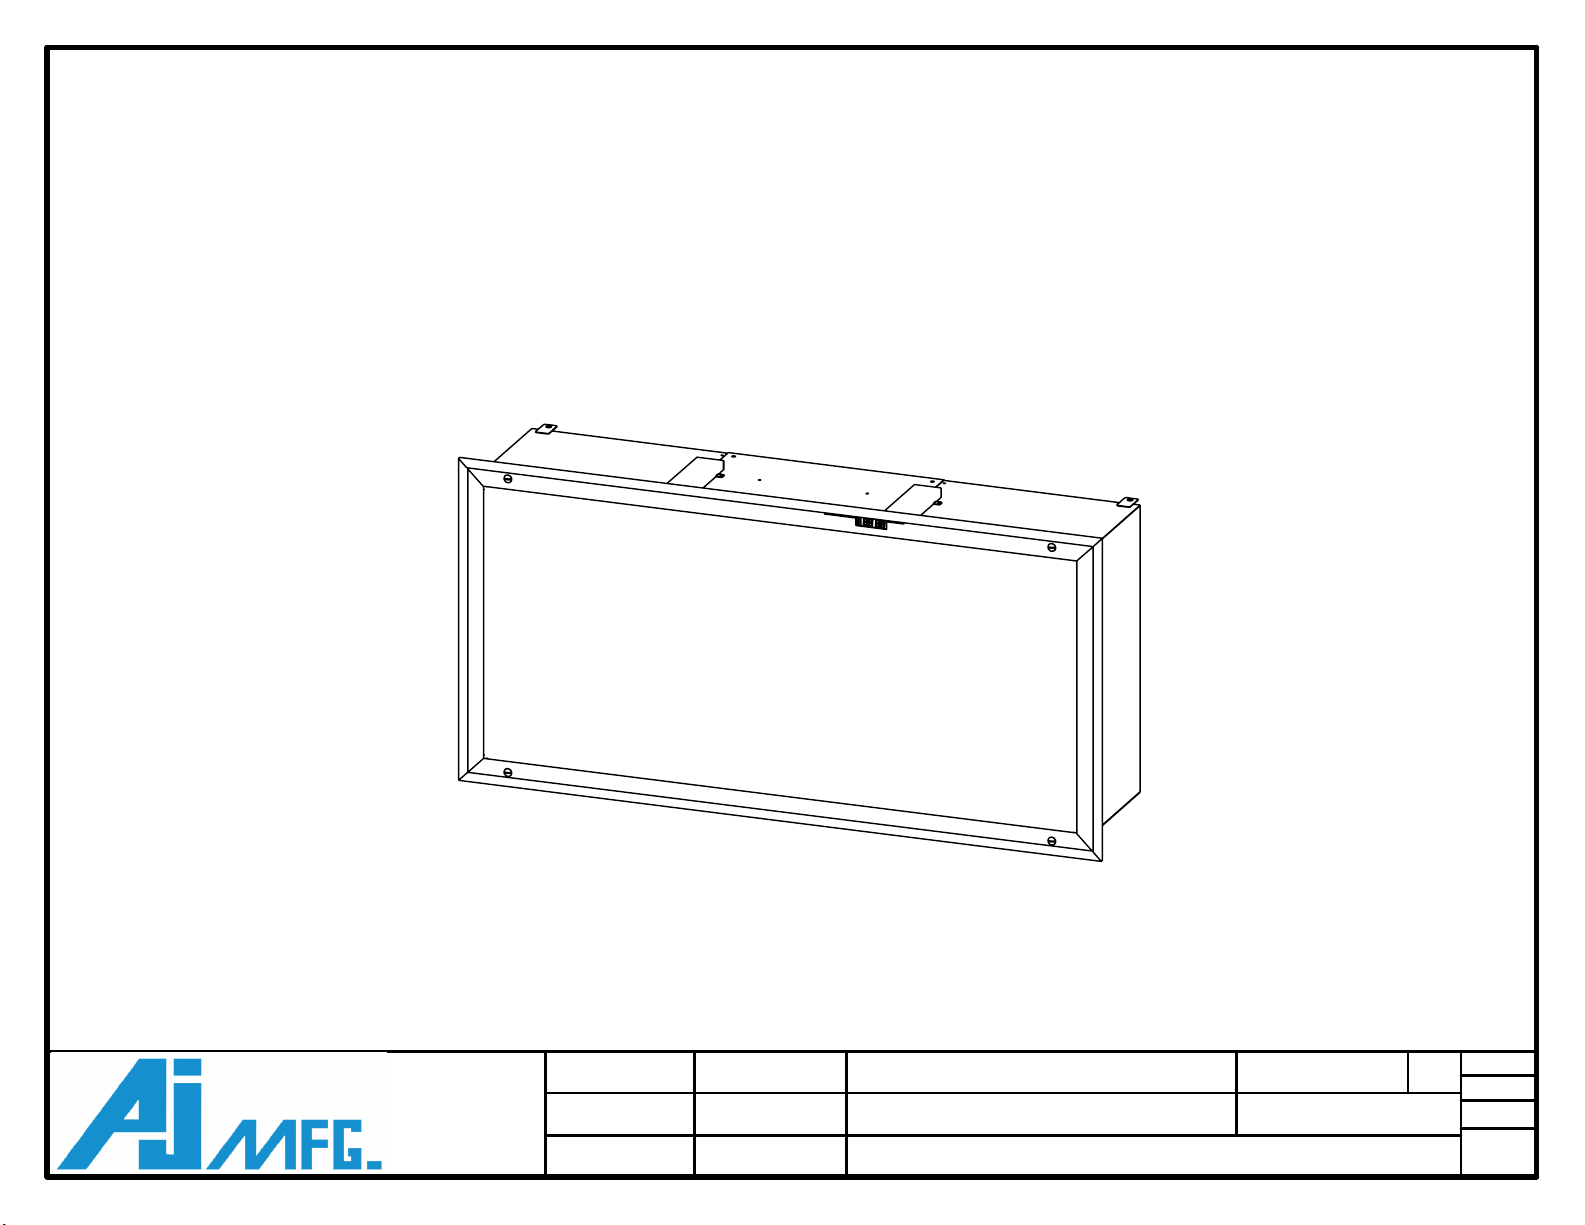
STAINLESS STEEL
SSLFHFD-FFU
CRITI-CLEAN ULTRA FAN FILTER UNIT
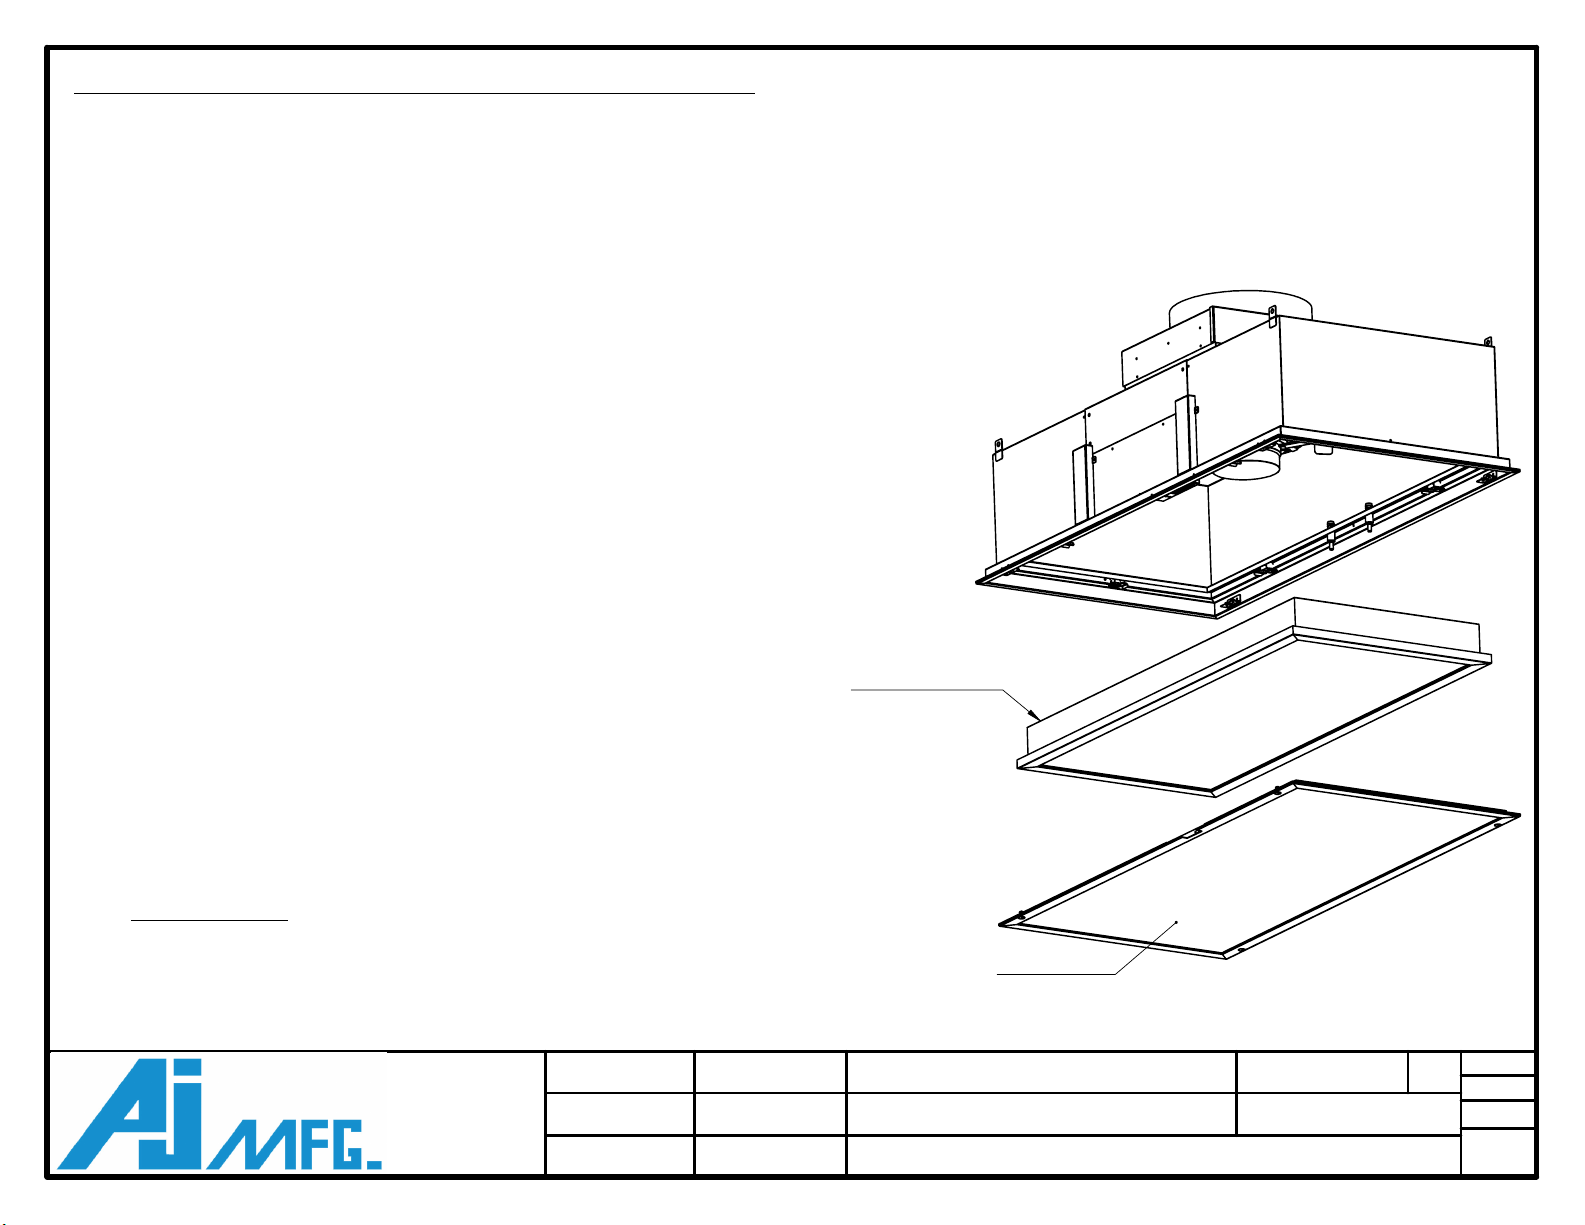
FACE FRAME
HEPA/ULPA Filter
Removal and Replacement of the HEPA Filter with Gel Seal
WARNING!
Disconnect the unit from the electrical power source before attempting to service the unit.
WARNING!
The HEPA filter may be protected by an expanded metal screen. The screen prevents accidental contact with the filter media.
It is not meant to allow handling of the filter by the media. Handle the filter ONLY by the frame.
NOTE: The manufacturer recommends two people to remove and install the HEPA filter in the unit.
Step 1 -- Using a flat screwdriver, release the face frame by rotating the four (4) fasteners a 1/4-turn counter clock-wise.
Unhook the safety cables from the filter clips. Set the frame aside.
Step 2 -- Turn the unit off with the switch located on the face of the unit (round, black button).
Step 3 -- Disconnect the unit at the power source or at the service panel in accordance with OSHA (LOTO)
practices and procedures.
Step 4 -- USE TWO PEOPLE TO SUPPORT THE FILTER and rotate the swingarm filter clips off of the filter until
clip is clear of the filter.
Step 4 ALT (if stud style filter clips) -- Using a 7/16” nut-driver, evenly loosen the nuts holding the filter retaining
clips by working your way around the unit loosening the nuts a little at a time. To make installing the new
filter easier, loosen the nuts until flush with the end of the threaded stud. USE TWO PEOPLE TO SUPPORT
THE FILTER and rotate the filter clips toward the offset hole until clip is clear of the filter.
Step 5 -- Allow gravity to pull the filter away from the unit. If installing a new filter discard the filter in an
appropriate manor.
Step 6 -- Unpack the new filter and inspect for shipping damage. If damage is found, do not install in unit; call the
vendor for replacement arrangements.
Step 7 -- Using two people, raise the filter into place in between the filter guides (or threaded posts if stud style) assuring the seal edge is
approximately in the center of the gel channel.
Step 8 -- While supporting the filter by its frame, rotate the filter clips so that the clips are supporting the frame
and are at 90° to the frame. (ALT--Evenly tighten the nuts by working your way around the unit tightening the nuts
a little at a time. Stop tightening when the aluminum filter frame contacts the stainless steel housing frame of the unit.
DO NOT OVER TIGHTEN
). Wait at least 30 minutes before performing any challenge testing to allow the
gel to fully adhere to the unit.
Step 9 -- Inspect all gaskets and seals for integrity. Reconnect power and turn unit power on.
Step 10 -- Raise the face frame back into place, reattach the safety chains, and secure 1/4-turn fasteners.
INSTALL AND OPERATION
DRAWING NAME
DRAWN
MATERIAL
CHKD
APRVD
FINISH
SIZE
ENGINEER
CONTRACTOR
TAG QTY
BRS
REV #
E
SHT
8 30
/
SCL
DO NOT
SCALE
1:12
JOB NAME