6
Version 1.20 Addendum
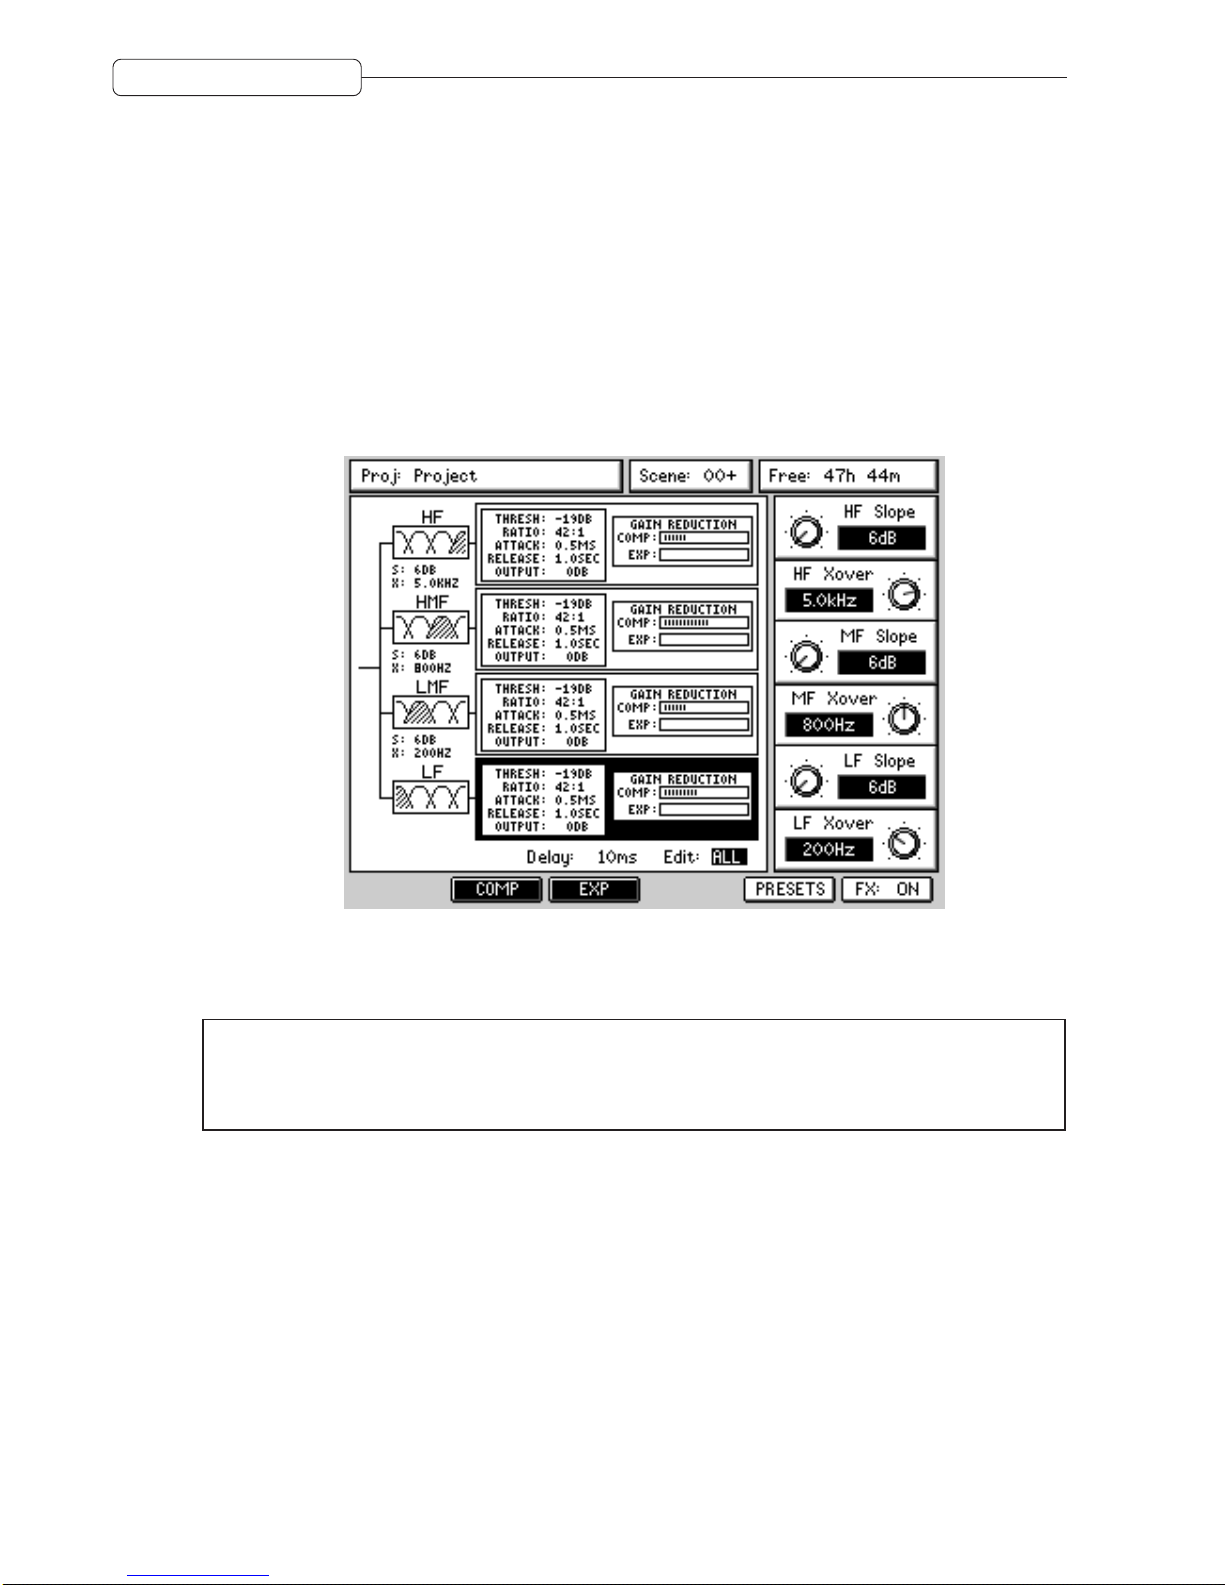
LOADING/SAVING MBCX PRESETS
Several preset MBCX configurations are provided that cover a wide range of applications. These can be
selected by pressing PRESETS (F5) in the MBCX page. This will take you to a page where you can select
the presets. Move to the preset you want to use and press RECALL (F3).
In this page, you can also store your own presets simply by pressing STORE (F4). You will see a naming
prompt - enter an appropriate name and press OK.
NOTES REGARDING THE MBCX
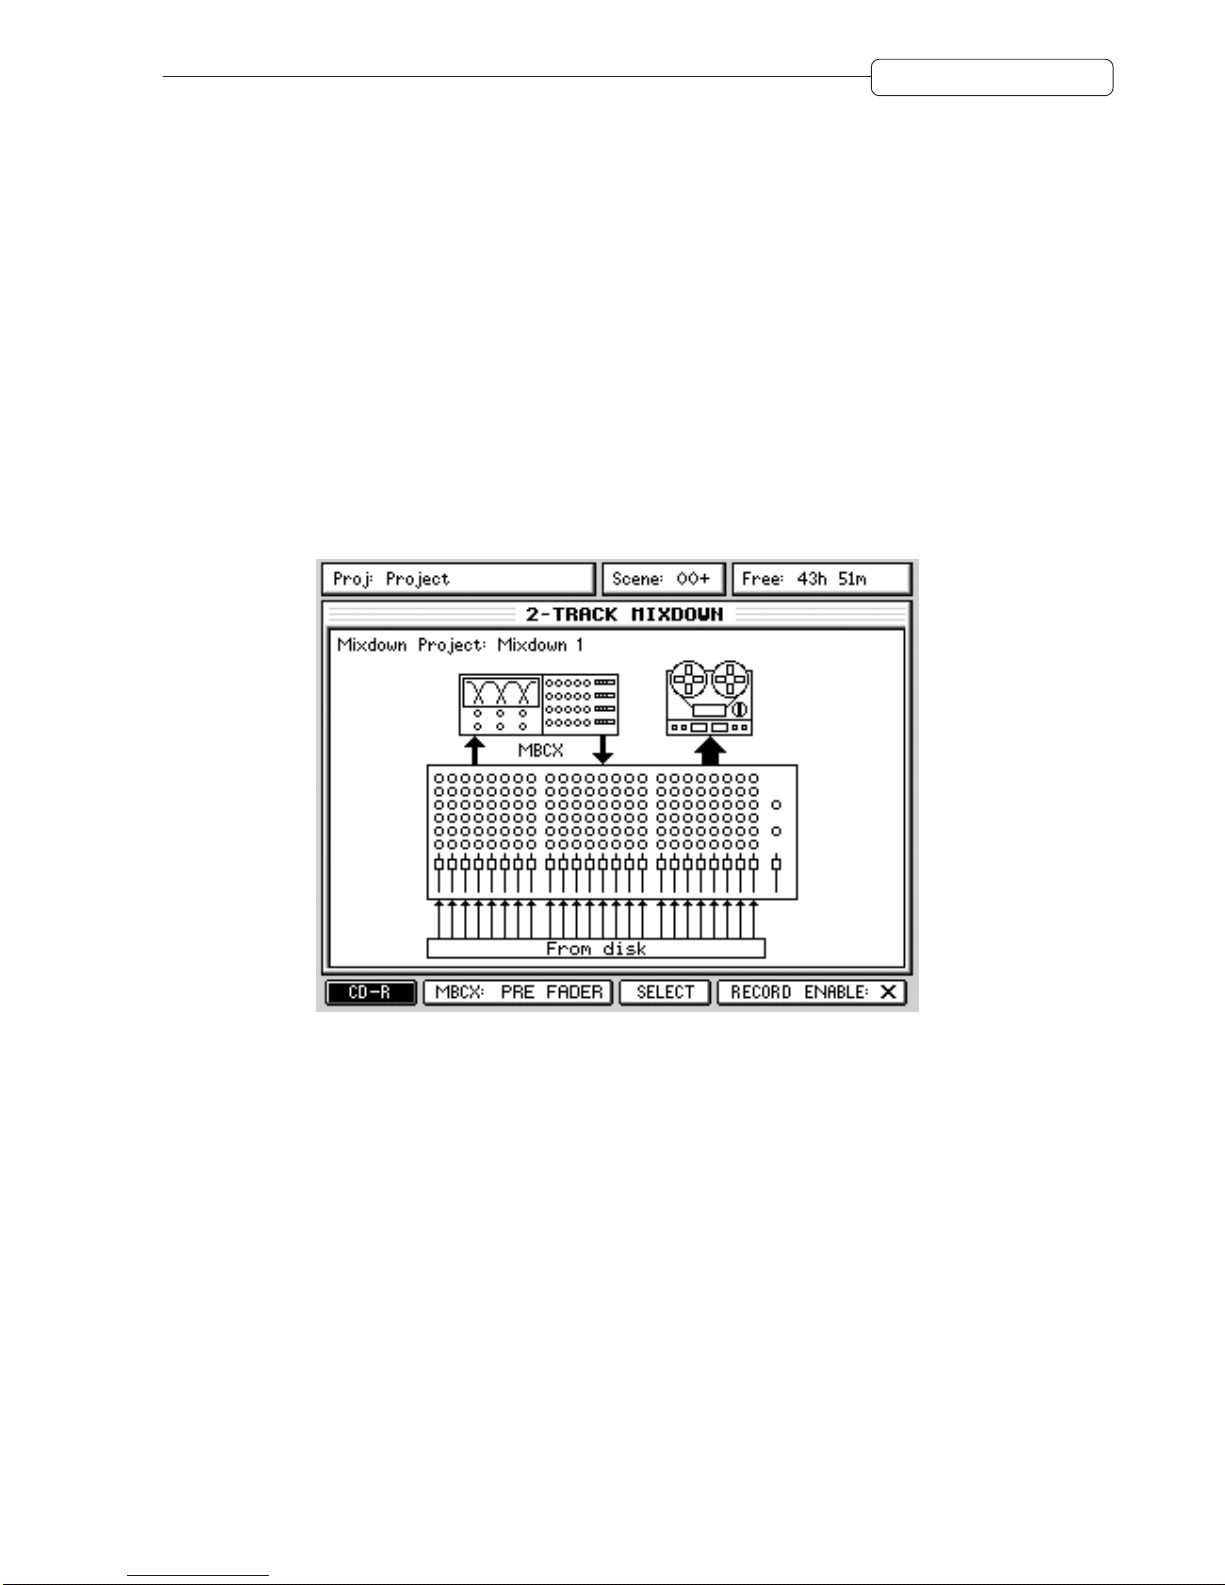
• When the MBCX is being used, it utilises all the effects DSP’s processing. In short, you cannot use
the four channels of effects when the MBCX is enabled.To return to the normal effects, you should
press CD-R, MIXDOWN and switch MBCX off using F2/3.
• When the MBCX is enabled, it is inserted into the L/R mix bus. It can be inserted pre-fade or post-
fade.
When using the MBCX as a ‘compander’to regulate overall dynamics, it is best to insert it pre-fade.
This is because, when being used in this way, the MBCX’s processing relies on levels to operate
properly. If the MBCX were to be inserted post-fade and you were to perform a fade out on the
master fader, as the level drops, so does the action of the MBCX on the signal.As such, in this case
it is best to insert it per-fade so that the MBCX is always receiving the full level of the stereo mix
bus.
However, when using the MBCX as a limiter (compressor ratio set to maximum), it is best to insert
it post-fade.
• When adjusting parameters on the MBCX, as with other static controls, be sure to either save your
work as a preset (see above) or store Scene 00 before re-commencing playback. Alternatively,
switch the automation off.
Scene 00 holds the initial state of the mixer for the project and is recalled whenever a project is
loaded or an automation pass is started. This means that when the dynamic automation is ON,
scene 00 will be automatically recalled whenever PLAY is pressed to ensure that all the controls,
including those which are not dynamically automated, are set to the correct value in relation to the
current playback time. It is therefore important to ensure that you store the required mixer state to
scene00 before startingto use the dynamicautomation and update itwhenever you wantto change
the initial state of a control during automation playback.
So, a possible scenario is: you are playing your mix and adjusting the MBCX and the track finishes.
You locate to the start of the track, press PLAY and.....
Your MBCX settings are all lost and Scene 00 re-initialises the static controls to their previously
stored state.
Of course, this is also true for all static controls.