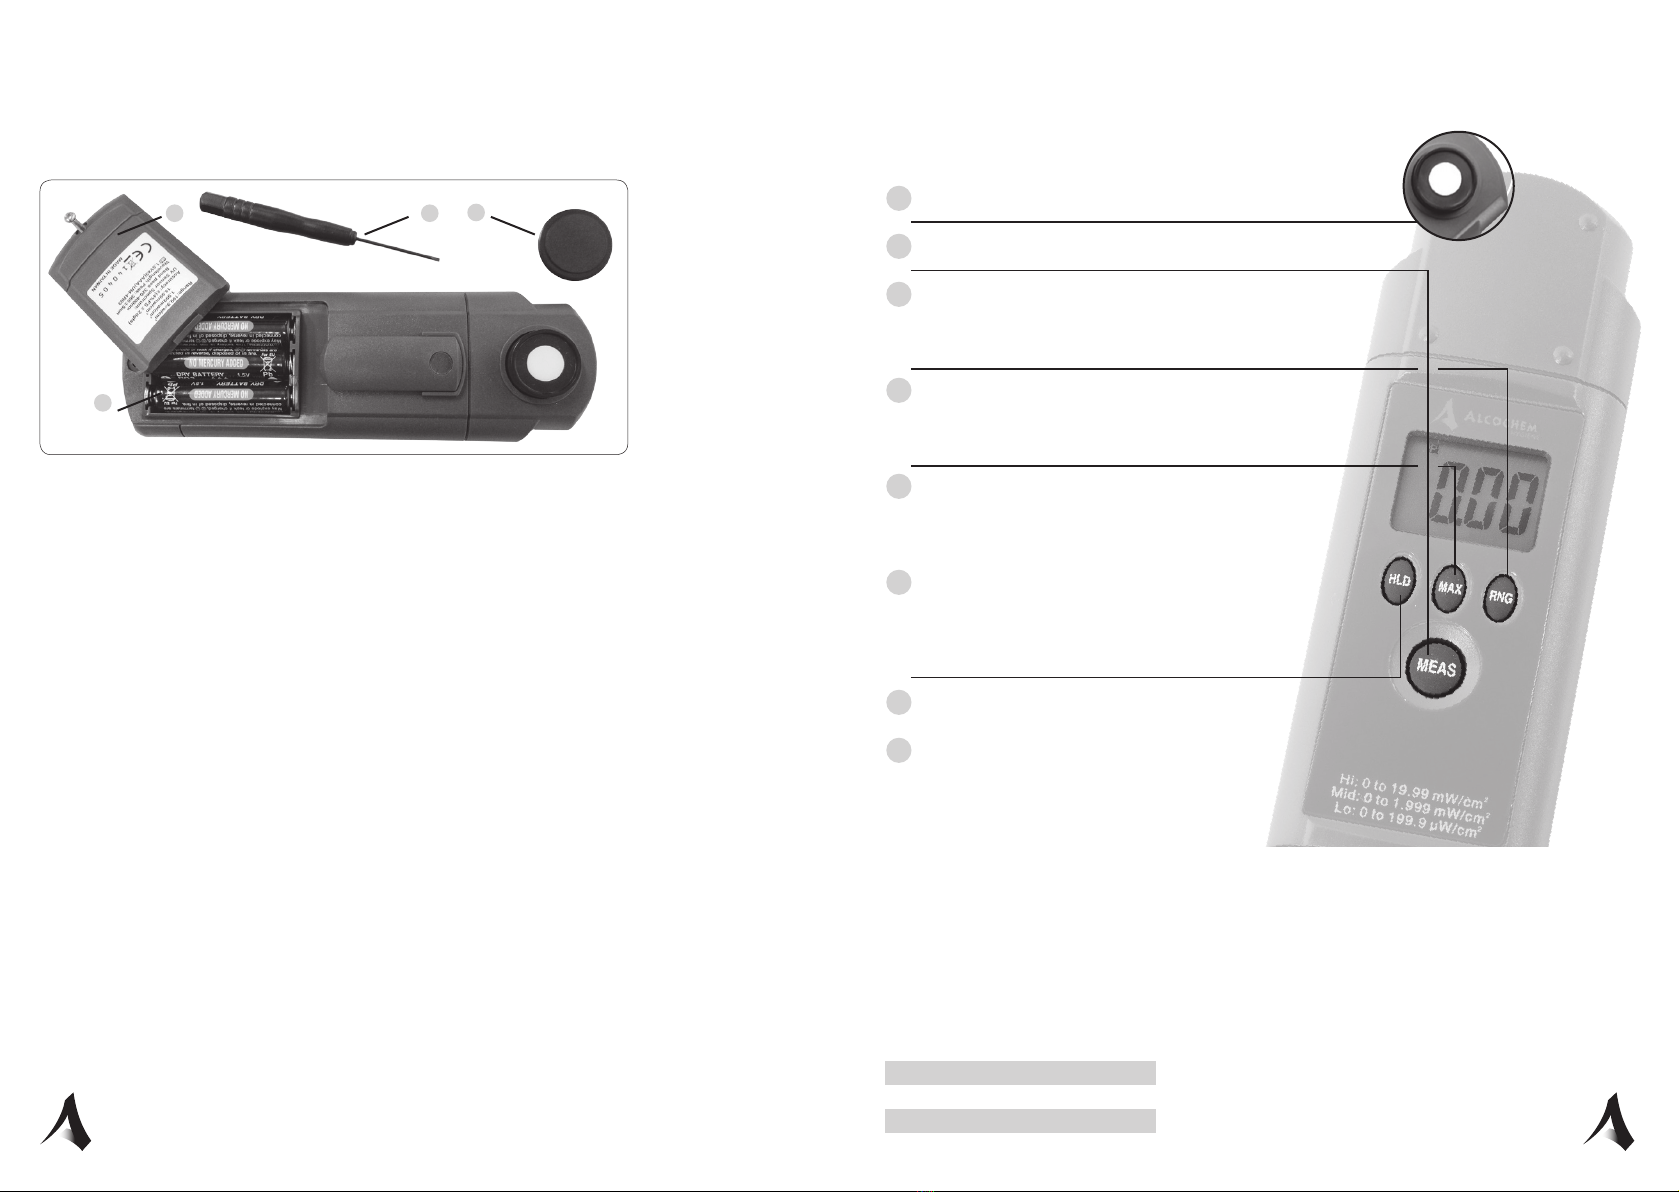
A. Screwdriver
B. Sensor cover
C. Batterie section (3x LR6)
D. Cover batterie section
The information in this service manual is based on the latest information, and is provided subject to
alterations. We reserve the right to change the construction and/or conguration of the product at
any time without obligation to modify earlier versions of the product.
Introduction
This instrument is a portable easy use 31/2 digit, compact-sized digital UV-A meter, designed for simple one
hand operation.The meter provides measurements in 199.9μW/cm21.999mW/cm2and 19.99mW/cm2units,
MAX-HOLD and DATA HOLD facilities.
Safety information
• To avoid injury or re hazard, do not use this product in an explosive atmosphere.
• To avoid eye injury, wear eye protection if there is a possibility of exposure to high-intensity rays.
• Do not immerse in liquids, clean the sensor head using only a damp cloth.
• Cover sensor head when not in use to extend silicon photo-diode sensor life.
Specications
Technical name : hand-held UV-A meter
Display : 3,5 digit liquid crystal display (LCD) with maximum reading of 1999.
Over range : “OL” is displayed.
Low battery indication : The “battery indicator” is displayed when the battery voltage
drops below the operating level.
Sensor type : photo diode
UV sensor spectrum : 320 - 400 nm
Wavelength Peak : 365 +/- 5nm
Accuracy : max 4% of max scale
Ranges : 199.9 μW/cm², 1.999 mW/cm², 19.99 mW/cm²
Dimensions : 155 x 48 x 24 mm
Weight : 82 gram (without batteries)
Power : battery operated (3 x LR6)
Temp operation conditions : 0 to + 50 degrees Celsius at < 75 % relative humidity.
Temp storage conditions : -20 to + 60 degrees Celsius, 0 to 80% R.H (without battery in meter)
Guarantee : 1 year return to base
CE-approval : yes
Resolution:
Range Resolution
199.9μW/cm20.1μW/cm2
1.999mW/cm20.001mW/cm2
19.99mW/cm20.01mW/cm2
1Remove the sensor cover on the backside of the UV-A meter
2Switch the meter on by pressing the MEAS button
3Select the range by pressing the RNG button twice to Hi, so
you will see two decimals behind the decimal point (ie: 0.00).
This will now measure from 0 to 19,99 mW/cm2
4Press the MAX button so you will record the highest
output value shown in the display. MAX will appear
in the display at the top of the screen.
5Now swipe the sensor head (white – round head) slowly
along the glass of the lamp from left to right. The sensor
head should be touching the glass during this operation.
6Then press the HOLD button. H will appear in the top
of the screen (This step is optional if you have pressed
the MAX button, but it holds the reading longer in the
display).
7Now you can read the UV-A output value.
8To take the next reading, press HOLD button
again to turn off HOLD (It now disappears from
the top of the screen). Press also MAX to clear
the reading.
Then repeat step 1 to 7 above.
Prior to taking a UV-A reading, make sure that the lamp has been working for at least 5 minutes.
Depending on the ambient temperature, it can take up to 5 minutes for a UV-A lamp to reach
its full UV-A output.
B
C
D A
Lamp is effective: (strong y attractant UV-A spectrum)
5 mW/cm2 (3 mW/cm2 for Basic Line) is required min. UV-A output, which ensures that the unit
stands out from its environment and insects notice the light in the perimeter around the y control unit.
Lamp needs replacing (ineffective y attraction level).


