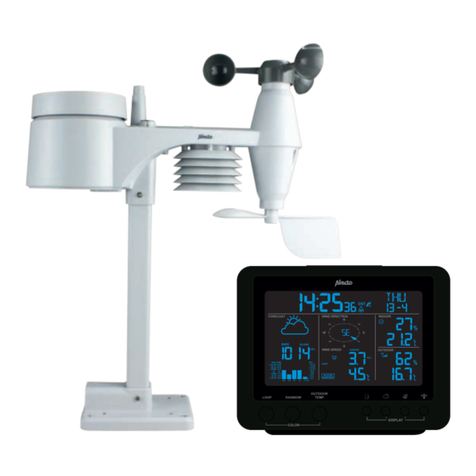
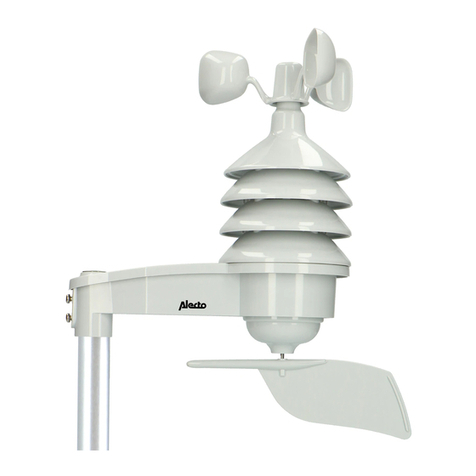
Alecto WS3875 User manual

BEDIENUNGSANLEITUNG
MODE D’EMPLOI
WS3875
USER MANUAL
GEBRUIKSAANWIJZING

2
2. INTRODUCTION
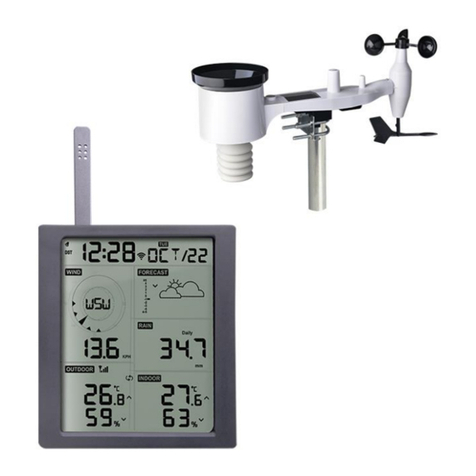
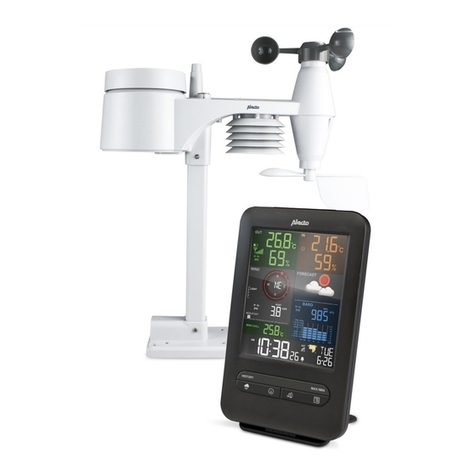
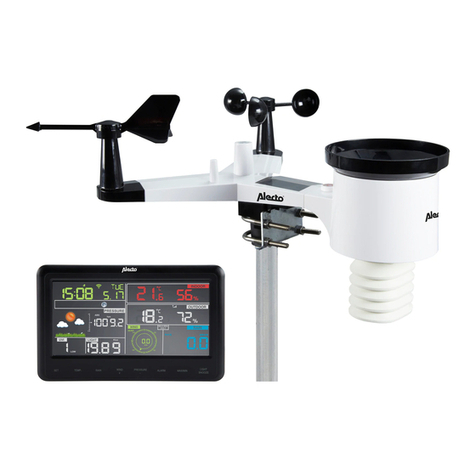
The Alecto WS3875 weather station consists of the following components:
Outdoor wind unit:
The outdoor wind unit has a built-in wind speed meter, wind direction
sensor, temperature sensor, humidity sensor and DCF receiver. The
measurement data from these sensors is transmitted wirelessly to
the display unit. The outdoor wind unit is powered by 4 x AA 1,5 Volt
batteries (excl.).
The outdoor wind unit is supplied with mounting materials.
Outdoor rain unit:
The outdoor rain unit has a built-in rain gauge. The measurement data
from the sensor is transmitted wirelessly to the display unit. The outdoor
rain unit is powered by 2 x AA 1,5 Volt batteries (excl.).
Indoor unit:
The indoor unit receives the measurement data from the outdoor units
and also has its own temperature sensor, humidity sensor and air
pressure sensor.
The indoor unit is powered by the supplied power adapter and 3 x AAA
1,5V batteries can be installed as a backup (excl.).
All measurement data is displayed on the 7,5 ”/ 19,1 cm large colour
LCD screen.
When using the adapter, the snooze/light button functions as a dimmer
batteries only. When touching the snooze/light button, the screen will
light up for 5 seconds.
TABLE OF CONTENTS
2. INTRODUCTION ......................................................................................2
3. OVERVIEW...............................................................................................3
3.1 Indoor unit:......................................................................................................................... 3
3.2 Outdoor unit wind:.............................................................................................................. 4
3.3 Outdoor rain unit:............................................................................................................... 4
4. INSTALLATION ........................................................................................4
4.1 Indoor unit:......................................................................................................................... 4
4.2 Outdoor units: .................................................................................................................... 5
4.3 Outdoor unit wind:.............................................................................................................. 5
4.4 Outdoor rain unit:............................................................................................................... 6
5. BASIC DISPLAY AND SETTINGS...........................................................7
5.1 Indoor Temp and Humi: ..................................................................................................... 7
5.2 Outdoor Temp and Humi:................................................................................................... 7
5.3 Pressure Trend and Pressure:........................................................................................... 7
5.4 Moon:................................................................................................................................. 7
5.5 Clock:................................................................................................................................. 7
5.6 Wind:.................................................................................................................................. 8
5.7 Rain: .................................................................................................................................. 8
5.8 Function keys:.................................................................................................................... 8
6. SETTING INDOOR UNIT:.........................................................................9
6.1 Mode:................................................................................................................................. 9
6.2 Date and time: ................................................................................................................... 9
6.3 Alarm time for the alarm clock: ........................................................................................ 10
6.4 Height correction setting atmospheric pressure gauge: ................................................. 10
6.5 Temperature alarm setting for outdoor and indoor temperature: ..................................... 10
6.6 Rain gauge display extension in mm or inches: .............................................................. 10
6.7 Wind speed display extension in km/h or mph: ............................................................... 10
7. GENERAL OPERATION AND FUNCTIONS:.....................................11
7.1 Barometer:........................................................................................................................11
7.2 Trend indication :...........................................................................................11
7.3 Weather forecast by icons: ...............................................................................................11
7.4 14-day learning mode:......................................................................................................11
7.5 Atmospheric pressure trend:............................................................................................ 12
7.6 Indoor and outdoor temperature:..................................................................................... 12
7.7 Indoor and outdoor humidity:........................................................................................... 12
7.8 Maximum and minimum temperature and humidity value: .............................................. 12
7.9 Moon phase display:........................................................................................................ 12
7.10 Wind speed:..................................................................................................................... 12
7.11 Wind direction:................................................................................................................. 12
7.12 Rain meter: ...................................................................................................................... 12
8. MAINTENANCE .....................................................................................13
8.1 Rain meter: ...................................................................................................................... 13
8.2 Outdoor temperature and humidity sensor: ..................................................................... 13
8.3 Wind vane and windmill scoops:...................................................................................... 13
9. USE INDOOR UNIT WITH BATTERIES. ...............................................13
10. RECEPTION FUNCTION. ......................................................................13
11. SPECIFICATIONS..................................................................................14
3
3. OVERVIEW
3.1 Indoor unit:
N
E
S
W
WSW
SW
SSW SSE
SE
NE
NW
ESE
ENE
NNE
NNW
WNW
hPa
Outdoor Temp
Wind Speed
km/h
Rain Fall
Accumulated
mm
1
AAA 1,5V AAA 1,5V AAA 1,5V
N
E
S
W
WSW
SW
SSW SSE
SE
NE
NW
ESE
ENE
NNE
NNW
WNW
Ft
M
inHg
hPa
Outdoor Temp
Wind Speed
max
mph
km/h
Rain Fall
Accumulated
today
yesterday
Last hour
this week
mm inches
19
3
4
6 7 98
510 11 12
2
13 14
17
16
18
20
15
1. Function keys
2. Outside temperature & humidity display
3. Wind speed display
4. Rainfall display
5. "Mode" key
6. Moon phase display
7. "Settings" key
8. Weather forecast display
9. “Alarm clock” key
10. Wind direction display
11. "Channel" key
12. Atmospheric pressure and atmospheric pressure trend animation
13. "Down/-" key
14. “Up/+” key
15. Power adapter connection
16. Day and month display
17. Current time display
18. Indoor temperature & humidity display
19. Hanging slots
20. Battery compartment for 3 x AAA, 1,5V batteries (excl.)

4
4. INSTALLATION
4.1 Indoor unit:
General installation and placement tips:
• Ensure that the ambient temperature around the indoor unit is not
• For hanging use: hang the unit free from obstructions, i.e. not behind a
curtain, for example.
• Make sure that the adapter cable cannot lead to falls or tripping.
Secure the cable with cable ties if it is too long.
Power supply:
The main power of the indoor unit is provided by the supplied power
adapter. Insert the low voltage plug of the adapter into the DC5.0V
connection on the right side of the indoor unit and connect the adapter to a
230V socket.
As a backup, to save the measurement data during a possible power failure
or if the adapter is accidentally unplugged, 3 pcs 1,5V AAA batteries can
be inserted. The light intensity setting will revert to the lowest setting after
5 seconds to increase battery life.
3.2 Outdoor unit wind:
5
6
1
4
2
3
1. Compass, for northern orientation of the outdoor unit
2. Mast
3. Battery compartment for 4 x AA 1,5V batteries (excl.)
4. Wind direction sensor
5. Location of temperature, humidity sensor and DCF receiver.
6. Wind speed sensor
7.
8. Rain gauge housing
9. Mounting feet
10. Tab to detach housing
11. Scoops for rain quantity measurement
12. Battery compartment for 2 x AA 1,5V batteries (excl.)
note:
Due to poor or non-performance of normal Alkaline batteries at
temperatures around or below 0°C, the use of standard Alkaline
batteries is not recommended for the outdoor unit. For the outdoor
units, we, therefore, recommend installing Lithium batteries which are
designed to function within a temperature range of -20°C to 60°C.
These batteries are available through the Alecto service department
on telephone number 073 6411 355 (Netherlands) or 03 238 5666
(Belgium) or via the internet www.alecto.nl.
The battery life of Lithium batteries with a capacity of 900 mAh is more
than a year.
3.3 Outdoor rain unit:
7
8
11
9
10
AA 1,5V
AA 1,5V
12

5
1. Open the battery compartment at
the back of the indoor unit.
2.
all the way to the left.
3. Insert the second battery and
slide it again to the left.
4. Insert the third battery.
5. Finally, replace the battery cover.
Hang or stand:
The indoor unit can either be placed freestanding on a cabinet or desk (fold
out the stand on the back of the indoor unit for this purpose) or the unit can
be hung on the wall (see keyhole openings on the back).
4.2 Outdoor units:
General installation and placement tips:
• First, check that the outdoor units are within reach of the indoor unit
before permanently mounting the outdoor units. Keep the distance
between the outdoor units and the indoor unit to within 30 meters.
• Ensure that the outdoor units are placed at least 1,5 meters above the
ground and freely exposed to the rain and wind.
• In order for the outdoor units to work as accurately as possible, they
must stand as horizontal as possible. For the outdoor rain unit, check
that the surface is level before mounting.
• To indicate which direction the wind is coming from, the outdoor wind
unit must be oriented to the South. See the S designation at the
bottom of the outdoor unit for this. Use the compass on the outdoor
wind unit to correctly orientate the unit.
• Make sure the outdoor units hang and/or stand freely. The wind speed
meter and the wind vane, in particular, should hang in direct wind.
AAA 1,5V AAA 1,5V AAA 1,5V
• Find a location where the likelihood of blowing leaves is minimal.
measurement results. In any event, we advise you to place the outdoor
units in such a way that it is fairly easy to remove any leaves and to
replace the batteries.
• Perhaps the outdoor units can be located within reach for a week to try
out all functions. Check that everything is functioning properly before
placing the outdoor units in their permanent location.
4.3 Outdoor unit wind:
Registration:
First register the outdoor units with the indoor unit before permanent
placement of the outdoor units Once the indoor unit batteries are installed, it
After the 5 minutes, the indoor unit can be manually set to receive. To do
this, press the channel button for 2 seconds to set the indoor unit to
receive mode.
Insert 4 x 1,5V AA batteries in the outdoor wind unit. See diagram. Set the
Channel switch to the same channel selected on the indoor unit. Then press
the TX key. Check that the indoor unit has received the signal. Press the
TX button once more, if necessary. The outdoor temperature and humidity
are displayed on the indoor unit via the outdoor wind unit.
The outdoor wind unit is registered
when the information appears on
the display.
reception, press the “WAVE” key.
To turn the DCF-77 reception on
again, register the outdoor unit
and reinserting the batteries
and repeating the registration
procedure.
S
AA 1,5V
AA 1,5V
AA 1,5V
AA
1V
A
AA 1,5V
TX
WAVE
1 2 3
TX
WAVE

6
4.4 Outdoor rain unit:
Registration:
Remove the battery compartment
screws at the bottom of the rain
screw holes, and remove the battery
cover. Insert 2 x 1,5V AA batteries in
the battery compartment as shown
in the diagram:
Install the battery within the 5 minute
registration time of the indoor unit, or set the indoor unit to receive.
If the indoor unit is set to receive, both the wind and rain unit should also
register.
detected by the indoor unit and the ---- disappears from the display.
Replace the battery cover and secure it with the screws. This ensures that
the batteries do not get wet.
The batteries should be installed before mounting the rain gauge.
Installation:
Place the rain gauge on a horizontal
surface where the rain will not be
obstructed. Fasten the rain gauge by
inserting the screws through the legs.
To replace the batteries, the rain gauge
Installation:
Insert the aluminium pole into the
mounting base and fasten it with the
screws provided. The mounting base can
be mounted on a horizontal or vertical
surface. Please note that the outdoor
wind unit must still be orientated to the
north. Make sure there is enough space
to do this adequately. Screw the base to a
wooden or stone wall using the supplied
screws and plugs.
Slide the outdoor wind unit
onto the pipe and fasten it with
the screws provided.
Orientate the outdoor wind
unit using the compass to
ensure the correct wind
direction.
The wind speed sensor,
temperature, humidity, and
wind direction part must be
south facing. See diagram:
S
N
E
S
W
WS ES
EN
WN
S
AA 1,5V
AA 1,5V

7
Cleaning:
Remove grid plate and clean it. Remove
all leaves from the rain gauge housing.
Using an Allen key, the cover can be
removed by pressing the internal tab and
pulling the cover up.
In case of problems, the rain gauge can
also be unscrewed.
Then clean the scoop and all holes
thoroughly. Replace the cover by clipping
it clicks. Check that the cover is secured.
Replace the grid plate.
5. BASIC DISPLAY AND SETTINGS
5.1 Indoor Temp and Humi:
• Indoor temperature and indoor humidity.
• Indoor temperature display in °C or °F.
• Press to switch between °C or °F.
• Indoor humidity display in %.
• Trend display higher, equal, or lower.
• Adjustable temperature high/low alarm.
5.2 Outdoor Temp and Humi:
• Display of outdoor unit wind channel 1, 2, 3, or alternating display.
• Outdoor temperature and humidity outdoors.
• Outdoor temperature display in °C or °F.
• Press to switch between °C or °F.
• Outdoor humidity display in %.
• Trend display higher, equal, or lower.
• Adjustable temperature high/low alarm.
5.3 Pressure Trend and Pressure:
• Display of atmospheric pressure progress and barometric pressure
with forecast by icons.
• View previous 12-hour
atmospheric pressure progress
• Atmospheric pressure value in:
Ft, M, inHG, and hPa.
• Atmospheric pressure trend
display
• 14 day learning mode.
5.4 Moon:
• Moon phase display indication.
• The stars are displayed between 18.00 and 6.00
5.5 Clock:
• Time display with date.
• DCF-77 indication time synchronization
reception.
• Alarm clock with snooze function.
N
E
S
W
WSW
SW
SSW SSE
SE
NE
NW
ESE
ENE
NNE
NNW
WNW
hPa
Outdoor Temp
Wind Speed
km/h
Rain Fall
Accumulated
mm
N
E
S
W
WSW
SW
SSW SSE
SE
NE
NW
ESE
ENE
NNE
NNW
WNW
hPa
Outdoor Temp
Wind Speed
km/h
Rain Fall
Accumulated
mm
N
E
S
W
WSW
SW
SSW SSE
SE
NE
NW
ESE
ENE
NNE
NNW
WNW
hPa
Outdoor Temp
Wind Speed
km/h
Rain Fall
Accumulated
mm
N
E
S
W
WSW
SW
SSW SSE
SE
NE
NW
ESE
ENE
NNE
NNW
WNW
hPa
Outdoor Temp
Wind Speed
km/h
Rain Fall
Accumulated
mm
N
E
S
W
WSW
SW
SSW SSE
SE
NE
NW
ESE
ENE
NNE
NNW
WNW
hPa
Outdoor Temp
Wind Speed
km/h
Rain Fall
Accumulated
mm

8
5.6 Wind:
• Wind speed display with reception indication outdoor wind unit.
• Wind direction display. Pointer indicates previous
and current wind direction. The wider triangle
indicates the current wind direction.
• Wind speed is displayed in mph or km/h.
5.7 Rain:
• Display amount of precipitation with the following time spans:
total
today
yesterday
last hour
this week
• Precipitation display in mm or inches.
• Low battery indication of the rain unit.
• Reception signal indication.
5.8 Function keys:
• Mode
• Set
• alarm
• channel
• down
• up
N
E
S
W
WSW
SW
SSW SSE
SE
NE
NW
ESE
ENE
NNE
NNW
WNW
hPa
Outdoor Temp
Wind Speed
km/h
Rain Fall
Accumulated
mm
N
E
S
W
WSW
SW
SSW SSE
SE
NE
NW
ESE
ENE
NNE
NNW
WNW
hPa
Outdoor Temp
Wind Speed
km/h
Rain Fall
Accumulated
mm
N
E
S
W
WSW
SW
SSW SSE
SE
NE
NW
ESE
ENE
NNE
NNW
WNW
hPa
Outdoor Temp
Wind Speed
km/h
Rain Fall
Accumulated
mm
N
E
S
W
WSW
SW
SSW SSE
SE
NE
NW
ESE
ENE
NNE
NNW
WNW
hPa
Outdoor Temp
Wind Speed
km/h
Rain Fall
Accumulated
mm
N
E
S
W
WSW
SW
SSW SSE
SE
NE
NW
ESE
ENE
NNE
NNW
WNW
hPa
Outdoor Temp
Wind Speed
km/h
Rain Fall
Accumulated
mm
Mode key: In normal mode, press mode to view the various
functions separately. If the mode key is not pressed for
10 seconds, the display will return to normal mode.
N
E
S
W
WSW
SW
SSW SSE
SE
NE
NW
ESE
ENE
NNE
NNW
WNW
hPa
Outdoor Temp
Wind Speed
km/h
Rain Fall
Accumulated
mm
Set key: In normal mode, press set to switch between °C and °F.
N
E
S
W
WSW
SW
SSW SSE
SE
NE
NW
ESE
ENE
NNE
NNW
WNW
hPa
Outdoor Temp
Wind Speed
km/h
Rain Fall
Accumulated
mm
alarm key: press alarm key to activate alarm 1, alarm 2, alarm 1
and 2 or no alarm.
N
E
S
W
WSW
SW
SSW SSE
SE
NE
NW
ESE
ENE
NNE
NNW
WNW
hPa
Outdoor Temp
Wind Speed
km/h
Rain Fall
Accumulated
mm
channel key: press channel key to switch between channel 1,
channel 2, channel 3 or scan between channel 1, 2, and 3.
Press and hold channel key for 2 seconds to activate reception of
outdoor units with new ID. First select the desired channel.
N
E
S
W
WSW
SW
SSW SSE
SE
NE
NW
ESE
ENE
NNE
NNW
WNW
hPa
Outdoor Temp
Wind Speed
km/h
Rain Fall
Accumulated
mm
down key: to switch between rain display in total, today, last hour,
yesterday and this week.
N
E
S
W
WSW
SW
SSW SSE
SE
NE
NW
ESE
ENE
NNE
NNW
WNW
hPa
Outdoor Temp
Wind Speed
km/h
Rain Fall
Accumulated
mm
up key: display of the lowest or highest measured value of the
indoor and outdoor temperature and humidity and the maximum
measured wind speed.

9
6. SETTING INDOOR UNIT:
6.1 Mode:
Use the mode button to select the desired adjustment function:
Press Mode for the following settings
date and time
alarm time for the alarm clock
height correction setting
temperature alarm setting for outdoor and indoor temperature
rain gauge display extension in mm or inches
wind speed display extension in km/h or mph
6.2 Date and time:
The time and date are automatically received via DCF-77 receiver which
receives the time data. This receiver is situated in the wind unit. The wind
unit must be switched on for at least 5 minutes to receive the DCF-77
signal. If the channels of the wind unit and the indoor unit are the same,
registration. Followed later by the correct time. The wind unit must be
switched on for approximately 2 minutes for the signal to be transmitted.
Alternatively, you can use the TX button in the battery compartment to
transmit manually. The wind unit should already be switched on for several
minutes at this point. Once the DCF signal is received, the following icon will
appear next to the time: . If DST appears below this icon ( ) then daylight
saving time is active (DST - Day Saving Time).
S
AA 1,5V
AA 1,5V
AA 1,5V
AA
1V
A
AA 1,5V
TX
WAVE
1 2 3
Pressing the WAVE button for a few
seconds will disable reception of the
DCF signal. Then wait a day and the
DCF-77 receive symbol will disappear.
It is also possible to restart the indoor
unit. The receive symbol will then also
not appear. The time and date must then be re-set manually.
• zone
press the Mode key 1 x . Date and time setting is displayed
Press the Set key for 3 seconds
zone using the up and down keys. (In the DCF time zone of the
Netherlands this is 0) The DCF time takes daylight saving time into
account.
• day name language
Press the Set key again to continue setting the day in English,
German, French, Italian, Dutch, Spanish or Danish. Select the desired
language with up and down keys.
• year
Press the Set key again to continue setting the year. Select the
desired year with the up and down keys.
• month-day / day month sequence
Press the Set key again to continue setting the day or month
sequence. Select the desired month-day or day-month indication with
up and down keys.
• month
Press the Set key again to continue setting the desired month
(1-2-3..to..12). Select the desired year with the up and down
keys the desired month indication.
• day
Press the Set key again to continue setting the desired day
(1-2-3..to..31). Select the desired day with the up and down
keys.
• 12/24 hour display
Press the Set key again to continue setting the desired hour format
(12 or 24 hours). Select the desired hour format with the up and
down keys.
• hour
Press the Set key again to continue setting the desired hour Select
the desired hour with the up and down keys.
• minutes
Press the Set key again to continue setting the desired minutes.
Select the desired minutes with the up and down keys.
• seconds
Press the Set key again to continue setting the desired seconds.
Select the desired seconds with the up and down keys.

10
6.3 Alarm time for the alarm clock:
There are two alarm clocks present in this weather station. These can be
key
N
E
S
W
WSW
SW
SSW SSE
SE
NE
NW
ESE
ENE
NNE
NNW
WNW
hPa
Outdoor Temp
Wind Speed
km/h
Rain Fall
Accumulated
mm
is located on top
of the device. The alarm will then stop for 5 minutes and the alarm icon
and snooze
N
E
S
W
WSW
SW
SSW SSE
SE
NE
NW
ESE
ENE
NNE
NNW
WNW
hPa
Outdoor Temp
Wind Speed
km/h
Rain Fall
Accumulated
mm
become progressively louder and then stop.
• alarm 1 hour
press 2 x on the Mode key . Alarm time appears
Press the Set key for 3 seconds
and down ,
the desired alarm hour of alarm 1.
• alarm 1 minutes
Press the Set key again to continue setting the desired minutes.
Select the desired minutes with the up and down keys.
• alarm 2 hour
Press the Set key again to continue setting the desired hour Select
the desired hour with the up and down keys.
• alarm 2 minutes
Press the Set key again to continue setting the desired minutes.
Select the desired minutes with the up and down keys.
6.4 Height correction setting atmospheric pressure gauge:
• height
press 3 x on the Mode key . Height setting appears
Press the Set key for 3 seconds
and down
keys, the desired height.
6.5 Temperature alarm setting for outdoor and indoor temperature:
• outdoor temperature alarm low.
press 4 x on the Mode key . Height setting appears
press the Set key for 3 seconds
and down keys, the desired temperature.
• outdoor temperature alarm low on or o.
Press the Set key
Select with the up and down keys whether the low temperature
• outdoor temperature alarm high.
Press the Set key again to adjust the high temperature setting.
Select with the up and down keys the desired alarm
temperature.
• outdoor temperature alarm high on or o.
Press the Set key again to turn the high temperature alarm on
and down keys whether the high
• indoor temperature alarm low.
Press the Set key again to adjust the low temperature setting.
Select with the up and down keys the desired alarm
temperature.
• indoor temperature alarm low on or o.
Press the Set key
Select with the up and down keys whether the low temperature
• indoor temperature alarm high.
Press the Set key again to adjust the high temperature setting.
Select with the up and down keys the desired alarm
temperature.
• indoor temperature alarm high on or o.
Press the Set key again to turn the high temperature alarm on
and down keys whether the high
6.6 Rain gauge display extension in mm or inches:
• extension setting
press 5 x on the Mode key . Precipitation details appear
Press the Set key for 3 seconds
and
down keys, the desired precipitation extension in (mm or inches).
6.7 Wind speed display extension in km/h or mph:
• extension setting
press 6 x on the Mode key . Wind speed details appear
Press the Set key for 3 seconds
and
down key, the desired wind speed extension in (km/h or mph).

11
7. GENERAL OPERATION AND FUNCTIONS:
7.1 Barometer:
The atmospheric pressure value is measured with a barometer. The
atmospheric pressure value can be displayed in Ft, M, inHG, and hPa.
In the Benelux, the hectoPascal notation is used; although previously
air pressure was also expressed as 1 mbar equals 1 hPa. The
atmospheric pressure decreases the higher you are above sea level. A
rule of thumb is that the atmospheric pressure decreases by 1 hPa per
8 meters. In this weather station menu, the height can be entered so
that the air pressure is compensated for and the correct air pressure
value is displayed. The height can be adjusted in 10-meter increments
between -90 meters and +1990 meters. See 6.4 for this setting.
7.2 Trend indication :
N
E
S
W
WSW
SW
SSW SSE
SE
NE
NW
ESE
ENE
NNE
NNW
WNW
hPa
Outdoor Temp
Wind Speed
km/h
Rain Fall
Accumulated
mm
If the atmospheric pressure increases or
decreases by 2 hPa per hour, the trend
display will point up or down. If the air
pressure changes less than 2 hPa per
hour, the straight arrow will be displayed.
7.3 Weather forecast by icons:
The following icons indicate the respective weather forecast.:
SUNNY PARTIALLY CLOUDY
CLOUDY RAIN
HEAVY RAIN SNOW
HEAVY SNOW ICE FORECAST
STORM FORECAST
7.4 14-day learning mode:
The automatic learning mode will activate after start-up or reset. This
appears in the “LEARNING” display. This will stop and disappear after
14 days.

12
7.5 Atmospheric pressure trend:
The animated graph below shows the atmospheric pressure for the
past 12 hours.
N
E
S
W
WSW
SW
SSW SSE
SE
NE
NW
ESE
ENE
NNE
NNW
WNW
hPa
Outdoor Temp
Wind Speed
km/h
Rain Fall
Accumulated
mm
The weather station must be switched on for at
least 12 hours for the correct value. The
-6hPa.
7.6 Indoor and outdoor temperature:
N
E
S
W
WSW
SW
SSW SSE
SE
NE
NW
ESE
ENE
NNE
NNW
WNW
hPa
Outdoor Temp
Wind Speed
km/h
Rain Fall
Accumulated
mm
The indoor and outdoor temperature is displayed in
the same manner. See 7.7 for outdoor
temperature display. The trend arrow indicates
the weather course. If the temperature rises or
falls by 1 °C, the trend arrow will point up or
down respectively. If the temperature change
remains below 1 °C for an hour, the trend
arrow remains straight. .
7.7 Indoor and outdoor humidity:
N
E
S
W
WSW
SW
SSW SSE
SE
NE
NW
ESE
ENE
NNE
NNW
WNW
hPa
Outdoor Temp
Wind Speed
km/h
Rain Fall
Accumulated
mm
Indoor and outdoor humidity is displayed in the
same manner. See 7.6 for indoor humidity
display. The trend arrow indicates the weather
course. If the humidity rises or falls by 5%, the
trend arrow will point up or down respectively.
If the humidity does not change by more than
5% within an hour, the trend arrow will remain
straight. .
7.8 Maximum and minimum temperature and humidity value:
In these screens, the maximum and minimum measured temperature
and humidity value can be displayed. To do this, press the up key .
Max. appears in the display and the maximum measured temperatures
and humidity are shown. Press the up key again . Min appears in
the display and the minimum measured temperature and humidity is
shown. Hold up key for at least 2 seconds to clear min. and max
indoor and outdoor temperature and humidity. Note: the maximum
wind speed is also cleared. Indoor and outdoor values are cleared
simultaneously.
7.9 Moon phase display:
The moon phase display is linked to the date, year, and time.
The stars are displayed between 18.00 and 6.00. The stars disappear
between 6.00 and 18.00.
The moon goes from no moon to full moon and then back to no moon.
The moon is divided into 7 segments.
7.10 Wind speed:
N
E
S
W
WSW
SW
SSW SSE
SE
NE
NW
ESE
ENE
NNE
NNW
WNW
hPa
Outdoor Temp
Wind Speed
km/h
Rain Fall
Accumulated
mm
The current wind speed is displayed. The maximum
wind speed is indicated by pressing the up key
. See 7.8 for clearing the maximum wind
speed. The wind speed is displayed in mph or
km/h.
7.11 Wind direction:
N
E
S
W
WSW
SW
SSW SSE
SE
NE
NW
ESE
ENE
NNE
NNW
WNW
hPa
Outdoor Temp
Wind Speed
km/h
Rain Fall
Accumulated
mm
Wind direction display. The pointer indicates
previous and current wind direction. The
wider triangle indicates the current wind
direction.
The wind rose consists of 16 wind
directions with an intermediate space of
22,5°.
Ensure that the wind unit is correctly aligned.
7.12 Rain meter:
N
E
S
W
WSW
SW
SSW SSE
SE
NE
NW
ESE
ENE
NNE
NNW
WNW
hPa
Outdoor Temp
Wind Speed
km/h
Rain Fall
Accumulated
mm
The rain gauge displays the total rainfall by default.
With the down key you can choose
between today, past hour, yesterday and this
week. After 10 seconds, the display changes
back to total fallen precipitation. Hold the
down key to clear the precipitation value.

13
8. MAINTENANCE
For easy access to the outdoor units
to carry out minor maintenance or
to replace the batteries
, it is advisable to place the outdoor units in an
accessible place, but still as far as possible in the wind or rain.
8.1 Rain meter:
The rain unit housing can be unclipped from the bottom center, and the
inside of the rain gauge can then be cleaned. Use a soft long-bristle
brush for this.
Clean the collection tray and remove any leaves. Place it back on
the rain gauge (note the 2 protruding tabs on the back) and press the
housing onto the rain gauge again until a mechanical "click" is heard.
See also 4.4 cleaning.
8.2 Outdoor temperature and humidity sensor:
Blow the openings of the sensor housing clean and use a long-bristle
soft brush to clean the rain slats. DO NOT use WATER but only a
damp cloth.
8.3 Wind vane and windmill scoops:
Wipe these parts with a slightly damp cloth.
Check that the bearings still rotate smoothly at the same time.
9. USE INDOOR UNIT WITH BATTERIES.
The indoor unit also runs on batteries without an adapter. This will then
run out faster than when using an adapter.
The display background will not illuminate, but when the buttons are
pressed the background lighting will come on for 5 seconds. The light
can then no longer be dimmed.
10. RECEPTION FUNCTION.
After installing the batteries and/or plugging in the power adapter
connected to the mains, the indoor unit will begin receiving signals
indoor unit will be seen as the correct outdoor unit and will remember
the code of the outdoor unit. Check that it is the correct outdoor unit.
After the 5 minutes, the indoor unit will stop receiving and will only
display the value of the outdoor unit received during this process.
To switch reception on again, press the channel key
N
E
S
W
WSW
SW
SSW SSE
SE
NE
NW
ESE
ENE
NNE
NNW
WNW
hPa
Outdoor Temp
Wind Speed
km/h
Rain Fall
Accumulated
mm
for at least
N
E
S
W
WSW
SW
SSW SSE
SE
NE
NW
ESE
ENE
NNE
NNW
WNW
hPa
Outdoor Temp
Wind Speed
km/h
Rain Fall
Accumulated
mm
again for
2 seconds.

14
11. SPECIFICATIONS
Indoor-unit:
Temperature:
measurement range
: -9.9
°C ~ 50°C (‘L0’ or ‘HI’ when out of range)
resolution
:
0.1°C
humidity
:1% ~ 99% RH
(if out of range, lower then the
display will show 1%, higher the display will
show 99%)
resolution
: 1% RH
accuracy
air pressure
:800 ~ 1100hPa
resolution
: 1hPa
measure time: every hour
High correction: -90meter ~ 1990meter
alarm duration
: 180 seconds
snooze duration
: 5 minutes
high/low alarm: outdoor temperature:
low default 0
°C (-50°C~10°C)
high default 35°C (28°C~70°C)
indoor temperature:
low default 20
°C (0°C~23°C)
high default 28°C (26°C~50°C)
power supply
: 3x 1,5V battery, format AAA
adapter:
Input voltage: 100-240VAC
Input frequency: 50/60Hz +/-3Hz
Output voltage constant: 5.0V
Output current constant: 0.3A
Output power constant: 1.5W
Input power no load: 0.08W
dimensions
: 125(H)x190(W)x15(D)mm
Outdoor-unit wind:
Temperature:
measurement range
:
-50°C ~ 70°C (‘L0’ or ‘HI’ when out of range)
resolution
:
0.1°C
humidity
:1% ~ 99% RH
(if out of range, lower then the
display will show 1%, higher the display will
show 99%)
resolution
: 1% RH
accuracy
wind speed
:0km/u ~ 127,5km/u
Resolution: 1km/u
power supply
: 4x 1,5V battery, format AA (*)
dimensions
: 382(H)x260(W)x105(D)mm
Outdoor-unit rain:
rainfall
:
measurement range:
0-6000mm
(‘---’ if outside this range)
accuracy:
+/-
10%
resolution
: 0,1mm upon precipitation <1000mm
1mm upon precipitation >1000mm
power supply
: 2x 1,5V battery, format AA (*)
dimensions
: 120(H)x164(W)x104(D)mm
Radio:
transmit frequency:
434,025 MHz
transmit interval: wind (55sec.) rain (90sec.)
range:
30m
.
RF power: < 0 dBm

15
2. INTRODUCTIE
Het Alecto WS3875 weerstation bestaat uit de volgende componenten:
Buiten-unit-wind:
De buiten-unit-wind heeft een ingebouwde windsnelheidsmeter,
windrichtingssensor, temperatuursensor, vochtigheidssensor en DCF-
ontvanger. De meetgegevens van deze sensoren worden draadloos
doorgestuurd naar de display-unit. De buiten-unit-wind wordt gevoed
door 4 x AA 1,5 Volt batterijen (excl.).
De buiten-unit-wind wordt geleverd inclusief bevestigingsmateriaal.
Buiten-unit-regen:
De buiten-unit-regen heeft een ingebouwde regenmeter. De
meetgegevens van de sensor wordt draadloos doorgestuurd naar de
display-unit. De buiten-unit-regen wordt gevoed door 2 x AA 1,5 Volt
batterijen (excl.).
Binnen-unit:
De binnen-unit ontvangt de meetgegevens van de buiten-
units en beschikt daarnaast over een eigen temperatuursensor,
vochtigheidssensor en luchtdruksensor.
De binnen-unit wordt gevoed door de meegeleverde voedingsadapter
en als back up kunnen 3 x AAA 1,5V batterijen geplaatst worden (excl.).
Alle meetgegevens wordt getoond op het 7.5” / 19,1 cm groot kleuren
LCD-scherm.
Bij gebruik van de adapter zal de snooze/light toets werken als dimmer
voor de achtergrondverlichting in 4 stappen. Bij gebruik van alleen
batterijen zal de achtergrondverlichting zijn gedoofd. Bij aanraken van
de snooze/light toets zal het scherm voor 5 seconden oplichten.
INHOUDSOPGAVE
2. INTRODUCTIE .......................................................................................15
3. OVERZICHT ...........................................................................................16
3.1 Binnen-unit:...................................................................................................................... 16
3.2 Buiten-unit wind: .............................................................................................................. 17
3.3 Buiten-unit regen: ............................................................................................................ 17
4. INSTALLATIE .........................................................................................17
4.1 Binnen-unit:...................................................................................................................... 17
4.2 Buiten-units:..................................................................................................................... 18
4.3 Buiten-unit wind: .............................................................................................................. 18
4.4 Buiten-unit regen: ............................................................................................................ 19
5. BASIS WEERGAVE EN INSTELLINGEN..............................................20
5.1 Indoor Temp en Humi: ..................................................................................................... 20
5.2 Outdoor Temp en Humi:................................................................................................... 20
5.3 Pressure Trend and Pressure:......................................................................................... 20
5.4 Moon:............................................................................................................................... 20
5.5 Klok:................................................................................................................................. 20
5.6 Wind:................................................................................................................................ 21
5.7 Regen: ............................................................................................................................. 21
5.8 Functie toetsen: ............................................................................................................... 21
6. INSTELLEN BINNEN-UNIT:...................................................................22
6.1 Mode:............................................................................................................................... 22
6.2 Datum en tijd:................................................................................................................... 22
6.3 Alarm tijd voor de wekker: ............................................................................................... 23
6.4 Hoogte correctie instelling luchtdrukmeter: ..................................................................... 23
6.5 Temperatuur alarm instelling voor buiten en binnen temperatuur:................................... 23
6.6 Regenmeter weergave extensie in mm of inch:............................................................... 23
6.7 Windsnelheid weergave extensie in km/h of mph:........................................................... 23
7. ALGEMENE BEDIENING EN FUNCTIES:.........................................24
7.1 Barometer:....................................................................................................................... 24
7.2 Tendense indicatie :...................................................................................... 24
7.3 Weersverwachting dmv iconen:....................................................................................... 24
7.4 14-daags leer mode:........................................................................................................ 24
7.5 Luchtdruk trend:............................................................................................................... 25
7.6 Temperatuur binnen en buiten:........................................................................................ 25
7.7 Luchtvochtigheid binnen en buiten: ................................................................................. 25
7.8 Maximale en minimale waarde temperatuur en luchtvochtigheid:................................... 25
7.9 Weergave maanstand:..................................................................................................... 25
7.10 Windsnelheid: .................................................................................................................. 25
7.11 Windrichting:.................................................................................................................... 25
7.12 Regenmeter:.................................................................................................................... 25
8. ONDERHOUD ........................................................................................26
8.1 Regenmeter:.................................................................................................................... 26
8.2 Buitentemperatuur- en vochtigheidssensor: .................................................................... 26
8.3 Windvaan en schoepjes van de windmolen:.................................................................... 26
9. GEBRUIK BINNEN-UNIT MET BATTERIJEN. ......................................26
10. ONTVANGST FUNCTIE. ........................................................................26
11. SPECIFICATIONS..................................................................................27

16
3. OVERZICHT
3.1 Binnen-unit:
N
E
S
W
WSW
SW
SSW SSE
SE
NE
NW
ESE
ENE
NNE
NNW
WNW
hPa
Outdoor Temp
Wind Speed
km/h
Rain Fall
Accumulated
mm
1
AAA 1,5V AAA 1,5V AAA 1,5V
N
E
S
W
WSW
SW
SSW SSE
SE
NE
NW
ESE
ENE
NNE
NNW
WNW
Ft
M
inHg
hPa
Outdoor Temp
Wind Speed
max
mph
km/h
Rain Fall
Accumulated
today
yesterday
Last hour
this week
mm inches
19
3
4
6 7 98
510 11 12
2
13 14
17
16
18
20
15
1. Functietoetsen
2. Weergave van de temperatuur & luchtvochtigheid buiten
3. Weergave van de windsnelheid
4. Weergave van de neerslag
5. Toets “Mode”
6. Weergave van de maanstand
7. Toets “instellingen”
8. Weergave van de weersverwachting
9. Toets “wekker”
10. Weergave windrichting
11. Toets “kanaal”
12. Weergave van de luchtdruk en luchtdruk trend animatie
13. Toets “omlaag/-”
14. Toets “omhoog/+”
15. Aansluiting voedingsadapter
16. Weergave van de dag en maand
17. Weergave van de actuele tijd
18. Weergave van de temperatuur & luchtvochtigheid binnen
19. Ophang-openingen
20. Batterijcompartiment voor 3 x AAA, 1,5V battterijen (excl.)

17
4. INSTALLATIE
4.1 Binnen-unit:
Algemene installatie-en plaatsingstips:
• Zorg dat de omgevingstemperatuur bij de binnen-unit niet wordt beïnvloed
door lampen, radiatoren, deuren of ramen, tocht, en dergelijke.
• Bij hangend gebruik: hang de unit vrij, dus niet achter bijvoorbeeld een
gordijn.
• Zorg dat het adaptersnoertje niet tot vallen of struikelen kan leiden.
Bind een te lang snoertje op met snoerbindertjes.
Voeding:
De hoofdvoeding van de binnen-unit wordt verzorgd door de meegeleverde
voedingsadapter. Doe het laagspanningsstekkertje van de
adapter in aansluiting DC5.0V aan de rechter zijkant van de binnen-unit en
doe de adapter in een 230V stopcontact.
Als backup, om de meetgegevens te bewaren bij een mogelijke
stroomuitval of als de adapter per ongeluk uit het stopcontact genomen
wordt, kunnen 3 stuks 1,5V AAA batterijen geplaatst worden. De
lichtintensiteit instelling zal na 5 seconden op de laagste stand gaan staan,
om de batterijcapaciteitsduur te verhogen.
3.2 Buiten-unit wind:
5
6
1
4
2
3
1. Kompas, om de buiten-unit op het noorden uit te richten
2. Mast
3. Batterijcompartiment voor 4 x AA 1,5V batterijen (excl.)
4. Windrichtingssensor
5. Hier zit de temperatuur, vochtigheidssensor en DCF ontvanger.
6. Windsnelheidssensor
7. Opvang bescherm korf voor bladeren en vuil
8. Regenmeter cabinet
9. Montage voetjes
10. Lipje om cabinet te kunnen verwijderen
11. Schoepjes om regenhoeveelheid te meten
12. Batterijcompartiment voor 2 x AA 1,5V batterijen (excl.)
note:
Omdat normale Alkaline batterijen niet of slecht presteren bij
temperaturen van rond of onder 0°C, is het toepassen van standaard
Alkaline batterijen in de buiten-unit niet aan te bevelen. Voor de
buiten-units adviseren wij dan ook om Lithium batterijen te plaatsen die
ontwikkeld zijn om te functioneren bij een temperatuurbereik van -20°C
tot 60°C. Deze batterijen zijn leverbaar via de serviceafdeling van Alecto
op telefoonnummer 073 6411 355 (Nederland) of 03 238 5666 (België)
of via internet www.alecto.nl.
De batterij levensduur bij Lithium batterijen met een capaciteit van
900mAh bedraagt ruim een jaar.
3.3 Buiten-unit regen:
7
8
11
9
10
AA 1,5V
AA 1,5V
12

18
1. Open het batterijcompartiment
aan de achterzijde van de
binnen-unit.
2. Plaats de eerste batterij en schuif
deze helemaal naar links.
3. Plaats de tweede batterij en
schuif deze ook naar links.
4. Plaats de derde batterij.
5. Plaats tot slot de batterijdeksel
terug.
Hangen of staan:
Naar keuze kan de binnen-unit losstaand op een kast of bureau geplaatst
worden (klap hiertoe de standaard aan de achterzijde van de binnen-unit
uit) of kan de unit aan de wand gehangen worden (zie de sleutelgat-
openingen aan de achterzijde.
4.2 Buiten-units:
Algemene installatie-en plaatsingstips:
• Controleer eerst of de buiten-units binnen bereik zijn van de binnen-
afstand tussen de buiten-units en de binnen-unit aan tot 30 meter.
• Zorg dat de buiten-units minimaal 1,5 meter boven de grond geplaatst
worden en dat de unit vrij in de regen en in de wind staat.
• Om de buiten-units zo nauwkeurig mogelijk te laten werken, moeten
de buiten-units zo exact mogelijk horizontaal staan. Voor de buiten-unit
regen controleer of de ondergrond waterpas is voordat deze wordt
gemonteerd.
• Om aan te kunnen geven uit welke richting de wind vandaan komt,
moet de buiten-unit wind op het Zuiden gericht worden. Zie hiervoor de
aanduiding S onder op de buiten-unit wind. Gebruik het kompas op de
buiten-unit wind, om de unit goed te richten.
• Zorg dat de buiten-units vrij hangen en/of staan. Vooral de
windsnelheidsmeter en het windvaantje moeten in de directe wind
hangen.
AAA 1,5V AAA 1,5V AAA 1,5V
• Zoek een locatie waar de kans op inwaaiende bladeren minimaal is. In
het regenbakje gewaaide bladeren kunnen de regenmeter blokkeren
of de meetresultaten beïnvloeden. In elk geval adviseren wij om de
buiten-units zodanig te plaatsen dat redelijk eenvoudig eventueel
ingewaaide bladeren verwijderd kunnen worden en de batterijen in de
buiten-units vervangen kunnen worden.
• Wellicht kunnen de buiten-units eerst een week binnen handbereik
gehouden worden om alle functies uit te proberen. Geef de buiten-
4.3 Buiten-unit wind:
Aanmelden:
aanmelden op de binnen-unit. Als de binnen-unit voorzien is van batterijen
gaat de binnen-unit de eerste 5 minuten zoeken naar buiten-units.
Na deze 5 minuten kan de binnen-unit met de hand op ontvangen worden
gezet. Druk hiervoor voor 2 seconden op toets om de binnen-unit in de
ontvangst modus te zetten.
Plaats 4 x 1,5V AA batterijen in de buiten-unit wind. zie afbeelding. Zet
de Channel schakelaar op het kanaal wat ook is geselecteerd op de
binnen-unit. Druk daarna op toets TX. Controleer of de binnen-unit het
signaal heeft ontvangen. Herhaal eventueel het drukken op de TX knop.
De buitentemperatuur, en luchtvochtigheid worden via de buiten-unit wind
weergegeven op de binnen-unit.
Als de buiten-unit gegevens
verschijnen op het display is de
buiten-unit wind aangemeld.
Om de ontvangst van de DCF-77
tijd uit te schakelen, druk op de
toets “WAVE”. Om de ontvangst
van DCF-77 daarna weer aan te
zetten, meld dan de buiten-unit op
nieuw aan door even de batterijen
los te maken en opnieuw te
plaatsen en de aanmeld procedure
te herhalen.
S
AA 1,5V
AA 1,5V
AA 1,5V
AA
1V
A
AA 1,5V
TX
WAVE
1 2 3
TX
WAVE

19
4.4 Buiten-unit regen:
Aanmelden:
Verwijder de schroeven van het
batterij vak aan de onderzijde van de
regenmeter. Schuif de batterijdeksel
van de schroefgaten af, en verwijder
de batterijdeksel. Plaats 2 x 1,5V
AA batterijen in het batterij vak zoals
aangegeven in de afbeelding:
Plaats de batterij binnen de
5 minuten aanmeldtijd van de
binnen-unit, of zet de binnen-unit op ontvangen.
Als de binnen-unit op ontvangen staat dienen zowel de wind en regen-unit
te worden aangemeld.
Het plaatsen van de batterijen is voldoende. Zodra de regen-unit zend wordt
dit gedetecteerd door de binnen-unit en verdwijnen de ---- van het display.
Plaats de batterijdeksel terug en schroef deze vast met de schroefjes. dit
zorgt ervoor dat de batterijen niet nat worden.
De batterijen dienen te worden geplaatst voordat de regenmeter wordt
gemonteerd.
Plaatsen:
Zet de regenmeter op een horizontale
ondergrond, waar de regen niet wordt
tegengehouden. Schroef de regenmeter
vast door de schroeven door de pootjes te
plaatsen.
Om de batterijen te vervangen dient
de regenmeter eerst te worden los
geschroefd.
Plaatsen:
Schuif de aluminium mast in de
montagevoet en schroef deze met
meegeleverd schroeven vast. Deze
montage voet kan op een horizontaal of
verticaal vlak worden gemonteerd. Houdt
er rekening mee dat de buiten-unit wind
nog wel naar het noorden moet worden
uitgericht. Zorg dat er voldoende ruimte
is om dit adequaat te kunnen doen.
Schroef de voet vast, met meegeleverde
schroeven en pluggen, aan
een houten of stenen muur.
Schuif de buiten-unit wind op
de pijp en schroef deze met
meegeleverd schroeven vast.
Richt de buiten-unit wind met
behulp van het kompas uit
zodat de windrichting van de
buiten-unit klopt.
De windsnelheid
sensor, temperatuur en
luchtvochtigheid en wind richting gedeelte dient richting zuid te staan. zie
afbeelding:
S
N
E
S
W
WS ES
EN
WN
S
AA 1,5V
AA 1,5V

20
Reinigen:
Verwijder rasterbord en reinig
deze. Verwijder alle blaadjes uit de
regendoorvoer. Met behulp van een
inbussleutel kan de kap worden
verwijderd door het interne lipje in te
drukken en de kap omhoog te trekken.
Bij problemen kan ook de regenmeter los
worden geschroefd.
Maak nu het wipje en alle gaten goed
schoon. Plaats het kapje terug door eerst
de achterzijde in te haken en dan voor
door drukken tot de klik. Controleer of de
kap vast zit. Plaats het rasterbord terug.
5. BASIS WEERGAVE EN INSTELLINGEN
5.1 Indoor Temp en Humi:
• Binnentemperatuur en luchtvochtigheid binnen.
• Weergave van de binnentemperatuur in °C of °F.
• Druk op om te wisselen tussen °C of °F.
• Weergave van de luchtvochtigheid binnen in %.
• Tendens weergave hoger, gelijk of lager.
• Instelbaar temperatuur hoog/laag alarm.
5.2 Outdoor Temp en Humi:
• Weergave van buiten-unit wind kanaal 1, 2, 3 of wisselende weergave.
• Buitentemperatuur en luchtvochtigheid buiten.
• Weergave van de buitentemperatuur in °C of °F.
• Druk op om te wisselen tussen °C of °F.
• Weergave van de luchtvochtigheid buiten in %.
• Tendens weergave hoger, gelijk of lager.
• Instelbaar temperatuur hoog/laag alarm.
5.3 Pressure Trend and Pressure:
• Weergave van luchtdrukverloop en luchtdruk met weersverwachting
door iconen.
• Luchtdrukverloop 12 uur
terug zien en totaalverschil van
12 hPa.
• Luchtdrukwaarde in: Ft, M, inHG,
en hPa.
• Weergave luchtdruk tendens
• 14 daagse leermodus.
5.4 Moon:
• Weergaveindicatie van de maanstand.
• Tussen 18.00 uur en 06.00 uur worden de sterren
weergegeven
5.5 Klok:
• Weergave van tijd met de datum.
• Indicatie DCF-77 tijd synchronisatie
ontvangst.
• Wekker functie met sluimerfunctie.
N
E
S
W
WSW
SW
SSW SSE
SE
NE
NW
ESE
ENE
NNE
NNW
WNW
hPa
Outdoor Temp
Wind Speed
km/h
Rain Fall
Accumulated
mm
N
E
S
W
WSW
SW
SSW SSE
SE
NE
NW
ESE
ENE
NNE
NNW
WNW
hPa
Outdoor Temp
Wind Speed
km/h
Rain Fall
Accumulated
mm
N
E
S
W
WSW
SW
SSW SSE
SE
NE
NW
ESE
ENE
NNE
NNW
WNW
hPa
Outdoor Temp
Wind Speed
km/h
Rain Fall
Accumulated
mm
N
E
S
W
WSW
SW
SSW SSE
SE
NE
NW
ESE
ENE
NNE
NNW
WNW
hPa
Outdoor Temp
Wind Speed
km/h
Rain Fall
Accumulated
mm
N
E
S
W
WSW
SW
SSW SSE
SE
NE
NW
ESE
ENE
NNE
NNW
WNW
hPa
Outdoor Temp
Wind Speed
km/h
Rain Fall
Accumulated
mm
Table of contents
Languages:
Other Alecto Weather Station manuals

Alecto
Alecto WS-1050 User manual

Alecto
Alecto WS-5300 User manual

Alecto
Alecto WS-3850 User manual

Alecto
Alecto WS-2300 User manual

Alecto
Alecto WS5400 User manual

Alecto
Alecto WS-3300 User manual

Alecto
Alecto WS-1700 User manual

Alecto
Alecto WS-4800 User manual

Alecto
Alecto WS-1550 User manual

Alecto
Alecto WS-150 User manual

Alecto
Alecto WS-1550 User manual

Alecto
Alecto WS-1700 User manual

Alecto
Alecto WS-1150 User manual

Alecto
Alecto WS-4900 User manual

Alecto
Alecto WS-1650 User manual

Alecto
Alecto WS-3800 User manual

Alecto
Alecto WS-2300 User manual

Alecto
Alecto WS-4700 User manual

Alecto
Alecto WS-4900 User manual

Alecto
Alecto WS5200 User manual