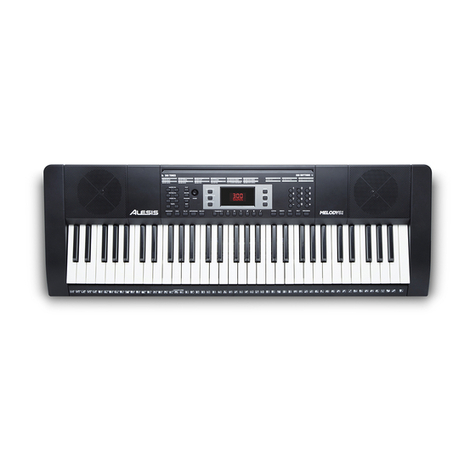
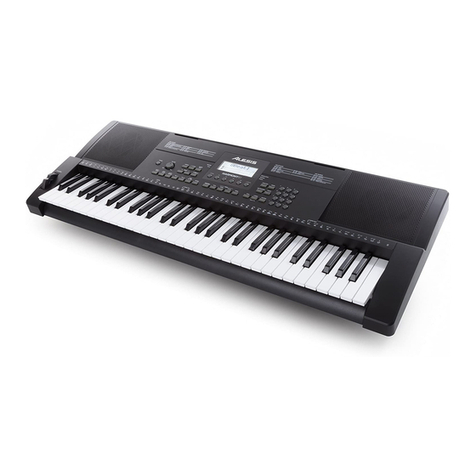
Alesis Melody61 MKII User manual

User Guide
English ( 3 – 9 )
Guía del usuario
Español ( 10 – 16 )
Guide d’utilisation
Français ( 17 – 23 )
Guida per l’uso
Italiano ( 24 – 30 )
Benutzerhandbuch
Deutsch ( 31 – 37 )
Appendix
English ( 38 )

2

3
User Guide (English)
Introduction
Box Contents
Melody 61
Microphone
Headphones
Keyboard Stand
Bench
Power Adapter
User Guide
Safety & Warranty Manual
Support
For the latest information about this product (system requirements, compatibility information,
etc.) and product registration, visit alesis.com.
For additional product support, visit alesis.com/support.
Setup
Bench
1 2 3

4
Stand
A
B
C(x2) D(x2) E(x2)
F(x8)
CC
DD
H IIH
F F
EE
B
A
F F
G(x2)
H(x4)
I (x4)
GG
1
2
3

5
UDISK AUDIO
INPUT
MIC PHONES/
OUTPUT
9V
Connection Diagram
Items not listed in Introduction > Box Contents are sold separately.
Microphone
Power
USB Flash Drive
Headphones
Music Player

6
Features
Top Panel
1. Power On/Off: Press this button to turn the keyboard on or off.
2. Transpose: Press the Transpose + or Transpose – button to increase or decrease the
key by a half-step. Press the Transpose + and Transpose – buttons simultaneously to
reset to the default value.
3. Rhythm Volume: Press the Rhythm Vol + or Rhythm Vol – button to increase or
decrease the rhythm volume. Press the Rhythm Vol + and Rhythm Vol – simultaneously
to reset to the default value.
4. Chord Volume: Press the Chord Vol + or Chord Vol –button to increase or decrease the
chord volume. Press the Chord Vol + and Chord Vol – buttons simultaneously to reset to
the default value.
5. Master Volume: Press the Master Vol + or Master Vol – button to increase or decrease
the overall volume for the sounds and rhythms. Press the Master Vol + and Master Vol –
buttons simultaneously to reset to the default value.
6. Te m p o : Press the Te m p o + or Te mpo – button to increase or decrease the rhythm
speed. Press the Te m p o + and Te m p o – buttons simultaneously to reset to the default
value.
7. Demo Songs: Press this to hear the 10 demonstration songs. Use the number buttons or
+or – buttons during playback to select another demonstration song.
8. One-Key: Press this button to start the Intelligent Teaching Function lesson 1.
9. Follow: Press this button to start the Intelligent Teaching Function lesson 2.
10. Ensemble: Press this button to start the Intelligent Teaching Function lesson 3.
11. LED Display: Shows the various keyboard functions and numerical values.
12. Program: Press this button to program a custom rhythm.
13. Play: Press this button to playback a custom rhythm.
14. Record: Press this button to record a custom rhythm.
15. To n e : Select from the 200 sounds using the number buttons or pressing + or –.
16. Rhythm: Press this button to activate the corresponding accompaniment rhythm. Select
another rhythm using the number buttons or pressing +or –.
17. Numbers: Use these buttons to select an instrument, rhythm, song, or tempo.
18. Sync: Press the Sync button, and then play the keys in the lowest two octaves
(corresponding to the chords/notes). The play-along feature starts immediately when
playing a key, instead of having to press the Start/Stop button to start it.
19. Start/Stop: Press to start or stop an accompaniment rhythm.
20. Fill-In: Press this button to have a temporary rhythm play during the accompaniment
rhythm.
21. Single: Press this button after starting a rhythm to use the automatic chord
accompaniment and play a single chord on the keys in the AUTO BASS CHORD area of
the keyboard, which is F# and below. You can play any major chord by pressing a key in
this area. Press this button again to disable the chord function.
TONE
USB Music
Player
000-007 PIANO
008-015 MALLET
016-023 ORGAN
024-031 GUITAR
032-039 BASS
040-047 STRINGS
048-055 STRING ENSEMBLE
056-063 BRASS
064-071 REEDS
072-079 FLUTE
080-087 LEAD
088-095 PADS
096-103 FX
104-111 ETHNIC
112-119 PERCUSSION
120-128 SOUND EFFECTS
129-133 SYNTH PERCUSSION
134-143 SYNTH ORGAN
144-159 SYNTH GUITAR
160-172 SYNTH STRINGS
173-187 SYNTH REEDS
188-199 SYNTH BRASS
000-042 8 BEAT/16 BEAT
043-046 BALLAD
047-062 JAZZ/EUROPEAN
063-100 LATIN
101-106 MARCH/POLKA
107-113 COUNTRY/WESTERN
114-118 ASIAN
119-127 WALTZ
25
25
25
25
1
2
3
4
5
6
78
9
10
10
11
11
12
12
13
13
14
14
15
15
17
17
18
18
19
19
20
20
21
21
22
22
23
23
16
16
24
24
25
25
26
26
27
27
28
28
29
29
30
30
31
31
32
32
33
33
34
34
35
35
36
36

7
22. Fingered: Press this button after starting a rhythm to use the automatic chord
accompaniment and play a fingered chord on the keys in the AUTO BASS CHORD area
of the keyboard, which is F# and below. You can play all the keys of a chord, including
inverted chords. Press this button again to disable the chord function.
23. Chord Timbre: Press this button to change the musical tone of the notes in the
accompanying chord.
24. Metronome: The metronome contains four tempos: 1/4, 2/4, 3/4 and 4/4, respectively.
Press this button continuously to cycle through and select one of the four tempos. To
disable the metronome, wait 4 seconds and then press the button again.
25. Sustain: Press this button to activate a sustain effect which simulates a sustain pedal
when playing the keyboard. Press this button again to disable the sustain effect.
26. Vibrato: Press this button to activate a pulsating change to the pitch when playing the
keyboard. Press this button again to disable to vibrato effect.
27. Dual: Press this button to layer two sounds together. The sound that you were using
before pressing the Dual button will be used for one part of the layer. To select the other
sound for the layer, press the Chord Timbre button and enter a number for the sound or
use the +and –buttons. Press the Dual button again to disable the dual-tone function.
28. Split: Press this button to split the keyboard into two zones. The sound that you were
using before pressing the Split button will be applied to the left-hand side of the
keyboard. To select a sound for the right-hand side, press the Chord Timbre button and
enter a number for the sound or use the +and –buttons. Press the Split button again to
disable the keyboard split.
29. Keyboard Percussion: Press this button to play the built-in drumkit and percussion
sounds. Press this button again to disable the keyboard percussion function.
30. Effect: Press this button to select between one of five EQ settings for MP3 music
playback.
31. MP3 Volume Control: Adjusts the volume for the MP3 file playback.
32. Previous: Selects the previous MP3 track on the USB flash drive.
33. Next: Selects the next MP3 track on the USB flash drive.
34. Play/Pause: Playback or pause a MP3 file on the USB flash drive.
35. Stop: Stop the playback of a MP3 file on the USB flash drive.
36. Playback Mode: Select to playback order of continuous, random, and single.
Rear Panel
1. USB Port: Connect a USB
flash drive here to playback
MP3 files.
2. Audio Input: Connect a
smartphone, MP3 player, or
similar audio device here to
play the audio signal through
the keyboard speakers or
headphone output.
3. Mic Input: Connect a microphone here to sing while playing the keyboard.
4. Phones/Output: Connect headphones here to hear the keyboard sounds, rhythms,
songs, audio input source, or microphone source.
5. Power Input: Connect the included power adapter here.
Bottom Panel
1. Battery Compartment: Install 6 “AA”
batteries here to power the keyboard if you
are not using the power adapter.
1
UDISK AUDIO
INPUT
MIC PHONES/
OUTPUT
9V
12 3 45

8
Operation
Rhythm Control
1. Press the Start/Stop button to start the accompaniment rhythm.
2. Play the keys on the keyboard.
3. Press the Fill-in button for a quick intermediate rhythm part to begin playing.
4. Press the Start/Stop button to stop the accompaniment rhythm.
Recording Function
1. Press the Rec button to start recording. When the memory is full, the screen will display
“FUL”, and recording will automatically stop.
2. During the recording process, press Play to stop recording. Press Play again to play the
recorded notes.
3. Press Play again to stop playback.
Note: The recorded notes will be erased when recording is started again or when the
keyboard is turned off.
Rhythm Programming
Create custom rhythms by playing the keyboard keys.
1. Press the Prog button and start programming the rhythm by playing each note in the
pattern, one at a time.
2. Press Play to stop programming and hear the programmed rhythm.
3. Press the Prog button again to disable the programming function and erase the
programming data.
Note: The programmed rhythm will be erased when programming is performed again or if the
keyboard is turned off.

9
Intelligent Teaching Function
This function is divided into three parts to guide in learning to play the keyboard. Use the exercise One-Key
to get familiar with the melody and rhythm of a song, use the Follow exercise for accurate playing of the
song notes, and then use the Ensemble exercise to freely play with others.
Teaching 1: One-Key
When the One-Key button is pressed, the One-Key teaching function is enabled, and the screen displays
the number of the current demonstration song for teaching. You can select the song to be learned by
pressing the number button or pressing +or –. One-Key teaching allows for mistakes when playing the
keys, but the keyboard still plays correct notes. The One-Key teaching can be disabled by pressing the
One-Key button again.
Teaching 2: Follow
When the Follow button is pressed, the Follow teaching function is enabled, and the screen displays the
number of the current demonstration song for teaching. You can select the song to be learned by pressing
the number button or pressing +or –. The display will then show the correct note to play and will wait for
you to play it before it moves to the next note. This will continue until the song is finished. The Follow
teaching function can be disabled by pressing the Follow button again.
Teaching 3: Ensemble
When the Ensemble button is pressed, the Ensemble teaching function is enabled, and the screen displays
the number of the current demonstration song for teaching. You can select the song to be learned by
pressing the number button or pressing +or –. The Ensemble teaching is used when you are able to play
the correct song notes. If a note is not played within 3 seconds, the keyboard will automatically play the
correct note. The Ensemble teaching function can be disabled by pressing the Ensemble button again.
MP3 File Playback
Insert a USB flash drive to select MP3 files for playback.
•Press to go to the previous track.
•Press to go to the next track.
•Press to play/pause a track.
•Press to stop a playing track.
•Press to cycle through the repeat modes for continuous, random, or single playback.
•Press the buttons to adjust the volume.
•Press the Effect button to cycle through one of five EQ settings until you find one that sounds best for
your MP3 music. The five EQ settings are Normal, Pop, Rock, Jazz, and Classical.
Note: Be sure your USB thumb drive is formatted as FAT32. Other formats, such as NTFS, will not work.
When adding MP3 files to your USB thumb drive, place them on the root directory of the drive. Do not place
them into any folders, or they will not be recognized.

10
Guía del usuario (Español)
Introducción
Contenido de la caja
Melody 61
Micrófono
Auriculares
Soporte para teclado
Banco
Adaptador de corriente
Guía del usuario
Manual sobre la seguridad y garantía
Soporte
Para obtener la información más reciente acerca de este producto (requisitos de sistema,
información de compatibilidad, etc.) y registrarlo, visite alesis.com.
Para obtener soporte adicional del producto, visite alesis.com/support.
Instalación
Banco
1 2 3

11
Soporte
A
B
C(x2) D(x2) E(x2)
F(x8)
CC
DD
H IIH
F F
EE
B
A
F F
G(x2)
H(x4)
I (x4)
GG
1
2
3

12
UDISK AUDIO
INPUT
MIC PHONES/
OUTPUT
9V
Diagrama de conexión
Los elementos que no se enumeran en Introducción > Contenido de la caja se venden por
separado.
Micrófono
Suministro
eléctrico
Unidad flash USB
Auriculares
Reproductor
de música

13
Características
Panel superior
1. Encendido/apagado: Pulse este botón para encender o apagar el teclado.
2. Transponer: Pulse el botón Transp ose + o Transp ose – para aumentar o disminuir el
tono en medio tono. Pulse los botones Transpose + y Transpose – simultáneamente
para restaurar el valor por defecto.
3. Volumen del ritmo: Pulse el botón Rhythm Vol + o Rhythm Vol – para aumentar o
disminuir el volumen del ritmo. Pulse los botones Rhythm Vol + y Rhythm Vol –
simultáneamente para restaurar el valor por defecto.
4. Volumen de los acordes: Pulse el botón Chord Vol + o Chord Vol –para aumentar o
disminuir el volumen de los acordes. Pulse los botones Chord Vol + y Chord Vol –
simultáneamente para restaurar el valor por defecto.
5. Volumen maestro: Pulse el botón Master Vol + o Master Vol – para aumentar o
disminuir el volumen general para los sonidos y los ritmos. Pulse los botones Master Vol
+y Master Vol –simultáneamente para restaurar el valor por defecto.
6. Te m p o : Pulse el botón Te m p o + o Tempo – para aumentar o disminuir la velocidad del
ritmo. Pulse los botones Te m p o + y Te m p o – simultáneamente para restaurar el valor por
defecto.
7. Canciones de demostración: Pulse este botón para escuchar las 10 canciones de
demostración. Utilice los botones numéricos o los botones +o – durante la reproducción
para seleccionar otra canción de demostración.
8. Una sola tecla Pulse este botón para comenzar la primera lección de la función de
enseñanza inteligente.
9. Seguimiento: Pulse este botón para comenzar la segunda lección de la función de
enseñanza inteligente.
10. Conjunto: Pulse este botón para comenzar la tercera lección de la función de enseñanza
inteligente.
11. Pantalla de LED: Muestra las diversas funciones del teclado y valores numéricos.
12. Programa: Pulse este botón para programar un ritmo personalizado.
13. Reproducir: Pulse este botón para reproducir un ritmo personalizado.
14. Grabar: Pulse este botón para grabar un ritmo personalizado.
15. To n o : Seleccione uno de los 200 sonidos utilizando los botones numéricos o pulsando +
o –.
16. Ritmo: Pulse este botón para activar el ritmo de acompañamiento correspondiente.
Seleccione otro ritmo utilizando los botones numéricos o pulsando +o –.
17. Números: Utilice estos botones para seleccionar un instrumento, ritmo, canción o
tempo.
18. Sincronización: Pulse el botón Sync y luego toque las teclas de las dos octavas más
bajas (correspondientes a los acordes/notas). La característica para tocar sobre pistas
comienza inmediatamente al tocar una tecla, en lugar de tener que pulsar el botón
Start/Stop para que empiece.
19. Iniciar/parar: Pulse este botón para iniciar o detener un ritmo de acompañamiento.
TONE
USB Music
Player
000-007 PIANO
008-015 MALLET
016-023 ORGAN
024-031 GUITAR
032-039 BASS
040-047 STRINGS
048-055 STRING ENSEMBLE
056-063 BRASS
064-071 REEDS
072-079 FLUTE
080-087 LEAD
088-095 PAD S
096-103 FX
104-111 ETHNIC
112-119 PERCUSSION
120-128 SOUND EFFECTS
129-133 SYNTH PERCUSSION
134-143 SYNTH ORGAN
144-159 SYNTH GUITAR
160-172 SYNTH STRINGS
173-187 SYNTH REEDS
188-199 SYNTH BRASS
000-042 8 BEAT/16 BEAT
043-046 BALLAD
047-062 JAZZ/EUROPEAN
063-100 LATIN
101-106 MARCH/POLKA
107-113 COUNTRY/WESTERN
114-118 ASIAN
119-127 WALTZ
25
25
25
25
1
2
3
4
5
6
78
9
10
10
11
11
12
12
13
13
14
14
15
15
17
17
18
18
19
19
20
20
21
21
22
22
23
23
16
16
24
24
25
25
26
26
27
27
28
28
29
29
30
30
31
31
32
32
33
33
34
34
35
35
36
36

14
20. Relleno: Pulse este botón para hacer que se reproduzca un ritmo temporal durante el
ritmo de acompañamiento.
21. Single: Pulse este botón una vez comenzado un ritmo para utilizar el acompañamiento
de acordes automático y toque un acorde único en las teclas en la zona AUTO BASS
CHORD del teclado, la cual se extiende desde F# hacia abajo. Puede reproducir
cualquier acorde mayor tocando una tecla en esta zona. Pulse este botón nuevamente
para desactivar la función de acordes.
22. Digitados: Pulse este botón una vez comenzado un ritmo para utilizar el
acompañamiento de acordes automático y toque un acorde único en las teclas en la
zona AUTO BASS CHORD del teclado, la cual se extiende desde F# hacia abajo. Puede
reproducir todas las teclas de un acorde, incluyendo los acordes invertidos. Pulse este
botón nuevamente para desactivar la función de acordes.
23. Timbre del acorde: Pulse este botón para cambiar el tono musical de las notas del
acorde de acompañamiento.
24. Metrónomo: El metrónomo contiene cuatro tempos: 1/4, 2/4, 3/4 y 4/4 respectivamente.
Pulse este botón continuamente para recorrer los cuatro tempos y seleccionar uno de
ellos. Para desactivar el metrónomo, espere 4 segundos y luego pulse el botón
nuevamente.
25. Sostenido: Pulse este botón para activar un efecto de sostenido que simula el pedal de
sostenido cuando se toca el teclado. Pulse este botón nuevamente para desactivar el
efecto de sostenido.
26. Vibrato: Pulse este botón para activar un cambio pulsante al tono al tocar el teclado.
Pulse este botón nuevamente para desactivar el efecto de vibrato.
27. Dual: Pulse este botón para disponer dos sonidos en capas. El sonido que estaba
utilizando antes de pulsar el botón Dual se utilizará en una parte de la capa. Para
seleccionar el otro sonido de la capa, pulse el botón Chord Timbre e introduzca un
número para el sonido o utilice los botones +y –. Pulse el botón Dual nuevamente para
desactivar la función de tono doble.
28. División: Pulse este botón para dividir el teclado en dos zonas. El sonido que estaba
utilizando antes de pulsar el botón Split se aplicará al lado izquierdo del teclado. Para
seleccionar el sonido del lado derecho, pulse el botón Chord Timbre e introduzca un
número para el sonido o utilice los botones +y –. Pulse el botón Split nuevamente para
desactivar la división del teclado.
29. Percusión con teclado: Pulse este botón para reproducir los sonidos de percusión y
batería integrados. Pulse este botón nuevamente para desactivar la función de percusión
con teclado.
30. Efecto: Pulse este botón para seleccionar uno de los cinco ajustes de ecualización para
la reproducción de música en MP3.
31. Control de volumen de MP3: Ajusta el volumen de la reproducción de archivos MP3.
32. Anterior: Selecciona la pista MP3 anterior en la unidad de memoria USB.
33. Siguiente: Selecciona la pista MP3 siguiente en la unidad de memoria USB.
34. Reproducir/Pausa: Reproduce o hace una pausa en el archivo MP3 de la unidad de
memoria USB.
35. Detener: Detiene la reproducción del archivo MP3 de la unidad de memoria USB.
36. Modo de reproducción: Selecciona el orden de reproducción entre continuo, aleatorio e
individual.

15
Panel trasero
1. Puerto USB: Conecte aquí
una unidad de memoria USB
para reproducir archivos
MP3.
2. Entrada de audio: Conecte
aquí un teléfono inteligente
(smartphone), reproductor
de MP3 o dispositivo de
audio similar para reproducir la señal de audio a través de los altavoces del teclado o la
salida para auriculares.
3. Entrada para micrófono: Conecte aquí con micrófono para cantar durante la
reproducción del teclado.
4. Auriculares/salida: Conecte auriculares aquí para escuchar los sonidos, ritmos,
canciones y la fuente de entrada de audio del teclado, o la fuente del micrófono.
5. Entrada de corriente: Conecte aquí el adaptador de corriente incluido.
Panel inferior
1. Compartimiento para pilas: Instale aquí 6
baterías "AA" para alimentar el teclado digital
Recital si no está utilizando el adaptador de
corriente.
Funcionamiento
Control del ritmo
1. Pulse el botón Start/Stop para iniciar el ritmo de acompañamiento.
2. Toque algunas teclas en el teclado.
3. Pulse el botón Fill-in para iniciar la reproducción de una parte rítmica intermedia rápida.
4. Pulse el botón Start/Stop para detener el ritmo de acompañamiento.
Función de grabación
1. Pulse el botón Rec para comenzar la grabación. Cuando la memoria se encuentre llena,
la pantalla mostrará “FUL” y la grabación se detendrá automáticamente.
2. Durante el proceso de grabación, pulse Play para detener la grabación. Pulse Play
nuevamente para reproducir las notas grabadas.
3. Pulse Play nuevamente para detener la reproducción.
Nota: Las notas grabadas se borrarán cuando se inicie una nueva grabación o cuando se
apague el teclado.
Programación de ritmos
Cree ritmos personalizados tocando las teclas del teclado.
1. Pulse el botón Prog y comience a programar el ritmo tocando cada una de las notas del
patrón de a una a la vez.
2. Pulse Play para detener la programación y escuchar el ritmo programado.
3. Pulse el botón Prog nuevamente para desactivar la función de programación y borrar los
datos programados.
Nota: El ritmo programado se borrará cuando se realice una nueva programación o cuando se
apague el teclado.
1
UDISK AUDIO
INPUT
MIC PHONES/
OUTPUT
9V
12 3 45

16
Función de enseñanza inteligente
Esta función se divide en tres partes para guiar el aprendizaje del estudiante de teclado. Utilice el ejercicio
Una sola tecla para familiarizarse con la melodía y ritmo de una canción, el ejercicio Seguimiento para la
interpretación precisa de las notas de una canción y finalmente el ejercicio Conjunto para tocar libremente
con los demás.
Lección 1: Una sola tecla
Cuando se pulsa el botón One-Key se activa la función de aprendizaje Una sola tecla y la pantalla muestra
el número de la canción de demostración actual para el aprendizaje. Puede seleccionar la canción a
aprender pulsando el botón numérico o pulsando +o –. La lección Una sola tecla permite errores al tocar
las teclas, pero aun así el teclado reproduce las notas correctas. La lección Una sola tecla puede
desactivarse presionando el botón One-Key nuevamente.
Lección 2: Seguimiento
Cuando se pulsa el botón Follow se activa la función de aprendizaje Seguimiento y la pantalla muestra el
número de la canción de demostración actual para el aprendizaje. Puede seleccionar la canción a aprender
pulsando el botón numérico o pulsando +o –. En ese momento la pantalla mostrará la nota correcta a
reproducir y esperar a hasta que la toque antes de pasar a la siguiente nota. Esto continuará hasta finalizar
la canción. La función de aprendizaje Seguimiento puede desactivarse presionando el botón Follow
nuevamente.
Lección 3: Conjunto
Cuando se pulsa el botón Ensemble se activa la función de aprendizaje Conjunto y la pantalla muestra el
número de la canción de demostración actual para el aprendizaje. Puede seleccionar la canción a aprender
pulsando el botón numérico o pulsando +o –. La lección Conjunto se utiliza cuando ya es capaz de tocar
las notas correctas de una canción. Si no se toca ninguna nota durante 3 segundos, el teclado reproducirá
automáticamente la nota correcta. La función de aprendizaje Conjunto puede desactivarse presionando el
botón Ensemble nuevamente.
Reproducción de archivos MP3
Inserte una unidad de memoria USB para seleccionar los archivos MP3 a reproducir.
•Pulse para regresar a la pista anterior.
•Pulse para pasar a la pista siguiente.
•Pulse para reproducir/pausar una pista.
•Pulse para detener la reproducción de una pista.
•Pulse para recorrer los modos de repetición y elegir entre una reproducción continua,
aleatoria o individual.
•Pulse los botones para ajustar el volumen.
•Pulse el botón Effect para recorrer los cinco ajustes de ecualización hasta encontrar el que hace que
su música en MP3 suene mejor. Los cinco ajustes de ecualización son normal, pop, rock, jazz y
clásica.
Nota: Asegúrese de que su unidad de memoria USB esté formateada en FAT32. Otros formatos, tales
como NTFS, no funcionarán. Al añadir archivos MP3 a su unidad de memoria USB, colóquelos en el
directorio raíz de la unidad. No los coloque en carpetas ya que no serán reconocidos.

17
Guide d’utilisation (Français)
Présentation
Contenu de la boîte
Melody 61
Microphone
Casque d'écoute
Support pour clavier
Banc
Câble d’alimentation
Guide d'utilisation
Consignes de sécurité et informations concernant la garantie
Assistance technique
Pour les toutes dernières informations concernant la configuration système requise, la
compatibilité, etc., et l’enregistrement du produit, veuillez visiter alesis.com.
Pour de l’assistance supplémentaire, veuillez visiter alesis.com/support.
Installation
Banc
1 2 3

18
Support pour clavier
A
B
C(x2) D(x2) E(x2)
F(x8)
CC
DD
H IIH
F F
EE
B
A
F F
G(x2)
H(x4)
I (x4)
GG
1
2
3

19
UDISK AUDIO
INPUT
MIC PHONES/
OUTPUT
9V
Schéma de connexion
Les éléments qui ne figurent pas dans la section Présentation > Contenu de la boîte sont
vendus séparément.
Microphone
Alimentation
Clé USB
Casque d’écoute
Lecteur multimédia

20
Caractéristiques
Panneau supérieur
1. Interrupteur d’alimentation : Cette touche permet de mettre le clavier sous et hors
tension.
2. Transposition : Utilisez les touches Transpose + et Transpose – afin d'augmenter ou de
diminuer la transposition du clavier. Appuyez sur les deux touches Transpose + et
Transpose – simultanément afin de réinitialiser la valeur par défaut.
3. Volume du rythme : Utilisez les touches Rhythm Vol + et Rhythm Vol – afin d'augmenter
ou de diminuer le volume du rythme. Appuyez sur les deux touches Rhythm Vol + et
Rhythm Vol – simultanément afin de réinitialiser la valeur par défaut.
4. Volume de l’accord : Utilisez les touches Chord Vol + et Chord Vol –afin d'augmenter
ou de diminuer le volume de l’accord. Appuyez sur les deux touches Rhythm Chord Vol
+et Chord Vol –simultanément afin de réinitialiser la valeur par défaut.
5. Volume général : Utilisez les touches Master Vol + et Master Vol – afin d'augmenter ou
de diminuer le volume général pour tous les sons et rythmes. Appuyez sur les deux
touches Master Vol + et Master Vol – simultanément afin de réinitialiser la valeur par
défaut.
6. Te m p o : Utilisez les touches Tempo + et Temp o – afin d'augmenter ou de diminuer la
vitesse du tempo. Appuyez sur les deux touches Tempo + et Te m p o – simultanément
afin de réinitialiser la valeur par défaut.
7. Chansons de démonstration : Appuyez sur cette touche pour jouer les 10 chansons de
démonstration. Utilisez les touches numériques ou les touches + et –durant la lecture
pour sélectionner une autre chanson de démonstration.
8. One-Key : Cette touche permet de lancer la leçon 1 de la fonction d’apprentissage
intelligente.
9. Follow : Cette touche permet de lancer la leçon 2 de la fonction d’apprentissage
intelligente.
10. Ensemble : Cette touche permet de lancer la leçon 3 de la fonction d’apprentissage
intelligente.
11. Affichage DEL : Affiche les diverses fonctions du clavier et les valeurs numériques.
12. Programme : Cette touche permet de créer un rythme personnalisé.
13. Lecture : Cette touche permet de lancer la lecture d’un rythme personnalisé.
14. Enregistrement : Cette touche permet d’enregistrer un rythme personnalisé.
15. Sonorité : Sélectionnez parmi les 200 sons disponibles en utilisant les touches
numériques ou en appuyant sur les touches + et –.
16. Rythme : Cette touche permet d’activer le rythme d’accompagnement correspondant.
Sélectionnez un autre rythme en utilisant les touches numériques ou les touches + et –.
17. Touches numériques : Ces touches permettent de sélectionner un instrument, un
rythme, une chanson ou un tempo.
18. Synchronisation : Appuyez sur la touche Sync puis jouer les touches dans
les deux octaves plus graves (correspondant aux accords/notes). La fonction
d’accompagnement commence immédiatement lorsqu’une touche est jouée sans avoir à
appuyer sur la touche Lancer/arrêter la lecture.
TONE
USB Music
Player
000-007 PIANO
008-015 MALLET
016-023 ORGAN
024-031 GUITAR
032-039 BASS
040-047 STRINGS
048-055 STRING ENSEMBLE
056-063 BRASS
064-071 REEDS
072-079 FLUTE
080-087 LEAD
088-095 PADS
096-103 FX
104-111 ETHNIC
112-119 PERCUSSION
120-128 SOUND EFFECTS
129-133 SYNTH PERCUSSION
134-143 SYNTH ORGAN
144-159 SYNTH GUITAR
160-172 SYNTH STRINGS
173-187 SYNTH REEDS
188-199 SYNTH BRASS
000-042 8 BEAT/16 BEAT
043-046 BALLAD
047-062 JAZZ/EUROPEAN
063-100 LATIN
101-106 MARCH/POLKA
107-113 COUNTRY/WESTERN
114-118 ASIAN
119-127 WALTZ
25
25
25
25
1
2
3
4
5
6
78
9
10
10
11
11
12
12
13
13
14
14
15
15
17
17
18
18
19
19
20
20
21
21
22
22
23
23
16
16
24
24
25
25
26
26
27
27
28
28
29
29
30
30
31
31
32
32
33
33
34
34
35
35
36
36
Other manuals for Melody61 MKII
1
Table of contents
Languages:
Other Alesis Electronic Keyboard manuals

Alesis
Alesis WX49 User manual

Alesis
Alesis Q61 User manual

Alesis
Alesis V149 User manual

Alesis
Alesis Q25 User manual

Alesis
Alesis Micron User manual

Alesis
Alesis V49 User manual

Alesis
Alesis Melody 54 User manual

Alesis
Alesis Recital Grand User manual

Alesis
Alesis QS7 Troubleshooting guide

Alesis
Alesis Melody61 MKII User manual

Alesis
Alesis V25 User manual

Alesis
Alesis QuadraSynth S4 Manual

Alesis
Alesis HARMONY61 User manual

Alesis
Alesis QX25 User manual

Alesis
Alesis VX 49 User manual

Alesis
Alesis V61 MKII User manual

Alesis
Alesis QuadraSynth User manual

Alesis
Alesis QuadraSynth User manual

Alesis
Alesis Q49 User manual

Alesis
Alesis Fusion 6HD Manual