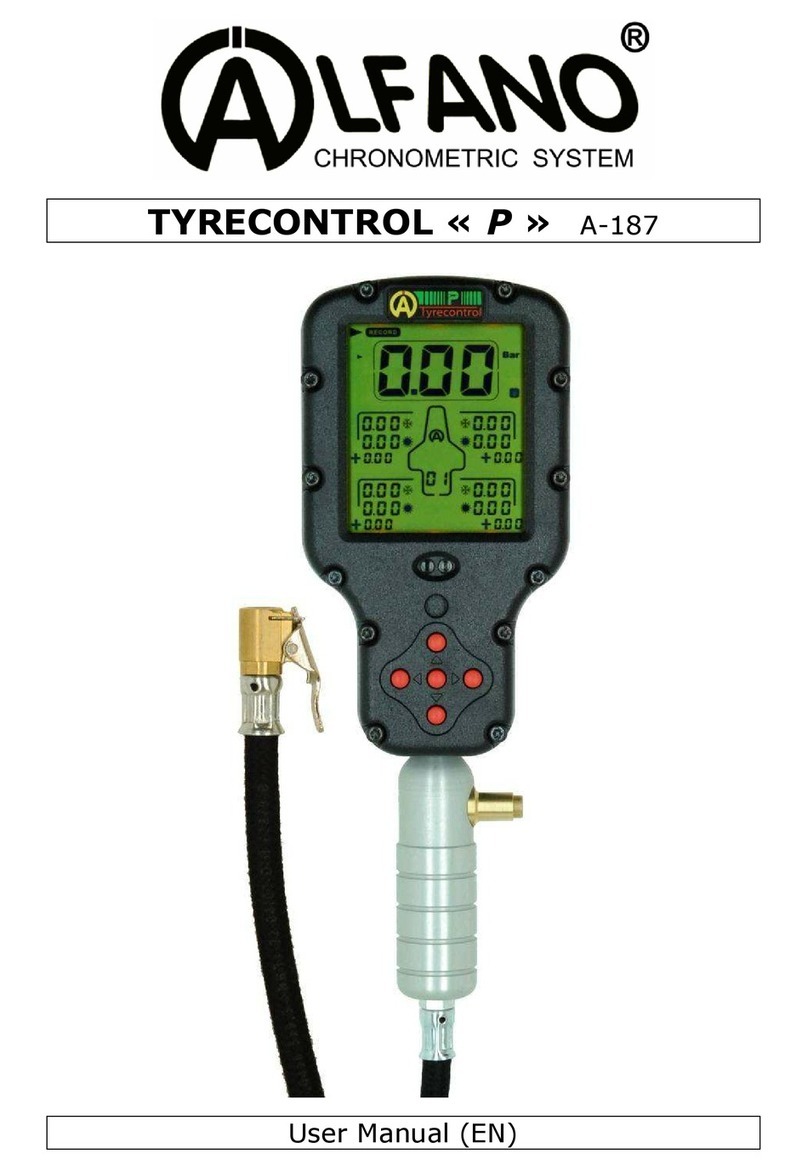
Alfano Tyrecontrol2 A-1910 User manual

Tyrecontrol2 A-1910
User Manual (EN)

Copyright ©2005 Alfano, S.A. Tous droits réservés.
2
Introduction
The TYRECONTROL2 allows you to :
-Measure the air pressures
-Adjust the air pressures (only to decrease)
-Measure the temperatures on the surface of the tyres and the asphalt
-Memorize these data until 495 sets for 5 vehicles, either 5x99 sets.
1 set = until 34 captures of data + Hour and Date « before and after race »
-With the software "VISUALTYRE" : recover the data recorded for a better analysis and
also bring a help to the configuration of your device
Replacing the batteries
Switch off the device before removing the used batteries to avoid all loss of data recorded. Insert the
two new batteries into the device properly and make sure the terminals "+" and "-" are aligned correctly.
Battery Type : 2 x AA
Important : It is imperative to use quality batteries manufactured by reputed brands in
order to prevent battery leakage into the device.
A failure caused by the battery acid voids the warranty.
Caution
The Tyrecontrol is a device of precision and, of this fact, it is
sensitive to the electromagnetic currents coming from the engine ignition.
Keep therefore the Tyrecontrol distant (minimum 50cm) of the engine ignition to avoid false
readings or a device ‘freezing’when the engine is running.

Copyright ©2005 Alfano, S.A. Tous droits réservés.
3
Switching on the TYRECONTROL
-Either normally pressing the central button , the TYRECONTROL starts :
WITHOUT the backlight.
-Either pressing for 2 seconds the same button, the TYRECONTROL starts :
WITH the backlight
.
.
Switching off the TYRECONTROL
When the Tyrecontrol is not in the menu « OFF », it dies out automatically after 10 minutes of non use.
Weak battery detection
As soon as the Tyrecontrol detects a weak level of batteries, the word « BAT » appears in most menus
while blinking.
Working
The TYRECONTROL has 8 main options represented by 8 icons :

Copyright ©2005 Alfano, S.A. Tous droits réservés.
4
This option consists in recording new data.
Procedure : I want to record the pressures and the temperatures for the vehicle 3, with the n°079
assigned. (See menu « SETUP », page 12, « assignment of the numbers of the vehicles »
1) With the help of the buttons , select the icon « RECORD » (figure 1)
▪In the position « RECORD », the Tyrecontrol displays :
➢The hour and the date in real time
➢The pressure in real time (allows a fast measure)
➢The pressures of the last « Set » of the vehicle 1
Figure 1
2) With the button or select the icon « Vehi » (figure 2)
3) With the button or select the vehicle wanted (5 to the total) (figure 2)
▪In the position « VEHI », the Tyrecontrol displays :
➢The hour and the date of the last « Set » of the Vehicle 3
➢The pressures of this « Set »
Figure 2

Copyright ©2005 Alfano, S.A. Tous droits réservés.
5
4) With the button or , select the « FACE » (figure 3)
▪In the position « FACE », the Tyrecontrol displays :
➢The hour and the date in real time
➢The pressure or the temperature in real time (according to the
programmed sequence of capture)
Figure 3
On the example (figure 3), the Tyrecontrol is ready to record, for the vehicle 3, a set of captures in the
Set « 03 » before race , (« Set » free of the vehicle 3) while starting with a capture of pressure on the
right rear tyre.
Figure 4 Figure 5 Figure 6
5) Apply the mouthpiece of the Tyrecontrol on the valve of the tyre (figure 4)
6) Press the central button to record the measured pressure as well as the hour and
the date of the moment, then, the point of capture displayed to the screen moves
automatically following the sequence programmed in the menu SETUP. In the
example (figure 5), the device positions itself on the measure of the temperature in
the center of the left rear tyre.

Copyright ©2005 Alfano, S.A. Tous droits réservés.
6
7) Apply the sensor of temperature on the tyre as indicated on the screen by the arrow
(figure 5).
8) Press the central button to record the measured temperature and prepare the
Tyrecontrol on the next point of capture (Figure 6).
9) Operate this way until the end of the programmed sequence.
Note :
the point of capture asphalts will be chosen automatically at the end of every sequence,
« before and after race ».
10) Since the hold of the temperature asphalts, the Tyrecontrol returns automatically to
the menu « RECORD ».
Note : it is possible to program a sequence of capture (temperatures and pressures) in the order desired
(See Menu « SETUP » page 15, « configuration of the captures sequence ».
This menu consists in recalling the recorded data.
Procedure : I want to visualize the data of the vehicle 1 with the n° 117 assigned.
1) With the help of the buttons , select the icon « RECALL » (figure 8)
▪In the position « RECALL », the Tyrecontrol displays :
➢The hour and the date in real time
➢The pressures of the last « Set » of vehicle 3
2) With the button or , select the icon « Vehi » (figure 9)
3) With the button or , select the vehicle wanted (figure 9)
▪In the position « VEHI », the Tyrecontrol displays :
➢The hour and the date of the last « Set » of the Vehicle 1
➢The pressures of this « Set »

Copyright ©2005 Alfano, S.A. Tous droits réservés.
7
4) With the button or , select the « FACE » (figure 10)
▪In the position « CADRAN », the Tyrecontrol displays :
➢Same way as in the position « VEHI »
Figure 8 Figure 9 Figure 10
On the example « Figure 10 », the Tyrecontrol displays for the vehicle 1, the first phase of data of the
last « Set » recorded, that is to say the tires pressures before and after race + the gaps.
Figure 11 Figure 12 Figure 13
5) Press the button or : the Tyrecontrol displays the second phase of data, that is
to say the outside temperatures of the tires, before and after race + the gaps
(figure 11).

Copyright ©2005 Alfano, S.A. Tous droits réservés.
8
6) Press again the button or : the Tyrecontrol displays the third phase of data,
that is to say the temperatures in the center of the tires, before and after race
+ the gaps (figure 12).
7) Press again the button or : the Tyrecontrol displays the last phase of data,
that is to say the inside temperatures of the tires, before and after race + the
gaps (figure 13).
8) Press again the button or : the Tyrecontrol displays the first phase of data of
first Set.
9) Press systematically the button or to browse all data recorded correspondent
in the selected vehicle.
10) Use the button : to browse the data recorded in the inverse sense.
-The hour and the date displayed above on the right indicate the moment where the hold of
captures of the data has been done, before race (if not yet captures after race) or after
race of « Set » displayed.
This menu consists in measuring the pressure.
Procedure :
1) With the help of the buttons , select the icon « P».
1) Apply the mouthpiece of the Tyrecontrol on the valve of the tyre.
The hour and the date are displayed in real time.

Copyright ©2005 Alfano, S.A. Tous droits réservés.
9
This menu consists in measuring the temperature. The hour and the date are displayed in real time.
Procedure :
1) With the help of the buttons , select the icon « T° ».
2) Apply the temperature sensor A481 on the tire.
This menu consists in erasing the recorded data.
Procedure :
1) With the help of the buttons , select the icon « RST » (figure 14)
2) With the button or , select the icon « Vehi » (figure 15)
3) With the button or , select the vehicle wanted (figure 15)
4) Press the central button during 1 second, to erase all data of vehicle 1
(figure 16)
Figure 14 Figure 15 Figure 16

Copyright ©2005 Alfano, S.A. Tous droits réservés.
10
B
Bl
lu
ue
et
to
oo
ot
th
h
This menu consists of activating the Bluetooth and being able to transfer the recorded data to an
application on Android or iOS. Download the APP for free on the Apple Store or Google Play.
Procédure :
A l’aide des boutons , sélectionnez l’icône
This menu consists in switching off the Tyrecontrol.
Procedure :
1) With the help of the buttons , select the icon :
2) Wait for 3 seconds.
Note : when the Tyrecontrol is not in the menu « OFF », it dies out automatically
after 10 minutes of non use.
I
ID
D
n
nu
um
mb
be
er
r
o
of
f
T
Ty
yr
re
ec
co
on
nt
tr
ro
ol
l2
2
P
Pi
in
n
n
nu
um
mb
be
er
r
t
to
o
b
be
e
i
in
nt
tr
ro
od
du
uc
ce
ed
d
t
th
he
e
f
fi
ir
rs
st
t
t
ti
im
me
e
i
in
n
t
th
he
e
A
AP
PP
P

Copyright ©2005 Alfano, S.A. Tous droits réservés.
11
SETUP
These menus consist in configuring various parameters of the Tyrecontrol :
01) Assignment of the numbers of the vehicles « menu 01 » (page 12)
02) Regulating of the clock and the calendar « menu 02 » (page 13)
03) Choice of the unit Bar/PSI « menu 03 » (page 14)
04) Choice of the unit C°/F° « menu 04 » (page 14)
05) Choice of the vehicle « menu 05 » (page 15)
06) Configuration of the sequence of the captures « menu 06 » (page 15)
07) Calibration of the Pressure sensor « menu 07 » (page 18)
08) Calibration of the Temperature sensor « menu 08 » (page 19)
09) Information Menu : Serial number and Firmware number of the device
Procedure to reach the SETUP :
1) The Tyrecontrol must be stopped.
2) Press the central button during minimum 5 seconds, the Tyrecontrol starts in
the first menu SETUP : « Assignment of the numbers of the vehicles ».
Procedure to browse the menus SETUP :
Press the button or
Procedure to leave the mode SETUP :
1) After the menu « Calibration of the Temperature sensor »,
2) Press the central button on « EXIT », the Tyrecontrol starts in its normal
working on mode « RECORD ».

Copyright ©2005 Alfano, S.A. Tous droits réservés.
12
01) Assignment of the numbers of the vehicles :
Procedure :
1) In this window, press the central button to enter in the menu, « Ent »
disappears.
2) With the button or , select the vehicle wanted, choice from 1 to 5,
3) Press the button to modify the number of the vehicle, choice from 0 to 999,
4) With the buttons , modify the number of the vehicle. To activate the fast
scrolling of the numbers, maintain the pressed button more than 1 second.
To assign a number to another vehicle :
5) Press the button to come back behind, you just need to repeat the operations as
explained above from the line 2.
6) Press the central button to leave the menu.
Note : After having come out of the menu, only the « Vehi 1 » with its assigned number will be visible.
Important :
-If the number of the vehicle 1 is adjusted on zero,
when using the Tyrecontrol, the system won't permit to choose another vehicle.

Copyright ©2005 Alfano, S.A. Tous droits réservés.
13
02) Regulating of the clock and the calendar :
Procedure :
1) In this window, press the central button to enter in the menu, « Ent »
disappears.
2) With the buttons , modify the hour,
3) Press the button to be able to modify the minutes,
4) With the buttons , modify the minutes. To activate the fast scrolling of the
numbers, maintain pressed more than 1 second.
5) Press the button to be able to modify the day calendar,
6) With the buttons , modify the day calendar,
7) Press the button to be able to modify the month,
8) With the buttons , modify the month,
9) Press the button , to be able to modify the year,
10) With the buttons , modify the year,
11) Press the button , to come back behind,
12) Press the central button , to come out of the menu.

Copyright ©2005 Alfano, S.A. Tous droits réservés.
14
03) Choice of the unit Bar/PSI :
Procedure :
OR
1) Owing one of these two windows, press the central button to enter in the menu,
“Ent”disappears.
2) With the button or , modify the unit,
3) Press the central button to come out of the menu.
04) Choice of the unit °C/°F :
Procedure :
OU
1) In one these two windows, press the central button to enter in the menu,
« Ent » disappears.
2) With the button or , modify the unit,
3) Press the central button to come out of the menu.

Copyright ©2005 Alfano, S.A. Tous droits réservés.
15
05) Choice of the vehicle :
Procedure :
ou
1) In one of these two windows, press the central button to enter in the menu,
« Ent » disappears.
2) With the button or , modify the type of vehicle (Car or Motorbike)
3) Press the central button to come out of the menu.
06) Configuration of the sequence of the captures :
Procedure :
ou
1) In one of these two windows (depending on the menu « 05 »), press the central
button to enter in the menu, « Ent » disappears.
Note : the explanation below is based on the example of the car.

Copyright ©2005 Alfano, S.A. Tous droits réservés.
16
2) The first Icon « P» (pressure) on the front left tyre appears by default blinking
(figure 17).
Figure 17 Figure 18 Figure 19
3) If you want to program the first capture in another place, choose then another icon
on the vehicle. For this, you just need to move with the help of the 4 buttons :
4) Press the central button to confirm your choice (figure 18).
After confirmation, the icon « P » selected freezes, the number 1 show off in the
« CADRAN ». Then, another icon appears automatically, blinking, (red arrow, figure
18). If the place of the second capture doesn't suit you, same thing, repeat the
operations as explained above (figure 19).
In this way, you can create a combination of captures with the priorities between
pressures and temperatures as you want them.
5) After having programmed the points of captures as wanted, move on the “EXIT”
icon, with the help of the 4 buttons.
6) Press the central button to leave the menu.

Copyright ©2005 Alfano, S.A. Tous droits réservés.
17
Figure 20
The « figure 20 » shows that 4 captures’points of pressures + 4 captures’points of
temperatures have been programmed with the wanted priorities + the capture point of asphalt
temperature.
Note :
In RECORD mode, the point of capture of the asphalt’s temperature will be chosen
automatically at the end of every sequence before and after race.
The two figures below represent the available capture places
On the car (left side) and on the motorbike (right side)

Copyright ©2005 Alfano, S.A. Tous droits réservés.
18
07) Calibration of the Pressure sensor :
Procedure :
1) In this window, press the central button to enter in the menu, « Ent »
disappears.
2) Press the central button to calibrate the sensor of pressure and to leave the
menu (figure 23).
Figure 21 Figure 22
Note :
-It is useful to calibrate the sensor when the FACE indicates a value of pressure whereas no
pressure has been entered in the Tyrecontrol (example : figure 21). The mouthpiece of the
Tyrecontrol must be free.
-IMPORTANT : calibrate the Tyrecontrol with the mouthpiece FREE.

Copyright ©2005 Alfano, S.A. Tous droits réservés.
19
08) Calibration of the Temperature sensor :
Procedure :
1) In this window, press the central button to enter in the menu, « Ent »
disappears.
2) Connect the sensor of temperature (figure 23).
3) With the buttons , adjust the temperature in the « FRAME » so that the
displayed temperature corresponds to a temperature of reference (figure 24).
Figure 23 Figure 24
Note :
- The temperature of reference must come from a precision device giving temperature.
- The two sensors of these devices must be placed at the same place.
- Wait that the two displayed values stabilize.
3) Press the central button to come out of the menu.

Copyright ©2005 Alfano, S.A. Tous droits réservés.
20
« 09 » Information Menu : Serial number and Firmware number of the device
The screen displays the Firmware number in the middle at the bottom (2 digits) and the serial number of
the device (6 digits: 3 on the left and 3 on the right).
Example :
Table of contents
Other Alfano Measuring Instrument manuals
Popular Measuring Instrument manuals by other brands

PCB Piezotronics
PCB Piezotronics Triaxial ICP 339A32/NC Installation and operating manual

dacell
dacell DN550A instruction manual

Mastech
Mastech MS2203 user manual

Agilent Technologies
Agilent Technologies PNA Series Installation and quick start guide

HP
HP 7090A Operator's manual

Ashcroft
Ashcroft 1131 installation instructions

Interscan Corporation
Interscan Corporation GF1900 manual

Rohde & Schwarz
Rohde & Schwarz EVSF1000 Getting started

Ebrington Medical
Ebrington Medical CareFusion MicroLoop operating manual

Navair
Navair 17-20VQ-05 Technical manual

Minolta
Minolta AUTOMETER III - PART 3 manual

TFA
TFA 30.3034 instruction manual