ALICE NightOne User manual

About the Alice NightOne device icons
The top of the Alice NightOne device has 4 icons that light up to give you information.
•
Figure 1. The effort belt, nasal cannula, and pulse oximeter icons
The effort belt, nasal cannula, and pulse oximeter icons (see Figure 1) tell you
about the sensors.
oIf these icons are green, it means the sensors are connected and working
properly.
oIf one of these icons is flashing yellow, it means that sensor needs to be
connected or adjusted. It may take a few seconds for the icon to change
from yellow to green after you connect or adjust a sensor.
•
Figure 2. The good study indicator
The good study indicator (see Figure 2) can tell you how how much of the data
from your HST is good quality. It also tells you when the Alice NightOne device is
turning on or off. The 4 parts of the good study indicator can light up separately.
About the user button
The user button is the round button on the front of the Alice NightOne device. You don’t
need to use it during your HST if you don’t want to.
If you want, you can use the user button to:
•Make the sensors icons light up. You can do this during your HST to check if the
sensors are connected and working properly.
•End your HST and show the good study indicator. You can do this in the morning
to check how much good quality data was collected. For more information about
this, read the section “Checking the data quality” near the end of this resource.

How to Put On the Sensors
Your healthcare provider will show you how to put on the sensors. They will also adjust
the effort belt for you. Use the instructions in this section to help remember how to put
on the sensors at home.
Wear a loose-fitting top (such as a t-shirt) on the night of your HST. Once you’re ready
for bed, put the sensors on as directed below. Put them on while you’re standing or
sitting up, not lying down.
Effort belt
1. Wrap the effort belt around your chest so the Alice NightOne device is in the
center of your chest (see Figure 3). The effort belt should be evenly across your
nipples or above your breasts. The belt should be snug but not too tight.
Figure 3. Effort belt around your chest
2. Plug the loose end of the effort belt into the Alice NightOne device (see Figure 3).
After the effort belt is connected, the good study indicator will blink green as the
device automatically turns on and starts recording.
3. Once the device is turned on, the effort belt icon will appear. It will probably be
flashing yellow. Use the buckle on the effort belt to adjust the belt so it’s snug but
not uncomfortable (see Figure 4).

Figure 4. Use the buckle to adjust the effort belt
4. Take several breaths with the belt connected. The effort belt icon on the device
should turn green. If it doesn’t, check the position and snugness of the belt.
Then, take a few more breaths and check the icon again.
Once the effort belt icon turns green, put on the nasal cannula. The nasal cannula icon
will appear to remind you.
Nasal cannula
1. Twist the cannula clockwise (to the right) to connect it to the top of the Alice
NightOne device (see Figure 5).
Figure 5. Connect the nasal cannula
2. Hold the nasal cannula tube in front of your face. Check that the prongs on the
tube curve slightly toward you. Then, gently place the prongs into your nose (see
Figure 6). One prong should go into each nostril.

3. Loop the nasal cannula tube over each of your ears and under your chin. Move
the slider on the tube up so the tube is snug under your chin (see Figure 7).
Figure 6. Place the nasal cannula prongs into your nose
Figure 7. Loop the tube over your ears and adjust the slider
4. Take several breaths with the nasal cannula in place. The nasal cannula icon on
the device should turn green. If it doesn’t, make sure the prongs are inside your
nostrils. Breathe through your nose for 10 seconds, then check the icon again.
Once the nasal cannula icon turns green, put on the pulse oximeter. The pulse oximeter
icon will appear to remind you.

Pulse oximeter
1.
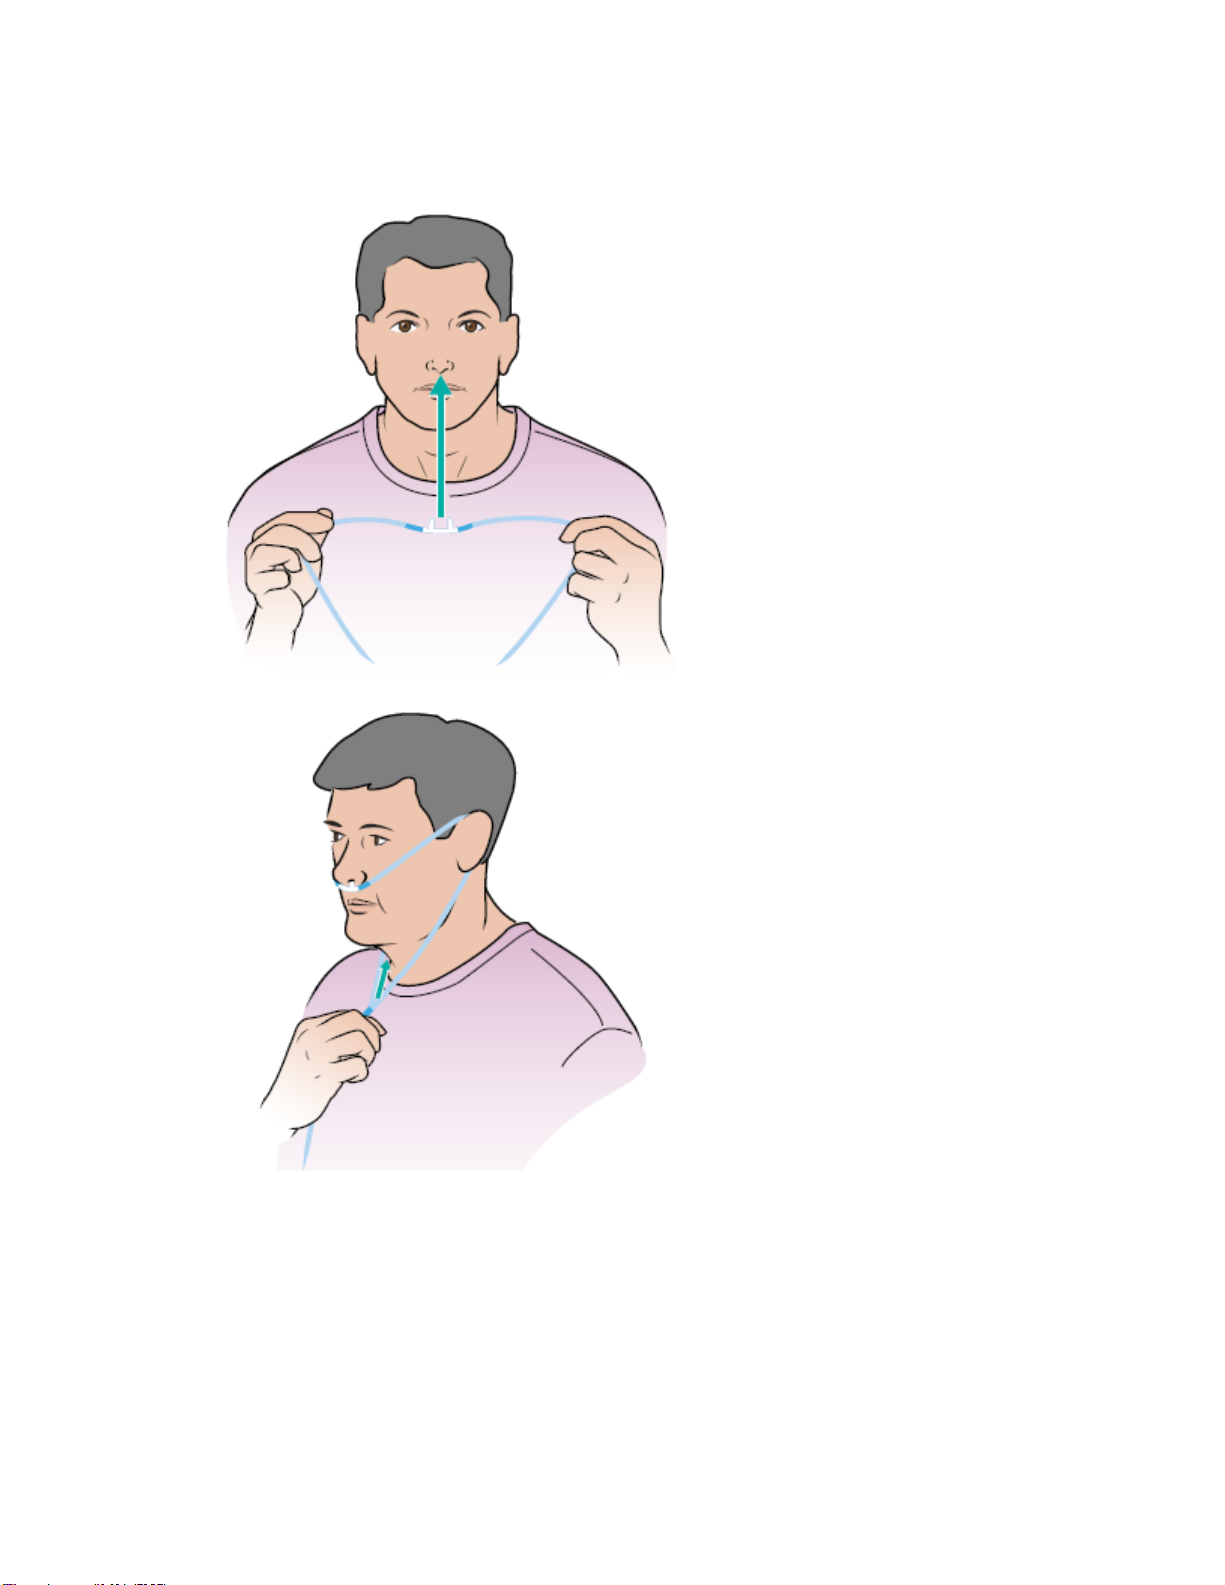
Figure 8. Put the pulse oximeter on your finger
Put the rubber sensor on one of your index (pointer) fingers (see Figure 8).
oThe pulse oximeter only works on a natural, clean nail. If you have a fake
nail or are wearing nail polish, remove this before putting the pulse
oximeter on.
oPlace the sensor so the wire goes over the back of your hand.
2. Take several breaths with the pulse oximeter in place. The pulse oximeter icon
should turn green. If it doesn’t, check the position of the sensor. Make sure it’s
securely in place. Then, take a few more breaths and check the icon again.
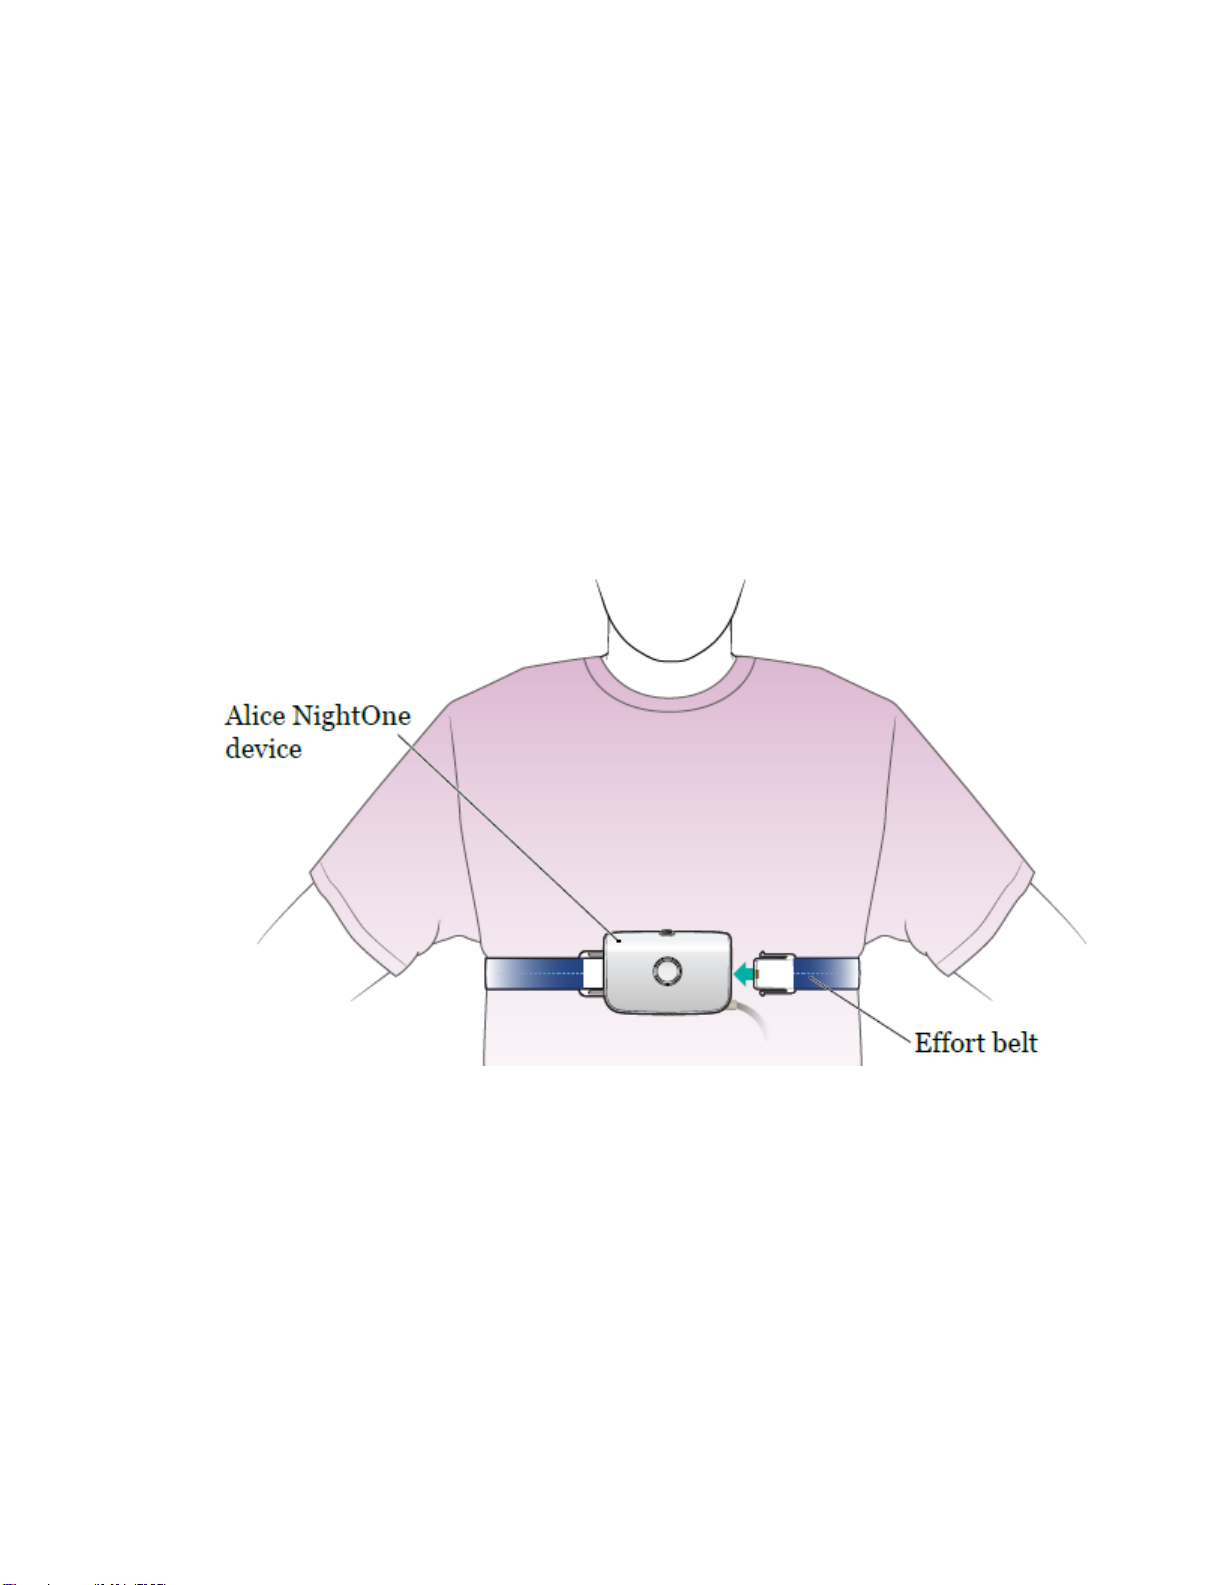
How to Start Your HST
Once all the sensors are connected and working properly, the 3 sensor icons and the
good study indicator will be solid green. After about a minute, the icons will start to turn
off one by one. Once all the icons have turned off, the Alice NightOne device is ready.
You may now go to sleep.
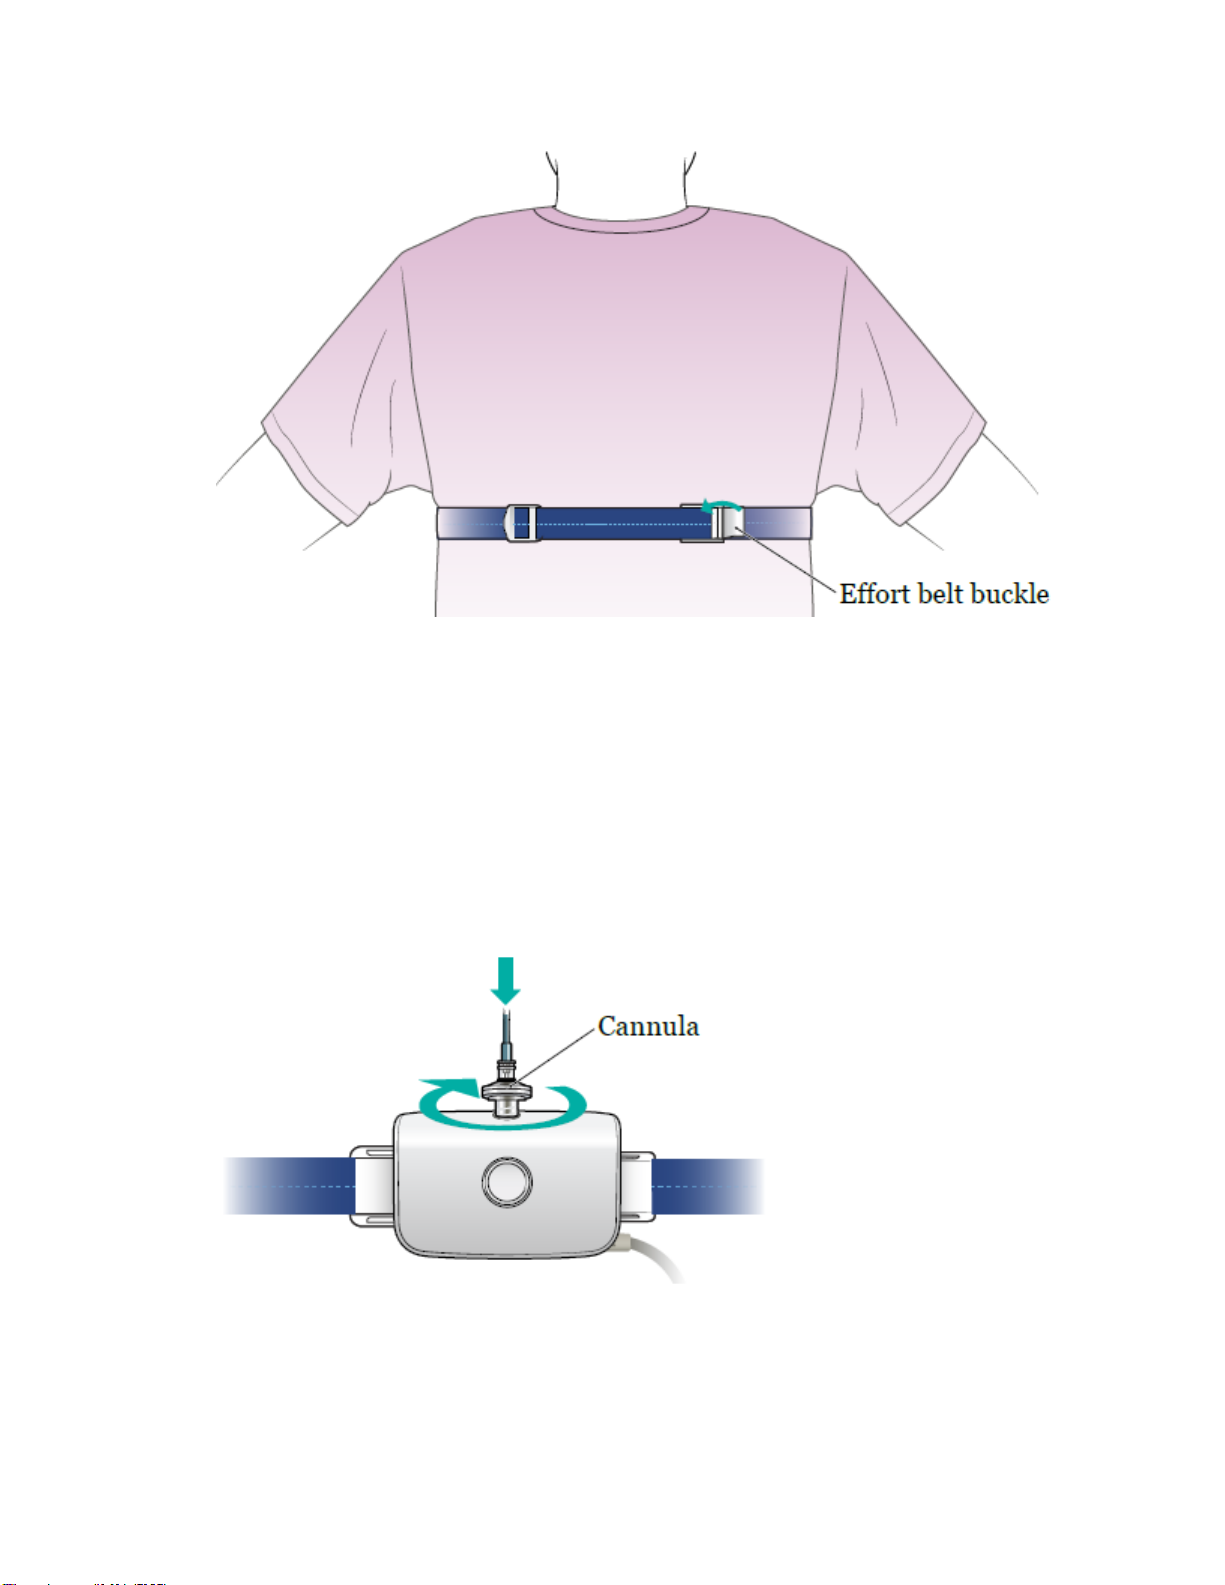
You can sleep in your usual position (such as on your back, side, or stomach) during
your HST. Leave the Alice NightOne device and sensors on all night, even if you get up
to use the restroom or for any other reason. If any of the sensors slip off or move during
the night, put them back on. You don’t need to stop your HST.
How to End Your HST
To end your HST, take off the sensors and disconnect them from the Alice NightOne
device. The device will turn off automatically.
Put the Alice NightOne device and sensors back into the carrying case. Bring the case,
device, and sensors back to the Memorial Sleep Lab where you picked it up.

Checking the data quality
If you want to, you can check how much good quality data the Alice NightOne device
collected during your HST. Only do this in the morning after you finish your HST. Follow
the instructions below.
1. Press and hold the user button until the good study indicator flashes. This means
the device is no longer recording.
2. Wait at least 1 minute.
3. Briefly (for less than 5 seconds) press the user button. Then release the user
button. The good study indicator will be displayed on top of the Alice NightOne
device.
oIf all 4 parts of the good study indicator are green, 100% of the data
collected is good quality.
oIf 3 parts of the good study indicator are green, 75% of the data collected
is good quality.
oIf 2 parts of the good study indicator are green, 50% of the data collected
is good quality.
oIf only 1 part of the good study indicator is green, 25% of the data
collected is good quality.
Contact Information
If you have any questions about your HST, call the Sleep Office at (812) 996-2186,
option #1.
Table of contents
Popular Medical Equipment manuals by other brands

Fresenius Medical Care
Fresenius Medical Care 5008 operating instructions

Datex-Ohmeda
Datex-Ohmeda S/5 Compact Anesthesia Monitor Technical reference manual

Invacare
Invacare 9630E Styxo Service manual

Optomed
Optomed Aurora user manual

VeinSight
VeinSight VS500 user manual

Transcend
Transcend 365 miniCPAP Auto quick guide