Alienware AW620M User manual

Mouse Model: AW620M
Regulatory Model: AW620M/UD2401t
Alienware Wireless
Gaming Mouse - AW620M
User’s Guide

Notes, cautions, and warnings
NOTE: A NOTE indicates important information that helps you make
better use of your mouse.
CAUTION: A CAUTION indicates potential damage to hardware or loss
of data if instructions are not followed.
WARNING: A WARNING indicates a potential for property damage,
personal injury, or death.
Copyright © 2023 Dell Inc. or its subsidiaries. All rights reserved. Dell, EMC, and other
trademarks are trademarks of Dell Inc. or its subsidiaries. Other trademarks may be trademarks of
their respective owners.
2023 – 02
Rev. A00

|3
Contents
What’s in the box................................5
Features .......................................6
Adjustable Dots Per Inch (DPI) . . . . . . . . . . . . . . . . 7
Setting up your gaming mouse ....................8
Connecting the mouse. . . . . . . . . . . . . . . . . . . . . . 8
Wireless mode (2.40 GHz) . . . . . . . . . . . . . . . . . . . . . . . . 9
Wired mode . . . . . . . . . . . . . . . . . . . . . . . . . . . . . . . . 10
Turning on the mouse . . . . . . . . . . . . . . . . . . . . . . 11
Charging the battery . . . . . . . . . . . . . . . . . . . . . . 11
Wired mode . . . . . . . . . . . . . . . . . . . . . . . . . . . . . . . . 11
Battery indicator colors . . . . . . . . . . . . . . . . . . . . . . . . . 12
Alienware Command Center (AWCC) application ..13
Installing AWCC through Windows Update . . . . . . . . .13
Installing AWCC from the Dell Support website . . . . . .13
Specifications ..................................14
General . . . . . . . . . . . . . . . . . . . . . . . . . . . . . .14
Electrical . . . . . . . . . . . . . . . . . . . . . . . . . . . . .14
Physical characteristics . . . . . . . . . . . . . . . . . . . . .14
Environmental . . . . . . . . . . . . . . . . . . . . . . . . . .15
Wireless . . . . . . . . . . . . . . . . . . . . . . . . . . . . . .15
Troubleshooting................................16
Statutory information . . . . . . . . . . . . . . . . . . . . . . . . . . .21

4 |
Warranty . . . . . . . . . . . . . . . . . . . . . . . . . . . . .21
Limited warranty and return policies. . . . . . . . . . . . . . . . . . 21
For U.S. customers: . . . . . . . . . . . . . . . . . . . . . . . . . . . . 21
For European, Middle Eastern and African customers:. . . . . . . . 21
For non-U.S. customers: . . . . . . . . . . . . . . . . . . . . . . . . . 21
What’s in the box |5
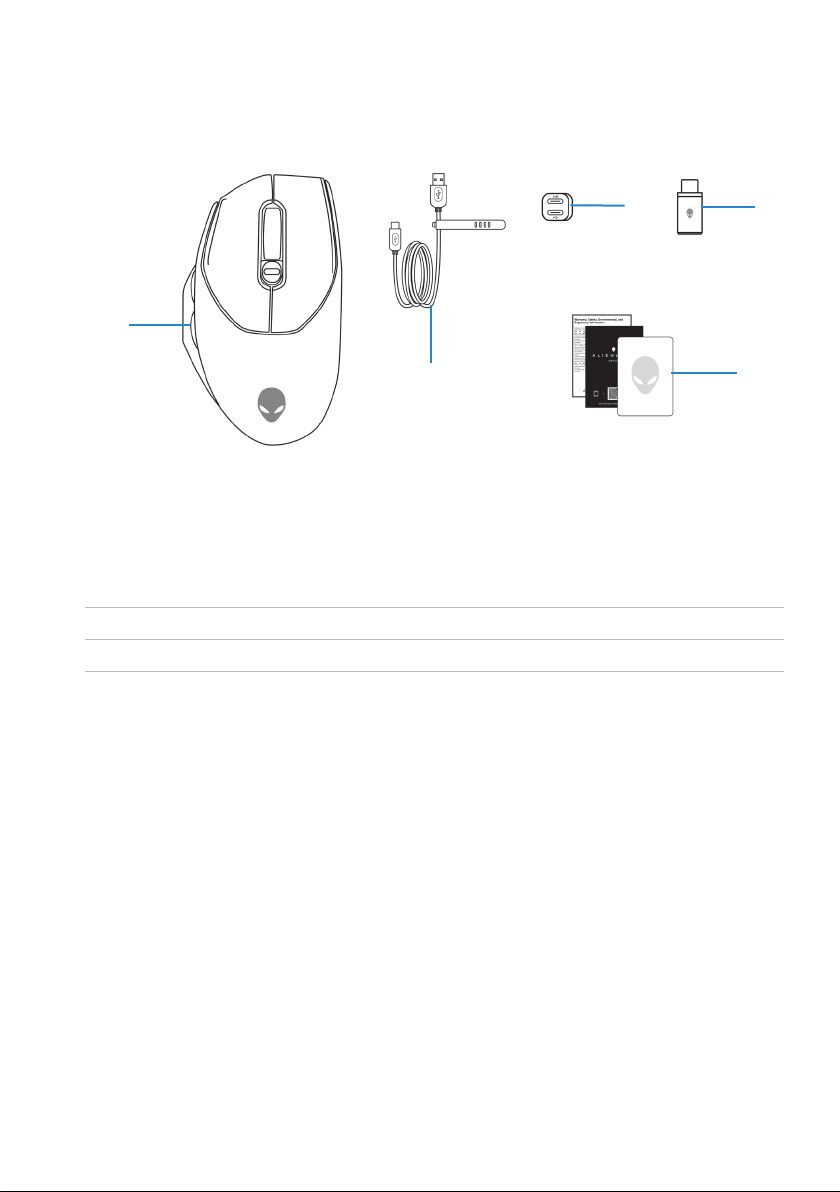
What’s in the box
1
2
34
5
1. Mouse 2. USB charging cable
3. Dongle extender 4. USB wireless dongle
5. Documents
6 |Features
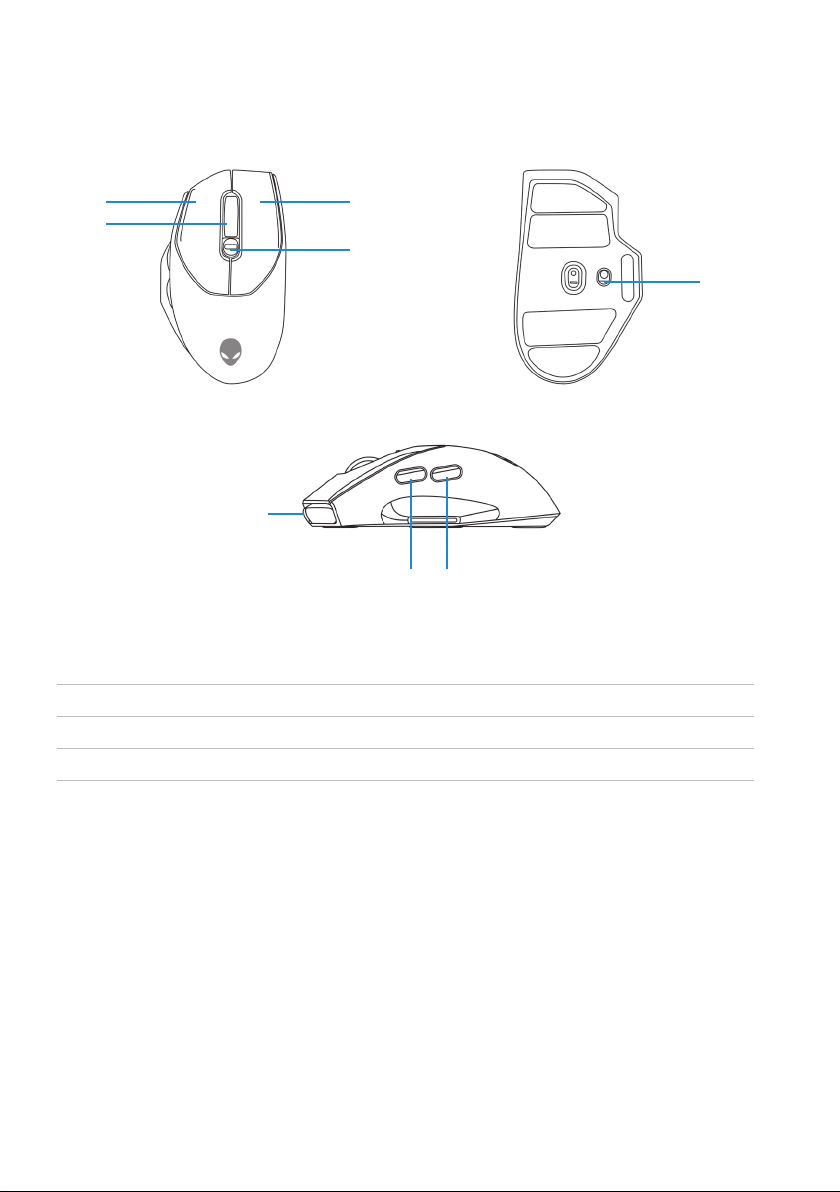
Features
Top
1
23
4
Bottom
5
7
Left Side
6
8
1. Left button 2. Scroll wheel
3. Right button 4. DPI adjustment button
5. Power button 6. USB-C port
7. Forward button 8. Backward button

Features |7
Adjustable Dots Per Inch (DPI)
Slide the DPI adjustment slider to instantly change the mouse tracking resolution.
DPI setting is indicated by the scroll wheel LED color. The default five DPI
settings available are as follows:
• 800: Blue ( )
• 1200: Green ( ) (default)
• 1600: Yellow ( )
• 2400: Purple ( )
• 3200: Red ( )
You can change the default DPI settings and customize the DPI stages with the
Alienware Command Center (AWCC) application.

8 |Setting up your gaming mouse
Setting up your gaming mouse
Connecting the mouse
NOTE: Your mouse has a rechargeable battery. For best results, ensure
that the battery is fully charged before using it for the first time.
NOTE: To improve battery life, turn off the power switch when the mouse
is not used.
1. Remove the protective sheet from the mouse.
2. Slide the power button down to turn on the mouse.

Setting up your gaming mouse |9
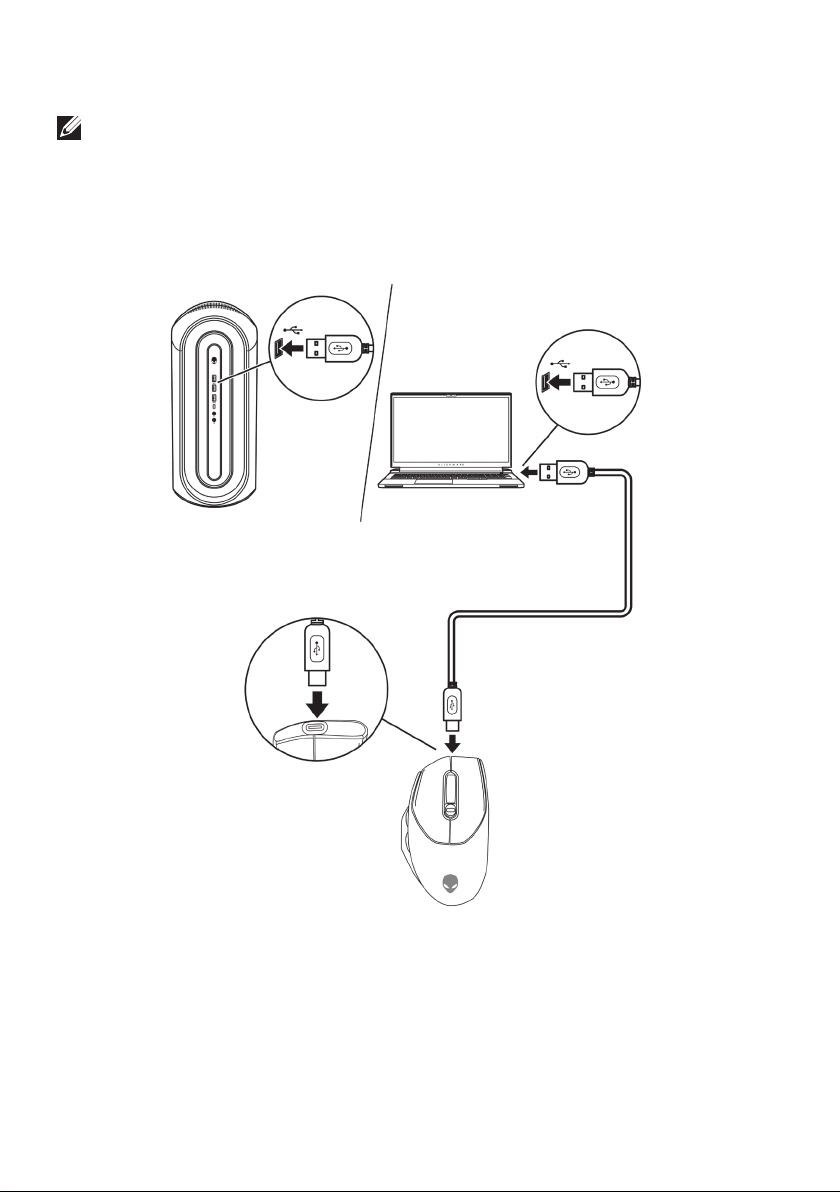
Wireless mode (2.40 GHz)
Laptop
Connect the USB wireless dongle to a USB port on your laptop.
Desktop
1. Connect the USB-C end of the USB charging cable to the bottom port of
the dongle extender. Insert the USB wireless dongle to the top port of the
dongle extender.
2. Connect the other end of the USB charging cable to an available port on
your computer.
USB dongle
Dongle
Extender
10 |Setting up your gaming mouse
Wired mode
NOTE: The battery starts charging automatically in wired mode.
1. Connect the USB-C end of the USB charging cable to the USB-C port on
the mouse.
2. Connect the other end of the USB charging cable to an available USB
port on your desktop or laptop.
Desktop Laptop
Table of contents
Other Alienware Mouse manuals


