All Pond Solutions WF-20000 User manual

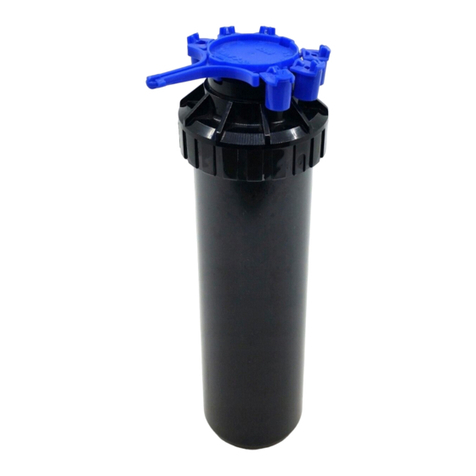
FLOATING FOUNTAIN PUMP
(AERATOR) WF-20000
360° DEGREE SPRAY
FLOATS ON THE WATER LEVEL
STRONG AERATION
SUITABLE FOR FISH PONDS, GARDEN
RIVER AERATION, ETC.

To ensure your fountain pump is set up and running correctly, and to prevent any
accidental damage or injury, please read and follow the below instructions
carefully before using your product.
SAFETY
IMPORTANT! Disconnect the mains electricity supply before attempting any
installation / maintenance of any kind. Do not attempt to modify this unit in
any way and only use the recommended parts for replacement.
· The WF-20000 fountain pump should never be run dry as this will cause the
unit to overheat and cause permanent damage.
· All connections must be earthed.
· The power cord of this appliance cannot be replaced; if the cord is
damaged, the appliance should be discarded. Never cut the cord.
· Do not connect to any voltage other than that stated.
· Do not place in liquids other than water.
· Do not use with water above 9 F or C.5° 35°
· Do not use with water below 39.2 or 4 .°F °C
· Do not carry or pull the unit by its electrical cable.
· Do not use this unit if it has a damaged cord, if it is malfunctioning or if it is
dropped or damaged in any manner
· Do not attempt to modify this unit in any way. Only use attachments and the
recommended parts for replacement recommended by the manufacturer.
· Before installing, maintaining or handling your equipment, or before placing
your hands in your pond, ensure that the unit is disconnected from the
electricity supply.
· Always disconnect any electrical devices when not in use.
· Carefully examine your fountain aeration pump after installation. Do not
connect the unit to the mains if there is water on any parts not intended to
be wet.

· To avoid injury, do not touch hot or moving parts such as, but not limited to
impellers.
· If the appliance shows any signs of water leakage or the RCD unit switches
off, disconnect the unit from the power supply and consult the retailer
where you purchased the unit.
· Do not install or store this unit where it will be exposed to temperatures
near to 4°C / 39.2°F. In freezing conditions, remove and store the unit in a
sheltered area ensuring all water has been drained from the filter.
· Do not bury the cord for this unit. Ensure it does not cause a trip hazard or it
at risk from damage from lawn mowers, strimmers or other garden
equipment.
Please note – this appliance can be used by children aged from 8 years and
above and persons with reduced physical, sensory or mental capabilities or lack
of experience and knowledge, provided they are given supervision and
instruction concerning use of the appliance and understand the hazards
involved. Children must not play with the appliance. Any maintenance must not
be made by children without supervision.

ELECTRIC
This unit comes complete with a generous supply of 3 core cable, however
should any additional cable be required, the use of an approved waterproof
cable connector with a proper rating is essential. A cord rated for less amperes
or watts than the appliance rating may overheat.
Please Ensure:
· The power supply must be earthed and fused at 3amps.
· You regularly inspect the cable for damage and deterioration.
· Do not connect to any voltage other than that stated.
· You consult a qualified electrician if in doubt about any aspects of
wiring.
· A residential current device (RCD) is used for additional safety
· You have complied with Local Electricity Authority regulations if
permanently installing to the mains supply.
Please Ensure: The power supply must be earthed and fused at 3amps.
Regularly inspect the cable for damage and deterioration. Consult a qualified
electrician if in doubt about any aspects of wiring.

Please read the below instructions carefully before beginning to set up your
filter system. DO NOT CONNECT THE UNIT TO THE MAINS UNTIL SET UP IS
COMPLETE AND UNIT IS FILLED WITH WATER.
WF-20000 is suitable for fish ponds, small garden river aeration and landscape
fountains.
1. Attach one end of the rope to the buoy. Repeat this for at least two other
edges (diagonal directions).
2. Tie the other ends of the rope to the pegs.
3. Fix the pump by inserting the pegs firmly into the ground. Make sure they are
secure.
4. When fixing, the motor part must be completely submerged to IMPORTANT!
avoid overheating.
INSTALLATION & USE
MAINTENANCE
To ensure optimal performance and that your unit functions correctly, regular
maintenance is essential. Failure to do so may result in damage to your unit and
may invalidate your warranty.
We recommend that a regular cleaning and maintenance schedule is followed
to ensure responsible fishkeeping. Depending on water volume and stocking
levels, regular cleaning of the impeller will help ensure that the product works
efficiently and your pond remains healthy.

General Maintenance
IMPORTANT! Failure to carry out routine maintenance and/or leaving the pump
with reduced/no flow rate for long periods will result in a shorter pump life and
will invalidate the warranty. It is recommended to disconnect your pump and
clean the impeller and pipework monthly.
Disconnect the mains electricity supply before attempting any installation /
maintenance of any kind.
1. Unfix the pegs and take the unit out of water.
2. Hold the main part of the water pump with one hand and rotate the buoy
counterclockwise with the other hand to separate the two.
3. Rotate the unit’s body counterclockwise and remove the fixing frame.
4. Push the lock clip and rotate along the joint to separate the water filter cover
from the lower shell of the main body.
5. Loosen two screws (as shown in the image below) to access the impeller.
Ensure that the plastic propeller part of the impeller is attached to the ceramic
part and that they have not come apart or split. If this is the case you need to
replace your impeller. Wash parts with fresh water carefully.
6. Clean it carefully under running water.
7. Re-assemble.

PARTS DIAGRAM
BUOY
FIXING FRAME
FILTER COVER
1
2
3
IMPELLER
4
SCREW
5
PUMP
6
CERAMIC PAD
7
5CERAMIC PAD BASE
8
BEARING
9
10
11
BEARING BLOCK
10
MOTOR BODY
11

TROUBLESHOOTING
Slow Flow RateSlow Flow Rate
1. Clean the pump’s housing. Occasionally, large clumps of debris may block it
and thus restricting the flow.
2. Locate the impeller and inspect for damage and clear the fittings and parts
of any waste build-up.
3. Ensure that the plastic propeller part of the impeller is attached to the
ceramic part and that they have not come apart or split. If this is the case you
need to replace your impeller.
Unable to start the pump
1. Check power supply is on.
2. Check fuse and cable for any damage.
3. Follow the slow flow rate guide (see above).
If none of the above resolves your issue, or you require spare parts for your
pump, please contact the supplier of your unit.
SPECIFICATIONS
WF-20000
90W
275 x 252 x 420
1m
FOUNTAIN HEIGHT:
DIMENSIONS (LxWxH) (mm):
POWER (WATTAGE):
3m
FOUNTAIN DIAMETER:
CABLE LENGTH:
20000L/H
OUTPUT:
MODEL:
10m (Plug not included)
VOLTAGE: 220-240v / 50Hz

The All Pond Solutions WF-20000 Pond Pump is guaranteed against defects in
material or workmanship under normal pond usage and comes with 12 months
warranty for all electrical parts. The warranty period commences from the date
of purchase.
If you require support on how to use your unit, replacement parts or if your filter
develops a fault during the warranty period, please contact the supplier of your
unit.
Non-replaceable, non-perishable and non-serviceable parts will be repaired or
replaced free of charge, once the unit is returned with all components along
with a valid proof of purchase and postage paid. We reserve the right to replace
or repair the unit at our discretion.
Please be aware that perishable parts that are subject to normal wear and tear,
such as impellers, impeller covers and motor seals are not covered by your
warranty and a charge may be required for replacements of these.
This warranty does not apply to any unit that has been subjected to misuse,
accidental damage, negligence, tampering or customisation. It does not apply
to units which have been assembled incorrectly, improperly maintained, or
where the instructions and safety information in this manual has not been
followed correctly.
No liability is assumed with respect to loss or damage to livestock or personal
property irrespective of the cause thereof.
Please ensure that only genuine All Pond Solutions components are used when
completing a replacement or repair. Spare parts are available at our official
website or from your local supplier.
Before returning your unit under warranty terms, check that all setup and
maintenance instructions have been correctly followed. If you are in doubt,
please contact your local aquatic retailer for further advice before returning the
product.
This does not affect your statutory rights.
WARRANTY

www.allpondsolutions.co.uk
All Pet Solutions Limited Trading as All Pond Solutions
Unit 203 Riverside Way, Uxbridge, Middlesex,
England, UB8 2YF
Table of contents
