ALL2205 Quick Installation Guide
8
ALLNET GmbH © 2009 – www.allnet.de
Wireless Setting
Power the IP Camera and connect an Ethernet network cable to the IP Camera’s LAN port. Using
Intelligent IP Installer and entering the camera’s setting page.
Please go to “Setting →Basic →System →Network →Wireless”, set the wireless option to “On”
1. Click Refresh and choose the Access Point you wish to connect.
2. Enter the password within the Active transmit key field if required.
3. Choose DHCP to connect through a dynamic IP or assign a static IP for the wireless connection.
4. Click “OK” to apply settings. The Wireless IP address appears in the IP address field.
Note: The wireless private IP address can be found in Intelligent IP Installer.
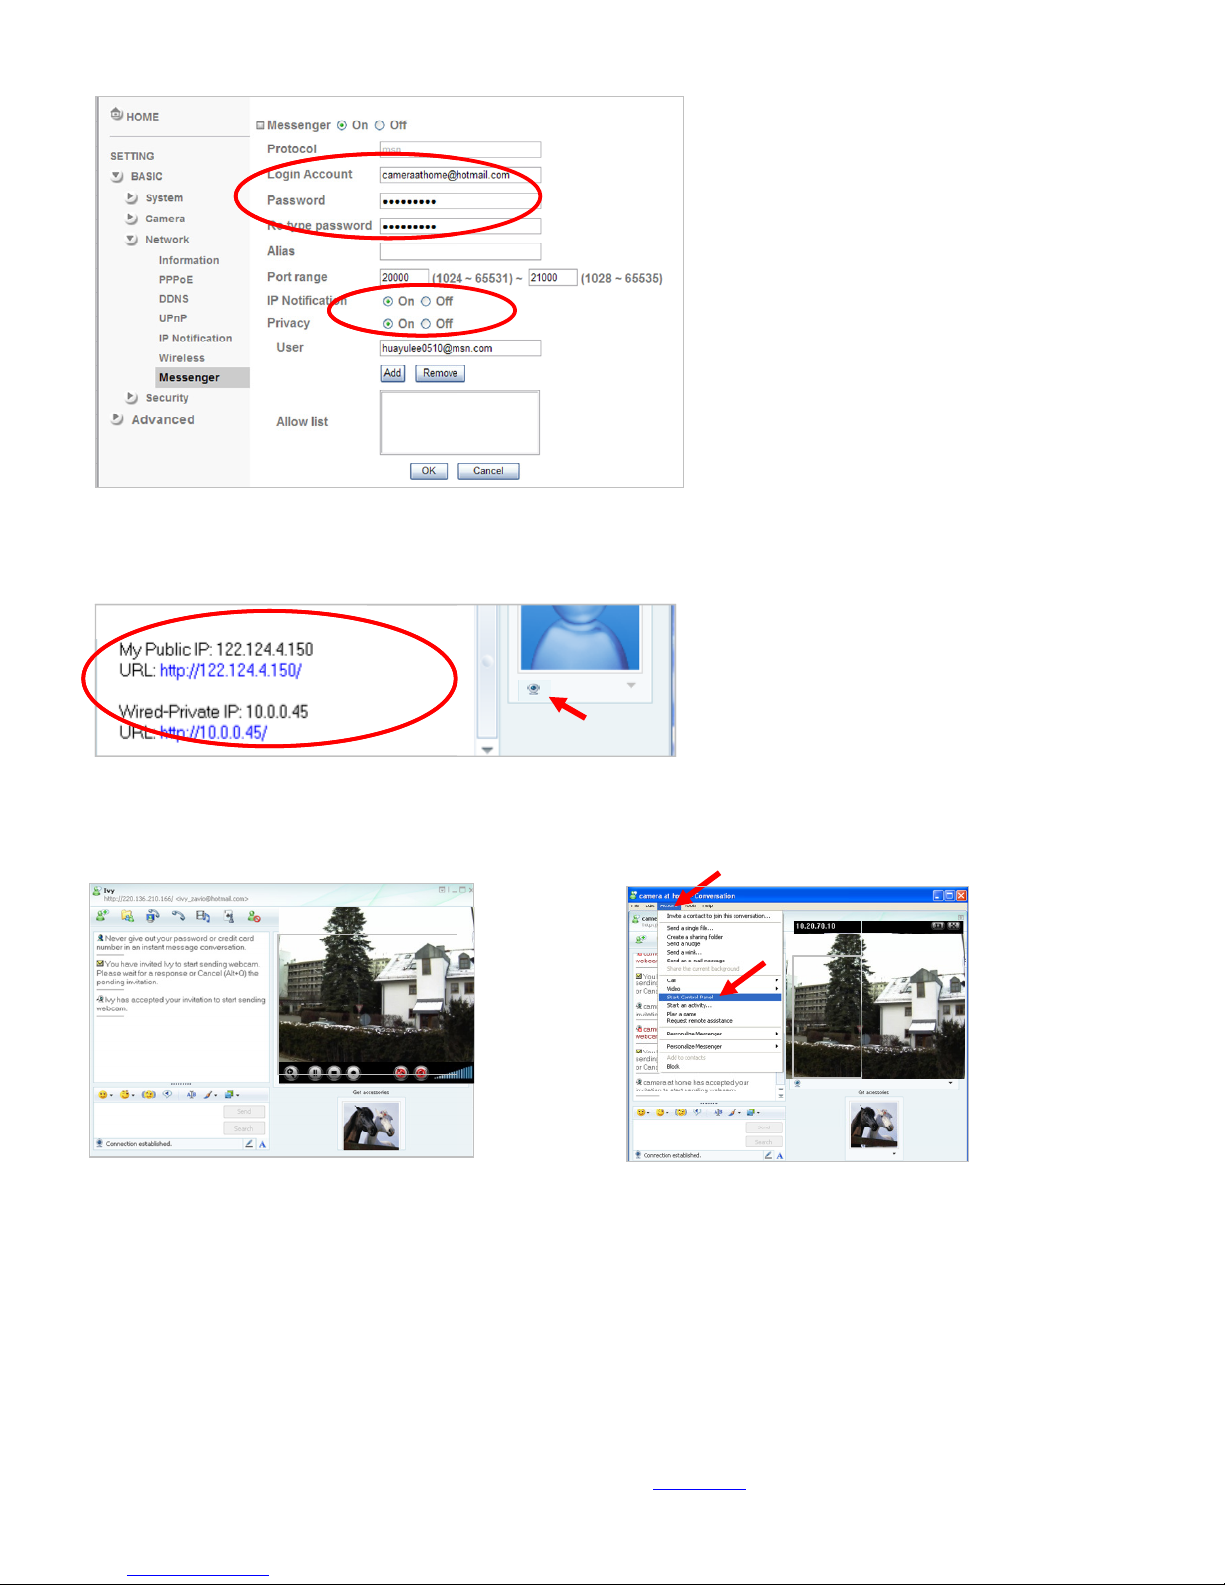
Windows Live Messenger Setting
Live video of the IP Camera can be displayed using Microsoft Live Messenger, whilst providing its public IP
address to users for access via the web browser. This feature is useful especially when the IP address of
the camera is dynamically assigned.
If you wish to set up MSN Messenger, enter the camera’s setting page.
Go to “Setting →Basic →System →Network →Messenger”, set the Messenger option “On.”
1. Create a new MSN Messenger account (e.g.: Camera at home) for the IP Camera.
2. Enter the new MSN Messenger Login Account and Password within the designated boxes.
3. Under the IP Notification Option, Click “On” to enable IP notification to the users.
4. Under the Privacy Option, Click “On” to create an allow list.
5. Use your existing account to login to MSN Messenger.
6. Add the new MSN Messenger account (e.g.: Camera at home) to your contact list.
6