Allnet ALL2272 User manual

ALL2272 QIG
1
ALLNET GmbH © 2009 – www.allnet.de
ALL2272 Quick Installation Guide
Day/Night Pan/Tilt IP Camera
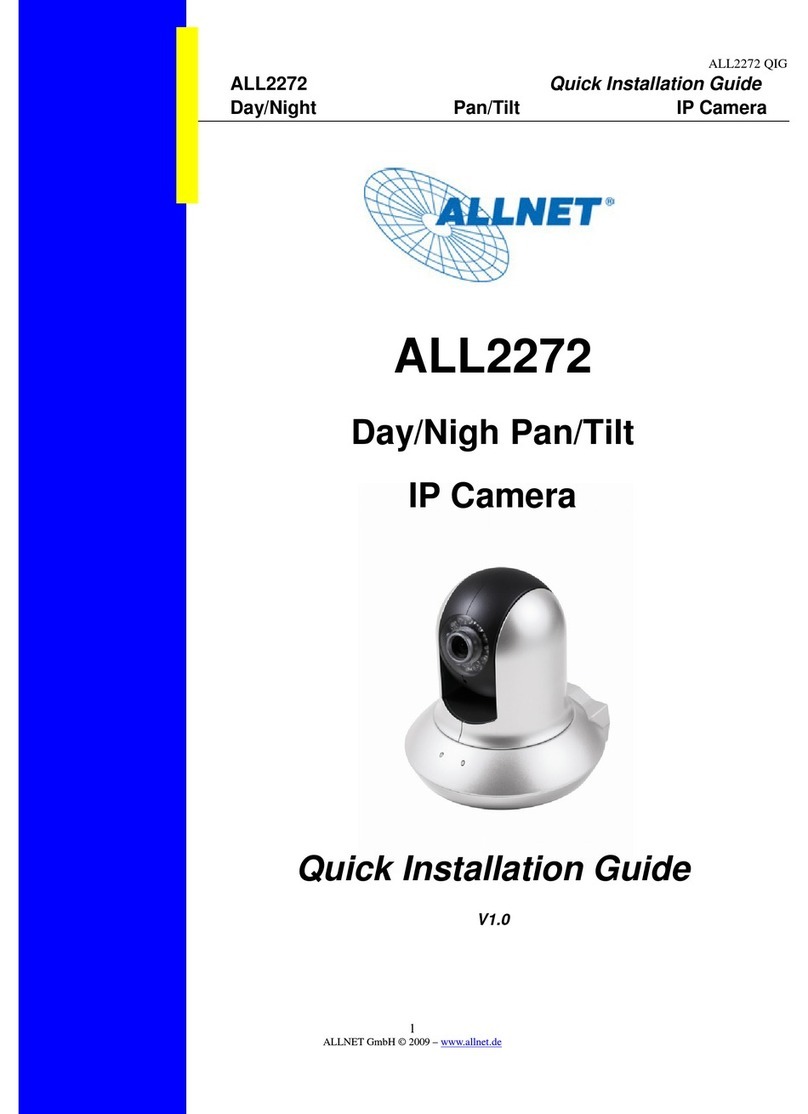
ALL2272
Day/Night Pan/Tilt
IP Camera
Quick Installation Guide
V1.0

ALL2272 QIG
2
ALLNET GmbH © 2009 – www.allnet.de
ALL2272 Quick Installation Guide
Please follow the installation steps below to set up your ALL2272 Day/Night Pan/Tilt IP Camera.
Package contents and physical overview. See P.2
Install the hardware and connect all cables. See P.3
Microsoft OS: Use the software CD to install Intelligent IP Installer. See P.4
Access the IP Camera using Intelligent IP Installer. See P.4
Mac OS using Safari Browser. See P.6
Change lighting environment setting. See P.8
Change the Web Interface into your preferred language. See P.8
Use IP Camera via Mobile Phone. See P.9
Wireless Setting. See P.9
Windows Live Messenger Setting. See P.7
Access to Internet via Static IP, Dynamic IP or both. See P.9
CE-Erklärung Siehe S.26
Copyright Siehe S.27
Package Contents
Camera
ALL2272 Day/Night Pan/Tilt IP Camera
Quick Installation Guide
Brief product information and quick installation
Software CD
IP Surveillance Software
Intelligent IP Installer
User Manuals
Language Packs
Component Pack
Bracket, two packs of screws
Adaptor
12V DC, max 6W
Physical overview
Focus Adjustment Ring: Adjust the focus ring to get a clear image.
Reset: When the device is powered, press the Reset Button to reboot the device, or hold the Reset Button
for 10 seconds to set the settings back to factory default

ALL2272 QIG
3
ALLNET GmbH © 2009 – www.allnet.de
Install the hardware and connect all cables
b. Connect all cables
b1. Without Power over Ethernet (PoE) connection
1. Connect the power adaptor to the IP Camera.
2. Using a standard RJ-45 network cable, connect the IP
Camera to a normal Hub / Switch / Router.
b2. Power over Ethernet (PoE)
1. Using a standard RJ-45 network cable, connect the IP
Camera to a PoE-enabled Hub / Switch / Router
b3. Wireless connection
1. Connect the power adaptor to IP Camera.
2. Connect to Wi-Fi
Microsoft OS:
Use the software CD to install Intelligent IP Installer
Power on your PC and insert the CD-ROM. The setup page will show up automatically. Please follow those
steps to install the firmware.
b 2
b 1
b 3
Select “Intelligent IP Installer” and follow the installation process to complete the installation.

ALL2272 QIG
4
ALLNET GmbH © 2009 – www.allnet.de
Access the IP Camera using Intelligent IP Installer
1. Before using Intelligent IP Installer, please check two setting.
a. Browser’s Internet Properties →Security
b. In Security setting page, find Download
unsigned ActiveX controls, change the setting to
Enable or Prompt.
2. Click the Intelligent IP Installer Icon on your desktop. The main page will show up listing all active
camera and video server devices. Select the relevant IP camera from the list and click Link to IE.

ALL2272 QIG
5
ALLNET GmbH © 2009 – www.allnet.de
3. Enter your Username and Password
to login to the IP Camera.
(Default is admin / admin)
4. When accessing the IP Camera for the first time, yellow information appears below the address bar:
To help protect your security, Internet Explorer stopped this site from installing an ActiveX control on
your computer. Click here for options….
5. Click the information bar, and select Install ActiveX control.

ALL2272 QIG
6
ALLNET GmbH © 2009 – www.allnet.de
6. Click Install.
7. Live video displays in the centre of your web browser.

ALL2272 QIG
7
ALLNET GmbH © 2009 – www.allnet.de
Mac OS using Safari Browser
3. Enter name and password to login to the IP
camera. (Default is admin / admin)
4. The monitor image will be displayed in your browser.
1. Select Safari icon
2. Click Bonjour function and select the camera
you wish to access.

ALL2272 QIG
8
ALLNET GmbH © 2009 – www.allnet.de
Change lighting environment setting
The default setting of lighting environment is 60Hz. However, if the image appears flickery, this might be
because the lighting environment in your country is 50 Hz. Hence, this setting can be changed into 50Hz.
Or if you wish to use this IP Camera in an outdoor environment, this setting can be changed into Outdoor
mode.
Go to “Setting →Basic →Camera →General”, choose the environment setting you wish.
Change the Web Interface into your preferred language
Use the settings screen to set the language of the Web Interface.
Go to “Setting →Basic →System →Initialize”.
1. Insert Software CD into your CD-ROM.
2. Browse and select the preferred language from language pack in the Software CD and then click OK.
3. The web interface will change into your preferred language.

ALL2272 QIG
9
ALLNET GmbH © 2009 – www.allnet.de
Use IP Camera via Mobile Phone
1. Using IP Camera via iPhone
Select Safari function →Enter IP address in the web link →enter username and password (default value
admin/admin) →The user interface and Live Image will show up in the middle of the screen.
2. Mobile phone viewing
a. 3G Mobile Phone Streaming Viewing
For 3G mobile phone viewing, please type “ rtsp://<IP>:<PORT>/video.3gp ” into your 3G web media
player.
<IP> is the IP address of your IP camera;
<PORT> is the RTSP port of your IP camera (Default value is 554.)
Example: rtsp://100.10.10.1:554/video.3gp
b. 2.5G Mobile Phone Viewing
b1. WAP viewing
For 2.5G WAP mobile phone viewing, type “ http://<IP>/mobile.wml ” into your 2.5G web browser.
b1. Browser viewing
For 2.5G mobile phone browser viewing, type “http:// <IP>/mobile.htm ” into your 2.5G web browser.
Windows Live Messenger Setting
Live video of the IP Camera can be displayed using Microsoft Live Messenger, whilst providing its public IP
address to users for access via the web browser. This feature is useful especially when the IP address of
the camera is dynamically assigned.
If you wish to set up MSN Messenger, enter the camera’s setting page.
Go to “Setting →Basic →System →Network →Messenger”, set the Messenger option “On.”
2. Enter the new MSN Messenger Login Account and Password within the designated boxes.
3. Under the IP Notification Option, Click “On” to enable IP notification to the users.
4. Under the Privacy Option, Click “On” to create an allow list.
5. Use your existing account to login to MSN Messenger.
7. The IP Camera will send you a message with its Public IP and Private IP if the IP Notification Option is
enabled.
8. Click on the small camera icon. Then, choose “View a new contact's webcam”.
Camera at home says:
9. The IP Camera automatically accepts your invitation and its live video is displayed
10
ALLNET GmbH © 2009 – www.allnet.de
7. The IP Camera will send you a message with its Public IP and Private IP if the IP Notification Option is
8. Click on the small camera icon. Then, choose “View a new contact's webcam”.
9. The IP Camera automatically accepts your invitation and its live video is displayed
ALL2272 QIG
7. The IP Camera will send you a message with its Public IP and Private IP if the IP Notification Option is
8. Click on the small camera icon. Then, choose “View a new contact's webcam”.
9. The IP Camera automatically accepts your invitation and its live video is displayed
.

ALL2272 QIG
11
ALLNET GmbH © 2009 – www.allnet.de
Access to the Internet
a. Internet connectivity of the IP camera can be established by inputting the cameras IP information within
the Information section.
(Please go to Setting →Basic →Network→Information)
b.
Internet Connectivity of the IP Camera can be established through PPPoE (Point-to-Point Protocol over
the Ethernet) by inputting the username and password from your Internet Service Provider (ISP) within the
PPPoE section
.
(Please go to Setting →Basic →Network→PPPoE)
Note 1: Please reboot the IP Camera, after changing the PPPoE settings.
Note 2: Please turn on the DDNS and IP Notification function when using the PPPoE function.

ALL2272 QIG
12
ALLNET GmbH © 2009 – www.allnet.de
c. Internet Connectivity of the IP Camera can be established if your router is UPnP (Universal Plug and
Play) enabled. The IP camera is automatically detected and added to “My Network Places” on your
computer. Please note that only Home Routers manufactured after 2006 support the UPnP function.
c1. If your router is a UPnP Internet Gateway Device (IGD), turn on the UPnP function within the UPnP
section. (Please go Setting →Basic →Network→UPnP)
Note: If you turn on the UPnP Port Forwarding function, RTSP (Real Time Streaming Protocol) Port
information will change to the illustrated value below.
c2. If your router is not a UPnP Internet Gateway Device, please setup Port Forwarding or Port Mapping
Note 1: Home Routers manufactured before 2006 do not support UPnP IGD function.
Note 2: Enterprise Routers do not support UPnP IGD function.

ALL2272 QIG
13
ALLNET GmbH © 2009 – www.allnet.de
ALL2272 Kurzanleitung
Tag/Nacht Schwenk/Neige IP Kamera
ALL2272
Tag/Nacht Schwenk/Neige
IP Kamera
Schnellinstallationhandbuch
V1.0

ALL2272 QIG
14
ALLNET GmbH © 2009 – www.allnet.de
Schnellinstallationshandbuch
Bitte beachten Sie die folgenden Installationshinweise um die ALL2272 IP Kamera zu konfigurieren.
Packungsinhalt des Original Kartons und Anschlussübersicht. Siehe S.14
Installieren Sie die Hardware und schließen Sie alle Kabel an Siehe S.15
Microsoft OS: Benutzen Sie Software CD um den Intelligenten IP Scanne zu installieren. Siehe S.15
Greifen Sie auf die IP Kamera mithilfe des intelligenten IP Scanners zu. Siehe S.16
Mac OS: Greifen Sie mit dem Safari Browser au die Kamera zu. Siehe S.18
Ändern Sie die Belichtungseinstellungen. Siehe S.20
Ändern Sie die Sprache des Web Interface auf die Ihnen bevorzugte Sprache um. Siehe S.21
Verwenden Sie die IP Kamera mit Ihrem Mobiltelefon. Siehe S.20
Windows Live Messenger Konfiguration. Siehe S.21
Zugriff auf das Internet via statischer IP, Dynamischer IP oder beides. Siehe S.23
CE-Erklärung Siehe S.26
Copyright Siehe S.27
Packungsinhalt
Kamera
ALL2272 IP Kamera
Schnellinstallationshandbuch
Kurze Produktinformation und schnelle Installation
Software CD
IP Überwachungs Software
Intelligenter IP Scanner
Benutzer Handbücher
Sprachpakete
Packungsbestandteile
Schellen, 2 Packungen Schrauben
Netzteil
12V DC, 0.5A, max. 6W
Anchlussübersicht
Fokussier Ring: Justieren Sie den Fokussier Ring um ein klares Bild zu erhalten.
Reset: Wenn das Gerät mit Strom versorgt ist, drücken Sie den Reset Knopf um es zu rebooten oder
halten Sie den Reset Knopf für 10 Sekunden gedrückt, um das Gerät in die Werkseinstellungen
zurückzusetzen.

ALL2272 QIG
15
ALLNET GmbH © 2009 – www.allnet.de
Installieren Sie die Hardware und schließen Sie alle Kabel an
a. Schliessen Sie alle Kabel an
a1. Ohne Power over Ethernet (PoE) Verbindung
1. Verbinden Sie das Stromkabel mit der IP Kamera.
2. Schließen Sie die ALL2272 IP Kamera mit einem Cat5 Kabel
an Ihren Switch / Router an.
a2. Power over Ethernet (PoE)
1. Schließen Sie die ALL2272 IP Kamera mit einem Cat5 Kabel
an Ihren PoE Fähigen Switch / Router an.
Microsoft OS: Benutzen Sie Software CD um den I
ntelligenten IP Scanne zu installieren
Starten Sie Ihren PC und legen Sie die CD-ROM ein. Die Setup Seite wird automatisch starten. Bitte
beachten Sie diese Schritte um die Firmware zu installieren.
b 2
b 1
Wählen Sie “Intelligent IP Installer” aus. Um die Installation erfolgreich abzuschließen,
folgen Sie dem Installationsprozess.

ALL2272 QIG
16
ALLNET GmbH © 2009 – www.allnet.de
Greifen Sie auf die IP Kamera mithilfe des intelligenten IP Scanners zu
1. Bevor Sie den Intelligenten IP Installer benutzen, überprüfen Sie bitte die zwei folgenden Einstellungen.
a. Internet Explorer Einstellungen
→Security →Custom Level
b. In den Sicherheitseinstellungen, suchen Sie Unsignierte
ActiveX-Steuerelemente herunterladen, ändern Sie die
Einstellung auf Aktivieren oder Bestätigen.
2. Klicken Sie auf das Intelligent IP Installer Icon auf Ihrem Desktop. Das Hauptfenster erscheint und zeigt
Ihnen eine Liste mit allen aktiven IP Kameras an. Wählen Sie die entsprechende IP Kamera aus der Liste
aus und klicken Sie anschließend auf
Link to
IE.
3

ALL2272 QIG
17
ALLNET GmbH © 2009 – www.allnet.de
3. Geben Sie Ihren Benutzernamen und
Passwort ein.
(Standard ist admin / admin)
4. Wenn Sie zum ersten Mal auf die Kamera zugreifen, wird eine gelbe Information erscheint
unterhalb der Adressleiste: Um Ihre Sicherheit zu gewähren, hielt der Internet Explorer diese Seite
davon ab, ein ActiveX Steuerelement auf Ihren Computer zu installieren.
Klicken Sie hier für Optionen …
5. Klicken Sie auf die Informationsleiste und wählen Sie ActiveX Steuerelement Installieren.

ALL2272 QIG
18
ALLNET GmbH © 2009 – www.allnet.de
6. Klicken Sie auf Installieren
7. Live Video wird in der mitte des Browserfensters angezeigt.

ALL2272 QIG
19
ALLNET GmbH © 2009 – www.allnet.de
Mac OS: Greifen Sie mit dem Safari Browser au die Kamera zu
3. Geben Sie Benutzername und Passwort
ein (Standard ist admin / admin) 4. Das Kamerabild wird in Ihrem Browser angezeigt.
1. Starten Sie Safari 2. Klicken Sie auf die Bonjourfunktion und
wählen Sie die Kamera aus, auf die Sie
zugreifen wollen.

ALL2272 QIG
20
ALLNET GmbH © 2009 – www.allnet.de
Konfiguration der Belichtungseinstellungen
Die Standardeinstellung für das Umgebungslicht ist 60Hz. Wenn ein flimmern im Bild zu erkennen ist, liegt
das daran, dass in Ihrem Land 50 Hz für die Belichtungseinstellung verwendet werden. Daher kann diese
Einstellung auf 50Hz geändert werden. Wenn die Kamera im Außenbereich eingesetzt werden soll, kann
über die Konfiguration auf den Outdoor-Modus geändert werden.
Gehen Sie zu Einstellung →Basic →Kamera →General , wählen Sie die Umgebungseinstellung, die Sie
auswählen möchten.
Verändern Sie die Sprache des Web Interface.
Verwenden Sie das folgende Konfigurationsmenü, um die Sprache des Web Interface zu konfigurieren
Gehen Sie zu “Einstellung →Basic →System →Initialize”.
1. Legen Sie die Software CD in Ihr CD-ROM Laufwerk ein.
2. Klicken Sie auf Durchsuchen und wählen Sie Ihre bevorzugte Sprache aus den Sprachpacketen auf der
Software CD aus und klicken Sie anschließend auf OK.
3. Das Web Interface wird sich auf Ihre gewünschte Sprache umstellen
Other manuals for ALL2272
2
Table of contents
Languages:
Other Allnet IP Camera manuals

Allnet
Allnet ALL2212 User manual

Allnet
Allnet ALL2205 User manual

Allnet
Allnet ALL2285 User manual

Allnet
Allnet ALL2272 User manual

Allnet
Allnet ALL2205 User manual

Allnet
Allnet ALL2272 User manual

Allnet
Allnet ALL-CAM2399-EP User manual

Allnet
Allnet ALL-CAM2372-WP User manual

Allnet
Allnet ALL2295 User manual

Allnet
Allnet ALL2298 User manual