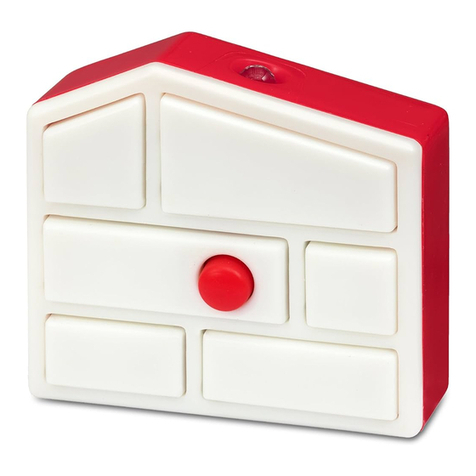
Allotech ECO 2 User manual

FR - AlloTech ECO 2 - 4
A) PROGRAMMATION TÉLÉCOMMANDE À RÉCEPTEUR
1)
2)
3)
4)
Sous le moteur ECOSTAR, vous trouverez un bouton transparent ; appuyez-le. Une diode
commencera à clignoter lentement. Relâchez donc le bouton.
Vous disposez maintenant de 10 secondes pour appuyer sur un bouton de votre nouvelle Allotech
ECO. La diode commencera à clignoter plus rapidement. Vous pouvez relâcher le bouton.
Maintenant, appuyez à nouveau sur le même bouton de votre Allotech ECO. Maintenez-le
enfoncé. La diode commencera à clignoter très rapidement. Vous pouvez relâcher le bouton.
Votre nouvelle télécommande est désormais programmée.
Repérez et appuyez le bouton transparent P, situé sous le moteur ECOSTAR. Gardez-le
enfoncé.
Patientez 5 secondes, puis relâchez le bouton.
La diode du moteur va commencer à clignoter lentement pendant 1 seconde, puis plus
rapidement pendant 4 secondes et terminera par un clignotement très rapide pendant 2
secondes.
La manipulation est terminée, toutes les télécommandes sont effacées.
1)
2)
3)
4)
B) EFFACER TOUTES LES TÉLÉCOMMANDES
ATTENTION : L’INSTALLATION ECOSTAR ACCEPTE LA PROGRAMMATION DE MAXIMUM 6
TÉLÉCOMMANDES ECO.
POINT NOM VALEUR
1 Alimentation Pile 3V - CR2032
2 Puissance consommée 20 mA
3 Fréquence 433 Mhz
D) DECLARATION DE CONFORMITE
Nous Allotech déclarons que ce produit est conforme aux exigences essentielles et autres dispositions pertinentes de la directive
1999/5/EC. (TR2)
Une déclaration de conformité est mise à disposition à l’adresse www.allotelecommande.com.
Le non respect de ces instructions exclut la responsabilité d’Allotech et sa garantie. Allotech ne peut être tenue responsable des
changements de normes et standards intervenus après la publication de cette notice.
C) DETAILS TECHNIQUES ECO
Scan Me!
Video tutorial
click 1
click 2
OK
1)
2)
3)
4)

POINT NAME VALUE
1 Power supply Pile 3V - CR2032
2 Consumption 20 mA
3 Frequence 868 Mhz
C) TECHNICAL DETAILS
POINT NAME WERT
1 Stromversorgung Pile 3V - CR2032
2 Energieverbrauch 20 mA
3 Frequenz 868 Mhz
D) DECLARATION OF CONFORMITY
Allotech hereby declares that this product is in compliance with the essential requirements and other relevant provisions of the
directive 1999/5 / EC. (TR2)
A declaration of conformity is available at www.alloteleccommande.com.
Failure to comply with these instructions renders void Allotech’s responsibility. Allotech may not be held responsible for changes to
norms and standards following the publication of this document.
D) KONFORMITÄTSERKLÄRUNG
Wir, Allotech, erklären, dass dieses Produkt den wesentlichen Anforderungen und weiteren zutreffenden Bestimmungen der Richtlinie
1999/5 / EG entspricht. (TR2)
Eine Konformitätserklärung ist auf der website www.allotelecommande.com.
Die Nichtbeachtung dieser Anweisungen schliebt die Haftung von Allotech und die Garantie aus. Allotech kann nicht für Änderungen
der Normen und Standards nach Veröffentlichung dieser Anleitung haftbar gemacht werden.
EN - AlloTech ECO 2 - 4 DE - AlloTech ECO 2 - 4
A) PROGRAMMING IN A FEW POINTS A) PROGRAMMIERUNG IN WENIGEN SCHRITTEN
1)
2)
3)
4)
1)
2)
3)
4)
Under the ECOSTAR engine you will nd a transparent button; press it. A LED will start to ash
slowly. Release the button.
You now have 10 seconds to press a button on your new Allotech ECO. The LED will start ashing
faster. You can release the button.
Now press the same button on your Allotech ECO again. Keep it pressed. The
diode will start ashing very quickly. You can release the button.
Your new remote control is now programmed.
Unterhalb des ECOSTAR-Antriebs nden Sie eine transparente Taste. Halten Sie diese gedrückt,
bis die LED langsam zu blinken beginnt. Lassen Sie die Taste nun wieder los.
Betätigen Sie jetzt innerhalb von 10 Sekunden eine beliebige Taste auf Ihrer neuen Ecostar RSC2.
Sobald die LED schneller zu blinken beginnt, können Sie die Taste wieder loslassen.
Betätigen Sie nun erneut dieselbe Taste auf Ihrer Ecostar RSC2 und halten Sie diese gedrückt.
Die LED beginnt nun sehr schnell zu blinken und Sie können die Taste wieder loslassen.
Ihre neue Fernbedienung ist fertig programmiert.
Locate and press the transparent button P, located under the ECOSTAR engine. Keep it
pressed.
Wait 5 seconds, then release the button.
The motor diode will start to ash slowly for 1 second, then faster for 4 seconds and will end
with a very rapid ashing for 2 seconds.
The manipulation is nished, all the remote controls are erased.
Finden und betätigen Sie die transparente Taste P, die sich an der Unterseite Ihres ECOSTAR
bendet, und halten Sie diese gedrückt.
Warten Sie 5 Sekunden und lassen Sie die Taste danach wieder los.
Die LED des Antriebs beginnt 1 Sekunde lang langsam zu blinken und blinkt danach 4
Sekunden lang schneller, gefolgt von einem sehr schnellen Blinken für 2 Sekunden.
Der Vorgang ist nun beendet und alle Fernbedienungen sind von Ihrem Gerät gelöscht.
1)
2)
3)
4)
1)
2)
3)
4)
B) ERASE ALL REMOTES B) SO WERDEN ALLE FERNBEDIENUNGEN VON IHREM GERÄT GELÖSCHT
WARNING : THE ECOSTAR INSTALLATION ACCEPTS THE PROGRAMMING OF A MAXIMUM OF 6 ECO
REMOTE CONTROLS.
BITTE BEACHTEN SIE: DAS ECOSTAR-SYSTEM AKZEPTIERT DIE PROGRAMMIERUNG VON BIS ZU 6
ECO-FERNSTEUERUNGEN.
C) TECHNISCHE DETAILS
ECO ECO
Scan Me! Scan Me!
Video tutorial Video tutorial
This manual suits for next models
1
Other Allotech Remote Control manuals
