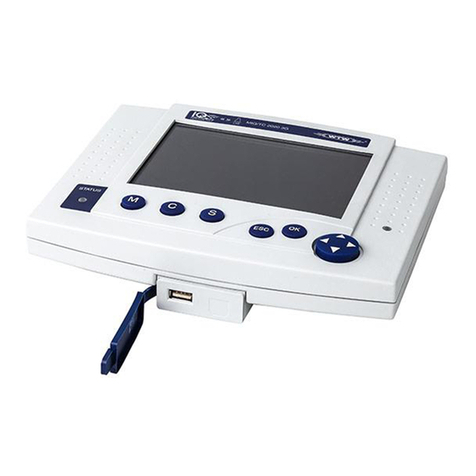
Allpay cashless User manual

allpay Cashless
EPoS Terminal
User Guide
The affordable cashless payments system
Cashless

2
allpay Cashless - <publication number or title>
Contents Page
What is allpay Cashless?....................................................................................................5
How it works ........................................................................................................................5
Account............................................................................................................................................................5
Making a Payment at the EPoS Terminal......................................................................................................5
Managing and Making Payments Online ......................................................................................................6
Cashless Management Web Portal................................................................................................................6
Cashless Back Office......................................................................................................................................6
Support.................................................................................................................................6
Contact Details................................................................................................................................................6
Hardware Overview .............................................................................................................6
EPoS Terminal Hardware Layout...................................................................................................................6
Power Supply Connection..............................................................................................................................8
Peripheral Connection....................................................................................................................................8
Network Connection .......................................................................................................................................8
Identification Device Connection ..................................................................................................................8
Swipecard Reader.......................................................................................................................................................8
Biometric Reader ........................................................................................................................................................8
Power On....................................................................................................................................................................8
Power Off....................................................................................................................................................................9
Logging into the EPoS Terminal ........................................................................................9
Receiving your EPoS Terminal Logon Account ..........................................................................................9
Logging In........................................................................................................................................................9
Server Log-off................................................................................................................................................10
End of Service Cash-up Process.................................................................................................................10
Sales...................................................................................................................................11
Product Selection..........................................................................................................................................11
Payment with an Account ............................................................................................................................11
Pay Using Biometric Identification.............................................................................................................................12
Pay Using Swipecard Identification...........................................................................................................................12
Pay Using Manual Lookup ........................................................................................................................................12
Pay Using Cash .............................................................................................................................................13
Customer Photograph Display ..................................................................................................................................13
Voucher Payment..........................................................................................................................................13

3
allpay Cashless - <publication number or title>
Refund Transaction.......................................................................................................................................14
Refund by Re-running the Transaction .....................................................................................................................14
Failed Payments............................................................................................................................................14
Managing Accounts......................................................................................................................................15
Account Enquiry........................................................................................................................................................15
Crediting an Account.................................................................................................................................................15
Free School Meal Allowances......................................................................................................................16
Creating a Free School Meal Allowance Token ........................................................................................................16
Managing Customers........................................................................................................17
Assign Biometric Identification...................................................................................................................17
Restarting the Biometrics Reader .............................................................................................................................18
Installing the Fingertip Scanner ..................................................................................................................18
EPoS Terminal Configuration...........................................................................................20
Managing Products.......................................................................................................................................20
Creating a new Sales Item............................................................................................................................20
Editing an Existing Product .......................................................................................................................................22
Removing a Product..................................................................................................................................................22
Adding or Amending a Category......................................................................................22
Till Map Management....................................................................................................................................22
Creating a New Till Map............................................................................................................................................23
Adding a food item....................................................................................................................................................24
Changing the PLU button properties.........................................................................................................................24
Adding a function button .............................................................................................................................24
Editing an Existing Till Map.......................................................................................................................................25
Deleting a Till Map ....................................................................................................................................................25
Creating a Payment Voucher.......................................................................................................................26
Stage 1 – Create the Voucher...................................................................................................................................26
Stage 2 – Assign the Voucher to the Till Map ...........................................................................................................27
Reports...............................................................................................................................27
Accessing Reports........................................................................................................................................27
Report Layout................................................................................................................................................28
Available Reports..........................................................................................................................................28
Data Management..............................................................................................................29
Allpay Web Links...........................................................................................................................................29
Pupil/Guardian Data Import..........................................................................................................................30
Error Log File Report....................................................................................................................................31

4
allpay Cashless - <publication number or title>
New Customer...............................................................................................................................................32
Wastage..............................................................................................................................32
Marking Food as Wastage............................................................................................................................32
Appendix............................................................................................................................33
File Format.....................................................................................................................................................33
Frequently Asked Questions .......................................................................................................................35

5
allpay Cashless - <publication number or title>
What is allpay Cashless?
allpay Cashless is a quick, cost effective system for the collection of payments towards any item including but not
limited to; school dinners, uniform sundries and trips.
allpay Cashless provides the Guardian with the ease of paying for products or services without cash changing
hands, either at the EPOS (Electronic Point of Sale) terminal or within the premises where the funds are collected.
The result is faster transaction processing and reduced queuing times for pupils. In addition, allpay allows flexibility
in how the item may be paid for; options include securing the item with a deposit, instalments over time or a lump
sum payment.
How it works
Account
All Guardians will be allocated an individual account together with a swipe card or barcoded invoice containing a
Payment Reference Number (PRN). The PRN gives reference details allowing Guardians to load an account by
making a payment. Payments may be made 24/7, free of charge using a debit or credit card (where allowed) via
allpay’s internet and telephone payment services or through the allpay App. If Guardians do not wish to pay via
card, they may pay by cash over the counter at their nearest network outlet, Post Office
®
or PayPoint.
Load Account Method Load Times for Cashless Accounts
Internet Payment
www.allpayments.net
Any payments made before the start of the school day will appear on
the pupils account in time for dinner service.
The allpay App is available to download from the Apple App store and
Google Play (formally the android marketplace)
Telephone Payment
0844 557 8321
The allpay App
Post Office
®
or PayPoint Any payments made before 5.30pm will appear on the pupils account
from 10.30am the next working day
Making a Payment at the EPoS Terminal
If paying for a school dinner using the allpay Cashless EPOS terminal, pupils must identify themselves using one of
the following 3 methods.
Swipecard registered against a payers account
Biometric scan
Customer name look up
If using a swipecard, it may be presented at the terminal where it will be swiped and funds debited. Individual
swipecards will be allocated to pupils by the school as and when required.

6
allpay Cashless - <publication number or title>
Biometric technology in the allpay Cashless system allows pupils to be identified by a single unique fingertip. When
using biometrics, no register of fingertips is kept and it is impossible to reconstitute a fingertip from the information
stored. This ensures security and peace of mind.
Managing and Making Payments Online
All account information including current balances, outstanding bills, transaction history and top ups are available to
the Guardians at any time through a secure online web interface. The swipecard or barcode provided with the
account is the identifier. Should the Guardian(s) loose or misplace their card or barcode, the funds will be safe and
a replacement card or barcode may be requested.
The Guardian’s web interface is available at the following website address:
www.allpayments.net
Cashless Management Web Portal
Schools, catering contractors or local educational authorities who administer payment media such as swipecards
and barcoded letters may do so through a simple-to-use web portal.
The web portal is available at the following website address:
www.allpaycashless.net
Cashless Back Office
Using the Cashless Back Office application, users may administer data, produce reports and manage the EPoS
terminal. The Cashless Back Office application can be installed onto the EPoS terminal or as a separate installation
on a standalone PC (recommended).
Support
Contact Details
Telephone and email support is available from allpay during office opening hours. Office opening hours are 8:30am
support queries.
Hardware Overview
The allpay Cashless EPoS terminal comprises of several individual components. Some components are essential
for unit operation; others are optional and provide increased flexibility for the user and the customer.
EPoS Terminal Hardware Layout
The EPoS till is a free standing unit, that is adjustable for the viewing display.

7
allpay Cashless - <publication number or title>
Figure 1 – Till illustration
Optional devices that may be connected to the EPoS terminal include:
Biometric Scanner
All connections including mains power, network and the optional devices listed above are made through the
External Input Panel. This is located to the rear of the terminal (see Error! Reference source not
found.2)
Figure 2 – Till Connectivity
LAN Port
External Input Panel
Power
Switch
Power In
USB
Connection
Swipecard
Reade
r
Power Display
Touch Screen
Adjustable
Stand

8
allpay Cashless - <publication number or title>
Power Supply Connection
The allpay Cashless EPoS terminal requires a standard UK 240V power source. To connect the power cable to the
unit, follow the instructions below:
1. Ensure the internal lead is connected to the Power In Socket
2. Plug the other end of the power cable into the mains supply
Peripheral Connection
The till offers full touch screen functionality, and it is possible to connect a Keyboard and Mouse which use standard
USB PC connections. The keyboard and mouse connect to any of the USB Ports shown in Fig 2.
Network Connection
In order to send and receive updates regarding transactions and account balances, the EPoS terminal will need to
synchronise with the central Cashless servers. This process requires a network connection. The Network cable
connects to the LAN port shown in Fig 2, a successful network connection is indicated by flashing lights on the LAN
port.
Identification Device Connection
The allpay Cashless EPoS terminal has 2 possible hardware devices that enable account identification:
Swipecard Reader
All EPoS terminals will include the functionality to read swipecards. Swipecard readers are typically located on the
right hand side of the unit (see Error! Reference source not found.) and remain permanently connected.
Biometric Reader
Using a separate device connected to the EPoS terminal, it is possible to identify an account by using a biometric
reader. Once registered against an account, a finger scan can be used to identify an individual and complete
transactions through the allpay Cashless system.
1. Ensure the EPoS terminal is powered down.
2. Plug the Biometric Reader into any USB Port on the External Input Panel (see Figure 2).
3. Power on the EPoS terminal. When successful, a blue light should show on the scanning device.
Note: The biometric finger reader works by deriving a numerical value from the fingertip. This numerical
value is then stored and used to identify the customer when making future transactions. allpay do not keep
an image of the fingertip nor can it be reconstructed from the data stored.
Power On
1. Ensure the EPoS terminal is connected to the mains power, the power indicator light will glow orange,
indicating standby mode.
2. Connect any other cables or devices required for operation.

9
allpay Cashless - <publication number or title>
3. Push the Power On/Off switch located on the External Input Panel (see Error! Reference source not
found.2).
4. The EPoS terminal should now power on, the power indicator light on the front panel will now glow blue.
Power Off
Before powering off ensure that the Cash-Up process has been completed detailed in the
End of Service
Cash-up Process
Section.
1. If logged into the EPoS terminal, from the till map, select Functions
2. From the Functions page, select Shutdown
3. Depending on preferences set by the Administrator, the EPoS can return to the Microsoft
®
Windows
desktop, Log off Windows or shutdown the EPoS terminal completely
Note: Ensure there are no sales pending before commencing the shutdown process. Any incomplete sales
will be highlighted to the user. The till operator must then run the Cash-Up process
Logging into the EPoS Terminal
Using the EPoS terminal, it is possible to perform a range of operations dependent on your access level. Typically,
the unit is used to process transactions however, it is also possible to run reports and manage accounts.
Receiving your EPoS Terminal Logon Account
Each new client will be supplied with a single “Manager” account by allpay Limited. This account contains
permissions to perform all tasks within the allpay Cashless EPoS terminal.
Upon receiving sign in credentials, the “Manager” may log into the EPoS terminal and create further user accounts
with similar or differing access permissions.
Logging In
1. Switch on the allpay Cashless EPoS terminal
2. From the user selection screen, select Touch to Start
3. To sign into the EPoS terminal, enter your personal PIN and select Accept

10
allpay Cashless - <publication number or title>
4. On successful sign-in to the EPoS, the user will be taken to their default till map. If unsuccessful, the user
must re-enter their PIN.
Important: A required window titled Identify will appear for the Biometrics reader (if installed); this window
must not be closed by using the Red X button
Server Log-off
1. From the Home menu choose the Server Logoff button, this will immediately log the current server off from
the system, no further enquiries or transactions can take place.
2. Should a change of Server be required during service, from the Home Screen choose Server Logoff
3. The log-on screen for the new server will be presented
4. The new server should now log-on
Note: An on-going transaction will not be affected if there is a change of server
End of Service Cash-up Process
At the end of each service a Cash-up must be carried out, a warning message will be displayed if a shutdown is
attempted without performing a Cash-up first
1. From the Home screen, choose Functions
2. Choose Cash-up station, choose the Accept option

11
allpay Cashless - <publication number or title>
3. Choose Yes to proceed with the Cash-up Process
Sales
Upon logging into the allpay Cashless EPoS terminal, a user may process a transaction on behalf of the customer.
The transaction process has been designed for flexibility and convenience.
Product Selection
1. Log into the EPoS terminal (see Logging into the EPoS Terminal)
2. Using the till map provided, select the appropriate product(s) from the list to add them into the Product
Window
Note: The product selection list may vary in accordance with the options configured by the Administrator
Payment with an Account
Using the linked allpay Cashless account, pupils can pay for goods and services without having to carry cash or
cards. In this example the pupil has chosen one item which is added to the Product Window, with a total cost of
£1.80

12
allpay Cashless - <publication number or title>
Depending on the status of the pupils account an Indicator code may be displayed in the payment window. The
possible codes are:
E = Emergency Meal
S = Credit Limit
M = Free School Meal
O = Overdraft
Pay Using Biometric Identification
1. Add the appropriate product(s) into the Product Window (see Product Selection)
Note: The customer may scan their fingertip at any point in the sales process. If an account is located, the
customer name and account summary will appear in the sales window.
2. To enable payment, ensure the customer places their pre-registered fingertip on the biometric scanner.
When an account is located, a summary is shown onscreen.
3. To complete the payment, select Pay Finger. If successful, the payment will complete and the screen
indicates its readiness for the next customer. Should any issues arise; the user will receive a prompt
onscreen.
Pay Using Swipecard Identification
1. Add the appropriate product(s) into the Product Window (see Product Selection).
2. Swipe the customer card through the swipe card reader on the EPoS terminal. If successful, the payment
will complete and the screen indicates its readiness for the next customer. Should any issues arise; the
user will receive a prompt onscreen.
Pay Using Manual Lookup
1. Add the appropriate product(s) into the Product Window (see Product Selection).
2. Select Name Lookup.
3. Using the onscreen keyboard, type the customers surname. The system will begin to filter the results as the
characters are entered. When the appropriate customer is located, touch the name onscreen to highlight
the account. A search is also possible by choosing Forename as an alternative.

13
allpay Cashless - <publication number or title>
Pay Using Cash
Add the appropriate product(s) into the Product Window (see Product Selection).
1. Select Cash Pay.
2. Using the onscreen keyboard, enter the cash tendered followed by Accept.
Note: Although allpay Cashless is primarily a cashless system, the functionality to accept cash remains.
The use of this function is entirely at the discretion of the user.
3. The screen will calculate the change (if required) and the payment will complete.
Customer Photograph Display
It is possible for the system to display a photograph of the customer, this is purely for customer confirmation, and
this is dependent upon suitable photographs being loaded on to the system from your organisations data file.
Please see the relevant section in the Cashless Back Office User Guide for further details on how photographs
are associated with a customer.
Voucher Payment
In addition to these methods a department or individual can use a voucher system in order for the following differing
types of visitors.
Teacher meals
Guests
Independent Learners
Contractors
This will allow the voucher holder to be entitled to a meal; up to three different types of Vouchers can be used.
Please (see section
Creating a Payment Voucher
) on how Vouchers are created.

14
allpay Cashless - <publication number or title>
Refund Transaction
A full transaction or a part transaction refund can be made after the transaction has been made.
Refund by Re-running the Transaction
1. Enter the Product items to be refunded, in this example there are three products to be refunded
2. From the Functions button, choose Refund (All Items)
3. To confirm the refund select an identification method (see Pay Using Swipe Card Identification, Pay
Using Biometric Identification or Pay Using Manual Lookup)
4. The Product Window will now confirm that the items have now been refunded to the students account.
Failed Payments
A payment can fail for a variety of reasons. These include but are not limited to:
Insufficient funds on the account
Maximum debt limit has been reached
Maximum number of emergency meals have been consumed
Maximum daily spend limit reached.
Sample Transaction Error Displays

15
allpay Cashless - <publication number or title>
Managing Accounts
Account Enquiry
A Staff Member, Pupil or Guardian may need to know what the current balance is on the account; in addition other
details such as credit and daily spend can be checked. An account enquiry can also produce a detailed statement
going back a maximum of three months.
1. From the Functions button choose Supervisor
2. From the Card User Admin button choose Enquiry Meal Accounts
3. Select the Customer
Crediting an Account
1. From the Supervisor menu choose Card User Admin
2. Choose Setup

16
allpay Cashless - <publication number or title>
3. Choose Enter Account O/Balance
4. Search for the pupils account to be credited
5. Enter the amount to be credited on the account.
6. Choose Post Balance, the new balance will now be updated
Free School Meal Allowances
This feature can be amended within the Cashless System, and is set up for your organisation, but there may be
reason to amend the details. The Cashless system uses a token, which is created, and allocated to pupils account.
There can be a maximum of three tokens in use, which can be set up to cover differing times of the day. The value
of the token can also be changed.
Creating a Free School Meal Allowance Token
1. From the Functions button choose Card User Admin
2. From the Setup menu choose Free Spend Allowances
3. Choose Add to create a new FSM token, it is possible to have several FSM tokens set-up
4. Enter the appropriate values, notice the time period for this FSM of Test Lunch FSM, this means that a
pupil who qualifies for a FSM and who wishes to purchase an item in morning break (which is before
11:45) will not have the transaction subtracted from the FSM allowance.

17
allpay Cashless - <publication number or title>
A FSM can exclude specific day(s) of the week. Choose Accept to save the process
Managing Customers
Assign Biometric Identification
Using biometric technology, pupils scan a fingertip to identify themselves. The advantage is that the pupil need not
carry any additional forms of identification that could be lost or misused.
It is advisable to be consistent when enrolling fingertips, it is suggested that the right index finger gives the best
results.
Important: The enrolment of biometrics cannot be performed unless consent has been given by the
Guardian of the pupil. Consent may be confirmed by the customer via their web interface or through the
organisation by an Administrator on the management web portal.
Tips for when enrolling fingertips:
Ensure the Biometric scanner is clean and dry
Ensure the Biometric scanner is at suitable height on a level surface
The customer should have a clean, dry finger, and the same part of the finger should be used for the scan.
To enrol a new student:
1. Log into the EPoS terminal (see Logging into the EPoS Terminal).
2. Ensure you have the necessary access permissions
3. At the Home screen choose Functions and choose Supervisor
4. Choose Card User Admin and select Biometric Enrolment, accept the on-screen message
5. Select the pupil to be enrolled
6. Choose the Enrol button
7. Ensure that the requisite number of finger tip reads is completed, and choose Close
8. Repeat the procedure for more finger tip reads

18
allpay Cashless - <publication number or title>
9. Close the Biometric module when the process is completed
Note: The Biometric reader module MUST be re-run after this procedure; the following section will
demonstrate this
Restarting the Biometrics Reader
Under certain circumstances the Biometrics Reader will need restarting
1. From the Functions button choose Card User Admin
2. Choose Re-Start Fingerprint Reader, the Identify Window will appear, ensure the window is minimised
and not closed
3. Close the Account Administration window
Installing the Fingertip Scanner
If the system displays a message saying that the fingertip scanner is not installed, then it may be necessary to setup
the fingertip scanner
1. From the home screen choose the Function button
2. From the Supervisor button choose System Setup
3. Choose Setup Hardware Devices
4. Browse down the list and locate the entry for Fingerprint Reader. If there is no entry of ‘Yes’ in the
Installed column the finger tip scanner will need to be installed

19
allpay Cashless - <publication number or title>
5. Choose Install
6. Accept the default of USB 0
7. Choose Next and Next
8. Choose Finish
9. Check to ensure that the Installed column now displays Yes for the Fingertip Reader, choose Exit and
select Home to return to the main EPoS screen.

20
allpay Cashless - <publication number or title>
EPoS Terminal Configuration
The allpay Cashless EPoS terminal is fully configurable from products and prices, to the colour scheme and button
layout.
Managing Products
The EPoS Till consists of two main elements, a Till Map and Sales Items (PLU). Sales Items can be freely placed
on a Till Map and there can be several Till Maps assigned to different tills.
A till map consists of:
Transaction Details of the customer
Product Items available for sale
Functions which can be performed on the EPoS
Sample Till Map
Creating a new Sales Item
1. Choose the Functions button from the Home screen, choose the Supervisor button
2. From the Data Admin button menu choose Sales Items (PLU’s)
3. From the PLU Setup screen, choose Add
Table of contents
Other Allpay Touch Terminal manuals
