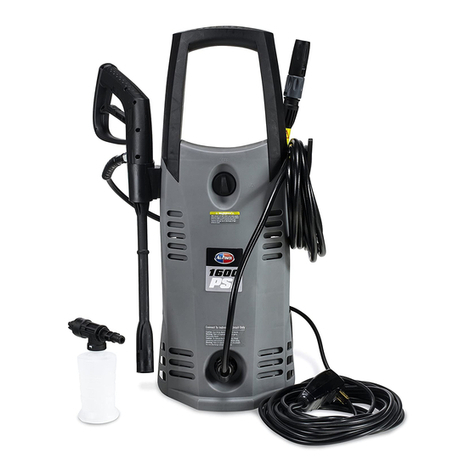
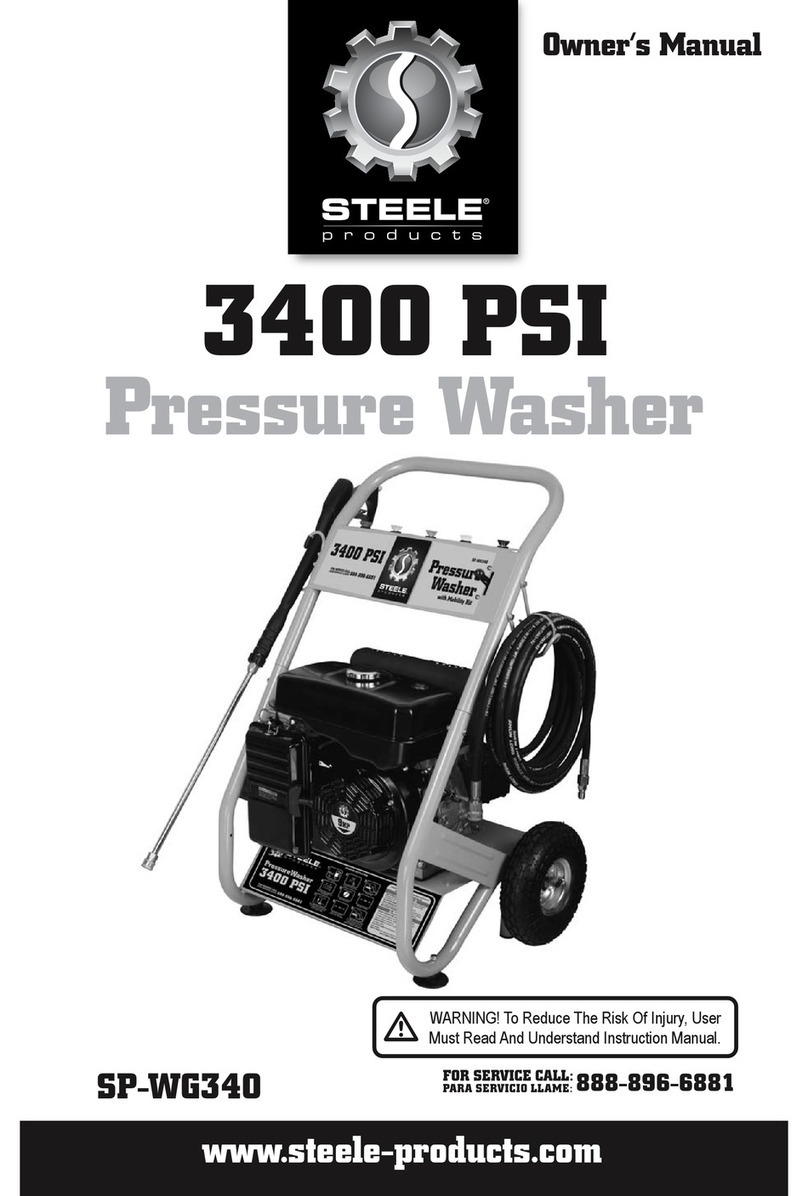
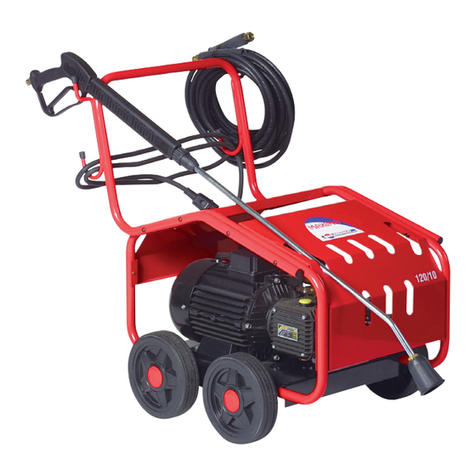
ALLPOWER EPW2000 User manual

Electric Pressure Washer
MODEL NO. EPW2000
OWNER’S MANUAL

2 | ALL POWER™ EPW2000 POWER WASHER www.allpoweramerica.com
Copyright and Compliance Statements
© 2014, Jiang Dong North America and All -Power America are copy written by Chong Qing
Dajiang Power Equipment Co. Ltd.
UNITED STATES ENVIRONMENTAL PROTECTION AGENCY, WASHINGTON, DC 20460
2014 Model Year Certicate of Conformity:
Manufacturer: Chong Qing Dajiang Power Equipment Co. Ltd.
Certicate Number: CDP-NRSI-06-02
Effective Date: 12/30/2014
Date Issued: 12/30/2014
Merrylin Zaw-Mon, Director, Compliance and Innovation Strategies Division, Ofce of
Transportation and Air Quality.
Pursuant to Section 213 of Clean Air Act (42 U.S.C. Section 7547) and 40 CFR 90, and subject
to the terms and conditions prescribed in those provisions, this certicate of conformity is
hereby issued for the following small non-road engine family, more fully described in the
documentation required by 40 CFR 90 and produced in the stated model year.
This certicate of conformity covers only those new small non-road engines which conform
in all material respects to the design specications described in the documentation required
by 40 CFR 90 and which are produced during the model year stated on this certicate.
This certicate of conformity does not cover small non-road engines imported prior to the
effective date of the certicate. SMALL NON-ROAD ENGINE FAMILY: 6CDPS
This certicate of conformity is conditional upon compliance of said manufacturer with
the averaging, banking, and trading provisions of 40 CFR Part 90, Subpart C both during
and after model year production. Failure to comply with these provisions may render this
certicate void ab initio. The HC + NOX family emission limit (FEL) is: g/k W-hr.
It is a term of this certicate that the manufacturer shall consent to all inspections described
in 40 CFR 90.126 and 90.506 and authorized in a warrant or court order. Failure to comply
with the requirements of such a warrant or court order may lead to revocation or suspension
of this certicate for reasons specied in 40 CFR 90. It is also a term of this certicate that
this certicate may be revoked or suspended or rendered void ab initio for other reasons
specied in 40 CFR 90.
This certicate does not cover small non-road engines sold, offered for sale, or introduced,
or delivered for introduction, into commerce in the U.S. prior to the effective date of the
certicate.
WARNING! PLEASE READ AND UNDERSTAND ALL SAFETY PRECAUTIONS IN THIS
MANUAL BEFORE OPERATING. FAILURE TO COMPLY WITH INSTRUCTIONS IN THIS
MANUAL COULD RESULT IN PERSONAL INJURY, PROPERTY DAMAGE, AND/ OR
VOIDING OF YOUR WARRANTY. ALL POWER AMERICA WILL NOT BE LIABLE FOR
ANY DAMAGE BECAUSE OF FAILURE TO FOLLOW THESE INSTRUCTIONS.
IMPORTANT INFORMATION
This manual contains important notations that
you need to know and understand to protect
YOUR SAFETY and to PREVENT EQUIPMENT
PROBLEMS.
READ AND UNDERSTAND ALL SAFETY PRECAUTIONS
IN THIS MANUAL BEFORE OPERATING. FAILURE
TO COMPLY WITH INSTRUCTIONS IN THIS MANUAL
COULD RESULT IN PERSONAL INJURY, PROPERTY
DAMAGE, AND/OR VOIDING YOUR WARRANTY.
ALLPOWER™ AMERICA WILL NOT BE LIABLE FOR ANY
DAMAGE DUE TO FAILURE OF COMPLYING THESE
INSTRUCTIONS.
This is a safety alert symbol. This is used to
alert you to potential personal injury hazard.
Obey all safety messages that follow this
symbol to avoid possible injury or death.
A WARNING indicates a hazardous
situation which, if not avoided, could result
in death or serious injury.
A NOTE indicates special precautions that
must be taken to avoid damage to the
machine or other property.
Congratulations on your purchase of an
All Power™EPW2000 Pressure Washer!
All Power™designs and builds pressure washers with the consumer in mind. With
proper use and maintenance, this pressure washer will bring years of service. This
‘Owner’s Manual’ will provide you with a good basic understanding of the operation
and maintenance of this machine. Every effort has been made to ensure the
accuracy and completeness of the information in this package. We reserve the
right to change, alter and/or improve the product and this document at any time
without prior notice. WARNING
2ALL POWER EPW2000 PRESSURE WASHER

ALL POWER™ EPW2000 POWER WASHER | 3
SAFETY INFORMATION .............................................4
GCFI .......................................................................... 4
General Safety Precautions ....................................... 5
Servicing of A Double-Insulated Appliance .............. 6
Use of Extension Cords............................................. 6
Proper Use of The Pressure Washer.....................6 - 7
ASSEMBLY ..................................................................7
Unpacking The Carton .............................................. 7
Assembly Instructions................................................ 8
OPERATING INSTRUCTIONS......................................9
Starting Up ................................................................ 9
Automatic On/Off ..................................................... 9
Bleeding The Gun ..................................................... 9
Gun Safety Lock ...................................................... 10
Adjustable Spray Nozzle ......................................... 10
Dispensing Detergent ............................................. 10
Adjusting The Pressure............................................ 10
Total Stop System.................................................... 11
Using Detergents .................................................... 11
CLEAN-UP AND STORAGE ......................................12
Shutting Down the Pressure Washer....................... 12
Winterizing and Long-Term Storage ....................... 12
CLEANING TIPS........................................................13
Maintenance............................................................ 13
Cleaning Tips........................................................... 13
Cement Patios, Stone and Brick.............................. 13
Cars, Boats and Motorcycles................................... 13
Barbecue Grills, Power Equipment & Garden Tools ....14
TECHNICAL DATA ....................................................14
TROUBLESHOOTING.........................................15 - 16
NOTES......................................................................17
PARTS LIST ........................................................18 - 19
NOTES...............................................................20 - 21
CONSUMER INFORMATION ....................................22
IdenticationNumberRecords ............................... 22
LIMITED WARRANTY ...............................................23
OWNER’S MANUAL | CONTENTS

4 | ALL POWER™ EPW2000 POWER WASHER www.allpoweramerica.com
4SAFETY INFORMATION | OWNER’S MANUAL
Read and understand all Safety Precautions
in this manual before operating. Failure to
comply with instructions in this manual could
result in personal injury, property damage
and/or voiding of your warranty. All Power
will not be liable for and damage because of
failure to follow these instructions.
Ground Fault Circuit Interrupter (GFCI)
This pressure washer is provided with a
ground fault circuit interrupter (GFCI) built
into the plug of the power supply cord. This
device provides additional protection from
the risk of electric shock. Should replacement
of the plug or cord become necessary, use
only identical replacement parts that include
GFCI protection.
This unit is equipped with a Ground Fault
Circuit Interrupter (GFCI). When connecting
the GFCI to the receptacle, the indicator
should appear red. If the indicator is not red,
depress the RESET button on the GFCI until
the indicator appears red. If the indicator
does not appear red, please see Section titled
“Troubleshooting” for more information.
SAFETY GUIDELINES - DEFINITIONS
This manual contains important information
that you need to know and understand in
order to protect YOUR SAFETY and to
PREVENT EQUIPMENT PROBLEMS. The
following symbols help you recognize this
information. Please read the manual and pay
attention to these sections.
SAVE THESE IMPORTANT SAFETY
INSTRUCTIONS!
A WARNING indicates a
certainty or strong possibility
of personal injury or death if
instructions are not followed.
WARNING
A CAUTION indicates a
possibility of equipment
damage if instructions are not
followed.
CAUTION
A NOTE indicates helpful
information.
WARNING
IMPROPER OPERATION OR MAINTENANCE OF
THIS PRODUCT COULD RESULT IN SERIOUS
INJURY AND PROPERTY DAMAGE. READ AND
UNDERSTAND ALL WARNINGS AND OPERATING
INSTRUCTIONS BEFORE USING THIS
EQUIPMENT. WHEN USING AIR TOOLS, BASIC
SAFETY PRECAUTIONS SHOULD ALWAYS
BE FOLLOWED TO REDUCE THE RISK OF
PERSONAL INJURY.
IMPORTANT SAFETY TIPS
• Never point the high-pressure nozzle at
people or animals.
• Never drink alcohol or use drugs while
operating the pressure washer.
• Never operate the pressure washer while
standing in water.
• Never touch the electrical plug with wet
hands.
• Never let electrical connections rest in water.
• Never operate pressure washer without the
water turned on.
• Never use hot water with this pressure
washer.

ALL POWER™ EPW2000 POWER WASHER | 5
OWNER’S MANUAL | SAFETY INFORMATION 5
IMPORTANT SAFETY PRECAUTIONS
WARNING
DUST FROM POWER SANDING, SAWING,
GRINDING, DRILLING, AND OTHER
CONSTRUCTION ACTIVITIES CONTAIN
CHEMICALS KNOWN TO THE STATE OF
CALIFORNIA TO CAUSE CANCER, BIRTH
DEFECTS OR OTHER REPRODUCTIVE HARM.
1. Readallinstructionsbeforeusingthe
product. Save all safety instructions.
2. Do not operate the pressure washer when
fatiguedorundertheinuenceofalcohol
or drugs.
3. Riskofinjectionorinjury–donotdirect
the high pressure water stream at any
people or animals.
4. Do not allow children to operate the
pressure washer at any time.
5. To reduce the risk of injury, close
supervision is necessary when the pressure
washer is used near children.
6. Know how to stop the unit and reduce
pressure immediately. Be completely
familiar with the controls.
7. Stayalert–alwaysbeawareofwhereyou
are directing the high pressure spray.
8. Keep cleaning area clear of all people.
9. Keep good footing and balance at all times
–donotoverreachorstandonanunstable
support.
10. The work area should have adequate
drainage to reduce the possibility of a fall
due to slippery surfaces.
11. Follow the maintenance instructions
speciedinthemanual.
12. To reduce the risk of electrocution, keep all
connections dry and off the ground. Do not
touch plug with wet hands.
General Safety Precautions
1. Intended for outdoor household use only.
2. High-pressure hose can develop leaks
from wear, abuse, kinking etc. Do not use
a damaged hose.
3. Do not use the pressure washer in areas
near combustible materials, combustible
fumes, or dust.
4. Some chemicals or detergents may be
harmful if inhaled or ingested causing
severe injury. Use a respirator or mask
whenever there is a chance that vapors may
beinhaled.Readallinstructionsincluded
with the mask so you are certain the mask
will provide the necessary protection
against inhaling harmful vapors.
5. Before starting the pressure washer in
cold weather, check all of the parts of the
equipment and be sure that ice has not
formed. Do not store the unit anywhere
that the temperature will fall below
0° C (32° F).

6 | ALL POWER™ EPW2000 POWER WASHER www.allpoweramerica.com
6. DO NOT MAKE ANY MODIFICATIONS TO
ANY OF THE COMPONENTS! Units with
broken or missing parts, or without the
protectivehousingorcoversshouldNEVER
be operated
7. Keep the high-pressure hose connected to
the pressure washer and the spray gun
while the system is pressurized.
Disconnecting the hose while the unit is
pressurized is dangerous, and may cause
injury.
8. Do not leave the pressure washer
unattended while the power switch is ON.
9. Keep water spray away from electrical
wiring or fatal electric shock may result.
Servicing of A Double-Insulated Appliance
In a double-insulated product, two systems of
insulation are provided instead of grounding.
No means of grounding is provided on a
double-insulated product, nor should a means
for grounding be added to the product.
Servicing a double-insulated product requires
extreme care and knowledge of the system,
andshouldbedoneonlybyqualiedservice
personnel.Replacementpartsfora
double-insulated product must be identical
to the parts they replace. A double-insulated
product is marked with the words “DOUBLE
INSULATION” or “DOUBLE INSULATED”.
This symbol may also be marked on the
product.
Use of Extension Cords
Use of an extension cord with this product is
NOTRECOMMENDED.Ifyoumustusean
extension cord, use only extension cords that
are intended for outdoor use. These cords
areidentiedbyamarking“ACCEPTABLE
FORUSEWITHOUTDOORAPPLIANCES,
STOREINDOORSWHILENOTINUSE.”Use
only extension cords having an electrical
rating not less than the rating of the product.
Examine extension cord before use. Do not
use damaged extension cords! Do not pull on
cord to disconnect from receptacle, always
disconnect by pulling on plug. Keep cord away
from heat and sharp edges. Always disconnect
the extension cord from the receptacle before
disconnecting the product from the extension
cord.
WARNING
To reduce the risk of electrocution, keep all
connections dry and off the ground. Do not touch
the plug with wet hands.
Proper Use of The Pressure Washer
Use of an extension cord with this product is
NOTRECOMMENDED.Ifyoumustusean
extension cord, use only extension cords that
are intended for outdoor use. These cords are
identiedbyamarking“ACCEPTABLE
NOTE: THIS UNIT IS INTENDED FOR
USE WITH COLD WATER ONLY!
DO NOT USE HOT WATER IN THIS
PRESSURE WASHER.
1. Operate the pressure washer at no more
thantheuidpressureratedforthe
pressure washer. Never run the pressure
washerwithoutawatersupply.Running
the unit without a water supply will cause
irreparable damage to the unit.
6SAFETY INFORMATION | OWNER’S MANUAL

ALL POWER™ EPW2000 POWER WASHER | 7
Proper Use of The Pressure Washer
(cont’d)
2. Make sure that the water supply you use
for the pressure washer is not dirty, sandy,
and does not hold any corrosive chemical
products. Using a dirty water supply will
compromise the long life of the pressure
washer.
The pressure washer can be used for a variety
of applications including washing cars, boats,
patios, decks, garages etc. where high pressure is
necessary to remove dirt and debris. High-pressure
water ow can damage the work surface if not
used properly! See the section titled “Operation”
for more details. Always test the spray in an open
area rst.
CAUTION
3. NEVERmovetheunitbypullingonthe
high pressure hose. Use the handle
provided on the top of the unit.
4. Always hold the high pressure gun and
wand with two hands. Keep one hand on
the gun/trigger, while supporting the wand
with the other hand.
5. When dispensing detergent, the pressure
washer applies detergent to the cleaning
area at low pressure only. Once the
detergent has been applied, spray the
detergent off of the work area by using
the adjustable nozzle.
ASSEMBLY INSTRUCTIONS (Fig 1)
Unpacking The Carton
After opening the carton, please remove all
parts and check them against the following
list of components that are included:
A. High Pressure Washer
B. Gun
C. High Pressure Hose
D. Adjustable Nozzle
E. Brass Connector
F. Water Intake Filter (Pre-Installed)
G. Detergent Bottle (Fig 1)
OWNER’S MANUAL | ASSEMBLY 7

8 | ALL POWER™ EPW2000 POWER WASHER www.allpoweramerica.com
ASSEMBLY INSTRUCTIONS (cont’d)
To assemble the enclosed parts, please refer
to the steps that follow:
Step 1 (Fig 2)
Insert the adjustable spray nozzle into the gun.
Push and turn the adjustable nozzle clockwise
onto the gun until hand tight to lock it in
place. When the pieces are joined properly,
you cannot separate the two components by
pulling straight out on the adjustable nozzle.
All attachments must be inserted into the gun
for proper use.
(Fig 2)
Step 2 (Fig 3)
Attach the L-shape coupler end of the
extension hose (N) into the water outlet and
the other end into the hose reel (H).
(Fig 3)
Step 3 (Fig 4)
Fasten the high pressure hose tightly
onto the gun assembly and tighten to
avoid leakage.
(Fig 4)
Step 4 (Fig 5)
Attach the hose connector to pressure washer.
Before attaching the connector to the male
tting,removetheplasticcap,whichis
insertedontothemalettingonthepressure
washer before shipping. This plastic cap
can be discarded once removed. After both
components have been installed, attach the
garden hose with connector screw on the
pressure washer. Connect the garden hose to
the waterspout.
8
Step 3
Attach the high-pressure hose to the male fitting on the front of the pressure washer.
Before attaching the high-pressure hose to the male fitting, remove the plastic cap,
which is inserted onto the fitting before shipping. This plastic cap can be discarded
once removed. Twist on tight to avoid leakage.
Step 4
Attach the hose connector to pressure washer. Before attaching the connector to the male
fitting, remove the plastic cap, which is inserted onto the male fitting on the pressure washer
before shipping. This plastic cap can be discarded once removed. After both components have
been installed, attach the garden hose with connector screw on the pressure washer. Connect
the garden hose to the waterspout.
1600PSIPressureWasher
(Fig 5)
8ASSEMBLY/OPERATION | OWNER’S MANUAL

ALL POWER™ EPW2000 POWER WASHER | 9
OPERATING INSTRUCTIONS
NOTE: THIS UNIT IS INTENDED FOR
USE WITH COLD WATER ONLY!
DO NOT USE HOT WATER IN THIS
PRESSURE WASHER.
Bleeding The Gun
It is very important to bleed all the air out of
the pressure washer before using it. To do this:
1.Releasetriggerlock.
2. Squeeze the trigger before turning the
electrical supply on. This removes any air
trapped inside the pressure washer and
lance before using the units.
3. Continue holding trigger for approximately
one minute to allow any excess air out of the
unit.Waterwillowthroughthegunatlow
pressure during this procedure.
4. Lock the trigger.
5. Plug the mains power cable into the
electricity supply.
6.Releasethetriggerlock.
7. Turn the ON/OFF switch clockwise to the
I/ON position. The pressure washer is ready
to using now.
Starting Up
After connecting the pressure washer to your
cold water supply, proceed as follows:
- Make sure that the ON/OFF switch is
in the OFF position.
- Connect the garden hose with quick
connecttotheinlettting.
- Attach the hose to the gun.
- Insert the adjustable spray nozzle
into the gun.
- Connect the high pressure hose to
thehighpressureoutlettting.
- Open the water supply valve completely.
- Before turning the unit on, press the gun
trigger to bleed all the remaining air out
of the pump and hose.
- Start the pressure washer by turning the
on/off switch to the on position and
squeeze the trigger.
REMINDER:Motordoesnotruncontinuously,
only when the trigger is squeezed.
WARNING
RISK OF INJECTION! Unit will start spraying
when trigger is squeezed. When turning the unit
off after use, high pressure still exists inside the
hose and unit. Point the gun in a safe direction
and discharge the excess pressure. NEVER direct
the high pressure water stream at people or
animals.
Automatic On / Off
The pressure washer is equipped with an
automatic ON/OFF switch. The pressure
washer will only run when the power switch is
in the ON position and the trigger on the gun
is squeezed. When you release the trigger to
stop spraying water through the gun, the
motor on the pressure washer will
automatically shut off. Simply squeeze the
trigger again to resume using the washer. To
stop using the pressure washer, release the
trigger and switch the unit to the OFF position.
The unit should be turned completely
OFF while not in use or while unattended.
OWNER’S MANUAL | OPERATION 9

10 | ALL POWER™ EPW2000 POWER WASHER www.allpoweramerica.com
Gun Safety Lock
This pressure washer is equipped with a
gun trigger safety lock. When not using the
pressure washer, use the safety lock to keep
from accidentally engaging the high pressure
spray.
Adjustable Spray Nozzle (Fig 6)
(Fig 6)
The adjustable nozzle will allow you to use any
variety of spray patterns from a full fan spray to
a direct stream spray (Diagram 2). When using
the pressure washer to clean wood decks,
siding, vehicles etc., always start using the
fan spray and begin spraying from a minimum
36” away to avoid damaging the surface of
the material you are cleaning. Always begin
by spraying in a testing area free and clear of
people and objects.
Dispensing Detergent (Fig 7)
The built-in detergent dispenser will allow
you to apply many forms of liquid detergent
onto the work surface. Detergent application
happens at low-pressure only. Insert the
adjustable nozzle onto the gun, and turn it to
end of “ - ” so that the pressure washer is in
low-pressuremode(seeFigure7).Remove
thecaponthedetergentreservoirandll
with liquid detergent only (see Figure B).
Do not put any water into the reservoir. The
pressure washer will mix water and detergent
automatically.
Whennishedapplyingthedetergenttothe
work surface, turn the adjustable nozzle to
end of “ + ” and spray off the detergent by
using the high-pressure spray. In high-pressure
mode, the pressure washer will not dispense
detergent.
(Fig 7)
(Fig B)
Adjusting The Pressure (Fig 8)
To adjust the pressure, proceed as follows:
1. Hold the shaft of the lance in one hand.
2. Turn the gray part of the nozzle clockwise
(to “+” end) to obtain the high pressure.
3. Turn the gray part of the nozzle
counterclockwise (to “-” end) to obtain
the low pressure.
(Fig 8)
10 DETERGENTS | OWNER’S MANUAL

ALL POWER™ EPW2000 POWER WASHER | 11
Total Stop System
Thepressurewasheristtedwithatotalstop
system to protect the motor when in use.
When the trigger is released the motor will
stop. When the trigger is squeezed the motor
will start up again.
Using Detergents
Biodegradabledetergentsarespecically
formulated to protect the environment and
your pressure washer. These Detergents will
notclogthelterandwillprotecttheinternal
parts of the pressure washer for a longer life.
(Fig 9)
Step 1 (Fig 9)
Open the cover of the detergent bottle by
twisting it off.
Step 2 (Fig 9)
Fill the detergent bottle with any approved
liquid detergent. Close the cover.
Step 3 (Fig 10)
Turn the adjustable nozzle to end of “ - ”,
put the pressure washer into low-pressure
mode.
(Fig 10)
Step 4
To apply the detergent cleanser to your working
area, turn the pressure washer switch to the ON
position. Pull the trigger to operate the unit.
The pressure washer will mix the detergent with
water. Do not allow the detergent to dry on the
object that you are cleaning.
WARNING
NEVER USE PRODUCTS WITH BLEACH OR
CHLORINE OR ANY OTHER CORROSIVE
MATERIALS, INCLUDING LIQUIDS CONTAINING
SOLVENTS (I.E. GAS, OILS ETC), TRI-SODIUM
PHOSPHATE PRODUCTS, AMMONIA, OR ACID-
BASED CLEANERS. THESE CHEMICALS WILL
HARM THE UNIT AND CAUSE DAMAGE TO THE
SURFACE BEING CLEANED. ALWAYS READ THE
LABEL.
Step 5
To clean the working area, turn the adjustable
nozzle to end of “ + ”, return it to high-pressure
mode. Spray high-pressure water onto the
work area to rinse off the work area and any
remaining detergent.
(Fig 11)
OWNER’S MANUAL | DETERGENTS/CLEAN-UP AND STORAGE 11

12 | ALL POWER™ EPW2000 POWER WASHER www.allpoweramerica.com
12 CLEAN-UP AND STORAGE | OWNER’S MANUAL
Shutting Down the Pressure Washer
When Finished Using The Pressure Washer,
Follow These Steps To Shut Down The Unit:
• Turn the pressure washer to the OFF
position.
• Turn off the water supply.
• Before disconnecting high-pressure
hose connection, point the gun in a safe
direction and discharge the high-pressure
water.
• Disconnect high-pressure hose from the
pressure washer and gun.
• Disconnect garden hose from the
pressure washer.
•Removeexcesswaterfromthepumpby
tipping the unit on both sides to
drain any remaining water from inlet and
outletttings.
•RemoveWaterIntakeFilterandushwith
watertoremovedirtordebris.Return
lteroncecleaned.
•Draindetergentreservoirandushwith
running water.
• Wipe away any remaining water on all
partsandttings.
• Engage the gun safety lock.
• Store the pressure washer, parts, and
accessories in an area with a temperature
above 0°C (32°F).
41
CLEAN-UP AND STORAGE
Shutting Down the Pressure Washer
WHEN FINISHED USING THE PRESSURE WASHER,FOLLOW THESE
STEPS TO SHUT DOWN THE UNIT:
•Turn the pressure washer to the OFF position.
•Turn off the water supply.
•Before disconnecting high-pressure hose connection, point the gun in a
safe direction and discharge the high-pressure water.
•Disconnect high-pressure hose from the pressure washer and gun.
•Disconnect garden hose from the pressure washer.
•Remove excess water from the pump by tipping the unit on both sides to
drain any remaining water from inlet and outlet fittings.
•Remove Water Intake Filter and flush with water to remove dirt or debris.
Return filter once cleaned.
•Drain detergent reservoir and flush with running water.
•Wipe away any remaining water on all parts and fittings.
•Engage the gun safety lock.
•Store the pressure washer, parts, and accessories in an
area with a temperature above 0°C (32°F).
1600 PSI Pressure Washer
(Fig 12)
Winterizing and Long-Term Storage
FOLLOW ALL OF THE ABOVE SHUT-DOWN
PROCEDURES, ADDING
THE FOLLOWING STEPS….
• After disconnecting the water supply, and
before disconnecting the high-pressure
hose, turn the pressure washer on for 2-3
seconds, until any remaining water in the
pump exits. Turn unit off immediately.
CONTINUED USE OF THE PRESSURE
WASHER WITHOUT WATER SUPPLY
ATTACHED WILL CAUSE SEVERE
DAMAGE TO THE UNIT!
• Always store the pressure washer, parts,
and accessories in an area with a
temperature above 0° C (32° F).
WARNING
Failure to comply with these storage instructions
will result in damage to the pump assembly.

ALL POWER™ EPW2000 POWER WASHER | 13
OWNER’S MANUAL | CLEANING TIPS 13
MAINTENANCE
• This pressure washer is supplied with
a closed lubrication system, so no
addition of oil is needed.
• Check all hoses and accessories for
damage prior to use.
• Checkthewaterintakelterperiodically
fordeposits.Cleanthislterregularly
for maximum performance.
8
Step 3
Attach the high-pressure hose to the male fitting on the front of the pressure washer.
Before attaching the high-pressure hose to the male fitting, remove the plastic cap,
which is inserted onto the fitting before shipping. This plastic cap can be discarded
once removed. Twist on tight to avoid leakage.
Step 4
Attach the hose connector to pressure washer. Before attaching the connector to the male
fitting, remove the plastic cap, which is inserted onto the male fitting on the pressure washer
before shipping. This plastic cap can be discarded once removed. After both components have
been installed, attach the garden hose with connector screw on the pressure washer. Connect
the garden hose to the waterspout.
1600PSIPressureWasher
(Fig 13)
WARNING
Always test the spray in an area free and clear
of people and objects before you spray at the
intended cleaning surface.
CLEANING TIPS
Wood and Vinyl Decks
Rinsedeckandsurroundingareawithfresh
water.Ifusingdetergent,llthedetergent
reservoir and apply to the area being cleaned
at low pressure. For optimal results, reduce
your work area to smaller sections and
clean each section one at a time. Allow the
detergent to rest on the surface for a few
minutes and then rinse at high pressure.
Do not let the cleanser dry. Always clean
from left to right and top to bottom for best
results.Rinseathighpressureusingthefan
spray keeping the tip of the spray nozzle at
least 6-9 inches from the cleaning surface.
Maintain a further distance from the cleaning
area when using a direct spray.
For softer woods, increase the distance from the
cleaning area.
CAUTION
Cement Patios, Stone, and Brick
Rinsecleaningandsurroundingareawith
freshwater.Ifusingdetergent,llthe
detergent reservoir and apply to the area
beingcleanedatlowpressure.Rinseathigh
pressure using the fan spray in a sweeping
motion keeping the tip of the spray nozzle
at least 3-6 inches from the cleaning surface.
Maintain a further distance from the cleaning
area when using a direct spray.
Cars, Boats, and Motorcycles
Rinsecleaningandsurroundingareawith
freshwater.Ifusingdetergent,llthe
detergent reservoir and apply to the area
being cleaned at low pressure. To achieve the
best results, clean one side at a time. Allow
the detergent to rest on the surface for a few
minutes, but do not let the detergent dry.
Rinseathighpressureusingthefansprayina
sweeping motion keeping the tip of the spray
nozzle at least 8 inches from the cleaning
surface.

14 | ALL POWER™ EPW2000 POWER WASHER www.allpoweramerica.com
14 CLEANING TIPS/TECHNICAL DATA | OWNER’S MANUAL
Maintain a further distance from the cleaning
area when using a direct spray. Wipe
surfacedryforapolishednish.
Barbecue Grills, Power Equipment,
and Garden Tools
Rinsecleaningandsurroundingareawithfresh
water.Ifusingdetergent,llthedetergent
reservoir and apply to the area being cleaned
at low pressure. Allow the detergent to rest
on the surface for a few minutes, but do not
let the detergent dry.
Rinseathighpressureusingthefanspray
keeping the tip of the spray nozzle at least
1-3 inches from the cleaning surface. Maintain
a further distance from the cleaning area
when using a direct spray.
TECHNICAL DATA
Mains voltage: 120 V
Mains frequency : 60 Hz
Max. Operating pressure: 2000PSI
Water consumption: 1.6 GPM
Max. Pressure water supply: 40-80PSI
Max. Water temperature 40-140F(5-60°C)
Weight: 25LBS
Guarantee
Refertotheenclosedguaranteeconditions
for the terms and conditions of guarantee.
Environment
Should your machine need replacement
after extended use, do not put it in the
domestic waste but dispose of it in an
environmentally safe way.

ALL POWER™ EPW2000 POWER WASHER | 15
OWNER’S MANUAL | TROUBLESHOOTING 15
Problem Probable Cause Solution
When the switch is in the “I”
position the machine will not
start.
Electrical socket is faulty. Check plug, socket and fuses.
Voltage is inadequate. Check that the voltage is adequate.
GFCI trips. Reset/Try another outlet.
Power cord is not plugged in. Plug in power cord.
The pump does not reach
adequate pressure or
uctuates.
Water Intake Filter is clogged Remove and clean lter
Pump is drawing air Tighten connections/bleed system
Suction valves are clogged/worn Clean or replace valves
Diameter of garden hose too small Replace with ¾ inch garden hose
Water supply is restricted Check hose for kinks or leaks
Insufcient water supply Fully open water source
The pressure washer has or
will not maintain pressure. Excessive air in waterline and pump Turn unit and water supply off / Bleed system / Hold trigger down
TROUBLESHOOTING GUIDE
The following troubleshooting guide is recommended for basic or
common problems; if there’s an issue with the generator that is not
listed, please call 1-888-896-6881.
NOTE: Troubleshooting problems may have similar causes
and solutions.

16 | ALL POWER™ EPW2000 POWER WASHER www.allpoweramerica.com
Problem Probable Cause Solution
The pressure washer makes
excessive noise.
Intake is blocked. Check the intake valves.
Valves are worn, dirty, or clogged. Check, clean or replace valves.
Water Intake Filter is dirty. Check, clean, or replace lter.
The motor stops running
while in use Net voltage lower than suggested. Check that the voltage is adequate.
NOTE: Troubleshooting problems may have similar causes
and solutions.
The following troubleshooting guide is recommended for basic or
common problems; if there’s an issue with the generator that is not
listed, please call 1-888-896-6881.
TROUBLESHOOTING GUIDE
16 TROUBLESHOOTING | OWNER’S MANUAL

ALL POWER™ EPW2000 POWER WASHER | 17
OWNER’S MANUAL | NOTES 17
NOTES

18 | ALL POWER™ EPW2000 POWER WASHER www.allpoweramerica.com
APA PART # DESCRIPTION QTY
EPW2000-01-MT SWITCH KNOB 1
EPW2000-02-MT SWITCH ORNAMENT RING 1
EPW2000-03-MT DECORATION PANEL 1
EPW2000-04-MT MIDDLE PANEL 1
EPW2000-05-MT OUTLET CAP 1
EPW2000-07-MT CASE(FRONT) 1
EPW2000-08-MT SCREW 8
EPW2000-09-MT SCREW 4
EPW2000-10-MT SWITCH CASE (FRONT) 1
EPW2000-14-MT SWITCH 1
EPW2000-15-MT SWITCH CASE (REAR) 1
EPW2000-16-MT SWITCH STALK 1
EPW2000-17-MT O-RING 1
EPW2000-18-MT PUMP 1
EPW2000-19-MT RUBBER BAND 4
EPW2000-20-MT SCREW 2
EPW2000-21-MT CLIP COVER 1
EPW2000-22-MT JACKET 1
EPW2000-23-MT WHEEL 2
18 PARTS LIST | OWNER’S MANUAL

ALL POWER™ EPW2000 POWER WASHER | 19
APA PART # DESCRIPTION QTY
EPW2000-24-MT WHEEL CAP 2
EPW2000-27-MT INLET FILTER 1
EPW2000-28-MT INLET CAP 8
EPW2000-29-MT SCREW 1
EPW2000-32-MT TUBE CLIP 1
EPW2000-33-MT SUCTION FILTER 1
EPW2000-34-MT BOTTLE CAPSULE 1
EPW2000-35-MT TUBE 1
EPW2000-36-MT CASE(REAR) 4
EPW2000-37-MT SCREW 2
EPW2000-38-MT NUT 2
EPW2000-39-MT SCREW BOLT 1
EPW2000-40-MT HANDLE FIXER (LEFT) 1
EPW2000-41-MT HANDLE FIXER (RIGHT) 4
APA PART # DESCRIPTION QTY
EPW2000-42-MT SCREW 2
EPW2000-43-MT HANDLE 2
EPW2000-44-MT SPRING CUSHION 2
EPW2000-45-MT NUT 1
EPW2000-46-MT SCREW 4
EPW2000-47-MT HANDLE(REAR) 1
EPW2000-48-MT HANDLE(FRONT) 4
EPW2000-49-MT SCREW BOLT 1
EPW2000-50-MT HOSE REEL ASSEMBLY 4
EPW2000-51-MT CAP 1
EPW2000-52-MT HIGH PRESSURE HOSE 4
EPW2000-53-MT SHELVES 2
EPW2000-54-MT SHORT HOSE 4
OWNER’S MANUAL | PARTS LIST 19

20 | ALL POWER™ EPW2000 POWER WASHER www.allpoweramerica.com
20 NOTES | OWNER’S MANUAL
NOTES
Table of contents
Other ALLPOWER Pressure Washer manuals
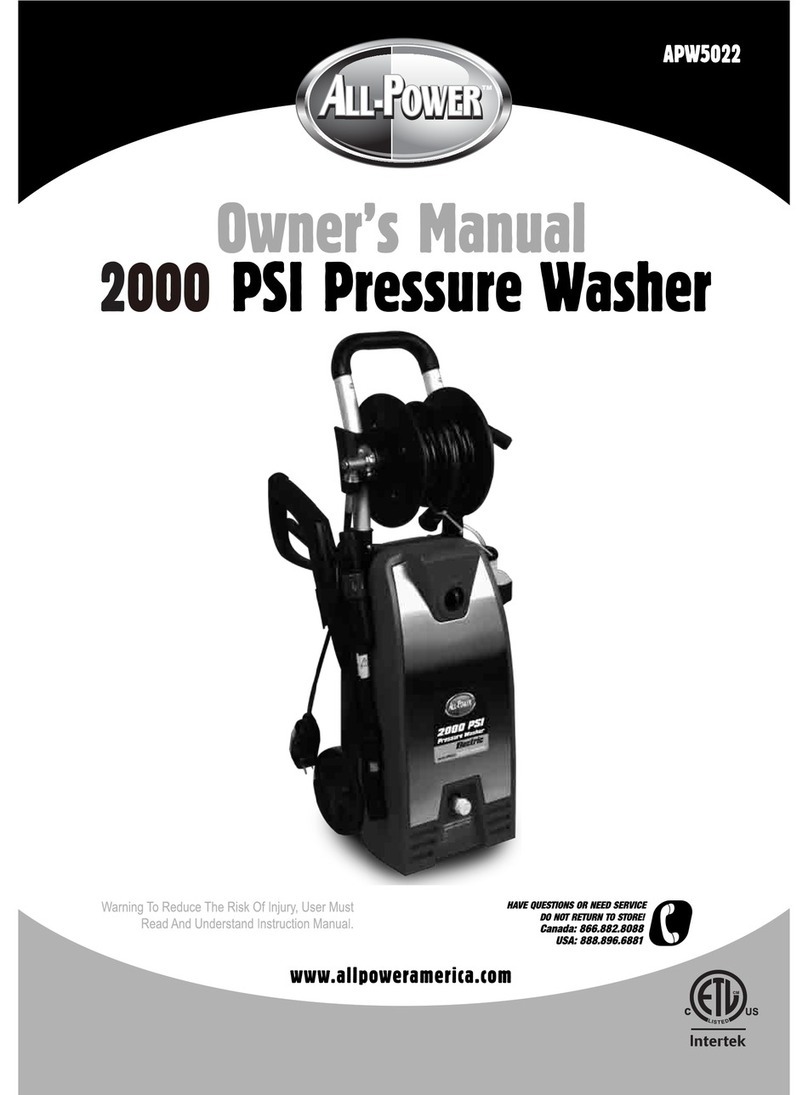
ALLPOWER
ALLPOWER APW5022 User manual
ALLPOWER
ALLPOWER APW5102 User manual

ALLPOWER
ALLPOWER APW5102 User manual
ALLPOWER
ALLPOWER APW5120 User manual
ALLPOWER
ALLPOWER APW5101 User manual
ALLPOWER
ALLPOWER APW5004 User manual
ALLPOWER
ALLPOWER 3200 PSI User manual
ALLPOWER
ALLPOWER 2000 PCI User manual
ALLPOWER
ALLPOWER EPW1600 User manual

ALLPOWER
ALLPOWER APW5102 User manual
