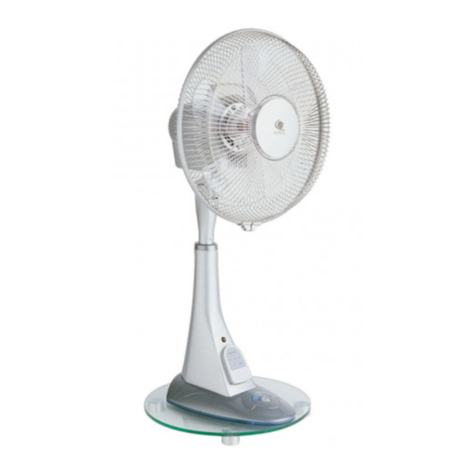
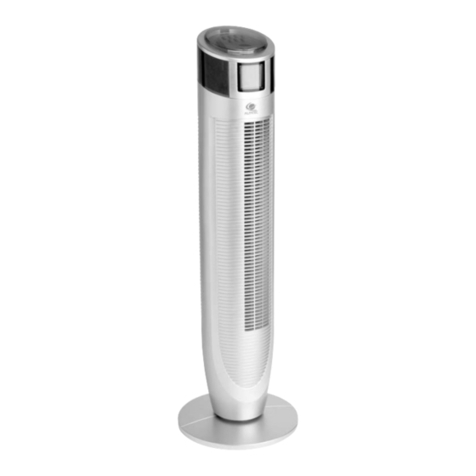
ALPATEC VLP 4005 VSIT User manual

MODE D’EMPLOI
MODE D’EMPLOI
USER MANUAL
USER MANUAL
V
Ventilateur Pr
entilateur Prestige
estige
Pr
Prestige Fan
estige Fan
VLP 4005 VSIT
notice_VLP4005_VSIT-reso 2/01/06 14:49 Page 1

CONSIGNES DE SÉCURITÉ
Lorsque vous utilisez des appareils électriques, des précautions de base sont à prendre.
LIRE ATTENTIVEMENT CETTE NOTICE AVANT LA PREMIERE UTILISATION DE L’APPAREIL
• Procéder au montage de l’appareil et vérifier que le voltage indiqué sur la plaque signalétique
correspond bien à celui de votre installation électrique avant de le brancher.
• Ne pas laisser cet appareil dans une pièce avec des enfants ou des personnes handicapées sans
surveillance.
• Ne pas immerger cet appareil ou le cordon d’alimentation dans l’eau ou tout autre liquide. Ne pas
l’exposer aux projections d’eau.
• Ne pas utiliser cet appareil dans un environnement humide, près d’une baignoire, d’une douche ou
d’une piscine.
• Ne pas utiliser cet appareil si le câble électrique est endommagé ou si une panne a été détectée.
• Ne pas utiliser d’autres connections électriques que celles livrées et recommandées par le
fabricant. Ceci peut être dangereux et risque d’endommager l’appareil.
• Ne jamais débrancher ou déplacer l’appareil en tirant sur le cordon d’alimentation.
• Débrancher l’appareil avant de le nettoyer ou d’effectuer le remplacement d’un élément.
• Ne pas placer l’appareil près d’une source de chaleur.
• Placer toujours l’appareil sur une surface plane et sèche.
• Ne pas utiliser l’appareil s’il n’est pas entièrement assemblé et veiller en particulier à ce que sa
grille de protection soit correctement fixée.
• Ne pas introduire d’objets dans la grille.
• Cet appareil est destiné à un usage domestique, en climat tempéré et selon les instructions du
manuel.
• Veiller à ne pas laisser l’appareil en fonctionnement si vous quittez votre domicile.
• Ne jamais réparer l’appareil vous même. Vous perdriez le bénéfice de la garantie. Comme tout
appareil électrique, il doit être réparé par une personne qualifiée. De même, le changement du
cordon d’alimentation représente un réel danger et il est nécessaire de contacter un réparateur
agréé.
LE FABRICANT NE SAURAIT ÊTRE TENU POUR RESPONSABLE DE LA MAUVAISE
UTILISATION DE L’APPAREIL.
CONSERVER SOIGNEUSEMENT CE MODE D’EMPLOI.
2
FRANÇAIS
FRANÇAIS
ALPATEC vous félicite d’avoir choisi ce produit et vous remercie de votre confiance.
Pour votre confort et votre sécurité, votre article a été vérifié à toutes les étapes
de sa fabrication et a passé avec succès tous nos tests de qualité.
Nos produits sont conçus pour vous plaire tant par leur design que par leur facilité
d’utilisation et dans l’objectif constant de vous apporter complète satisfaction.
notice_VLP4005_VSIT-reso 2/01/06 14:49 Page 2

CARACTERISTIQUES
CARACTERISTIQUES
Voltage : 230 V (50Hz)
Consommation : 60 W
Vitesses de ventilation : 3
Débit d’air : 3600 m
3
/h
DESCRIPTION DE L
DESCRIPTION DE L’APP
’APPAREIL
AREIL
3
1- Bloc moteur
2- Tête du ventilateur
3- Vis de fixation
4- Tube principal
5- Cordon d’alimentation électrique
6- Bouche de sortie des ions négatifs
7- Tableau de commandes
8- Récepteur du signal de la
télécommande
9- Axe moteur
10- Goupille de fixation
11- Poignée
12- Corbeille arrière
13- Ecrou de fixation de la corbeille
14- Hélice de ventilation
15- Ecrou de fermeture
16- Corbeille avant
17- Clip de fermeture de la corbeille
18- Développeur de fragrance
19- Couvercle
20- Télécommande (fonctionne
avec 2 pile AAA, non fournis)
21- Base en verre
22- Visserie
23- Support de télécommande
24- Commande aux pied
notice_VLP4005_VSIT-reso 2/01/06 14:49 Page 3

ASSEMBLAGE DE L
ASSEMBLAGE DE L’APP
’APPAREIL
AREIL
- Assembler la commande au pied (24) et le tube principal (4). Monter l’ensemble sur la base en verre (21)
à l’aide des 4 vis et de la platine (22)(voir schéma 1).
- Fixer la tête du ventilateur (2) et le tube principal (4) à l’aide de la vis de fixation (3).
- Positionner la corbeille arrière (12) sur l’axe moteur (9) en utilisant les détrompeurs. Fixer fermement la
corbeille sur le moteur avec l’écrou de fixation (13).
- Positionner l’hélice (14) sur l’axe moteur (9) en arrêt sur la butée. Fixer l’hélice avec l’écrou de
fermeture (15). L’écrou doit être serré en le vissant dans le sens inverse des aiguilles d’une montre.
Vérifier que l’hélice tourne bien en la poussant avec la main.
- Desserrer la vis de maintien du clip de fixation(17) de la corbeille avant. Enclencher le cercle de la
corbeille avant (16) sur la corbeille arrière, resserrer le clip (17) (voir schéma 2).
- Positionner le diffuseur de fragrance (18) dans l’emplacement prévu à cet effet et installer le couvercle
(19).
UTILISA
UTILISATION DE L
TION DE L’APP
’APPAREIL
AREIL
(avec le tableau de bord ou la télécommande)
Note : insérer des piles de
type AAA dans la télécommande.
4
schéma 1 schéma 2
C
A
B
E
D
A
Arrêt
B
M/V
D
Temps
C
Mode
E
Osc.
F
Ion
Tableau de commandes
Télécommande
notice_VLP4005_VSIT-reso 2/01/06 14:49 Page 4

VITESSES DE VENTILATION :
Appuyer sur la touche M/Vitesse (B) pour mettre en marche l’appareil.
Pour sélectionner la vitesse de ventilation utiliser la touche M/vitesse (B), une pression correspond à une
vitesse comme décrit ci-dessous :
L’appareil démarre automatiquement en vitesse de ventilation lente et en mode NORMAL.
- Marche vitesse lente vitesse moyenne vitesse rapide.
MODE DE FONCTIONNEMENT :
Pour modifier le mode de fonctionnement de l’appareil, appuyer sur la touche mode (C). L’appareil est
équipé de 3 modes de fonctionnement et chaque pression correspond à un mode :
Le mode normal est caractérisé par le picto :
- Normal brise nuit
LE MODE BRISE :
• L’appareil change de rythme de façon aléatoire pour vous offrir la sensation d’une brise naturelle.
- Si vous sélectionnez la vitesse de ventilation rapide, il oscillera entre les trois vitesses.
- Si vous sélectionnez la vitesse de ventilation moyenne, il oscillera entre cette vitesse et la vitesse lente.
- Si vous sélectionnez la vitesse lente, il oscillera entre la vitesse lente et la vitesse moyenne mais en
privilégiant la vitesse lente.
Remarque : l’appareil passe par des phases d’arrêt.
LE MODE NUIT :
• Ce mode découle du mode BRISE.
- Si vous sélectionnez le mode NUIT avec la vitesse rapide, l’appareil fonctionne 30’ en mode BRISE avec
vitesse de ventilation rapide, puis 30’ en mode BRISE avec vitesse de ventilation moyenne puis il
fonctionne en mode BRISE avec ventilation lente.
- Si vous sélectionnez le mode NUIT avec la vitesse moyenne, l’appareil fonctionne 30’ en mode BRISE
avec vitesse de ventilation moyenne puis il fonctionne en mode BRISE avec ventilation lente.
Le mode NUIT avec ventilation lente correspond au mode BRISE avec ventilation lente.
Pour avoir un arrêt automatique, utiliser la programmation.
5
notice_VLP4005_VSIT-reso 2/01/06 14:49 Page 5

OSCILLATION :
Appuyer sur la touche OSC. (E) pour activer ou désactiver l’oscillation de l’appareil. Votre appareil est
équipé d’une oscillation horizontale automatique et d’une oscillation hélicoïdale automatique. Pour
choisir l’oscillation souhaitée appuyer sur la touche OSC., chaque pression correspond à un type
d’oscillation :
- Oscillation horizontale oscillation hélicoïdale pas d’oscillation
PROGRAMMATION HORAIRE :
Vous pouvez programmer la durée de fonctionnement du ventilateur à l’aide de la touche TEMPS (D).
Chaque pression sur la touche ajoute 30 min de fonctionnement, de 0,5 à 7,5h. Le temps sélectionné
apparait sur l’écran de controle.
IONISATION :
Pour activer la fonction ionisation, appuyer sur la touche ION (F) située sur le tableau de bord de
l’appareil.
Pour arrêter l’ionisation appuyer de nouveau sur cette touche.
La fonction est automatiquement activée au démarrage.
Qu’est ce que la Ionisation ?
Il existe dans l’air des particules électrisées que l’on appelle IONS. Il y a des ions positifs et des ions
négatifs. La sensation de bien être est liée à la densité des particules électriques nous entourant.
C’est la charge en ions négatifs qui est essentielle au bien être.
Des travaux scientifiques et médicaux ont démontrés de façon incontestable les bénéfices de l’ionisation
sur le traitement de l’asthme allergique et sur les bronchites chroniques.
ARRÊT :
Pour arrêter l’appareil, appuyer sur la touche arrêt (A).
SÉCURITÉ
Votre appareil est équipé d’une sécurité sensorielle.
Si une partie de peau entre en contact avec la corbeille, l’appareil s’arrête instantanément. Il redémarre
automatiquement après 5 secondes sans contact.
ENTRETIEN
ENTRETIEN
• Assurez-vous que l’appareil est débranché avant de le nettoyer.
• Pour démonter l’appareil afin de le nettoyer ou le ranger après la saison chaude, suivez les instructions
d’assemblage dans le sens inverse.
• Vous pouvez laver l’hélice à l’eau chaude avec un produit nettoyant doux. Essuyez-la ensuite avec un
chiffon doux. Assurez-vous qu’elle soit complètement sèche avant de la remonter. Les deux corbeilles
peuvent être nettoyées avec une brosse souple ou un chiffon doux. Le bloc moteur et le pied peuvent
être essuyés avec un chiffon doux. Ne jamais plonger l’appareil dans l’eau pour le nettoyer.
6
notice_VLP4005_VSIT-reso 2/01/06 14:49 Page 6

CAUTION
CAUTION
When using electrical appliances, some rules have to be respected.
READ THESE INSTRUCTIONS CARREFULLY BEFORE USING THIS PRODUCT.
• Assemble the product and make sure that the voltage on the rating plate is same as your main one
before plugging.
• Never let the appliance in a room with children and handicapped people without supervising.
• Do not immerse appliance or power cord. Do not expose to water projection.
• Do not use in a wet environment, close to a bath-tub, a shower or a swimming pool.
• Do not use if power cord or appliance is damaged.
• Do not use any other electrical connection but the one supplied and recommended by the
manufacturer. This could be dangerous and may damage the appliance.
• Never move or unplug by pulling the power cord.
• Unplug before cleaning or replacement of one part.
• Never use near a hot place.
• Place the appliance on a dry and level surface.
• Do not use if it is not totally assembled and particularly if the protection grid is not secured.
• Do not introduce parts through the grid.
• Only use this appliance for domestic purpose, in moderate climate and following the instructions of that
manual.
• Do not let the appliance running if your leave your residence.
• Do not attempt to repair the appliance yourself. Otherwise, guarantee would cancel. It has to be
repaired by a qualified worker. Power cord has to be changed by a qualified person if needed.
THE MANUFACTURER WILL NOT ASSUME ANY RESPONSABILITY IN CASE OF NON ADHERENCE TO
THIS RECOMMANDATIONS.
KEEP THIS MANUAL CAREFULLY.
7
ENGLISH
ENGLISH
ALPATEC thanks you for buying this product and hope you will be totally
satisfy with it. For your comfort and security all the steps of the manufacturing
have been checked and the product succeeded in all our quality tests.
ALPATEC’s products : their design and facility of use make you like them.
notice_VLP4005_VSIT-reso 2/01/06 14:49 Page 7

SPECIFICA
SPECIFICATIONS
TIONS
Volt : 230 V (50Hz)
Power : 60 W
Speeds : 3
Air flow : 3600 m
3
/h
DESCRIPTION
DESCRIPTION
8
1- Motor
2- Head
3- Screw
4- Stand
5- Power cord
6- Ion outlet
7- Control panel
8- Receptor
9- Motor shaft
10- Shaft pin
11- Handle
12- Rear guard
13- Guard lock nut
14- Fan blade
15- Spinner lock nut
16- Front guard
17- Guard securing clips
18- Aroma box
19- Cap
20- Remote control
21- Glass base
22- Screws
23- Remote control support
24- Foot control
notice_VLP4005_VSIT-reso 2/01/06 14:49 Page 8

ASSEMBL
ASSEMBLY OF THE APPLIANCE
Y OF THE APPLIANCE
- Assemble the foot control (24) and the stand (4) and the base (21). Fix them with the 4 screws (22).
- Fix the two stands (2 and 4) by using the screw (3). (Fig. 1)
- Fit the rear guard (12) on the motor shaft (9). Secure the guard to the motor body with the guard lock nut
(13).
- Push the fan blade (14) onto the motor shaft (9). Fix the fan blade with the spinner lock nut (15). The
spinner lock nut must be tightened by turning it in anti-clockwise direction. Check that the fan blade
rotates freely by turning with your hand.
- Unscrew the guard securing clip (17). Press the rim of the front guard (16) onto the rear guard (12).
Close the clip and tighten the screw. (Fig. 2)
- Place the aroma box (18) and push the cap (19).
USING OF APPLIANCE
USING OF APPLIANCE
Note : insert batteries type AAA in the
remote control.
9
Fig. 1 Fig. 2
C
A
B
E
D
A
Arrêt
B
M/V
D
Temps
C
Mode
E
Osc.
F
Ion
Control panel
Remote control
notice_VLP4005_VSIT-reso 2/01/06 14:49 Page 9

FAN SPEEDS
Press “M/Vitesse” touch (B) to start the appliance.
Press again this touch to adjust the fan speeds, as show :
The appliance start automatically on normal mode with low fan speed.
Start low speed middle speed high speed
MODE
To select the running mode, press “mode” touch (C) : press on time to select normal mode, two time to
select natural mode and three time to select the sleep mode.
Normal mode natural mode sleep mode
NORMAL MODE :
The fan speed is continuous.
NATURAL MODE :
The fan speed will change automatically from high speed to medium speed to low speed to stop and so
on if you have selected high speed.
If you have selected medium speed, it will be the same without high speed steps.
If you have selected low speed, it will be the same as medium but mostly with low speed.
SLEEP MODE :
This mode uses the NATURAL mode.
If you select SLEEP mode and high speed, it works 30’ like NATURAL mode and high speed, then 30’ like
NATURAL mode and medium speed and then it works like NATURAL mode and low speed.
If you select SLEEP mode and medium speed, it works 30’ like NATURAL mode and medium speed and
then it works like NATURAL mode and low speed.
If you select SLEEP mode and low speed, it works like NATURAL mode and low speed.
To stop automatically, use the timer.
SWING
Press “OSC.” touch to activate or not the swing function. The appliance is equipped with an horizontal
swing and helicoidally swing. Press “OSC.” touch to select the swing :
- Horizontal swing helicoidally swing no swing
10
notice_VLP4005_VSIT-reso 2/01/06 14:49 Page 10

TIMER
To activate the timer, press “TEMPS” touch (D) several time until the desired time appears : from 30
minutes to 7h30. The desired time appears on control panel display.
IONIZATION
To activate the ionization function, press one time the “ION” touch (7) on the base of appliance.
To stop ionization press again the ”ION” touch. Ionization is automatically activated when you start the
fan.
STOP
To stop the appliance, press “arrêt” touch (A).
SECURITY
When the appliance is running, if you touch the front guard, the appliance stops automatically. It restarts
5 seconds later if there is no contact.
MAINTENANCE
MAINTENANCE
- Ensure the appliance is unplug before cleaning.
- To dismantle the appliance for cleaning or long term storage, follow assembly instructions in reverse
order.
- The fan blade may be washed in warm water using a little mild detergent. It may be wiped over with a
soft damp cloth. Ensure it is completely dry before re-fitting. The front and rear guards can be cleaned
with a soft brush or soft damp cloth. The motor housing and stand can be wiped clean with a soft damp
cloth.
- Never immerse the appliance in any liquid.
11
notice_VLP4005_VSIT-reso 2/01/06 14:49 Page 11

12
Indications relatives à la protection de l’environnement
Au terme de sa durée de vie, ce produit ne doit pas être éliminé avec les ordures ménagères mais doit être remis à un
point de collecte destiné au recyclage des appareils électriques et électroniques. Le symbole figurant sur le produit, la
notice d’utilisation ou l’emballage vous indique cela. Les matériaux sont reyclables conformément à leur marquage.
Vous apporterez une large contribution à la protection de l’environnement par le biais du recyclage, de la réutilisation
matérielle ou par les autres formes de réutilisation des appareils usagés. Veuillez vous adresser à votre municipalité
pour connaître la déchetterie compétente.
Instructions on environment protection
Do not dispose of this product in the usual household garbage at the end of its life cycle ; hand it over a collection point
for the recycling of electrical and electronic appliances. The symbol on the product, the instructions for use or the
packing will inform about the methods of disposal. The materials are recyclable as mentioned in its marking.
By recycling or others forms of re-utilization of old appliances, you are making an important contribution to protect our
environment. Please inquire at the community administration for the authorized disposal location.
notice_VLP4005_VSIT-reso 2/01/06 14:49 Page 12
Table of contents
Languages:
Other ALPATEC Fan manuals

ALPATEC
ALPATEC VT 23 User manual

ALPATEC
ALPATEC BF 20 User manual

ALPATEC
ALPATEC BAP 18 User manual

ALPATEC
ALPATEC VLO 312 User manual

ALPATEC
ALPATEC VLP 3005 VSIT User manual

ALPATEC
ALPATEC TF 120 MT User manual

ALPATEC
ALPATEC TF 360 ESI User manual

ALPATEC
ALPATEC BF 30.2 User manual

ALPATEC
ALPATEC TF 110 User manual

ALPATEC
ALPATEC VLM 37.1 User manual

ALPATEC
ALPATEC BF 21 User manual

ALPATEC
ALPATEC TF 45 S User manual

ALPATEC
ALPATEC TF 118 CIT User manual

ALPATEC
ALPATEC VL 940 MPT User manual

ALPATEC
ALPATEC TF 78 User manual

ALPATEC
ALPATEC TF75 User manual

ALPATEC
ALPATEC WEB VL 28.1 User manual

ALPATEC
ALPATEC BAP 16 User manual

ALPATEC
ALPATEC VL 37.2 User manual

ALPATEC
ALPATEC TF 116 ST User manual