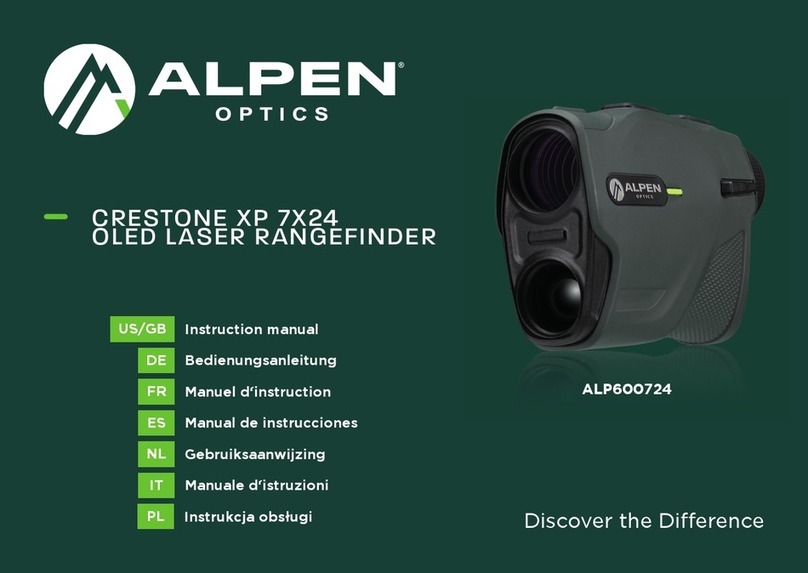
Alpen Optics CRESTONE XP 7x24 User manual

Instruction Manual
CRESTONE XP 7x24
OLED LASER RANGEFINDER
Discover the Difference
Model: 890LR

2www.alpenoptics.com
GENERAL WARNINGS
Read the safety instructions and the
instruction manual carefully before using
this device. Keep this instruction manual
in a safe place for future reference. When
the device is sold or given to someone
else, the instruction manual must be
provided to the new owner/user of the
product.
DANGER!
Keep packaging materials (plastic bags,
rubber bands, etc.) away from children!
There is a DANGER OF CHOKING!
Never look through this device directly
at or near the sun. There is a risk of
BLINDING YOURSELF!
Do not allow children to play with unit.
Do not expose the device to
high temperatures. Use only the
recommended batteries. Do not short-
circuit the device or batteries or dispose
of in fire! Excessive heat and improper
handling can cause short circuits, fires
and even explosions! Do not expose this
device - especially the lenses - to direct
sunlight! Focusing of sunlight could
cause fires.
DANGER OF
AN ELECTRIC SHOCK!
This unit contains electronic parts
that are powered by a power source
(AC adapter or batteries). Never leave
children unattended whilst handling the
device! Only use the device as described
in the manual. Otherwise, you run the
DANGER of an ELECTRIC SHOCK.
RISK OF BURNS!
Leaking battery acid can lead to
chemical burns. Avoid contact of
battery acid with skin, eyes and mucous
membranes. In the event of contact
with acid, rinse the affected region
immediately with plenty of water and
seek for medical attention.

3
www.alpenoptics.com
NOTE!
• Do not disassemble.
• All electronic operation should strictly
comply with electrical safety codes, fire
codes, and other pertinent codes in your
area.
• Do not drop the device or expose it
to strong mechanical shocks or large
electromagnetic radiation.
• Do not clean the device with detergent
but use a slightly damp cloth to clean the
lens.
• If necessary, clean the lens with a
slightly damp eyeglass cleaning cloth
and do not use physical pressure. The
protective surface could be damaged by
this.
• Do not expose the device to direct
sunlight or similar strong heat sources.
Otherwise, blooming or smear effects
may occur and at the same time the
service life of the sensor will be impaired.
The sun can burn into the sensor and
cause irreparable sensor damage.
• The optics can be twisted out of the
socket if turned excessively. Please turn
the optics only so far in both directions
until you have optimized the focus of the
device.
PRIVACY PROTECTION!
This device is intended for home use.
Respect the privacy of your fellow
human beings - do not look into private
property with this device!
Cancer and Reproductive Harm –
www.P65Warnings.ca.gov.
WARNING:

4www.alpenoptics.com
CLASS 3R LASER PRODUCT INVISIBLE LASER
RADIATION AVOID DIRECT EYE EXPOSURE
This product complies with IEC 60825-1 : 2014 Ed. 3 and complies with FDA
performance standards for laser products except for deviations pursuant to
Laser Notice No. 50, dated June 24, 2007. Pp < 25W, = 905 nm, tp = 200 ns
SAFETY AND PRECAUTIONS
Do not stare into beam or view directly without
laser eye protection. Staring continuously into
beam for prolonged periods of time could cause
harm to your eyes. If used properly, this device is
safe for your eyes and laser eye protection is not
needed. Do not activate device while aiming at
someone’s face or looking into objective lens.
CAUTION: Use of controls, adjustments or performance of procedures other
than those specified herein may result in hazardous laser radiation exposure.
DANGER

5
www.alpenoptics.com
ONE (1) YEAR LIMITED WARRANTY
ALPEN OPTICS warranties our products to be free from defects in materials and
workmanship for a specified period based on product type. ALPEN OPTICS will repair
or replace such product or part thereof that upon inspection by ALPEN OPTICS, is
found to be defective in materials or workmanship. As a condition to the obligation
of ALPEN OPTICS to repair or replace such product, the product must be returned to
ALPEN OPTICS together with proof-of-purchase and product registration satisfactory
to ALPEN OPTICS.
Limited Warranty is in the USA, USA territories and Canada. For full warranty
protection, the product must be registered within 60 days of purchase.
You can scan the QR code to consult the full guarantee terms
as well as information on extending the guarantee period and
details of our services.
(USA) www.alpenoptics.com/pages/warranty
WARRANTY & SERVICE

6www.alpenoptics.com
PARTS OVERVIEW:
1. Mode Button
2. Measure Range Button
3. Eyepiece/Diopter Focus Adjustment
4. Objective Lens
5. Laser Rangefinder Modules
6. Battery Compartment
7. Lanyard Loop
3
6
21
4
7
5
IMPORTANT:
This device has an IPX4
water resistance rating,
which means it is protected
from minor splashes coming
from any direction. DO NOT
SUBMERGED UNDER WATER.

7
www.alpenoptics.com
4.1875in / 106mm
3in / 76mm
1.5in / 38mm

8www.alpenoptics.com
• OLED projected red readout with adjustable brightness
• Compact and contoured design for best hand fit and grip
• 7x magnification with a 24mm objective lens
• Hard target measurement up to 2000 yards (1828 meters)
• Soft target measurement up to 700 yards (640 meters)
• Reticle can be dimmed / brightened to 6 different levels for low light
and bright conditions
• Choose between yards or meters
• Water-resistant IPX4 rating
• Multi-coated lens
• Comes with soft pouch
KEY FEATURES
Outdoor sports enthusiasts can get the precise measurements they need
to connect with their target with the Alpen 7x24 OLED Rangefinder. This
compact device, which has an easy-to-grip dual-barrel design, quickly and
accurately measures distances up to 2000 yards for hard targets and 700
yards for soft targets. The measurements, which can be given in yards or
meters, are shown on an OLED display with a red readout and adjustable
brightness.

9
www.alpenoptics.com
(+)
(-)
SET UP
Diopter Adjustment
The diopter adjustment is used to bring the OLED display
into sharp focus along with the target image. The diopter
adjustment can turn clockwise (+) or counter-clockwise
(-) from the eyecup and adjusted depending upon the
user’s prescription, Fig.2.
+
-
Fig. 2
Fig. 1
Installing Battery
Remove the battery cap by turning the cap in a
counter-clockwise direction. Insert (1) CR2 lithium
battery (-) terminal side first. The (+) terminal
should be facing out, Fig.1. Place the cap onto the
(+) battery terminal and reinstall the battery cap by
turning the cap in the clockwise direction.
CAUTION - Be careful to not cross-thread
the cap or overtighten.

10 www.alpenoptics.com
OLED DISPLAY INFORMATION
A. Degrees Display
B. Circle Center Reticle
C. Range Display
D. Meters and Yards Unit
E. Battery Status
F. Brightness Display 0-6
G. Horizontal Component Distance Mode (HCD)
H. Line of Sight Mode (LOS)
A
B
CD
E
F G H

11
www.alpenoptics.com
OLED DISPLAY INFORMATION
Power On Press Second Press Press & Hold
When the MEASURE button is pressed, the OLED display will power on and
show the circle center reticle, unit of measure (Y or M), LOS angle degree or
HCD measurement, and battery status. The display will remain active for up
to 10 seconds.
The first press will power on and display the scan mode and unit of
measure. Second press will start scanning. If you press and hold the
MEASURE button, you will noticed a blinking “S” and it will continuously
scan objects until the button is released.

12 www.alpenoptics.com
SETTINGS
To change display settings, press the MEASURE button to power on and
press and hold the MODE button for 3 seconds until you see the screen
below, Fig.3. Depress the MODE button and the first setting menu will be
brightness, then unit of measure, then mode conversions.
Settings Mode
Fig. 3

13
www.alpenoptics.com
SETTINGS
Use the MODE button to change the setting menu and the MEASURE button
to select the options.
Once you have the desired settings, press and hold the MODE button
for 3 seconds until you see the power on screen again. At this point the
rangefinder is ready for scanning objects.
Brightness Menu
0 - 6
Unit of Measure Menu
Y or M
Mode Menu
LOS or HCD

14 www.alpenoptics.com
LOS AND HCD MODES
Line of Sight Mode (LOS): In the LOS Mode, the following information is
displayed: Horizontal distance to the object and the angle that the device is
being held in relation to the target.
Angle Measurement: The angle of measurement between your position and
any target can be displayed in the upper area of the display.
Horizontal Component Distance Mode (HCD): The HCD mode shows you
the horizontal and straight distance to the target.
HCD Mode
Target
Distance
Angle Degree
&
Horizontal
Distance
LOS Mode

15
www.alpenoptics.com
LOS AND HCD MODES
Example: A LOS range of 500 yards at a 30° decline
equals to a HCD of 433 yards.
Line of Sight (LOS) range of 500 yards
at 30° decline
Horizontal Component Distance Mode
(HCD) is 433 yards
30°

16 www.alpenoptics.com
SPECIFICATIONS
Magnification 7x
Objective Diameter 24mm
Transmission Diameter 18mm
Field of View 6.6°
Eye Relief 14mm
Exit Pupil 3.4mm
Diopter Focus -3.0 ~ +3.0dpt
Lens Coating Multi-Coated
Waterproof IPX4 Water-resistant
Auto-Off 10 seconds
Units of Measure Yards & Meters
Distance Range Min. 5m/6yds
Distance Range Max. 1828m/2000yds
Range Reflective Target up to 1828m/2000yds
Range Building Target up to 1280m/1400yds
Range Tree Target up to 914m/1000yds
Range Deer Target up to 640m/700yds

17
www.alpenoptics.com
SPECIFICATIONS
Range Response Time <1.5 seconds
Range Accuracy < 100yds ± 1yds
Range Accuracy 100yds - 1000yds ± 2yds
Range Accuracy > 1000yds ± 3yds
Inclinometer Max ± 60°
Inclinometer Accuracy within ±30° ± 1°
Inclinometer Accuracy between ±30° - ±60° ± 2°
Battery Type (1) CR2
Display Type Red OLED
Laser Type Class 3R
Operating Temperature Range 14°F - 122°F (-10°C - 50°C)
Storage Temperature Range -4°F - 149°F (-20°C - 65°C)

18 www.alpenoptics.com
CLEANING & STORAGE
Blow away any dust or debris on the lens (or use a soft lens brush).
To remove fingerprints or other smears, clean with a soft cotton cloth
rubbing in a circular motion. A “microfiber” cleaning cloth (available from
camera or computer retailers) is ideal for the routine cleaning of your optics.
For a more thorough cleaning, photographic lens tissue and photographic-
type lens cleaning fluid or isopropyl alcohol may be used. Always apply the
fluid to the cleaning cloth – never directly on the lens.
For extended periods of storage, store in a cool and dry environment to
avoid any damage to the device.

19
www.alpenoptics.com
NOTES

Alpen Optics
1010 S. 48th Street
Springdale, AR 72762
Phone: 866.252.3811
www.alpenoptics.com
V: 2023.3
This manual suits for next models
1
Table of contents
Other Alpen Optics Measuring Instrument manuals
Popular Measuring Instrument manuals by other brands

Lucky Reptile
Lucky Reptile TR-1 operating instructions

Atten
Atten AT5010 operating instructions

Lutron Electronics
Lutron Electronics VB-8206SD Operation manual

janitza
janitza UMG 96-PA installation instructions

TSI Incorporated
TSI Incorporated 8380 ACCUBALANCE Operation and service manual

PCB Piezotronics
PCB Piezotronics 608A11/-0112 Installation and operating manual