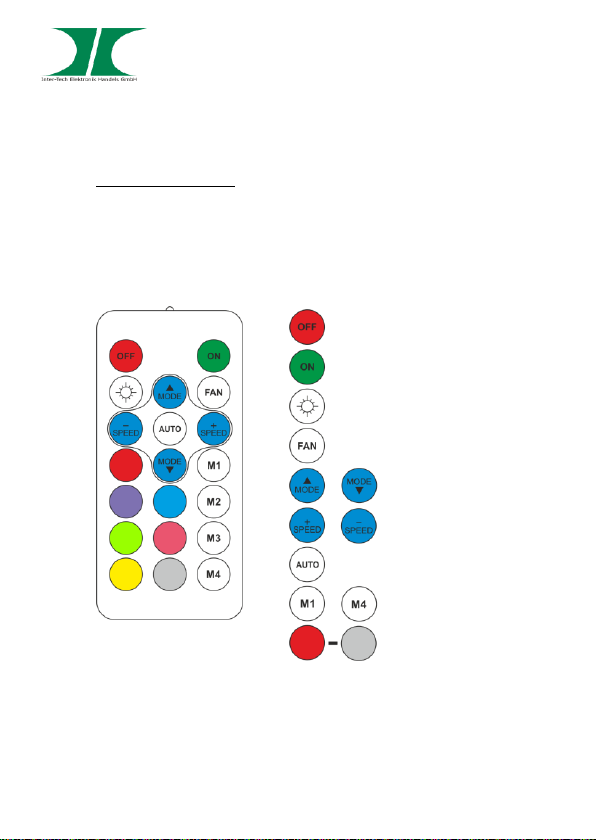
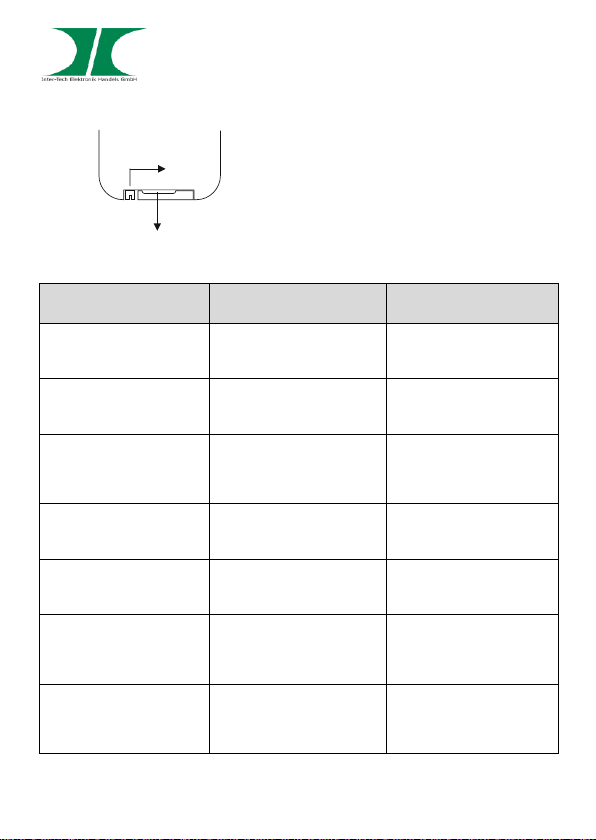
ALSEYE Halo 3 Fan Set User manual

Manual
Halo 3 Fan Set
Halo 3 Fan

Manual Halo 3.0 2 of 13
14.06.2019
1General Information…………..………………………………………………………………..3
1.1 Introduction..……………………………………………………………………………………..3
1.2 Scope of delivery..…....………………………………………………………………………….3
2Security.............………………………………………………………………………………….4
2.1 Intended use of the device.....................................…………………………………………..4
2.2 General information....…………………………………………………………………………..4
2.3 Dangers and protective measures.....…………………………………………………………4
3Specifications....….……………………………………………………………………………..5
3.1 Technical data........………………………………….…………………………………………..5
3.2 Features...........…………………………………………………………………………………..6
4 Assembling and commissioning........……………………………………………………...6
5Operation...………………………………………………………………………………..……..7
6Troubleshooting………………………………………………………………………………9
7Maintenance......……………………………………………………………………………….10
8Disposal......……………………………………………………………………………………10
9Warranty..............................………………………………………………………………….11
10 Contact…………………………………………………………………………………………11
11 Radio operation………………………………………………………………………………11

Manual Halo 3.0 3 of 13
14.06.2019
1 General information
1.1 Introduction
Thank you for purchasing a product from the Argus series.
In order to know all functions of the product, we recommend to read this manual
carefully.
1.2 Scope of delivery
Halo 3.0 Fan Set:
3x RGB Fan
1x Control unit
1x Remote control
1x Button cell CR2025
Halo 3.0 Fan:
1x RGB Fan

Manual Halo 3.0 4 of 13
14.06.2019
2 Security
2.1 Intendend use of the device
This equipment is designed to be used only for installation and operation in a
computer chassis and for connection to computer power supplies or motherboards
within confined spaces.
Do not use or store the device in damp rooms or near water.
Do not operate the device near heat sources. The additional heat supply could lead
to overheating and defect or fire.
2.2 General information
Please read the operating instructions carefully and completely before installing or
using the device.
Keep this manual in a safe place. Pass this manual when you pass the device.
Follow the instructions and warnings before using the device.
Failure to follow these instructions may result in injury or damage.
We accept no liability for damages resulting from non-compliance with this manual.
2.3 Dangers and protective measures
Do not apply any external forces to the cables.
Do not pull the plug by pulling on the cable.
Do not connect a patched or damaged cable to the device.
Do not place the device or cable near sources of heat
If you notice any strange noises, smells, or smoke, unplug the power cord as quickly

Manual Halo 3.0 5 of 13
14.06.2019
as possible.
Make sure all cables are firmly connected to the device.
Keep the device away from children.
Do not operate the device with wet hands.
Make sure that the device is not dusty (can cause overheating and fire).
Pay attention to a sufficient heat dissipation of the device (can cause overheating
and fire).
Leave the maintenance and / or cleaning of the device only to authorized specialist
personnel.
Do not insert your fingers into the fan during operation (may cause injury).
Do not block the fan during operation (Can cause overheating and fire).
3 Specifications
Technical data
Halo 3.0 Fan Set:
Fan:
Fan speed: 1500rpm
Airflow: 1500l/min. max. each fan
Noise level: 23 dBA max.
Bearing: Hydraulic
Voltage: 12V
Connection Fan / LED: 6pin (special design)
Weight: 150g each fan
Dimensions: 120x120x25mm each fan
LED amount: 16 pcs. each fan
LED color: RGB
Remote control:
Battery: Lithium CR2025, 3V
Radio frequency: 433MHz
Controller:

Manual Halo 3.0 6 of 13
14.06.2019
Connection power: Molex
Connection Fan / LED: 6pin (special design)
Connection LED strip: 4pin (special design)
Connection swtich: 2pin
Halo 3.0 Fan
Fan speed: 1500rpm
Airflow: 1500l/min. max. each fan
Noise level: 23 dBA max.
Bearing: Hydraulic
Voltage: 12V
Connection Fan / LED: 6pin (special design)
Connection LED strip: 4pin (special design)
Weight: 150g
Dimensions: 120x120x25mm
LED amount: 16 pcs.
LED color: RGB
3.2 Features
Halo 3.0 Fan Set:
- Connection of up to 10 LED fans (Item no. 88885485).
- Connection of up to 2 strips (not available yet).
- Two level speed control via remote control or switch (not included in delivery, e.g.
reset button of the case).
- Many lighting effects.
- Switching over the effects via remote control or switch (not included in delivery, e.g.
reset button of the case).
Halo 3.0 Fan:
- Only suitable for connection to Halo 3.0 Fan Set
4 Assembling and commissioning
1. Unpack the product and check the contents for completeness (see also point 1.2.).
If parts have external defects or parts of the scope of delivery are missing, please
contact your retailer for replacement. Keep the original packaging in order to be able
to ship the device safely in case of repair. Only connect the product to the power
supply when all needed cables are connected.

Manual Halo 3.0 7 of 13
14.06.2019
Preparation:
Mount the fan(s) in a suitable location in your case using the included screws.
Place the controller to a suitable location in your chassis. Pay attention to the length
of the connection cables, which must be routed from each fan to the controller.
Connect the fans to the controller.
The fan connections are marked Fan 1-10 and for the strips (optional) LED 1-2.
1. Fan connection
2. Strip connection
3. Connection for external switch (fan speed)
4. Power connection
5. Connection for external switch (RGB effects)
Once all fans / strips have been connected, connect the controller to a Molex
connector on your power supply.
5 Operation
Control
You can control all functions of the LEDs with the radio remote control and some of
the functions also via a switch.
Control via switch
Connect a suitable switch to control the LED functions via a switch. E.g. take the
reset switch on the front of your case (In that case you will lose the reset function via
the switch) or another unused switch on your front panel or an additional switch that
you install anywhere on your case. If you have connected the controller with the
switch, you can switch to the lighting mode by pressing the switch. The control
option via the remote control is retained.
To control the fan speed via a switch, connect a suitable switch to your case. E.g.
take the reset switch on the front of your case (In that case you will lose the reset

Manual Halo 3.0 8 of 13
14.06.2019
function via the switch) or another unused switch on your front panel or an additional
switch that you install anywhere on your case. If you have connected the controller
with the switch, you can select two fan speeds by pressing the switch. The control
option via the remote control is retained.
Control via remote control
You can switch the light on and off, choose between various light effects and switch
between two fan speed with the remote control.
First remove the plastic strip in the battery compartment. This is done by a short pull
on the designated, out of the remote control, plastic tab.
Lighting OFF
Lighting ON
Brightness change
(three stages)
Fan speed
(900/1500rpm)
RGB effect change
(Up / Down)
RGB effect speed
(eight stages)
Automatic RGB effect change
Memory buttons for RGB effects
7 buttons for setting a fixed color
Note: To save an effect, press one of the M1-M4 buttons longer than 5 seconds.

Manual Halo 3.0 9 of 13
14.06.2019
Replacing the battery: Open the battery compartment on the back of the
remote control by pushing the small tab inwards while
pulling out the battery holder.
Remove the battery and reinsert a new CR2025
battery as shown on the back of the remote control.
Do not dispose of the battery in the household waste.
Please read chap. 8th.
6 Troubleshooting
Fault / error message
Possible reason(s)
Help
The fan(s) do not turn
Fan(s) not connected
Check that the cables
marked "Fan" are correctly
connected.
LEDs do not light up
Switched off
Switch on the LED
illumination via the remote
control.
Cable not connected or not
connected correctly
Check that the cables
marked with "LED" are
correctly connected.
Please also read chap. 4
Check if the controller is
connected to the power
supply.
Effects cannot be adjusted
with the remote control
Connection to the receiver /
controller disturbed
Move the remote control
closer to the receiver /
controller.
Reconnect remote control
and receiver / controller.
Please read chap. 5
"reconnect".
Battery of the remote
control empty
Replace the battery of the
remote control. Please
read Chap. 5 "Replacing
the battery"
1.
2.

Manual Halo 3.0 10 of 13
14.06.2019

Handbuch Halo 3.0 11 von 13
14.06.2019
7 Maintenance
Basically, fan and LED Strip require no maintenance.
But intook dust can contaminate fans and stripes and can cause overheating and
fire. Therefore you should clean the fans and stripes from time to time.
This dust can be blown by compressed air from the fan / strip. To blow it out
yourself, disconnect the power adapter from the main grid. Remove the fans and use
a suitable compressed air pistol to blow off the dust from the fans.
Never open the controller itself. On the one hand, this can damage components and
on the other hand you will lose all warranty claims.
To ensure efficient cleaning, we recommend to let cleaning made by a professional.
8 Disposal
If you want or need to replace the fan / strip, please do not dispose of it with
household waste, but via the special collection points for electronic waste. If you
have any questions, please contact your municipality / city administration or ask your
retailer.
Packaging residues of cardboard and plastics dispose of via the corresponding
collection containers of your household waste.
In connection with the distribution of batteries or the delivery of devices containing
batteries, we are obliged to inform you of the following:
You are legally obliged to return used batteries as end users. You can return used
batteries, which we have or had sold, gratuitously at our shipping warehouse (Inter-
Tech, Hainhäuser Weg 93, 30855 Langenhagen). The symbols shown on the
batteries have the following meaning:
The symbol of the crossed-out wheelie bin means that the battery must not be
disposed of with household waste.
Pb = Battery contains more than 0.004 mass percent lead
Cd = Battery contains more than 0.002 mass percent cadmium
Hg = Battery contains more than 0.0005% by mass of mercury
Please note the above instructions

Handbuch Halo 3.0 12 von 13
14.06.2019
9 Warranty
We grant our product a warranty of 24 months from the date of purchase when used
properly.
To process the warranty claim, please contact your retailer with your proof of
purchase.
We do not guarantee at:
missing or damaged warranty seal, negligent behavior, non-observance of the
operating instructions, improper use, misuse of any kind, malfunction due to external
influences, damage due to force majeure, damage caused by manipulation,
extension, update or modification of hardware or software, Damage caused as a
result of other damage.
In the event of data loss and file corruption, Inter-Tech shall only be liable for gross
negligence or intent and, in all other cases, for the recovery of data from a regular,
daily backup copy. Incidentally, liability is excluded.
10 Contact
Inter-Tech Elektronik Handels GmbH
Hainhäuser Weg 93
D-30855 Langenhagen
Germany
Phone: +49 511 72667830 - Fax: +49 511 72667837 - Mail: vertrieb@inter-tech.de -
www.inter-tech.de
11 Radio operation
This product includes a radio remote control. The transmission of the signals takes
place on an open transmission path, so that interference by other radio links are
possible. Furthermore, the transmission power also depends on environmental and
environmental conditions.
Hereby, Inter-Tech declares that this product complies with the essential
requirements of the RED 2014/53 / EU Directive. The complete declaration of
conformity can be found at www.inter-tech.de.

www.inter-tech.de
This manual suits for next models
1
Table of contents