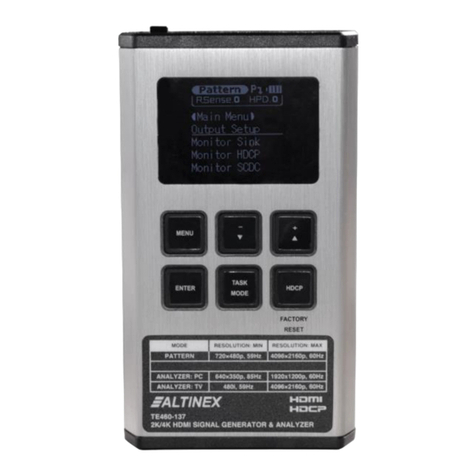
Altinex SIGNAL MANAGEMENT SOLUTIONS TE460-137 User manual

TE460-137 2K/4K HDMI SIGNAL GENERATOR & ANALYZER User’s Guide
400-0753-003 1
Welcome!
Everyone at Altinex greatly appreciates your purchase of the
TE460-137. We are confident that you will find it to be reliable and
easy to use. If you need support, please do not hesitate to call us
at 714-990-2300.
At Altinex, we are committed to developing unique and state of
the art Signal Management Solutions®for demanding audiovisual
installations. Welcome to the Altinex family of satisfied customers
around the world!
1. Precautions and Safety Warnings
•These instructions are to ensure the reliable operation of
your TE460-137 and to prevent fire and shock hazards.
Please read them carefully and heed all warnings.
1.1 General
•Qualified Altinex service personnel or their authorized
representatives must perform all service.
1.2 Installation Precautions
•To prevent fire or shock, do not expose this unit to water
or moisture. Do not place in direct sunlight, near heaters
or heat-radiating appliances, or near liquid. Exposure to
direct sunlight, smoke, or steam can harm internal
components.
•Handle carefully; dropping or jarring can cause damage.
1.3 Cleaning
•Clean with a dry cloth only. Never use strong detergents
or solvents such as alcohol or thinner.
1.4 FCC Notice
•This device complies with Part 15 of the FCC Rules.
Operation is subject to the following two conditions:
(1) This device may not cause harmful interference, and
(2) this device must accept any interference received,
including interference that may cause undesired
operation.
•This equipment has been tested and found to comply with
the limits for a Class B digital device, pursuant to Part 2
of the FCC Rules. These limits are designed to provide
reasonable protection against harmful interference when
the equipment is operated in a commercial environment.
This equipment generates, uses, and can radiate radio
frequency energy and, if not installed and used in
accordance with the instructions found herein, may cause
harmful interference to radio communications. Operation
of this equipment in a residential area is likely to cause
harmful interference in which case the user will be
required to correct the interference at their own expense.
•Any changes or modifications to the unit not expressly
approved by Altinex, Inc. could void the user’s authority to
operate the equipment.
2. Installation Procedures
Note: Download and read the entire online manual to become familiar with the TE460-137 and for detailed information.
See the top label of the TE460-137 for control details or refer to the complete online manual.
Note 2: Go to www.youtube.com and search TE460-137 for how to videos. Start with EASY MODE.
Step 1: Insert a small paperclip into the battery compartment slot and press firmly.
Step 2: Install the battery provided with the tester. Make sure the mylar tab is underneath the
battery as shown in the image to the right.
Caution: Make sure the polarity of the battery matches the tester.
Step 3. The tester is now ready; turn on power. The TE460-137 powers up in EASY MODE.
EASY MODE provides the basic functionality required by most users.
If more detailed information or features are required, select ADVANCED MODE as
follows. Press and hold the TASK button for about 2 seconds and wait for the
TE460-137 to reinitialize.
Step 4. Select the desired mode of operation using the TASK button on the front of the tester. Do NOT press ENTER to confirm the
selection. Once the correct task is displayed at the top, just wait for the task to start automatically.
Step 5. Use the MENU and UP/DN arrows to navigate the menus.
ENTER button selects a menu. UP/DN buttons cycle through options. ENTER button confirms the selection.
3. Warranty and Return Policies
Please visit the Altinex website at www.altinex.com for details on warranty and return policies. In the case of a unit needing repair,
please complete a RMA (return material authorization) form located on the bottom left hand corner of the Altinex homepage. Once

TE460-137 User’s Guide
400-0753-003 2
4. Technical Specifications
Specifications are subject to change due to design improvements. Please see www.altinex.com for up to date information.
Features/Description
TE460-137
Input Connectors*
Digital Video + Audio
HDMI F, Type A
Power
Micro USB F (1)
Output Connectors
Digital Video + Audio
HDMI F, Type A
Compatibility
Digital Signal types
HDMI 1.4,3D
Signal resolution
Up to 4k x 2k
Accessories Included
Power supply
2.4A USB Wall charger (1)
2.0 USB cable
6ft, A- M /B- M cable (1)
HDMI Cable
1 ft, HDMI M/M cable (1)
Lithium battery
3.6V 3350MAB (1)
Optional Accessories
Table 1. TE460-137 General
Mechanical
TE460-137
Material
Steel
Color
Silver
Height
1.06 in. (27 mm)
Width
3.15 in. (80 mm)
Length
4.88 in. (124 mm)
Weight
0.6 lb. (0.26 kg)
T° Operating
10°C-40°C
Humidity
60% RH non-condensing
MTBF (calc.)
38,000 hrs.
Table 2. TE460-137 Mechanical
Electrical
TE460-137
Video Input Signals
Digital Video + Audio
HDMI Standard
Output Signals
Digital Video + Audio
HDMI Standard
Power
5V
5W
Table 3. TE460-137 Electrical
HDMI, the HDMI Logo, and High Definition Multimedia
Interfaces are trademarks or registered trademarks of HDMI
Licensing LLC in the United States and other countries.
* Warning: The 5V from the source on the HDMI
input must NOT exceed +5.3 VDC.

TE460-137 User’s Guide
400-0753-003 3
5. About Your TE460-137
•EASY and ADVANCED mode options
•HDMI input and output with 18Gbps (600MHz) 4K UHD support
•DVI 1.0 compliant with the use of an HDMI-DVI adaptor
•HDCP 1.4 and 2.2 compliant
•Supports HD resolutions up to 4096×2160@60Hz (4:4:4, 8-bit)
•Source bypass support in Analyzer mode
4K sources can be scaled down to 1080p in Analyzer mode to support a
wider range of displays when analyzing a high-bandwidth source
•HDR bypass and analysis support
•Source video, audio and timing analysis
•Analysis and emulation of EDID data
•HDCP and SCDC monitoring functions
•HDMI packet analysis
•Analyzer mode complies with the CEA standard HDR static metadata
extensions CEA-861-F and CEA-861.3
•23 selectable output resolutions available in Test Pattern mode
•17 selectable static test patterns in Test Pattern mode
•HDMI 2.0 cable test function including tests for 5V, CEC continuity, and
hot- plug detection support
oCables tested at 4k 60Hz (ADVANCED MODE)
oCable test starts at 1080p60 (EASY MODE) adjustable over full
resolution range
•Supports LPCM 2.0, 5.1, and 7.1 audio output with adjustable sinewave frequencies for each channel
•Comprehensive EDID management support with 10 built-in default EDIDs and 10 user EDIDs copied from sink devices
•Powered by a single Lithium-ion battery (included). Use of an external USB power bank can provide extended operation time
•OLED display with rapid updates of current status information
•Supports optional Windows control software in EASY or ADVANCED modes
The latest firmware supports an EASY MODE option for the TE460-137. In EASY MODE, users have quick access to the most
commonly used features. All information is available on a single screen with no need to navigate submenus for information.
The TE460-137 HDMI Signal Generation and Analysis tool provides a convenient way to test and verify all aspects of an HDMI signal
path, including source and sink. TE460-137 complies with the HDMI 2.0a and HDCP 1.4/2.2 standards. The TE460-137 Analyzer mode
complies with the CEA standard HDR static metadata extensions CEA-861-F and CEA-861.3 for EDID analysis.
TE460-137 is powered by a single rechargeable Lithium-ion battery. Beyond the Lithium-ion battery, the unit may also be powered (and
the battery recharged) via the micro USB port using included with unit USB wall charger and USB cable. An external power bank can
also be used to extend the portable service time. 4K sources can be scaled down to 1080p output in Analyzer mode to support a wider
range of displays when analyzing high- bandwidth sources.
TE460-137 has an integrated OLED display which provides a way to quickly and clearly view the current signal state or the
results of signal analysis. This portable handheld design is ideal for both the professional end user and installation engineer
alike. TE460-137 unit can be used in following applications Installer/Integrator multi-function test tool, HDMI source and sink
testing, HDCP compliance verification, production testing, etc.

TE460-137 User’s Guide
400-0753-003 4
Description

TE460-137 User’s Guide
400-0753-003 5
6. Application Diagrams

TE460-137 User’s Guide
400-0753-003 6
7. Operation
The OLED display provides the user with quick access to
details about the TE460-137 and the status of the
generator/analyzer.
The display automatically switches off after the set number of
minutes. All other functions of the unit continue normally while
the display is turned off. The HDCP button slowly flashes red
indicating it is in power saver mode. Press any button to
restore the display.
7.1 Modes of Operation
The TE460-137 powers up in EASY MODE as this is best for
most users. However, there are many more advanced features
and information available using the ADVANCED MODE.
In order to access ADVANCED MODE, press and hold the
TASK MODE button for about 2 seconds and the TE460-137
automatically initializes ADVANCED MODE.
EASY MODE
7.1.1 EASY Analyzer Mode
The status line displays the 5v, TMDS clock, and sync
detection state of the connected source. (I = detected, 0 = not
detected.) The remaining lines display the signal timing, HDCP
version, the format, and audio information.
The information is updated when changes occur, or another
source is connected.
7.1.2 EASY Pattern Mode
The status line displays the Rx Sense and Hot-plug detection
state of the connected display. (I = detected, 0 = not detected.)
The remaining lines on the display allow navigation to and
setting of the output resolution, test pattern, audio volume, and
the audio format.
7.1.3 EASY Cable Test Mode
The status line displays a cable connection graphic. If a cable
is detected, the test starts automatically. After 10 seconds, the
test results are displayed as PASS or FAIL. Failed properties
are displayed to indicate the problem.
At the end of the test, you can press ENTER to re-run the test.
After removing the cable, when a new cable is connected, the
test starts again to test the new cable.
ADVANCED MODE
A full listing of menus and submenus may be found later in this
section. Each mode has its own table of menu items.
7.1.4 Analyzer Mode
The status line displays the 5v, TMDS clock, and sync
detection state of the connected source. (I = detected, 0 = not
detected.)
Video, audio, and EDID information is available using the
various submenus. See section OSD Menu –Analyzer for
menu items.
7.1.5 Pattern Mode
The status line displays the Rx Sense and Hot-plug detection
state of the connected display. (I = detected, 0 = not detected.)
Video, audio, and EDID information is available using the
various submenus. See section OSD Menu –Pattern
Generator for detailed menus.
7.1.6 Cable Test Mode
The status line displays cable connection graphic. In
ADVACNED MODE, all cables are tested at 4k60Hz and the
minimum test time is 2 minutes.
There are 2 screens in ADVANCED MODE. The second
screen is accessed by pressing the down arrow. This screen
shows the graphic progress of the bandwidth test.
See section OSD Menu - Cable Test for details.
7.1.7 Menu Listings
Use the shortcuts below to view individual sections.
OSD Menu –Analyzer
OSD Menu –Pattern Generator
OSD Menu - Cable Test
Test Timings
PC Resolutions
Test Patterns
RS232 Command Listing

TE460-137 User’s Guide
400-0753-003 7
7.2 Notes and Limitations
7.2.1 Analyzer
The CEC line is not affected by the generator. CEC signals
pass through the unit, but there is no analysis of the data.
7.2.2 Pattern Generator
The Pattern Generator does not block or prevent CEC signals
from passing among devices when connected to a display or
switcher.
7.2.3 Cable Test
If BW is displayed after the fail message, the problem is the
shielded, twisted-pair lines resulting in insufficient bandwidth.
If 5V is displayed after the fail message, the 5V line (pin 18)
conductor is either damaged or missing.
If CEC is displayed after the fail message, the CEC line
(pin 13) is either damaged or missing.
If DDC is displayed after the fail message, either the SCL or
SDA conductor is damaged or missing.
If HDP is displayed after the fail message, either the hot plug
detect conductor is damaged or missing. This line also
represents the audio return channel (ARC).
7.3 Controls and Indicators
7.3.1 Battery Charging LED
The battery charging LED will illuminate red when a USB
power source is connected and actively charging the battery.
7.3.2 Menu Button
Press to back out from menu items and return to the main
menu screen.
7.3.3 Plus, Minus, Up, Down Buttons
Press to move up and down or adjust selections within menus.
7.3.4 Enter Button
Press to confirm a selection or to go deeper into a menu.
In Analyzer and Pattern modes, press and hold this button for
2 seconds to toggle audio on and off.
7.3.5 Task Mode Button
Press to switch the unit between Analyzer Mode, Pattern
Mode, and Cable Test Mode.
Advanced Mode
•In Analyzer mode, press and hold this button for 2
seconds to toggle the input's hot plug trigger.
•In Pattern mode, press and hold this button for 2 seconds
to enable or disable the output's AV Mute function.
7.3.6 HDCP Button
Press to switch between supported HDCP versions (1.4, 2.2)
or to disable HDCP.
•In Analyzer mode, this changes the HDCP versions
supported by the input port.
•In Pattern mode, this changes the HDCP required by the
output port.
Note: The button's outline illuminates based on the HDCP
state and current version. Red = HDCP 1.4,blue =
HDCP 2.2, and off = HDCP disabled. A flashing LED
indicates HDCP authentication failure.
7.3.7 Factory Reset (HDCP) Button
Pressing and holding the HDCP button during power on will
reset the unit to its factory default settings.
7.4 Inputs/outputs
7.4.1 Power
Flip this switch to turn the unit ON or OFF.
7.4.2 USB
The micro USB port is used for power, battery charging,
firmware updates, and/or RS-232 command control.
Note: The different USB modes are accessed using the Setup
option in the Main Menu.
7.4.3 HDMI OUT
Connect to an HDMI TV, monitor or amplifier for digital video
and audio output.
7.4.4 HDMI IN
Connect to HDMI source equipment such as a media player,
game console or set-top box.
7.4.5 HDMIT OUT to HDMI IN
Cable tests are run by connecting the cable under test
between the input and output ports.

TE460-137 User’s Guide
400-0753-003 8
7.5 Battery Compartment
The TE460-137 may be powered directly via the USB port or
by a rechargeable Lithium-ion battery (included but packaged
separately) which is concealed within the bottom of the unit.
7.5.1 Opening the Compartment
Use a paperclip to gently, but firmly press down into the slot
behind the base panel and the bottom cover will pop out.
7.5.2 Removing the Battery
If a battery is already installed, a Mylar tab is visible beneath
the battery. Pull on the Mylar tab to pop the battery out of its
holding brackets.
7.5.3 Inserting the Battery
Turn the unit so that it is face down and align the battery so
that the positive terminal of the battery (marked with a +) is
aligned with the positive (+) marking on the right-hand side on
the back of the battery compartment. Extend the Mylar tab out
of the battery compartment, then place the battery on top of the
extended tab and slide the battery into the unit until it snaps
into the holding brackets as shown in the illustration.
7.5.4 Closing the Compartment
After the battery has been properly inserted, place the battery
compartment cover back into the bottom of the unit by first
Ming the 2 small tabs on the cover into the 2 slots in the case
and then gently snapping the cover into place.
7.5.5 Charging the Battery
Connect a USB charger (5V/2.1 A minimum) to the USB port to
charge the unit's battery until it is full. The typical charging
time, from empty to full, is approximately 3 hours while the
unit's power is off. Average operation time from a fully charged
battery is roughly 4 hours but may be less depending on
specific usage and battery quality.
Note: The battery is included; Panasonic NCR 18650B
(3.6v/3350mAh) Lithium-ion rechargeable.
7.6 Display Indicators
7.6.1 USB Port
USB port is power mode
USB port is RS232 mode
USB port is in firmware update mode
7.6.2 Battery
External power only; no battery.
External power, battery is at max.
External power, battery is charging.
Battery percentage 100%
Battery percentage 75%
Battery percentage 50%
Battery percentage 25%
Battery critically low

TE460-137 User’s Guide
400-0753-003 9
7.7 OSD Menus
7.7.1 OSD Menu –Analyzer (Menu Listings)
Input Setup
Hotplug Time
50ms ~ 500ms (150ms)
Hotplug Toggle
RxSense*
On
Off
DDC Bus*
On
Off
HDCP Port*
v1.4
v1.4+v2.2
Off
HDCP REAUTH-REQ
4K to 1080p
On YCbCr Out
On RGB Out
Off (POR)
SCDC Port*
On (POR)
Off
PC Tolerance
1 ~ 10 (6)
Monitor Source
Timing
[Measured]
HDCP
[Measured]
Format
[Measured]
Colorspace
[Measured]
Audio
[Measured]
Deep Color
[Measured]
AVI, AIF, HDR, VSI,
AVMute,
[Measured]
SPD, 3D
[Measured]
Monitor HDCP (v1.4)
Source HDCP
[Measured]
Rx HDCP Port
[Measured]
Aksv
[Measured]
Bksv
[Measured]
Ri Source
[Measured]
Ri’ Rx
[Measured]
Count
[Measured]
Day 0 00 : 00 : 00
[Measured]

TE460-137 User’s Guide
400-0753-003 10
Monitor HDCP (v2.2)
Source HDCP
[Measured]
Rx HDCP Port
[Measured]
TxCaps
[Measured]
RxCaps
[Measured]
Receiver ID
[Measured]
rn
[Measured]
riv
[Measured]
Monitor SCDC
Rx SCDC Port
[Measured]
Sink Version
[Measured]
Source Version
[Measured]
Scramble Enabled
[Measured]
Scramble Status
[Measured]
Clock Detect
[Measured]
Ch2/1/0 Locked
[Measured]
CED Ch0
[Measured]
CED Ch1
[Measured]
CED Ch2
[Measured]
ENTER Reset/Start
[Measured]
HF VSDB
[Measured]
SCDC Exist
[Measured]
Video Timing
Timing
[Measured]
TMDS Clock
[Measured]
Pixel Clock
[Measured]
Data Rate
[Measured]
Bit Depth, 3D, Y4:2:0,
scramble
[Measured]
Total (H/V Total Pixel/Line)
[Measured]
Act (H/V Active Pixel/Line)
[Measured]
Polarity (H/V Sync. Polarity)
[Measured]
Scan
[Measured]
Hfreq (H Sync. Frequency)
[Measured]
Vfreq (V Sync. Frequency)
[Measured]
Offset1 (H/V Sync. Offset1)
[Measured]
Offset2 (H/V Sync. Offset2)
[Measured]

TE460-137 User’s Guide
400-0753-003 11
Audio Timing
ACR, AIF, ASP, HBR
[Measured]
N
[Measured]
CTS
[Measured]
ASP PLL Lock
[Measured]
ASP audio FIFO
[Measured]
ASP Layout
[Measured]
ASP Ch No.
[Measured]
CHS App. Type
[Measured]
CHS Audio Coding
[Measured]
CHS Ch No.
[Measured]
CHS Source No.
[Measured]
CHS Sampling Rate
[Measured]
CHS Sampling Size
[Measured]
Packet
GCP 0x03
[Measured]
AVI 0x82
[Measured]
AIF 0x84
[Measured]
SPD 0x83
[Measured]
VSIF H14b 0x81
[Measured]
DRMI (HDR) 0x87
[Measured]
EDID Analyzer
Sink
[Measured]
Rx EDID
[Measured]
[D1] DVI
[Default EDID Details]
[D2] VGA
[Default EDID Details]
[D3] 8B LPCM PC
[Default EDID Details]
[D4] 8B LPCM HD
[Default EDID Details]
[D5] 12 BS 720p
[Default EDID Details]
[D6] 12 BS HD 3D
[Default EDID Details]
[D7] 12 BS 4K6G
[Default EDID Details]
[D8] 12 HBR 4K3G
[Default EDID Details]
[D9] 12 HBR 4K420
[Default EDID Details]
[D10] 12 HBR 4K6G
[Default EDID Details]
[C1 ~ 10] Copy 01 ~ 10
[Copied EDID Details]

TE460-137 User’s Guide
400-0753-003 12
EDID Emulator
Copy Sink
[D1] DVI
[Default EDID Details]
[D2] VGA
[Default EDID Details]
[D3] 8B LPCM PC
[Default EDID Details]
[D4] 8B LPCM HD
[Default EDID Details]
[D5] 12 BS 720p
[Default EDID Details]
[D6] 12 BS HD 3D
[Default EDID Details]
[D7] 12 BS 4K6G
[Default EDID Details]
[D8] 12 HBR 4K3G
[Default EDID Details]
[D9] 12 HBR 4K420
[Default EDID Details]
[D10] 12 HBR 4K6G
[Default EDID Details]
[C1 ~ 10] Copy 01 ~ 10
[Default EDID Details]
EDID Copy Sink
[C1 ~ 10] Copy 01 ~ 10
EDID Burn Sink
[D1] DVI
[Default EDID Details]
[D2] VGA
[Default EDID Details]
[D3] 8B LPCM PC
[Default EDID Details]
[D4] 8B LPCM HD
[Default EDID Details]
[D5] 12 BS 720p
[Default EDID Details]
[D6] 12 BS HD 3D
[Default EDID Details]
[D7] 12 BS 4K6G
[Default EDID Details]
[D8] 12 HBR 4K3G
[Default EDID Details]
[D9] 12 HBR 4K420
[Default EDID Details]
[D10] 12 HBR 4K6G
[Default EDID Details]
[C1 ~ 10] Copy 01 ~ 10
[Copied EDID Details]

TE460-137 User’s Guide
400-0753-003 13
Setup
USB Port
Power
RS-232
OLED Contrast
0 ~ 8 (6)
Firmware Update
Yes
No
Power Saving
2min ~ 10min
Off
EDID Reset
Yes
No
Factory Restore
Yes
No
Information
[Unit Version Details]

TE460-137 User’s Guide
400-0753-003 14
7.7.2 OSD Menu –Pattern Generator (Menu Listings)
Output Setup
Timing
[T1] 720×480p59
[T2] 720×576p50
[T3] 1280×720p25
[T4] 1280×720p30
[T5] 1280×720p50
[T6] 1280×720p60
[T7] 1920×1080i50
[T8] 1920×1080i60
[T9] 1920×1080p24
[T10] 1920×1080p25
[T11] 1920×1080p30
[T12] 1920×1080p50
[T13] 1920×1080p60
[T14] 3840×2160p24
[T15] 3840×2160p25
[T16] 3840×2160p30
[T17] 3840×2160p50
[T18] 3840×2160p60
[T19] 4096×2160p24
[T20] 4096×2160p25
[T21] 4096×2160p30
[T22] 4096×2160p50
[T23] 4096×2160p60
Pattern
[P1] Black
[P2] Blue
[P3] Cyan
[P4] Green
[P5] Magenta
[P6] Red
[P7] White
[P8] Yellow
[P9] Color Bar
[P10] Grayscale 256
[P11] V Line OnOff

TE460-137 User’s Guide
400-0753-003 15
Output Setup (cont.)
Format
HDMI
DVI
Colorspace
RGB
YUV444
ColorRange
Full
Limited
Audio LPCM*
2CH
5.1CH
7.1CH
HDCP Out
v1.4
v2.2
Off
HDCP V2.2 AKE_Stored_km()
On
Off
AVMute*
On
Off
Output*
On
Off
+5V Out
Follow
On

TE460-137 User’s Guide
400-0753-003 16
Monitor Sink
HDCP Port/Auth
[Measured]
EDID
[Measured]
SCDC Port
[Measured]
Monitor HDCP
(Output HDCP 1.4)
Tx HDCP
[Measured]
Sink HDCP Port
[Measured]
Aksv
[Measured]
Bksv
[Measured]
Ri Tx
[Measured]
Ri’ Sink
[Measured]
Count
[Measured]
Day 0 00:00:00
[Measured]
Monitor HDCP
(Output HDCP 2.2)
Tx HDCP
[Measured]
Sink HDCP Port
[Measured]
TxCaps
[Measured]
RxCaps
[Measured]
Receiver ID
[Measured]
rn
[Measured]
riv
[Measured]
Stored km
[Measured]
Sink REAUTH
[Measured]
Count
[Measured]
Day 0 00:00:00
[Measured]
Monitor SCDC
Sink SCDC Port
[Measured]
Sink Version
[Measured]
Source Version
[Measured]
Scramble Enable
[Measured]
Scramble Status
[Measured]
Clock Detect
[Measured]
Ch2/1/0 Locked
[Measured]
CED Ch0
[Measured]
CED Ch1
[Measured]
CED Ch2
[Measured]
ENTER Reset/Start
[Measured]
HF VSDB
[Measured]
SCDC Exist
[Measured]

TE460-137 User’s Guide
400-0753-003 17
Audio Output
Volume
0 ~ 80 (70)
Sample Rate
48 kHz
96 kHz
192 kHz
Word Length
16 Bits
20 Bits
24 Bits
Channels*
2
5.1
7.1
SD0-L ~ SD03-L Freq.
Mute
200Hz ~ 1600Hz
(1000Hz)
SD0-R ~ SD3-R Freq.
Mute
200Hz ~ 1600Hz
(1000Hz)
EDID Analyzer
Same as Analyzer Mode
[Measured]
EDID Emulator
Same as Analyzer Mode
[Measured]
EDID Copy Sink
Same as Analyzer Mode
[Measured]
EDID Burn Sink
Same as Analyzer Mode
[Measured]

TE460-137 User’s Guide
400-0753-003 18
HDR Emulator
HDR Out
On
Off
AVI Colorimetry
BT.2020 (1)
BT.2020 (2)
No Data
ITU601
ITU709
xvYCC601
AVI Colorimetry
xvYCC709
sYCC601
Adobe Y601
Adobe RGB
EOTF
[0] SDR Lumi Range
[1] HDR Lumi Range
[2] SMPTE ST2084.2
[3] Future EOTF
Metadata Descr.
S. Metadata Type 1
Reserved
Max. Content L-L
0 ~ 65500 (0)
Max. FrameAve L-L
0 ~ 65500 (0)
AVI Color Space
[Measured]
Sink EDID HDR
[Measured]

TE460-137 User’s Guide
400-0753-003 19
Setup
USB Port
Power
RS-232
OLED Contrast
0 ~ 8 (6)
Firmware Update
Yes
No
Power Saving
2min ~ 10min
Off
EDID Reset
Yes
No
Factory Restore
Yes
No
Information
[Unit Version Details]

TE460-137 User’s Guide
400-0753-003 20
7.7.3 OSD Menu - Cable Test (Menu Listings)
Run Test
Normal/Strict
[Measured]
(Enter- Start/Stop)
Elapsed Time (Min:Sec)
(PASS or FAIL result)
+5V
Hotplug
DOC Bus
CEC
4K6G AN
Cable Setup
Level
Normal
Strict
Time
2 minutes
5 minutes
10 minutes
15 minutes
30 minutes
1 hour
Infinite
Calibration Value
Default
Loose
Strict
Setup
USB Port
Power
RS-232
OLEO Contrast
0~8 (6)
Firmware Update
YES/NO
Power Saving
2 min ~ 10 min
Off
EDID Reset
Yes/No
Factory Restore
Yes/No
Information
[Unit Version Details]
Other manuals for SIGNAL MANAGEMENT SOLUTIONS TE460-137
1
Table of contents
Other Altinex Measuring Instrument manuals