manuals.online logo
Brands
  1. Home
  2. •
  3. Brands
  4. •
  5. ALTRACO
  6. •
  7. Indoor Furnishing
  8. •
  9. ALTRACO 5932026COM User manual

ALTRACO 5932026COM User manual

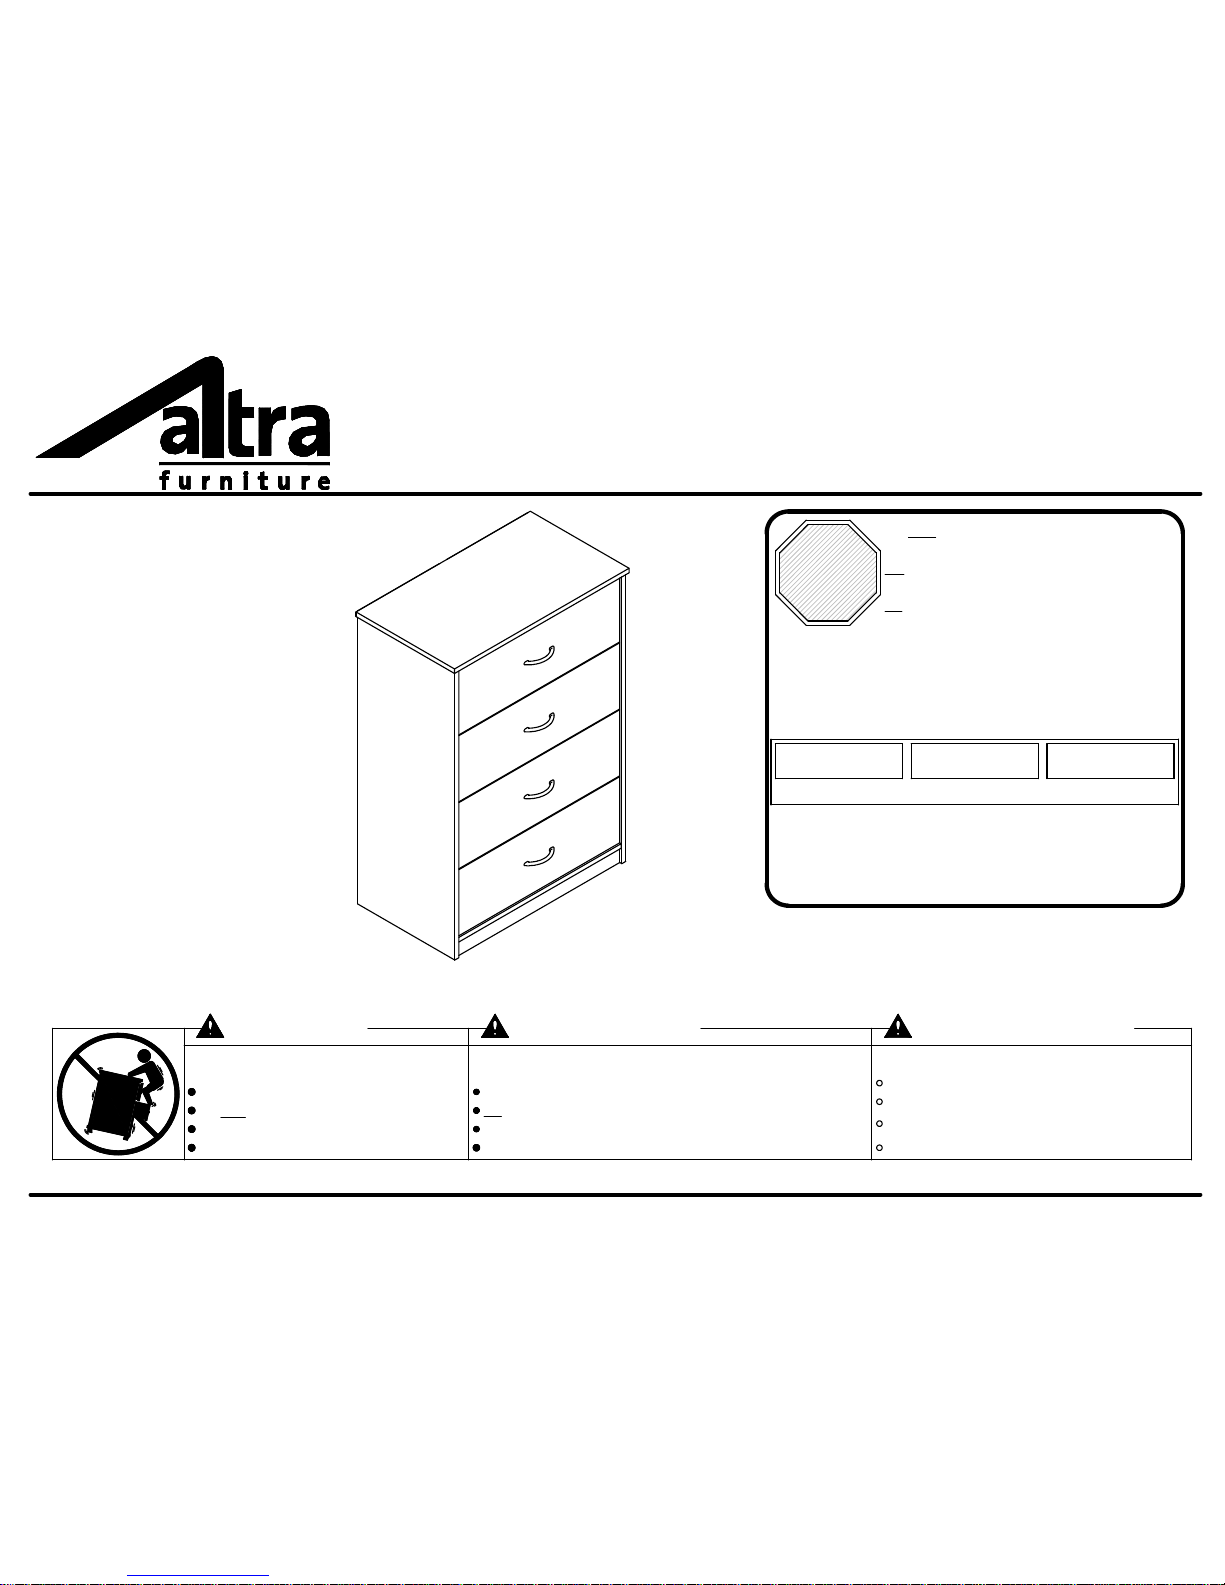
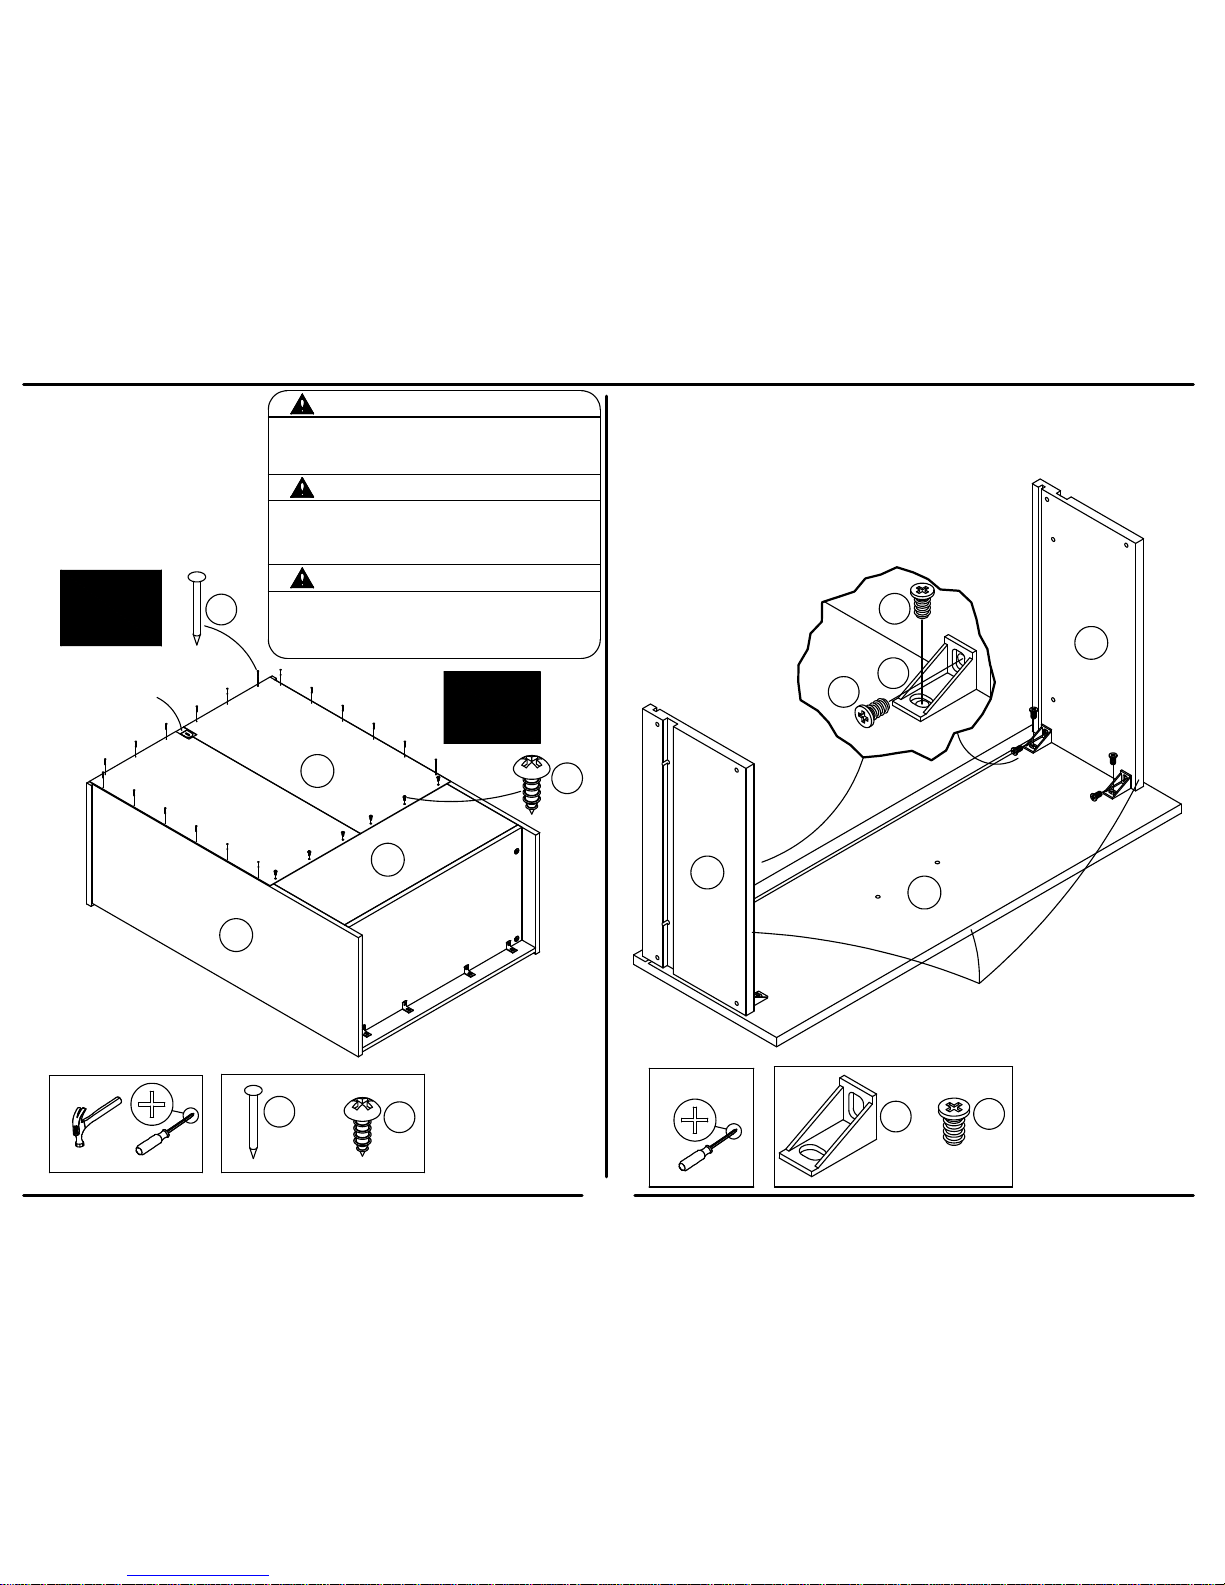
WARNING ADVERTENCIA AVERTISSEMENT
Unit can tip over causing severe injury
or death.
Anchor unit to stud or wall.
DO NOT allow children to climb on unit.
Put heavy items on lower shelves or drawers.
Read and follow all assembly instructions.
Este mueble puede caerse por encima
causando daño serio o la muerte
Anolar el mueble a un espárrago muro.
NO dejar que los niños suben por encima del mueble.
Poner los articulos mas pesados en los tableros o cajones inferiores.
Leer y sequir todos de los instucciones para el montaje.
L'unité peut basculer et causer des
blessures graves ou la mort.
Fixez l'unité au mur ou à un montant.
Ne laissez PAS les enfants grimper sur le meuble
Déposez les pièces lourdes sur les tablettes ou tiroirs
du bas.
Lire et suivre toutes les instructions d'assemblage.
STOP
ALTO
ARRÊT
DO NOT RETURN PRODUCT TO THE STORE
NO REGRESAS ESTA PRODUCTO A LA TIENDA
NE RETOURNEZ PAS LE PRODUIT AU MAGASIN
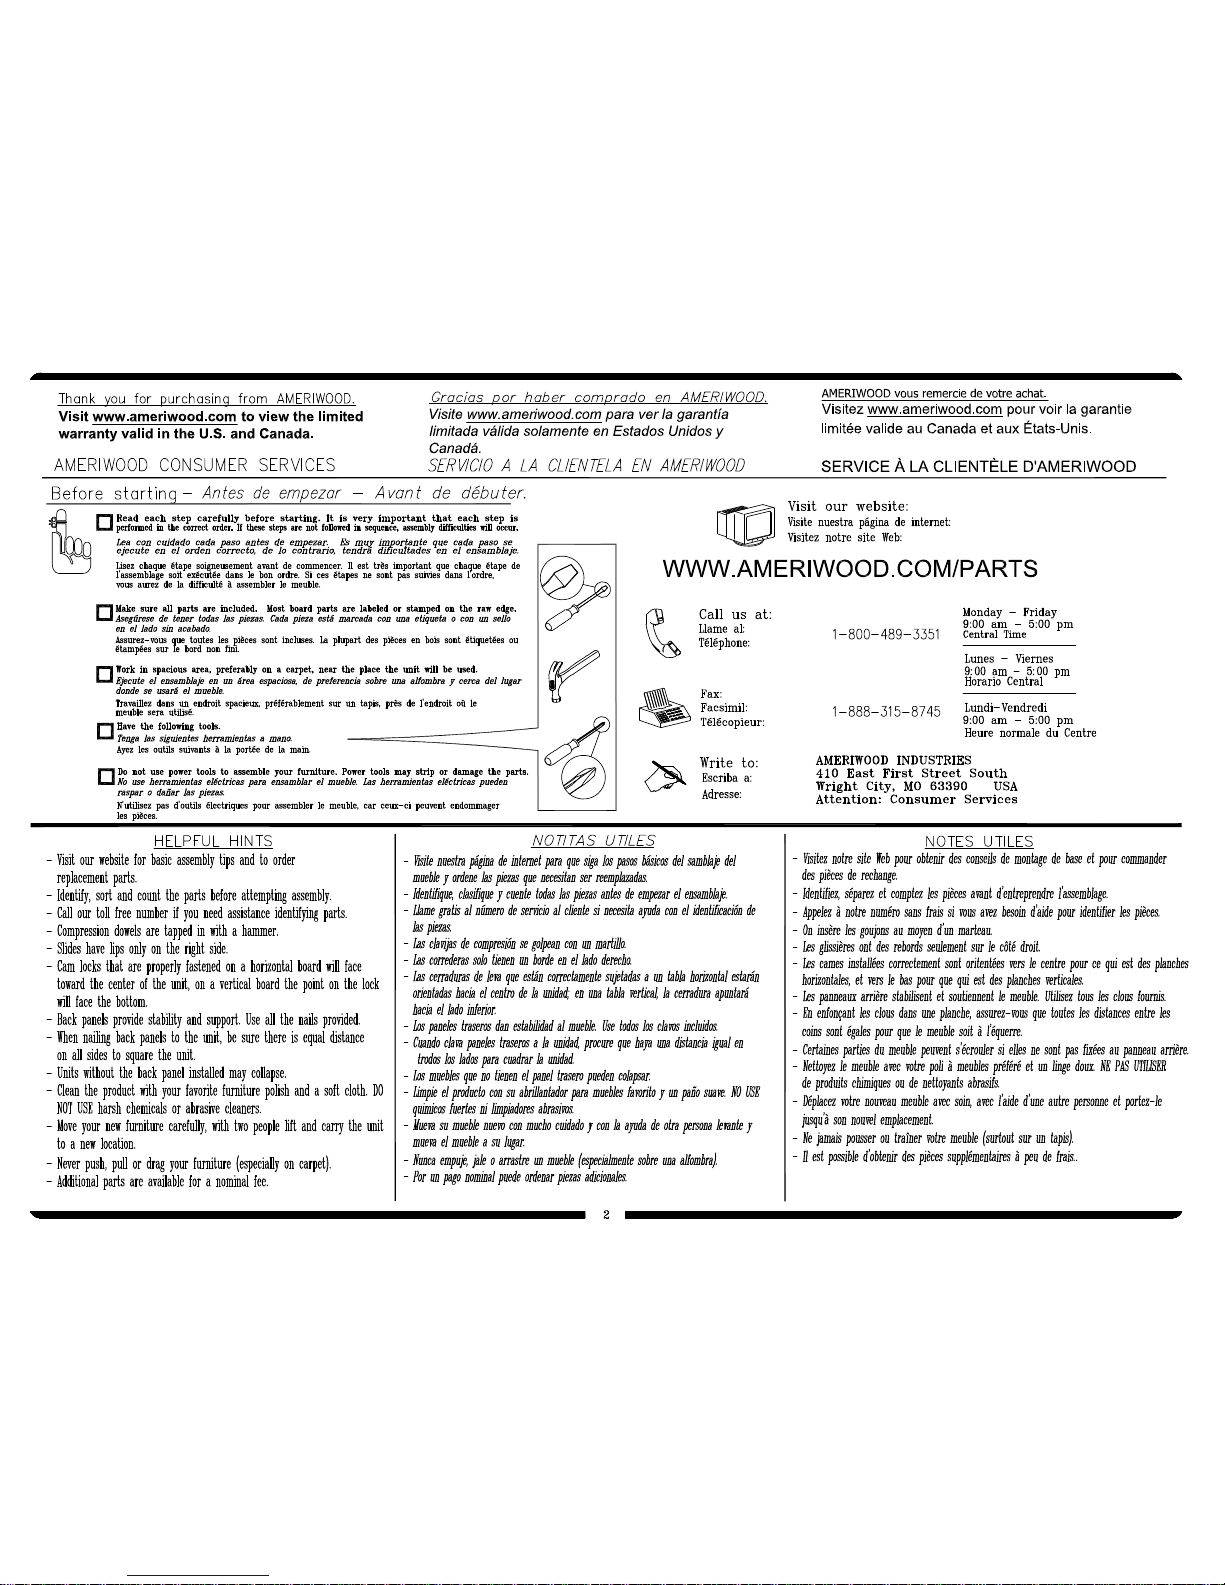
Individual stores do not stock parts.
Las tiendas no tiene partes.
Les magasins individuels ne gardent pas de pièces.
If a part is missing or damaged, please visit our website or call our toll-free customer
service line. We will gladly ship your replacement parts FREE of charge.
Si las partes están perdidas o dañadas Por favor visite nuestra página de Internet o
llame a nuestra línea de teléfono gratis de Servicio al Cliente. Nosotros le enviaremos
sus repuestos sin cargo adicional, serán totalmente gratis.
Si une pièce est manquante ou endommagée, veuillez visiter notre site web ou appelez
sans frais notre Service à la clientèle. Nous expédierons avec plaisir vos pièces de
rechange GRATUITEMENT.
Need Parts or
Assistance? Nesacitas partes o
Asistancia? Besoin de Pièces ou
d'assistance?
WWW.AMERIWOOD.COM/PARTS
or call toll free:
o llame a nuestra línea gratis:
ou appelez sans frais: 1-800-489-3351
For prompt, reliable service; please have your assembly manual ready.
Para servicio mas rapido y reliable por favor tenga esta manual listo.
Pour un service rapide et fiable, s'il vous plaît ayez votre livret d'assembage en
main.
-KEEP FOR REFERENCE- -GUARDAR PARA REFERENCIA- -GARDEZ POUR RÉFÉRENCE-
B345932026COM0
5932026COM
B345932026COM0
3 /12
?? www.ameriwood.com ??
PARTS - PIEZAS - PIECES
left panel
panel izquierdo
panneau gauche
35932026010
top
cima
dessus
35932026030
bottom
fondo
fond
35932026040
back panel
panel trasero
panneau arrière
K59320000
right panel
panel derecho
panneau droit
35932026020
kick panel
retroceso
plaque
35932026050
brace
soporte
support
35932000100
4 drawer fronts
4 frentes del cajón
4 devants du tiroir
35932026060
8 drawer sides
8 lados del cajón
8 côtés du tiroir
35932302090
4 drawer backs
4 traseros del cajón
4 dos du tiroir
35932302070
4 drawer bottoms
4 fondos del cajón
4 fond de tiroir
35932302080
I
JK
AB
CDE
F
G
H
solid back
trasero solido
panneau arrière solide
35932000110
L
This piece is paperboard construction. It is not made from wood but is required
for the assembly of your unit.
Esto pedazo son la construcción del cartón. Ello no son hecho de madera,
pero se requlere para la asamblea de su unidad.
Cette pièce est de construction en carton. Elle n'est pas fabriquée de bois,
mais nécessaire pour l'assemblage de votre meuble.
B345932026COM0
4 /12
Parts - Piezas
cam bolt
perno de la leva
boulon de came
#A22510
Qty: 12
nail
clavo
clou
#A21110
Qty: 18
1/2" screw
tornillo de 1/2"
vis 1/2"
#A12210
Qty: 14
cam lock
cerradura de la leva
serrure de came
#A22570
Qty: 12
handle
manija
poignée
#A50690
Qty: 4
drawer runners
corredores del cajón
coulisse du tiroir
#A57000
Qty: 4
left runner
corredor izquierdo
coulisse gauche du tiroir
right runner
corredor derecho
coulisse droite du tiroir drawer stops
paradas del cajón
les arrèts du tiroir
wood dowel
clavija de madera
goujon de bois
#A21660
Qty: 8
angle bracket
anaquel del angulo
support de l'angle
#A53600
Qty: 4
drawer bracket
soporte del cajón
support de tiroir
#A53760
Qty: 16
drawer screw
tornillo del cajón
vis de tiroir
#A15600
Qty: 32
1-1/4" screw
tornillo de 1-1/4"
vis 1-1/4"
#A11600
Qty: 16
3/4" screw
tornillo de 3/4"
vis 3/4"
#A12610
Qty: 32
7/8" screw
tornillo de 7/8"
vis 7/8"
#A12700
Qty: 8
10 11
12
13
14
14a
14b
14c
12
3
5
9
8
7
6
safety bracket kit
estuche de seguridad
ensemble de courroie de
sécurite
#A84050
Qty: 1
15
15d
15c
15b
15a
B345932026COM0
5 /12
1
x 2 x 4 x 16
x 4
finished edge
borde acabado
bord fini
14a
9
9
STOP - do not discard drawer stops, they will be used
later in the assembly.
ALTO - no descartar las paradas del cajón, porque serán
utilizados mas tarde en el montaje.
ARRÉT - ne pas jeter les butées de tiroir, ils seront utilisés
plus tard dans l'assemblage.
14c
3
5
Certificate of Conformity
1. This certificate applies to the Ameriwoood Industries Inc. product identified by this
instruction manual.
2. This certificate applies to compliance of this product with the CPSC Ban on
Lead-Containing Paint (16 CFR 1303).
3. This product is distributed by: Ameriwood Industries Inc.
410 East First Street South
Wright City, MO 63390
1-800-489-3351
4. Site of Manufacture:
□Tiffin OH
5. See front page of instruction manual for date of manufacture.
3
6
x 1
5
6
14a
A
Proper orientation of CAM LOCK
Posición correcta de la cerradura de leva.
Bonne orientation de la SERRURE DE CAME
2
3½ turn to fully
lock.
½ se vuelven a
totalmente
cerradura.
½ tour pour
verrouiller
complètement.
4
Tighten to fully seat. Do not over
tighten.
Apriétese a totalmente asiento. No
haga encima de apriétese.
Serrez pour mettre le siège bien en
place. Ne pas trop serrer.
Proper orientation of cam.
La orientación apropiada de leva.
Bonne orientation de la came.
1
This illustration shows how the CAM fastening system works.
Esta ilustración muestra el sistema de fijación de leva y como funciona.
Cette illustration montre le système de fixation CAME et son fonctionnement.
Lock
Apretar
Serrer
Titus
Titus
Titus
2
B345932026COM0
6 /12
3
x 2 x 4 x 16
x 4
x 4
3
C
5
9
14b
14c
3
15a
15b
x 1
x 1
5
5
6
x 1
15a
15b
5
9
614b
B
Proper orientation of CAM LOCK
Posición correcta de la cerradura de leva.
Bonne orientation de la SERRURE DE CAME
STOP - do not discard drawer stops, they will be used
later in the assembly.
ALTO - no descartar las paradas del cajón, porque serán
utilizados mas tarde en el montaje.
ARRÉT - ne pas jeter les butées de tiroir, ils seront utilisés
plus tard dans l'assemblage.
finished edge
borde acabado
bord fini
finished edge
borde acabado
bord fini
4
B345932026COM0
7 /12
5
x 4
78
x 8
x 4
D
3
3
36
x 2
6
6
Proper orientation of CAM LOCK
Posición correcta de la cerradura de leva.
Bonne orientation de la SERRURE DE CAME
D
E
7
8
8
finished edge
borde acabado
bord fini finished edge
borde acabado
bord fini
6
B345932026COM0
8 /12
7
x 4
A
D
J
3
3
3
x4
K
K
J
6
x 4
6
6
6
UNLOCK LOCK
APRETAR
DESAPRETAR
OUVRIR SERRER
Proper orientation of CAM LOCK
Posición correcta de la cerradura de leva.
Bonne orientation de la SERRURE DE CAME
E
finished edge
borde acabado
bord fini
finished edge
borde acabado
bord fini
8
B345932026COM0
9 /12
9
A
B
D
A
B
C
E
J
x4 x4
UNLOCK LOCK
APRETAR
DESAPRETAR
OUVRIR SERRER
UNLOCK LOCK
APRETAR
DESAPRETAR
OUVRIR SERRER
finished edge
borde acabado
bord fini
finished edge
borde acabado
bord fini
10
B345932026COM0
10 /12
11
x 18
B
10 11
x 16 x 32
10
11
11
x 4
2
F
I
I
Place unit on its front.
Ponga la unidad en su frente.
Placez l'unité sur sa face avant.
Do not overtighten
No apriete firmemente
Ne serrez pas trop
These screws can be used to adjust the drawer fronts
vertically, if needed, once the drawers are installed in the
cabinet.
Estos tornillos pueden usarse para ajustar los frentes de
cajon verticalmente, si necesito, una vez los cajones se
instalan en el armario.
notch at this end
muesca a este extremo
encoche à cette fin
L8
8
x 6
first
primero
premier
second
segundo
deuxième
K
product collapse, and/or serious injury.
Por favor asegúrese que las Parte de atrás se atan
firmemente. Todos los clavos deben manejarse en las
partes recto y deben apretarse firmemente. El fracaso para
hacer para que podría causar inestabilidad, derrumbamiento
del producto, y/o la lesión seria.
S’il-vous-plaît assurez-vous que les PANNEAUX
ARRIÈRES sont attachés solidement. Tous les clous
doivent être enfoncés perpendiculairement et solidement
dans les parties. Sinon le meuble peut devenir instable,
s’effondrer subitement et/ou causer des blessures graves.
tightened firmly. Failure to do so could cause instability,
All nails must be driven into the parts straight and
Please make sure that the Backs are attached securely.
ADVERTENCIA
AVERTISSEMENT
WARNING
finished edge
borde acabado
bord fini
Ces vis peuvent être utilisés pour ajuster les façades de
tiroirs verticalement, si nécessaire, une fois que les
tiroirs sont installés dans l'armoire.
2
12
B345932026COM0
11 /12
13
12 x 16
12
x 4
x 8 x 8 x 4
1
1
14c
14c 13
12
F
G
H
I
I
F
13
The DRAWER
STOPS are located
at the end of your
drawer runners.
Los PARADAS DE
CAJÓN se localizan
a la extremidad de
sus correderas de
cajon.
Les arrêts de tiroir
sont situés à
l'extrémité de vos
coureurs de tiroir.
Slide the DRAWER BOTTOM (H) into the grooves of the
DRAWER SIDES (I) and the DRAWER FRONT (F).
Deslicese el FONDO DEL CAJON (H) en la ranura de los
LADOS DEL CAJON (I) y el FRENTE DEL CAJON (F).
Note:
The DRAWER BOTTOM (H) must insert into the groove in the DRAWER BACK (G).
Nota:
El FONDO DEL CAJON (H) debe insertar en la ranura en el TRASERO DEL CAJON (G).
Remarque:
Le FOND DE TIROIR (H) doit insérer dans la rainure dans le tiroir (G).
finishedsurface
superficie acabado
surfacefinie
finished edge
borde acabado
bord fini
Faites glisser le FOND DE TIROIR (H) dans les
rainures des côtés de tiroir (I) et la façade de
tiroir (F).
B345932026COM0
12 /12
This unit has been designed to support the maximum loads shown.
Exceeding these load limits could cause sagging, instability, product
collapse, and/or serious injury.
40 lbs.
18.2 kg
20 lbs
9.1 kg
Note:
If drawer fronts need to be adjusted,
loosen the drawer screws (11), make
needed adjustments and retighten
drawer screws.
Nota:
Si los frentes del cajon necesitan ser
ajustados, por favor suelte los
tornillos del cajon (11), haga los
ajustes necesitados y apriete los
tornillos del cajon.
Note:
Si les façades de tiroirs doivent être
ajustés, desserrez les vis du tiroir
(11), faire les ajustements
nécessaires et resserrer les vis du
tiroir.
20 lbs
9.1 kg
20 lbs
9.1 kg
20 lbs
9.1 kg
15d
15c
x 1 x 1
Option 1:
Screw (15c) through the safety bracket (15a) and into a solid area
of the wall. If you cannot screw into something solid, use option 2.
Opción 1:
Tornillo (15c) a través del anaquel de seguridad (15a) y en una
área sólida de la pared. Si usted no puede atornillar en algo el
sólido, use opción 2.
Option 1:
Vis (15c) à travers le support de sécurité (15a) et dans une zone
pleine de la paroi. Si vous ne pouvez pas visser dans quelque
chose de solide, utiliser l'option 2.
Option 2:
Drill a 3/16" diameter hole (5mm) in the wallboard. Tap the wall
anchor (15d) into the hole until it is flush. Fasten the safety bracket
(15a) to the wall anchor (15d) with the screw (15c).
Opción 2:
Taladre un agujero de 3/16" de diámetro (5mm) en la pared.
Golpea la ancla de pared (15d) en el agujero hasta que sea
parejo. Abroche la anaquel de seguridad (15a) a la ancla de pared
(15d) con el tornillo (15c).
Option 2:
Percez un trou de 3/16 "de diamètre (5 mm) dans la plaque de
plâtre. Appuyez sur l'ancrage de la paroi (15d) dans le trou jusqu'à
ce qu'il soit aligné. Fixer le support de sécurité (15a) à l'ancrage
de la paroi (15d) avec la vis (15c) .
15c
15d
option 1
opción 1
l'option 1
15a
DO NOT set a TV on the top of
this product
NO ponga un TV en la parte
superior de este producto
NE PAS mettre une télévision
sur le haut de ce produit
MAXIMUM LOADS – CARGA MAXIMA - CHARGES MAXIMALES
Esta unidad ha sido diseñada para
soportar la carga máxima anotada. El
exceder estos límites puede causar
inestabilidad, colapsarse y/o causar
serias lesiones.
Ce meuble a été conçu pour supporter les charges
maximales indiquées. En excédant ces limites de
charge, le meuble pourrait devenir instable,
s’effondrer, et/ou causer des blessures graves.
stud
montante
planche
wallboard
muro
mur
hole
agujero
trou
option 2
opción 2
l'option 2

Other ALTRACO Indoor Furnishing manuals

ALTRACO 9883303COM User manual

ALTRACO

ALTRACO 9883303COM User manual

ALTRACO 5647012COM User manual

ALTRACO

ALTRACO 5647012COM User manual

ALTRACO 9883214COM User manual

ALTRACO

ALTRACO 9883214COM User manual

ALTRACO TR4266 User manual

ALTRACO

ALTRACO TR4266 User manual

ALTRACO 1617096 User manual

ALTRACO

ALTRACO 1617096 User manual

ALTRACO 5206301PCOM User manual

ALTRACO

ALTRACO 5206301PCOM User manual

ALTRACO 5745303COM User manual

ALTRACO

ALTRACO 5745303COM User manual

ALTRACO 9107213PCOM User manual

ALTRACO

ALTRACO 9107213PCOM User manual

ALTRACO 5744303COM User manual

ALTRACO

ALTRACO 5744303COM User manual

ALTRACO 5692056COM User manual

ALTRACO

ALTRACO 5692056COM User manual

ALTRACO 5741215COM User manual

ALTRACO

ALTRACO 5741215COM User manual

ALTRACO 9633196 User manual

ALTRACO

ALTRACO 9633196 User manual

ALTRACO 9523196 User manual

ALTRACO

ALTRACO 9523196 User manual

ALTRACO 1222056PCOM User manual

ALTRACO

ALTRACO 1222056PCOM User manual

ALTRACO 9354303PCOM User manual

ALTRACO

ALTRACO 9354303PCOM User manual

ALTRACO 5977303COM User manual

ALTRACO

ALTRACO 5977303COM User manual

Popular Indoor Furnishing manuals by other brands

Dorel Home Products 2467309N manual

Dorel Home Products

Dorel Home Products 2467309N manual

Techni Sport RTA-TS38C Assembly instructions

Techni Sport

Techni Sport RTA-TS38C Assembly instructions

Better Homes and Gardens COLETTE BH17-021-099-76 Assembly instructions

Better Homes and Gardens

Better Homes and Gardens COLETTE BH17-021-099-76 Assembly instructions

Kring Provence Assembly instructions

Kring

Kring Provence Assembly instructions

Amart Furniture RICARDO 62499 Assembly instruction

Amart Furniture

Amart Furniture RICARDO 62499 Assembly instruction

Ameriwood HOME 5364222COM manual

Ameriwood HOME

Ameriwood HOME 5364222COM manual

Discovery Telecom 2118 quick start guide

Discovery Telecom

Discovery Telecom 2118 quick start guide

Cooper Lighting PM133ob Specification sheet

Cooper Lighting

Cooper Lighting PM133ob Specification sheet

Whittier Wood Furniture Prairie City 1253AFLSOc Assembly instructions

Whittier Wood Furniture

Whittier Wood Furniture Prairie City 1253AFLSOc Assembly instructions

avaks nabytok REA AMY 27/90 Assembly instructions

avaks nabytok

avaks nabytok REA AMY 27/90 Assembly instructions

American muscle MUSCLE AIR DOCK S user guide

American muscle

American muscle MUSCLE AIR DOCK S user guide

VANCOUVER CLASSICS AIRLIFT OFF65871 Assembly instruction

VANCOUVER CLASSICS

VANCOUVER CLASSICS AIRLIFT OFF65871 Assembly instruction

DURAVIT N1 7952 Mounting instructions

DURAVIT

DURAVIT N1 7952 Mounting instructions

Coaster CALIFORNIA 203481KW Assembly instructions

Coaster

Coaster CALIFORNIA 203481KW Assembly instructions

baby&child Tribeca Wide Dresser quick guide

baby&child

baby&child Tribeca Wide Dresser quick guide

OAKWORKS Cabana Lounger instruction manual

OAKWORKS

OAKWORKS Cabana Lounger instruction manual

muuto IN SITU Assembly instructions

muuto

muuto IN SITU Assembly instructions

Dauphin Syncro-Automatic @Just magic2 Series owner's manual

Dauphin

Dauphin Syncro-Automatic @Just magic2 Series owner's manual

manuals.online logo
manuals.online logoBrands
  • About & Mission
  • Contact us
  • Privacy Policy
  • Terms and Conditions

Copyright 2025 Manuals.Online. All Rights Reserved.