manuals.online logo
Brands
  1. Home
  2. •
  3. Brands
  4. •
  5. Amacom
  6. •
  7. Storage
  8. •
  9. Amacom ezSecure User manual

Amacom ezSecure User manual

Popular Storage manuals by other brands

IBM 40/80 GB HH DLTVS user guide

IBM

IBM 40/80 GB HH DLTVS user guide

Synology DiskStation DS716+II Quick installation guide

Synology

Synology DiskStation DS716+II Quick installation guide

Vantec NexStar-HX4 user manual

Vantec

Vantec NexStar-HX4 user manual

LaCie Christofle Galet datasheet

LaCie

LaCie Christofle Galet datasheet

LaCie Rugged Thunderbolt user manual

LaCie

LaCie Rugged Thunderbolt user manual

OCZ IBIS datasheet

OCZ

OCZ IBIS datasheet

Transcend JetFlash 110 Brochure & specs

Transcend

Transcend JetFlash 110 Brochure & specs

QNAP TS 32PXU Series user guide

QNAP

QNAP TS 32PXU Series user guide

LaCie RUGGED RAID user manual

LaCie

LaCie RUGGED RAID user manual

Freecom CLS DOCK Quick install guide

Freecom

Freecom CLS DOCK Quick install guide

PNY Attache P-FD64MBATT3 install guide

PNY

PNY Attache P-FD64MBATT3 install guide

OWC Mercury Elite Pro Dual mini Assembly manual

OWC

OWC Mercury Elite Pro Dual mini Assembly manual

OLT 6x6 Maximizer Assembly manual

OLT

OLT 6x6 Maximizer Assembly manual

Transcend JetFlash 160 Specifications

Transcend

Transcend JetFlash 160 Specifications

Thunderbolt 600 user manual

Thunderbolt

Thunderbolt 600 user manual

Intel RAID High Availability user guide

Intel

Intel RAID High Availability user guide

LaCie 12big Thunderbolt 3 Quick install guide

LaCie

LaCie 12big Thunderbolt 3 Quick install guide

Spectra Logic T-Series Spectra T50e quick start guide

Spectra Logic

Spectra Logic T-Series Spectra T50e quick start guide

manuals.online logo
manuals.online logoBrands
  • About & Mission
  • Contact us
  • Privacy Policy
  • Terms and Conditions

Copyright 2025 Manuals.Online. All Rights Reserved.

Amacom ezSecure
Quick Start Guide
Note to Mac Users
ezSecure drives are preformatted with an NTFS format.
In order to read and write to the ezSecure drive, you will
need to change the volume format to FAT32 by following
these steps:
In Finder, click on Applications.
Open Utilities.
Open Disk Utility.
Once Disk Utility is open, click on the drive
associated with ezSecure. (The ezSecure should be connected to
the Mac, and the password should have been entered so that the
computer recognizes that ezSecure is connected.)
Click the partition tab and format the drive to the MS-DOS (FAT) format.
For more information and technical support please visit us online at
www.originstorage.com.
Origin Storage Limited
2-4 Rutherford Centre, Rutherford Road
Basingstoke, Hampshire, RG24 8PB, UK
Phone: +44 (0)8701 688 889
[email protected]
Getting started
Before you begin, make sure the ezSecure is properly
connected to the USB port of your computer using the
cable provided.
(You will notice there are two USB male ends that can be connected to your
computer. The main end is for power and data. The secondary end is for
additional power as some older computers may require additional power.)
Switch the power on.
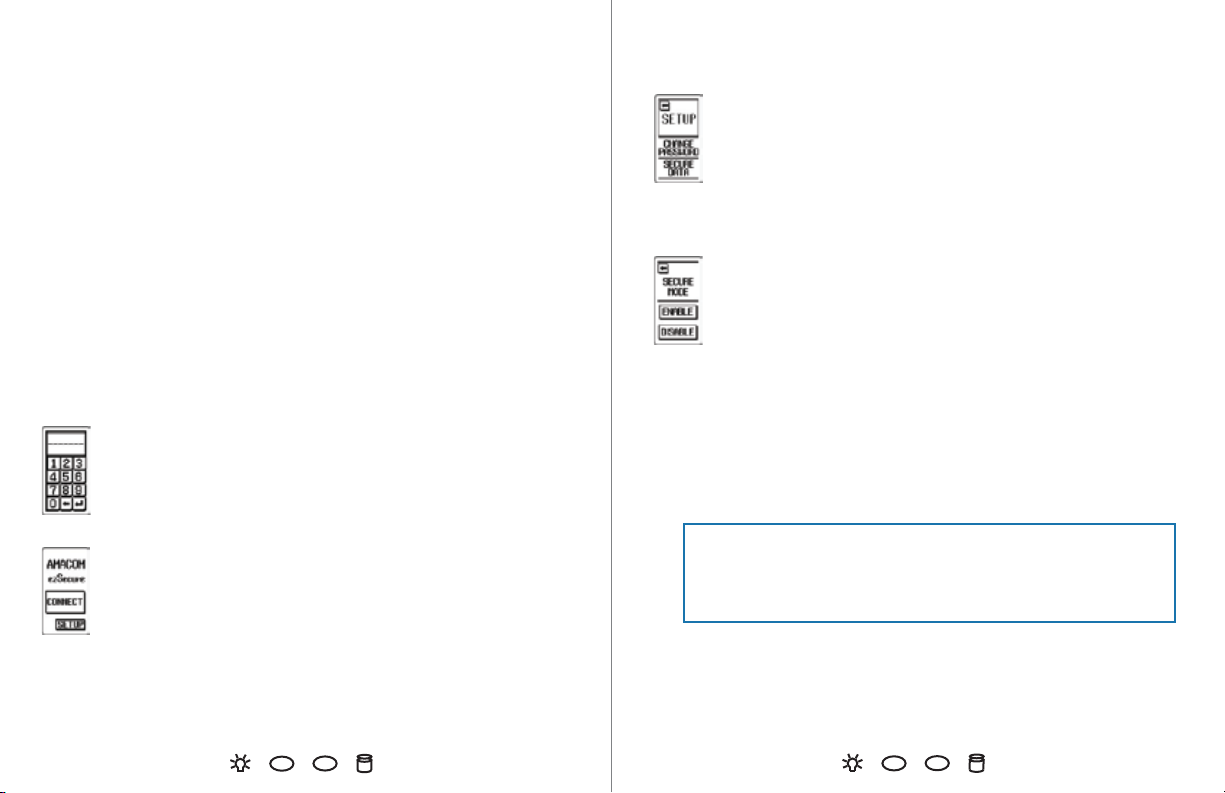
You will see a numeric keypad on the LCD touch screen.
Enter the factory default password: ‘000000’ and press the enter button.
You will see two buttons: CONNECT and SETUP.
To access your data, press the CONNECT button.
You can now access your data.
To change your password or secure your data, press the SETUP button.
See the Setup section at right.
Setup
Changing your password
To change your password, press CHANGE PASSWORD. If you decide
not to change your password between the menus, simply press
the enter button, and you will return to the Setup menu.
ezSecure will ask you for your old password once and your new password twice.
Remember the factory default password is ‘000000’.
Securing your data
When secure mode is enabled, the hard drive cannot be accessed
though a non ezSecure enclosure. When secure mode is disabled,
the hard drive can be accessed through a non ezSecure enclosure.
Choose ENABLE or DISABLE.
If secure mode is already enabled, you will see the DATA LOCKED icon when the
ezSecure is connected.
Hard Disk Drive Installation Instructions (for enclosure only purchasers)
ezSecure requires a 2.5" SATA hard disk drive.
Remove the back cover of your ezSecure.
Push the hard disk drive interface pins into the ezSecure's connector.
Make sure the pins are fully inserted into ezSecure's connector.
Return the back cover to its original position and secure the cover.
For more details, see the online manual at www.originstorage.com.
IF YOU REMOVE AND TRY TO USE THE HARD DRIVE IN A NON EZSECURE
ENCLOSURE YOU MUST DISABLE SECURE MODE FIRST TO PREVENT DATA
LOSS.