manuals.online logo
Brands
  1. Home
  2. •
  3. Brands
  4. •
  5. Ambient Weather
  6. •
  7. Measuring Instrument
  8. •
  9. Ambient Weather WS23C User manual

Ambient Weather WS23C User manual

Other Ambient Weather Measuring Instrument manuals

Ambient Weather WS-25 User manual

Ambient Weather

Ambient Weather WS-25 User manual

Ambient Weather FISCHER 1508BTH-01 User manual

Ambient Weather

Ambient Weather FISCHER 1508BTH-01 User manual

Ambient Weather WS-26 User manual

Ambient Weather

Ambient Weather WS-26 User manual

Ambient Weather WS-YG501 User manual

Ambient Weather

Ambient Weather WS-YG501 User manual

Ambient Weather Fischer 1434B-22-B User manual

Ambient Weather

Ambient Weather Fischer 1434B-22-B User manual

Ambient Weather WS-YG901 User manual

Ambient Weather

Ambient Weather WS-YG901 User manual

Ambient Weather DHR70B-BRASS User manual

Ambient Weather

Ambient Weather DHR70B-BRASS User manual

Ambient Weather WS-228TBH User manual

Ambient Weather

Ambient Weather WS-228TBH User manual

Ambient Weather WS-0262 User manual

Ambient Weather

Ambient Weather WS-0262 User manual

Ambient Weather WS-0262A User manual

Ambient Weather

Ambient Weather WS-0262A User manual

Ambient Weather WH31-SRS User manual

Ambient Weather

Ambient Weather WH31-SRS User manual

Ambient Weather WS-0265 WiFi User manual

Ambient Weather

Ambient Weather WS-0265 WiFi User manual

Ambient Weather WS-03 User manual

Ambient Weather

Ambient Weather WS-03 User manual

Ambient Weather WM-3 User manual

Ambient Weather

Ambient Weather WM-3 User manual

Ambient Weather WS-3000-X8 User manual

Ambient Weather

Ambient Weather WS-3000-X8 User manual

Ambient Weather BA30806 User manual

Ambient Weather

Ambient Weather BA30806 User manual

Ambient Weather WS-3000 User manual

Ambient Weather

Ambient Weather WS-3000 User manual

Ambient Weather WS-HE01 User manual

Ambient Weather

Ambient Weather WS-HE01 User manual

Ambient Weather PM2.5IN User manual

Ambient Weather

Ambient Weather PM2.5IN User manual

Ambient Weather WS-2063 User manual

Ambient Weather

Ambient Weather WS-2063 User manual

Ambient Weather WS-23 User manual

Ambient Weather

Ambient Weather WS-23 User manual

Popular Measuring Instrument manuals by other brands

Powerfix Profi 278296 Operation and safety notes

Powerfix Profi

Powerfix Profi 278296 Operation and safety notes

Test Equipment Depot GVT-427B user manual

Test Equipment Depot

Test Equipment Depot GVT-427B user manual

Fieldpiece ACH Operator's manual

Fieldpiece

Fieldpiece ACH Operator's manual

FLYSURFER VIRON3 user manual

FLYSURFER

FLYSURFER VIRON3 user manual

GMW TG uni 1 operating manual

GMW

GMW TG uni 1 operating manual

Downeaster Wind & Weather Medallion Series instruction manual

Downeaster

Downeaster Wind & Weather Medallion Series instruction manual

Hanna Instruments HI96725C instruction manual

Hanna Instruments

Hanna Instruments HI96725C instruction manual

Nokeval KMR260 quick guide

Nokeval

Nokeval KMR260 quick guide

HOKUYO AUTOMATIC UBG-05LN instruction manual

HOKUYO AUTOMATIC

HOKUYO AUTOMATIC UBG-05LN instruction manual

Fluke 96000 Series Operator's manual

Fluke

Fluke 96000 Series Operator's manual

Test Products International SP565 user manual

Test Products International

Test Products International SP565 user manual

General Sleep Zmachine Insight+ DT-200 Service manual

General Sleep

General Sleep Zmachine Insight+ DT-200 Service manual

Sensa Core Lacto Spark user manual

Sensa Core

Sensa Core Lacto Spark user manual

VOLTCRAFT UTS-1980 operating instructions

VOLTCRAFT

VOLTCRAFT UTS-1980 operating instructions

EBCHQ 94915 Operation manual

EBCHQ

EBCHQ 94915 Operation manual

Balluff BIP LD2-T017-01-EP-S4 Series user guide

Balluff

Balluff BIP LD2-T017-01-EP-S4 Series user guide

Pulsar IMP Lite Series instruction manual

Pulsar

Pulsar IMP Lite Series instruction manual

ETCR 6800 user manual

ETCR

ETCR 6800 user manual

manuals.online logo
manuals.online logoBrands
  • About & Mission
  • Contact us
  • Privacy Policy
  • Terms and Conditions

Copyright 2025 Manuals.Online. All Rights Reserved.

Ambient Weather WS-23-C Wireless Indoor/Outdoor
8-Channel Thermo-Hygrometer with Backlit Display
(Console Only) User Manual
Version 1.0 ©Copyright 2015, Ambient LLC. All Rights Reserved. Page 1
Table of Contents
1.Introduction ....................................................................................................................
2.Getting Started ......................................................................................................3
2.1 Parts List .......................................................................................................3
2.2 Display Console Set Up ................................................................................3
2.2.1 Display Console Layout .........................................................................5
2.2.2 Sensor Operation Verification ................................................................5
3.Remote Sensor Installation ...................................................................................6
4.Console Operation ................................................................................................6
4.1 Min/Max Mode ........................................................................................6
4.2 Clearing Min/Max Daily ...................................................................................... 7
4.3 Outdoor Channel Selection and Scroll Mode .......................................................7
4.4 Temperature Units of Measure ..................................................................7
4.5 Sensor Search Mode and Resyncing the Sensors ..................................7
4.6 Best Practices for Wireless Communication................................................ 8
4.7 Backlight Operation ..................................................................................9
4.7.1 Backlight Operation, Battery Power..................................................9
4.7.2 Backlight Operation, AC Power(optional)......................................9
4.8 Adjustment or Calibration ..............................................................................9
4.8.1 Indoor Temperature and Humidity Calibration.........................................10
4.8.2 Outdoor Temperature and Humidity Calibration.....................................11
5.Glossary of Terms ...............................................................................................12
6.Specifications ......................................................................................................13
6.1 Wireless Specifications ...............................................................................13
6.2 Measurement Specifications .......................................................................13
6.3 Power Consumption.....................................................................................13
7.Troubleshooting Guide ........................................................................................13
8.Accessories .........................................................................................................15
9.Liability Disclaimer ............................................................................................16
10.FCC Statement ..................................................................................................17
11.Warranty Information ........................................................................................18
2
WS23C
1. Introduction
Thank you for your purchase of the Ambient Weather WS23C Wireless
Indoor/Outdoor 8-Channel Thermo-Hygrometer with Backlit Display
(Console Only). The following user guide provides step by step
instructions for installation, operation and troubleshooting. To download
the latest manual and additional troubleshooting tips, please visit:
http://ambientweather.wikispaces.com/ws23
The WS23C includes an indoor temperature and humidity sensor (there
is a sensor inside the display) as well as supports up to 8 remote sensors
(sensors and receivers are sold separately):
Version 1.0 ©Copyright 2015, Ambient LLC. All Rights Reserved. Page 2
Item Number Image Description
F007TH
F007T
F007TP
F007PF
8-channel sensor measures temperature
and humidity. Applications include indoor
and outdoor air temperature and
humidity measurement.
8-channel sensor measures
temperature. Applications include
indoor and outdoor air temperature
measurement.
8-channel sensor measures probe
temperature. Applications include
refrigerators and freezers (where the
probe is placed inside the appliance(s)
and the display is outside), water
temperature, soil temperature and
ground temperature.
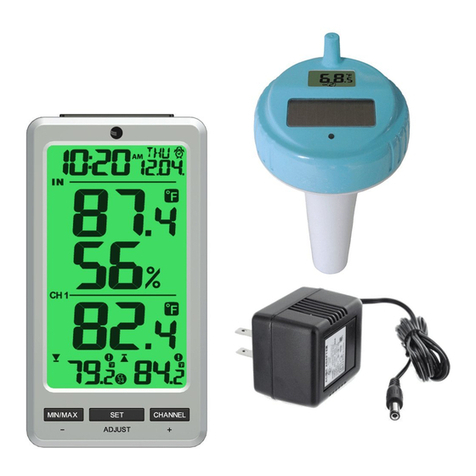
8-channel pool float thermometer.
Applications include pools, spas, and
lakes.
2. Getting Started
The WS23C (console only) works perfectly fine as a standalone unit (no
sensors required) if you simply want to monitor indoor temperature and
humidity. The WS23C is also sold without any remote sensors so that
you can add additional consoles to your system.
Some of this manual is devoted to wireless communication to one or
remote sensors. You can ignore this information if you purchased the
console as a stand-alone system.
Note: If you own a remote sensor, the power up sequence must
be performed in the order shown in this section (insert batteries in the
remote transmitter(s) first, Display Console second).
2.1 Parts List
2.2 Display Console Set Up
1. Move the remote thermo-hygrometer(s) about 5 to 10’ away from
the display console (if the sensor is too close, it may not be received by
the display console). If you have more than one thermo-hygrometer,
make sure they are all powered up and transmitting on different channels.
2. Remove the battery door on the back of the display, as shown in
Figure 1. Insert four AAA (alkaline or lithium, avoid rechargeable)
batteries in the back of the display console.
Version 1.0 ©Copyright 2015, Ambient LLC. All Rights Reserved. Page 3
QTY Item
Display Console
Frame Dimensions (LxHxW): 6 x 3.25 x 1 in
LCD Dimensions (LxW): 4.5 x 2.5”
LCD Segment Height: 1 inch
1
User Manual
1
WS23C
Add as many display consoles as you
like to your existing system. For
example, you can have one remote
sensor display temperature and place a
display console in every room.
Figure 1
All of the LCD segments will light up for a few seconds to verify all
segments are operating properly.
3. Replace the battery door, and fold out the desk stand and place the
console in the upright position.
The console will instantly display indoor temperature and humidity. The
remote temperature and humidity will update on the display within a few
minutes on the appropriate channel.
While in the search mode, the remote search icon will be constantly
displayed next to the channel number.
If you have more than one remote sensor (up to eight remotes are
supported), the display will automatically toggle between sensors until all
sensors have reported in.
Do not touch any buttons until the remote sensor has reported in, or the
radio search icon is no longer on, otherwise the remote sensor search
mode will be terminated. When the remote sensor temperature and
humidity has been received, the console will automatically switch to the
normal mode, and all further settings can be performed.
Version 1.0 ©Copyright 2015, Ambient LLC. All Rights Reserved. Page 4
If the remote does not update, please reference the troubleshooting guide
in Section 7.
2.2.1 Display Console Layout
Note: The following illustration shows the full segments of the LCD for
description purposes only and will not appear like this during normal
operation.
Figure 2
1. Channel 1,2,3,4,5,6,7,8, indictor 6. Indoor Relative Humidity (%)
2. Scroll mode (CH 1-8) 7. Indoor Temperature
3. Transmitter low battery indicator 8. Outdoor Relative Humidity (%)
4. Min/Max Record mode 9. Outdoor Temperature
5. Min/Max reset for 24h 10. Temperature units (°F or °C)
2.2.2 Sensor Operation Verification
Verify the indoor and outdoor humidity match closely with the console and
sensor array in the same location (about 5 to 10’ apart). The sensors
should be within 10% (the accuracy is ± 5%). Allow about 30 minutes for
both sensors to stabilize. The humidity can be adjusted or calibrated later
to match each other a known source.
Version 1.0 ©Copyright 2015, Ambient LLC. All Rights Reserved. Page 5
2
1
3
5
6
8
9
10
4
6
7
Verify the indoor and outdoor temperature match closely with the console
and sensor array in the same location (about 5 to 10’ apart). The sensors
should be within 2°F (the accuracy is ± 1°F). Allow about 30 minutes for
both sensors to stabilize. The temperature can be adjusted or calibrated
later to match each other or a known source.
3. Remote Sensor Installation
If you purchased the outdoor sensor for this console (optional):
It is recommended you mount the remote sensor on a north facing wall, in
a shaded area. Direct sunlight and radiant heat sources will result in
inaccurate temperature readings. Although the sensor is water resistant,
it is best to mount in a well protected area, such as under an eve. Use a
screw or nail (not included) to affix the remote sensor to the wall, as
shown in Figure 3.
Figure 3
4. Console Operation
Note: The console has four buttons for easy operation: MIN/MAX/-
button, CLEAR/ADJUST button, CHANNEL/+ button and LIGHT button.
4.1 Min/Max Mode
The Min/Max mode displays the minimum and maximum temperature and
humidity (since reset of the unit) for the indoor, remote channel 1 through
8 sensors.
Version 1.0 ©Copyright 2015, Ambient LLC. All Rights Reserved. Page 6
Prior to entering the MIN/MAX mode, press the CHANNEL/+ button to
select the temperature and humidity values you wish to view.
1. Display Maximum. Press the MIN/MAX button once to display
the maximum. The MAX icon will be displayed.
2. Clear Maximum. To reset the maximum values to the current
values, press and hold the CLEAR button for 3 seconds.
3. Display Minimum. Press the MIN/MAX button again to display
the minimum. The MIN icon will be displayed.
4. Clear Minimum. To reset the minimum values to the current
values, press and hold the CLEAR button for 3 seconds.
To return to normal mode, press the MIN/MAX button again.
4.2 Clearing Min/Max Daily
The minimum and maximum can be set to clear every 24 hours
automatically. Press and hold the CLEAR/ADJUST button for 3 seconds
to switch between Clears 24h and Clears Manually.
When you manually clear the minimum and maximum, the Clears 24h
function will clear every 24 hours from the time you clear it.
For example, if you clear the min and max at 4:00pm, it will continue to
clear every day at 4:00pm.
4.3 Outdoor Channel Selection and Scroll Mode
Press the CHANNEL/+ button to switch the display between remote
sensors 1 through 8, and scroll mode . In scroll mode, all of the remote
sensors will be displayed in five second intervals.
4.4 Temperature Units of Measure
The default temperature units of measure are degrees Fahrenheit. To
toggle between degrees Celsius and degrees Fahrenheit, press and hold
the MIN/MAX button for 3 seconds.
4.5 Sensor Search Mode and Resyncing the Sensors
If any of the sensor communication is lost, dashes (--.-) will be displayed
on the screen. To reacquire the signal:
Version 1.0 ©Copyright 2015, Ambient LLC. All Rights Reserved. Page 7
1.If a specific channel is lost, press the CHANNEL/+ button to display
this channel, then Press and hold the CHANNEL/+ button for 3 seconds,
and the remote search icon will be constantly displayed for up to 10
minutes. Once the signal is reacquired, the remote search icon will
turn off, and the current values will be displayed.
2.If new sensors are added, subtracted, or multiple sensor channels
are lost, Press and hold the CHANNEL/+ button for 5 seconds, and the
remote search icon will be constantly displayed for up to 10 minutes.
Once the signal is reacquired, the remote search icon will turn off,
and the current values will be displayed.
4.6 Best Practices for Wireless Communication
Note: To insure proper communication, mount the remote sensor on
a vertical surface, such as a wall. Do not lay the sensor flat.
Wireless communication is susceptible to interference, distance, walls
and metal barriers. We recommend the following best practices for
trouble free wireless communication.
1. Electro-Magnetic Interference (EMI). Keep the console several
feet away from computer monitors and TVs.
2. Radio Frequency Interference (RFI). If you have other 433 MHz
devices and communication is intermittent, try turning off these other
devices for troubleshooting purposes. You may need to relocate the
transmitters or receivers to avoid intermittent communication.
3. Line of Sight Rating. This device is rated at 300 feet line of sight
(no interference, barriers or walls) but typically you will get 100 feet
maximum under most real-world installations, which include passing
through barriers or walls.
4. Metal Barriers. Radio frequency will not pass through metal
barriers such as aluminum siding. If you have metal siding, align the
remote and console through a window to get a clear line of sight.
The following is a table of reception loss vs. the transmission medium.
Each “wall” or obstruction decreases the transmission range by the factor
shown below.
Version 1.0 ©Copyright 2015, Ambient LLC. All Rights Reserved. Page 8
4.7 Backlight Operation
The backlight operation is different when operating on batteries to save
power.
4.7.1 Backlight Operation, Battery Power
To temporarily turn on the back light for five seconds, press the LIGHT
button on the top of the console.
To turn on the backlight for 30 minutes, press and hold the LIGHT button
on the top of the console for two seconds.
To turn off the backlight at any time, press and hold the LIGHT button for
two seconds.
4.7.2 Backlight Operation, AC Power (optional)
The AC power plug is optional.
To temporarily turn on the back light for five seconds, press the LIGHT
button on the top of the console.
To turn on the backlight permanently, press and hold the LIGHT button on
the top of the console for two seconds.
To turn off the backlight at any time, press and hold the LIGHT button for
two seconds.
Note: When AC power plug in, the backlight will turn on permanently.
4.8 Adjustment or Calibration
Note: The calibrated value can only be adjusted on the console. The
remote sensor(s) always displays the un-calibrated or measured value.
Version 1.0 ©Copyright 2015, Ambient LLC. All Rights Reserved. Page 9
Medium
RF Signal Strength Reduction
Glass (untreated)
Plastics
Wood
5-15%
10-15%
10-40%
Brick
Concrete
Metal
10-40%
40-80%
90-100%
Note: The measured humidity range is between 10 and 99%.
Humidity cannot be accurately measured outside of this range. Thus, the
humidity cannot be calibrated below 10% or above 99%.
The purpose of calibration is to fine tune or correct for any sensor error
associated with the devices margin of error. The measurement can be
adjusted from the console to calibrate to a known source.
Calibration is only useful if you have a known calibrated source you can
compare it against, and is optional. This section discusses practices,
procedures and sources for sensor calibration to reduce manufacturing
and degradation errors. Do not compare your readings obtained from
sources such as the internet, radio, television or newspapers. They are in
a different location and typically update once per hour.
The purpose of your weather station is to measure conditions of your
surroundings, which vary significantly from location to location.
4.8.1 Indoor Temperature and Humidity Calibration
Press and hold the ADJUST and MIN/MAX buttons at the same time for 3
seconds and the indoor temperature value will begin flashing. Press the
CHANNEL/+ button to increase the temperature and the MIN/MAX/-
button to decrease the temperature reading in 0.1° increments. To rapidly
increase (or decrease) the temperature reading, press and hold the
CHANNEL/+ or MIN/MAX/- button.
To return the temperature to the actual or uncalibrated measurement,
press the ADJUST button.
Press and hold the ADJUST and MIN/MAX buttons at the same time for 3
seconds again, and the indoor humidity value will begin flashing. Press
the CHANNEL/+ button to increase the humidity and the MIN/MAX/-
button to decrease the humidity reading in 1% increments. To rapidly
increase (or decrease) the humidity reading, press and hold the
CHANNEL/+ or MIN/MAX/- button.
To return the humidity to the actual or uncalibrated measurement,
press the ADJUST button.
Version 1.0 ©Copyright 2015, Ambient LLC. All Rights Reserved. Page 10