10
1.
Gently insert the side glass panel into the channels. With someone helping you,
place the door return glass panel into the door rail. Install the corner support
bracket. (dia. 20) You will be adjusting the fixed glass panel so it's level with the
door and has an even ¼" gap between the door and the glass panel. Use rubber
setting block to adjust height and level if necessary.
2.
Next, to determine the position of the bottom hinge pin hole, place the top hinge
pin bracket upside down on bottom pan threshold as a template. (dia. 21) Align
bracket hole to center of side glass panel. Mark the hole and remove the bracket.
Carefully drill ¼" dia hole for hinge pin approximately 1¼" deep into the pan
threshold.
3.
Pick up the door you have installed the hinges and handle onto, and gently place
the bottom hinge pin into the ¼" hole you have drilled into the pan threshold.
(making sure you have the Teflon slide washer on the pin)
D - Install Fixed Glass Panel & Glass Door
1.
2.
3.
With someone helping to hold the shower door, place the top hinge mounting
bracket (dia. 22) over the top hinge pin (making sure you have the Teflon slide washer
on the pin). Check to make sure door is plumb and level, then mark with a pencil
through the 3 holes on top hinge mounting bracket.
Move door and top hinge mount to one side and pre-drill the holes into the studs.
The drilled holes should be large enough so the screws don’t bind in the stone.
Insert and tighten screws.
Next dry-fit the side panel into the correct alignment with the door, remove the
glass and apply a ¼" bead of 100% silicone into the channels. Re-insert the fixed
glass panel and check alignment again. Allow the silicone to dry. You can silicone
any gaps between the stone and glass to ensure water tightness.
diagram 21
diagram 20
gasket
set screws
gasket
SB
C - Dry-fit Fixed Glass Panel & Glass Door
side wall
casing top hinge
pin bracket
¼” pin hole
pan threshold
diagram 23
Glass
Door
to inside
of shower
*To keep door
closed adjust height
of door sweep to
provide proper
tension and seal
*
Shower Threshold
diagram 24
glass
panel
strike
side
door
hinge
side
inside shower
outside shower
GD
GP
GS GH
h-seal
L-seal
hinge
pin
side
plate
diagram 22
side
plate
hinge
pin
inside
shower
outside
shower
T eflon slide
washer
teflon slide
washer
hinge wall
bracket
screw
(3 places) HB
GH
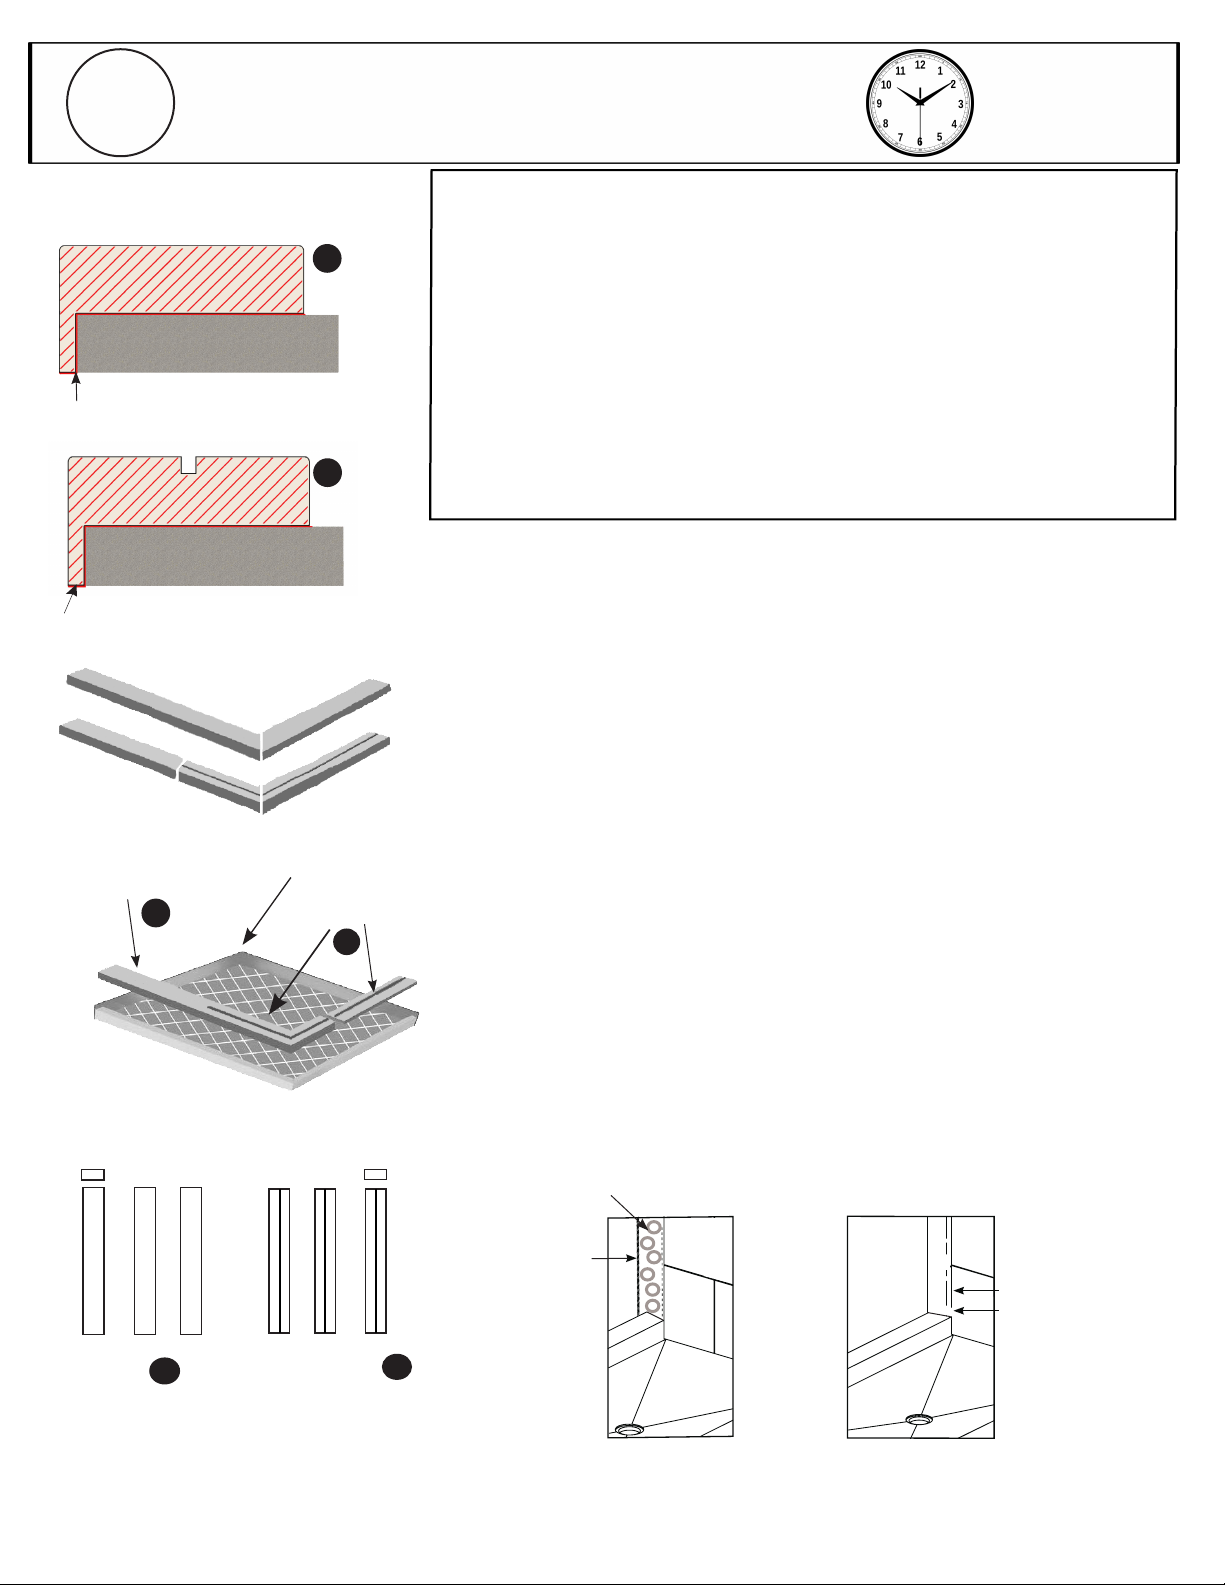
E - Install Door Sweep & Seals
Locate the clear door sweep and attach it to the bottom of the glass door. The
reflective shield should face into the shower. (dia 23) The door sweep is what keeps the
door closed. Adjust the door seal until the required tension is achieved. The door
sweep has been cut to fit over the hinge. Cut off the excess length opposite of hinge
side.
We have provided door seals for water sensitive areas such as wood floors. If glass
panels and door are installed correctly with the proper spacing, outside water spillage
will be minimal and the side seals won’t be necessary.
If you would like to use these side seals, follow the steps below:
1.
2.
3.
4.
5.
6.
7.
The L-shaped seal goes along the hinge side of the door on the threshold trim
pieces. (dia. 24)
Place the seal along the edge of the glass and cut the seal to the proper
length.
Remove the backer from the seal exposing the double-sided tape, only
remove a small amount at a time.
Starting from the top, align the seal along the edge of the door and stick the
seal to the threshold.
Work your way down the door. Do small sections at a time, slowly peeling the
backer off the seal.
Locate the plastic h-shaped seal. It goes on the fixed glass, next to the handle
edge. (dia. 24) Measure and cut the seal to length.
Starting from the top, push the seal onto the glass panel, slowly working your
way down.