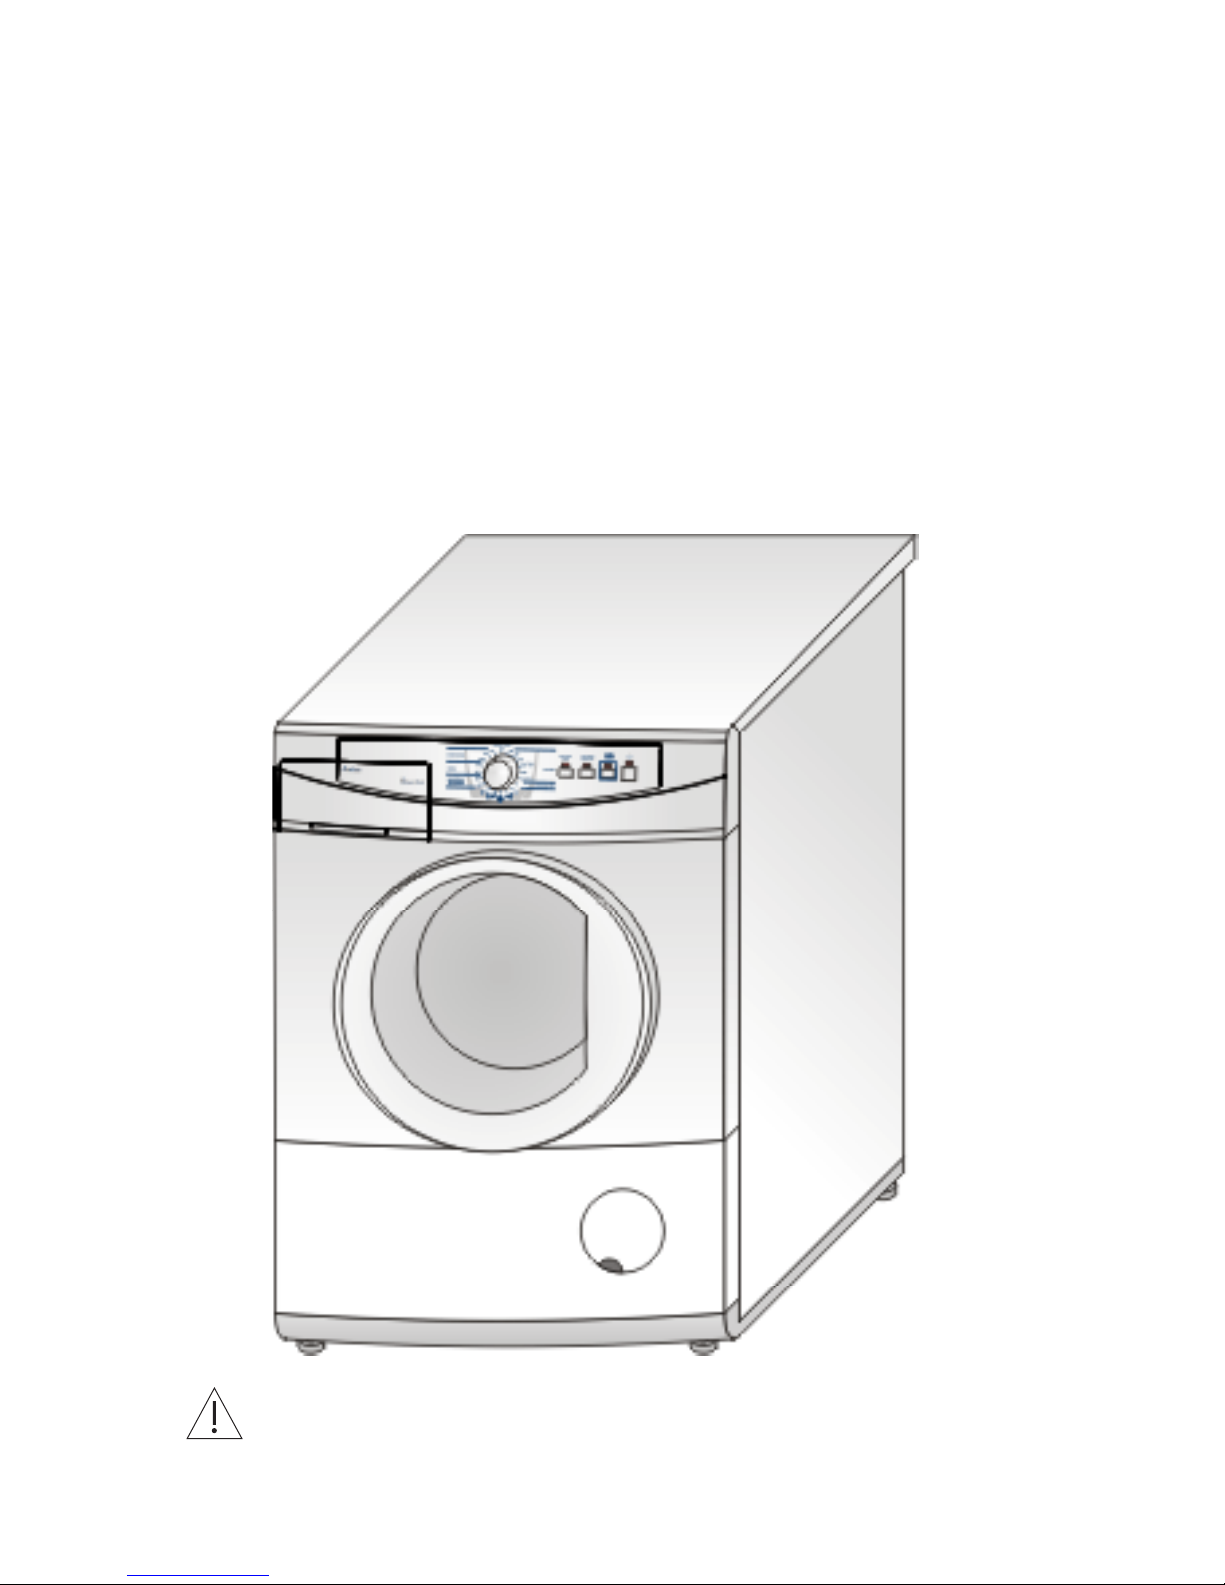
Amica AWCT 10L User manual

Operating manual
Washing machine
AWCT 10L
Start up your washing machine only once you’ve read the
Manual and the abridged Instructions for Use!
AWCT 12L
IOAP-239
(11.2008./1)

2
TABLE OF CONTENTS
General information........................................................................................................3
Safety instructions .........................................................................................................4
Installation.......................................................................................................................5
Troubleshooting guide....................................................................................................7
Care labels symbols......................................................................................................10
Maintenance and cleaning............................................................................................11
Practical washing hints................................................................................................12
Technical data................................................................................................................16
Guarantee and service..................................................................................................16
Disposing of the device
When disposing of the device, do not bring it to regular municipal waste containers.
Instead, bring it to electrical and electronic waste recycling and reuse center. A rele-
vant label has been put on the device, its instructions manual, or on the package.
The device has been manufactured of recyclable materials. By bringing old device to
recycling collection center, you show that you care about nature. Ask your local
environmental care authority for information on location of such facilities.

3
DEAR CUSTOMER
By reading this Manual you will become a conscious user of new washing machine, a
modern and technologically advanced product.
The new automatic washing machine has been designed by technicians and engineers
working in constructional and research forces, using the latest technical knowledge and
modern designing tools.
It is a perfect response to the key needs of the market such as demand of reliability, func-
tionality, simplicity of operation and modern design.
Every washing machine that leaves our plant is thoroughly inspected and tested before
packing. The tests, carried out on independent inspection stands, check the safety features
and functionality of every nal product. There might still be some moisture or residual water
inside the tested appliances.
Please read the Manual carefully before you start up the appliance.
Compliance with the provided instructions and recommendations will prevent you from
misusing the appliance.
Keep the manual handy at all times.
Carefully observe the Manual to avoid accidents.
Warning!
The washing machine is designed only for household applications and may be used
only for washing machine-washable fabrics and textiles.
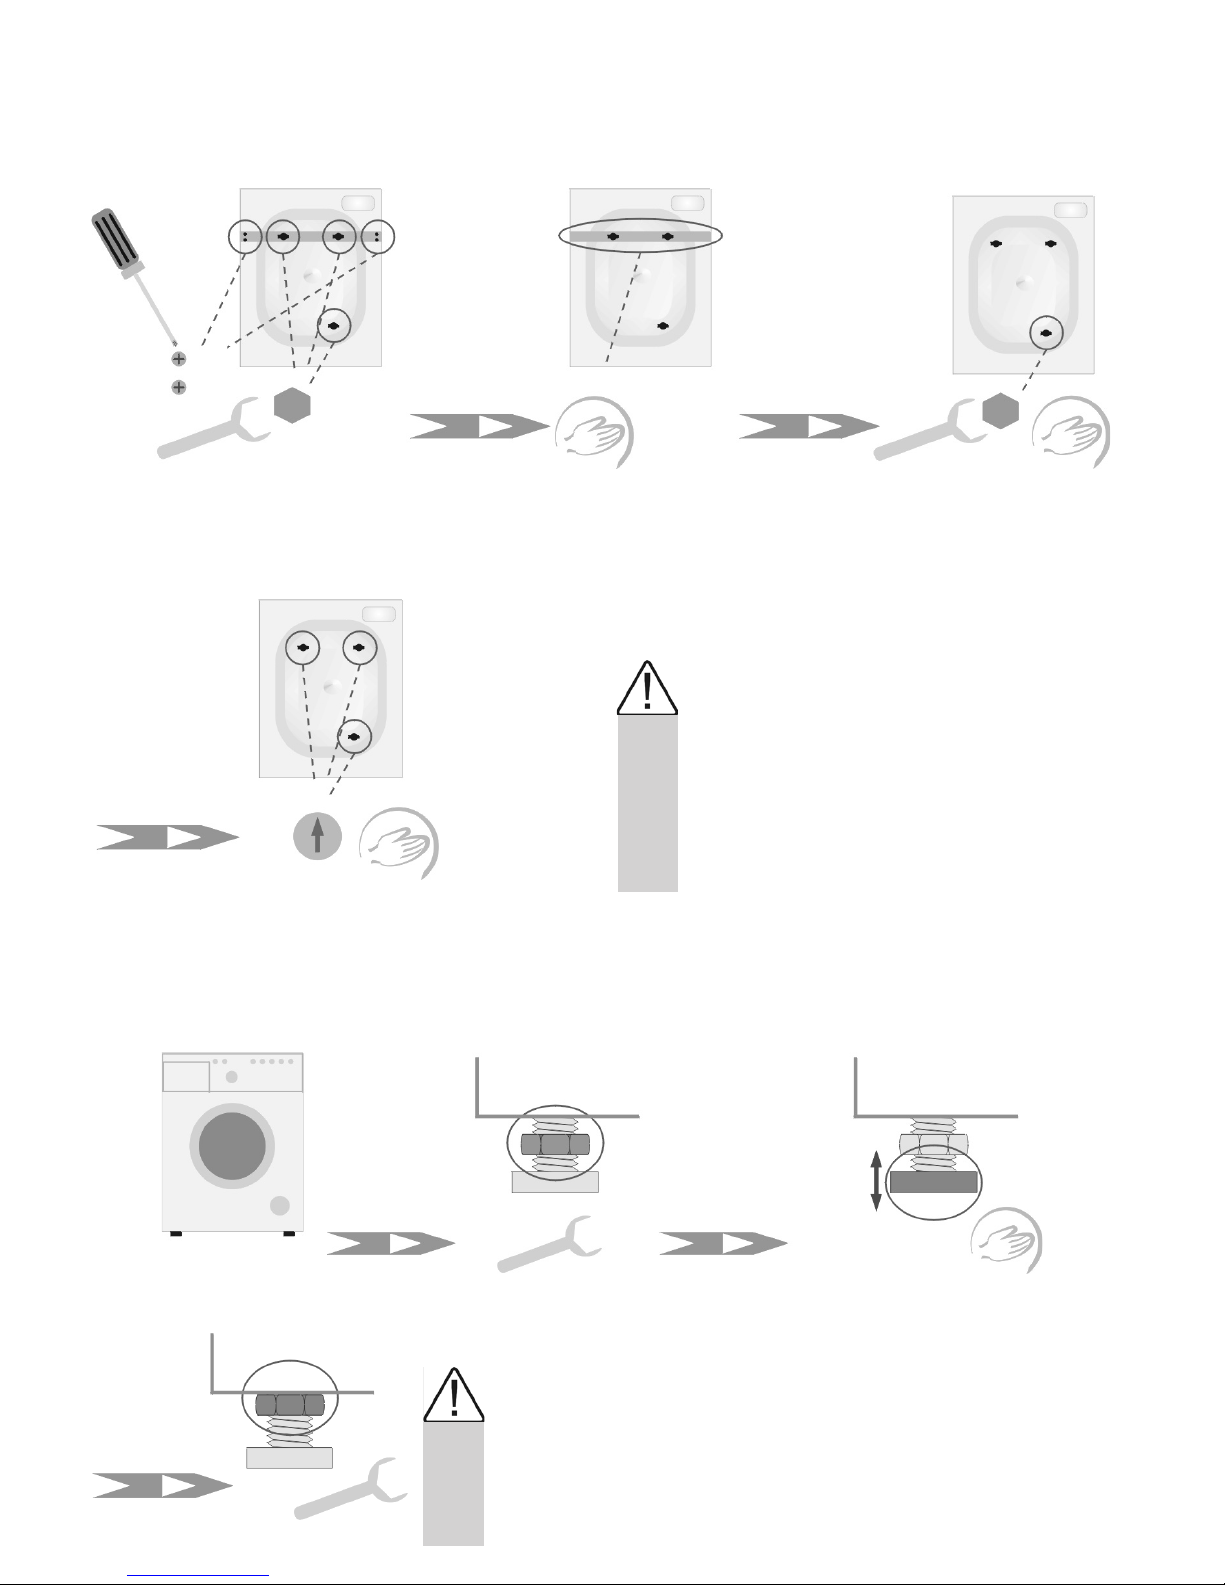
Before connecting to the mains, remove all the protective materials and level the
appliance.
The Manufacturer reserves himself a right to introduce changes not affecting the
performance of the appliance.
Usage
lOperate the appliance only after reading and understanding the Manual
lNever use the appliance outdoors or in rooms exposed to freezing temperatures.
Warning! Temperatures below O°C may damage the washing machine!
lChildren and persons not familiarised with the Manual must not operate the ap-
pliance.
Certicate of compliance
Compliance with the following Directives: 73/23/EEC, 89/336/EEC, 92/75/EEC
The Manufacturer declares that its product complies with the general safety, hygienic and
environmental protection requirements pursuant to the European Community Directives
and that the specic documents applicable to the said product, especially the European
Community Dec la ration of Conformity issued by the manufacturer may be viewed in ofces
of the competent authorities and may be obtained through the Manufacturer.

4
Stability control
When the washing machine is installed and levelled, make sure that all four feet are rest-
ing rmly on the oor by pressing down each corner and checking if the appliance stands
still.
Proper positioning and levelling guarantee safe, reliable and long-term operation.
Warning! Improper levelling and lack of stability may cause the appliance to
move during operation.
lNever allow children to remain unattended near the cooktop nor to play with the
control panel.
lUnless properly supervised by caretakers or upon thorough studies of the operat-
ing manual, the appliance must not be operated by persons (including children)
of limited physical or psychical abilities, these of limited technical expertise, or
unfamiliar with the equipment.
Withdrawal from operation
From safety reasons, a worn out washing machine must be made inoperable. In order to
do so, unplug it and cut off the power lead.
Dispose of the appliance in conformity with local regulations.
Do not use any solvent-containing washing agents as they may dam-
age some parts of the appliance or may release poisonous gases and
create ignition and explosion danger.
The window and door of your washing machine are hot during op-
eration. Do not allow children in the vicinity of the appliance. Use only
those washing agents and bleaches that are appropriate for washing
in automatic washing machines.
Before you begin any transport activities pull out the mains plug. The
washing machine must be locked during transportation. Place both
the upper and bottom interlocks. See Installation.
Data plate specifying all the main technical data is located in the up-
per part of the aback cover.
SAFETY INSTRUCTIONS
Burns
Washing agents
Transportation
Data plate
Loading the wash Do not admit unwanted objects into the appliance. Empty all the pock-
ets, do up all the buttons and fasten zippers. Put small and loose
objects in a cloth bag or pillow case as they may break and damage
the drum and the inside tank. Do not overload the machine.

5
INSTALLATION
I. Remove all the packing materials (keep them for future use!)
lUnscrew the screws using a
screwdriver.
lUnscrew the bolts that x the
guard.
lRemove the transport guard
together with sleeves and bolts.
lUnscrew the bolt
lRemove the sleeve and bolt.
Before you start up the appliance
check that all the locking devices
are removed !
Do not place washing machine on
a carpet!
l Plug holes with stoppers.
II. Positioning and levelling
lPlace the washing machine on a solid
and level oor surface.
lAdjust the feet to level the ma-
chine.
When the washing machine is installed and levelled, make
sure that all four feet are resting rmly on the oor by
pressing down each corner and checking if the appliance
stands still!
Warning! Before you start up the appliance, remove the
protecting foil from the control panel.
lTighten the locknuts!
lSlacken the
locknuts.

6
III. Water supply
IV. Water outlet
max 100 cm
min. 50 cm
V. Power supply
Secure the drain hose so it does not move dur-
ing operation!
Do not insert the drain hose too dip into the
water pipe!
the inlet hose with seals is in the drum of
the washing machine Connection of the supply hose with Aqua
Stop
Water pressure min. 0.1 MPa (1 bar), max 0.8
MPa (8 bar)
Feed the cold water to the washing machine
exclusively
Use new complete hoses
supplied together with the
equipment. Do not apply
the already used hoses.
lConnection of the washing machine to the mains (plug-in soc-
ket in the electrical installation) should be at a conspicuous and
accessible place!
lConnect the washing machine only to the correctly installed
and earthed socket
lDo not use an extension cord
lBroken power leads, may be replaced only by authorised se-
rvicemen
lType of the power lead – H 0 5 V V – F 3G 1.0/
lCatalogue number of the power lead: 8010551

7
TROUBLESHOOTING GUIDE
I. The appliance will not operate
lPower failure
lProperly insert the power plug in the
mains socket.
lCheck the mains fuse.
II. The appliance will not operate
lThe door are not closed!
lClose the door.
The appliance is equipped with a system which helps the user at the search for causes
and at the localization of little problems resulting from operating errors by means of corre-
sponding „codes” which are shown by the signal lights at the function keys. The error rec-
ognition is signalled by blinking START/PAUSE. The error code is shown by appropriately
shining signal lights at the function keys.
Display
of codes
signal light
Code: shinning signal light D1, D2,
D3, D4.
D1 D2 D3 D4

8
lCheck pressure in the water supply
system.
lClean the mesh lter on the water sup-
plying hose.
lTurn the tap on completely.
III. Low pressure
IV. Pump lter clogged
V. Washing machine is overloaded
lClean the lter.
lClean the pump lter.
lReduce the load.
Code: shinning signal light D2, D3.
Code: shinning signal light D1, D3.
Code: shinning signal light D1, D3, D4.
VI. Water under washing machine lTighten the pump lter.
lCheck the drain hose and fasten
it if necessary
TROUBLESHOOTING GUIDE

9
VIII. Washing interrupted lSwitch the washing program
CONDITIONING on,
in order to remove the foam residues
from the laundry.
VII. Washing machine moves lRemove the transport locking devices.
lPlace the machine in a perfectly hori-
zontal position.
lLock the feet (tighten the locknuts).
XI. Poor nal spin results lClean the pump lter (see ma in te
nance).
X. Foam formation lCheck water hardness and adjust
the dose of the washing agent.
lCheck water hardness.
XI. Poor washing results lAdjust the dose of the washing
agent to the degree of soiling and
water hardness (see recommenda-
tions on the washing agent packaging).
lSelect appropriate programme.
XII. Poor rinsing results lAdjust the dose of the washing
agent to the degree of soiling and
water hard ness (see recommenda-
tions on the washing agent packaging).
lSelect appropriate programme.
TROUBLESHOOTING GUIDE

10
Care label symbols
I. Washing
II. Dry cleaning
III. Spin dryer
IV. Ironing
boiling
temp. 950C
normal
temp. 600C
Do not
wasch!
delicate manual
all solvents
Do not
clean!
normal
Do not
dry!
1100C 1500C 2000C
Select a programme taking into account the care labels indications.
normal
temp. 400C
all but TRI Benzine only
low high
Do not
iron!
If error occurs, the washing machine will lock the door. To open the door, selection knob
in the position and wait approximately 2 minutes.
If the display of error codes shows an error different from the above mentioned errors or
the recommended activities do not help, you should:
lwrite down the error code
lswitch off the appliance
lpull out the mains plug
lcall the service
TROUBLESHOOTING GUIDE

11
MAINTENANCE AND CLEANING
Never use solvents or sharp, abrasive cleaning agents (for example cleaning powders)
to clean the cover and plastic parts! Clean the appliance using delicate, liquid cleaning
agents.
I. Pump lter Clean the lter periodically, after approx. 20
washing cycles.
Forgetting to clean the lter may cause dif
culties in draining water from the appliance!
lOpen the door lTake out the release
lRemove the plug from the
release
lDrain the residual water on
a tray
lUnscrew the lter
lRemove the lter
lRemove the lter pad.
lWash the lter and the
lter pad under running
water.
lReassemble the
lter in a reverse
order.
III. Detergent drawer
lExtract the drawer (pull hard
on it to overcome the limited
protrude).
lWash under running water (use
brush if necessary).
lInsert the drawer

12
PRACTICAL WASHING HINTS
If you want to stop a programme, keep pressing button
until READY lamp is lighted.
If you want to change a programme when the appliance
is in operation, rst stop the current pro gramme by press-
ing START button (see above) and then select another
programme.
If you change position of the programme selector knob
without cancelling the programme, the run programme will
still not be changed.
The appliance is equipped with a lock, preventing the door
from being opened during operation.
To open the door proceed as follows:
l wait 2 minutes until stops ashing or
lswitch off the appliance using the button and wait ap-
prox. 2 minutes.
Warning! If the programme has been stopped during
washing and the temperature inside the drum is high,
the door may remain locked until the temperature drops
below 60° C.
It you pull out the mains plug or there is a power failure, the
current programme will not be cancelled. It will be remem-
bered and continued once the power supply appears.
I. Cancelling and changing the pro-
gramme
II. Door lock
III. Power failure

13
SPIN ROTATION SPEED REDUCTION
After the washing program DELICATE has been brought to its end, the water from the last
rinse remains in the tub (see the „washing program table” enclosed to the instructions
of use.)
To take out the laundry from the appliance, you have to:
lstart the washing program DRAINING.
This program is absolutely necessary, because otherwise the water would ow out of the
appliance after opening the door.
The WASHING TEMPERATURES as well as the washing and spin rotation speeds for
individual washing programs are listed in the “Washing program table” enclosed to the
instructions of use.
IV. Displayed information
START/PAUSE
Washing program selection Additional function
PRACTICAL WASHING HINTS

14
Load articles into the drum observing the following instructions:
cotton – maximally full drum (do not force articles into the drum as it
may reduce the washing efciency!).
synthetic – maximally 1/2 drum
wool, silk, delicate fabrics - maximally 1/3 drum
Warning! Do not overload the appliance! Overloading may cause dam-
ages to the washed articles!
The electronic control device includes a load distribution control sys-
tem. If the system detects uneven distribution of load in the drum, the
appliance will try to relocate the load before spinning. If several trials
prove unsatisfactory, the appliance will automatically decrease the
spin speed or refuse spinning.
Uneven distribution of load may be caused by:
too large load
too small load
a single article (for example a ball-shaped sheet that closes several
other articles inside itself)
Fabric softeners added for rinsing:
Observe the manufacturer recommendations.
Pour softener into the middle chamber marked with symbol.
Do not exceed the MAX level marked on the drawer chamber.
The softener will be added in the last rinse.
Starch
Observe the manufacturer recommendations.
Starch using “Conditioning” programme
Pour starch into the middle chamber marked with symbol.
Liquid washing agents
Insert partition into the main wash chamber marked with symbol.
Fill the dose of the liquid washing agent recommended by the manu-
facturer into the chamber.
Programme
Select a suitable washing programme (Synthetic, silk, wool, delicate
fabrics).
Load
See “Load”
V. Load
VI. Even load
distribution
control
VII. Washing agents
and conditioners
VIII. Delicate
fabrics
PRACTICAL WASHING HINTS

15
Insufcient dose of the washing agent may cause:
Grey laundry.
Pellets of oil, built up scale.
Overdosing the washing agent causes:
Excessive foaming.
Reduced washing efciency, poor rinsing results.
Energy
Wash lightly soiled linen in low washing temperatures.
Use Refreshing programme, activate “short wash” function with a se-
lected washing programme.
Water
Wash lightly soiled linen using Refreshing programme, activate “short
wash” function with a selected washing programme.
Usage of optimal dosages of washing agents do not require additional
rinse.
Hard water results in building up scale.
Information concerning the hardness of water may be obtained in the
nearest Water Company.
Use water softeners for every washing cycle.
Stubborn stains
Before washing, treat stains with stain remover according to its manu-
facturer recommendations.
Heavy soiled textiles
Wash smaller loads at a time.
Increase the washing agent dose.
Lightly soiled textiles
See “Energy savings”.
IX. Dosage
X. Savings
XI. Water hardness
XII. Degree of soiling
PRACTICAL WASHING HINTS

Technical data
lType AWCT 10L/AWCT 12L
lRated voltage 230V / 50Hz
lRated power 2300 W
lOvercurrent protection 10 A
lMaximal load max. 6,0 kg
lWater pressure min 0,1 MPa (1 bar), max 0,8 MPa (8 bar)
lDimensions according to the drawing
lWeight 65 kg
lComplies with EC regulations PN-EN-60456 standard
Guarantee
Guaranteed services according to the Guarantee Card
The manufacturer will not be held responsible for any damages resulting from inappropriate usage
of the appliance.
In compliance with PN-EN- 60456, during a control programme (cotton colour 600C programme):
l water consumption during one washing cycle is 49,5 l
l power consumption is 1,02 kWh

17
TECHNICAL SPECIFICATION
(In accordance with the Regulation of the Minister of Economy, Labour and Social Policy dated April
2003 on the requirements regarding the energy efciency).
Energy efciency class1) 2)
Electric power consumption in [kW /
cycle] 2)
Washing efciency class1) 2)
Spin efciency class1) 2)
Drainage efciency in [%] 2)
Spin speed in [rev./min] 2)
Rated load in [ kg ] 2)
Water consumption in [l] 2)
Programme duration time in [min] 2)
Mean yearly electric power consump-
tion in [kWh]
water in [ l ] 3)
Noise level in [ dB(A) re 1 pW ]
washing
spinning
Manufacturer name
Type
1)Energy efciency class in a scale from A (more efcient) to G (less effective)
2)For a standard washing cycle ”cotton 60°C” with active the “Intensive wash”function
3)Estimated yearly consumption (200 standard washing cycles ”cotton 60°C” for a family of 4 persons)
Wronki S.A.
AWCT 10L
A
1,02
A
C
58
1000
6,0
49,5
150
204
9900
60
74
AWCT 12L
A
1,04
A
C
53
1200
6,0
49,5
150
204
9900
60
76

18

19

20
Amica Wronki S.A.
ul.Mickiewicza 52
64-510 Wronki
tel. 067 25 46 100
fax 067 25 40 320
www.amica.com.pl
This manual suits for next models
1
Table of contents
Other Amica Washer manuals

Amica
Amica WMA612 User manual

Amica
Amica AWP510L User manual

Amica
Amica AWB610L User manual

Amica
Amica WA484100W User manual

Amica
Amica WA 14789 User manual

Amica
Amica AWCM 10L User manual

Amica
Amica AWN712D User manual

Amica
Amica AWN912DJB User manual

Amica
Amica AWT714S User manual

Amica
Amica AWI612L User manual

Amica
Amica AWSN 10DA User manual

Amica
Amica WME610 User manual

Amica
Amica WA 14681 W User manual

Amica
Amica AWI814L User manual

Amica
Amica WA 484 081 User manual

Amica
Amica WA 474 020 User manual

Amica
Amica WA 474 021 User manual

Amica
Amica WME712 User manual

Amica
Amica WA 484 081 User manual

Amica
Amica WME712/1 User manual