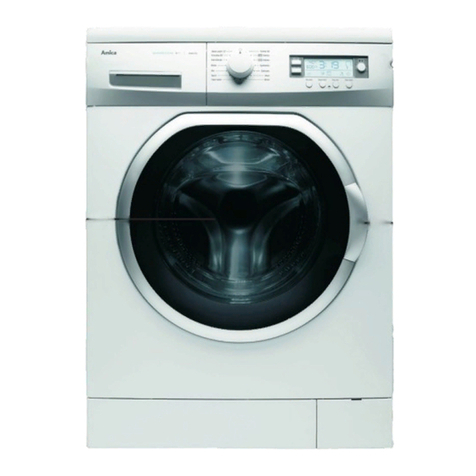
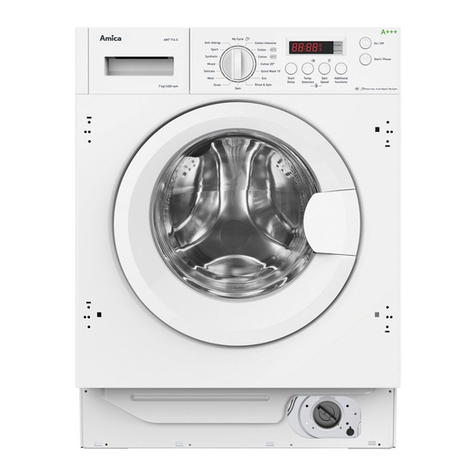
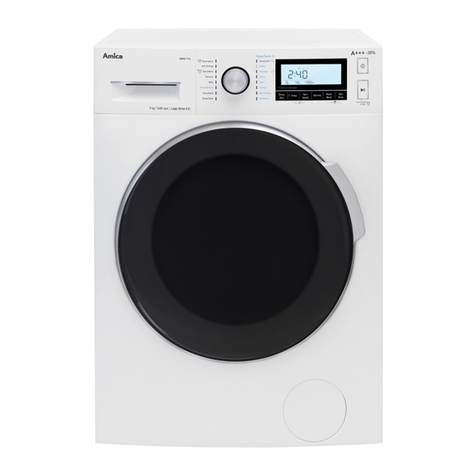
Amica EWA 34657 W User manual

WASHING MACHINE
Please read these instructions carefully before you start using the washing
machine!
USER MANUAL EN
IO-WMS-0112
(01.2016)
EWA 34657 W

2
In accordance with the European directive 2012/19/EUand the Polish law on waste elec-
trical and electronic equipment, this appliance is marked with the symbol of a crossed-
out waste container.
This symbol indicates that this appliance cannot be disposed of together with other
household waste at end-of-life.
The user is obliged to deliver the appliance to a collection point for waste electrical and
electronic equipment. The collection facilities, including local collection points, shops and
municipal facilities, form a system providing for the return of this appliance. The correct
disposal of electrical and electronic waste will help prevent negative consequences for human health
and the environment caused by the presence of pollutants or the incorrect storage or treatment of such
materials.
Basic information ........................................................................................................................3
Safety instructions .....................................................................................................................4
Install the washing machine ................................................................................................8
Explanation of the laundry symbols on clothes labels ..............................................10
Description of control panel and display .........................................................................13
Special programmes ............................................................................................17
Operate the washing machine ................................................................................................18
Table of washing programmes .........................................................................................19
Troubleshooting ......................................................................................................................20
Maintenance and cleaning .......................................................................................22
Practical advice ...................................................................................................23
Technical data .....................................................................................................26
Product data sheet ..............................................................................................27
Built-in installation................................................................................................................28
CONTENTS

3
BASIC INFORMATION
Dear Customer,
from now on washing will be easier than ever. Your washing machine combines very easy
operation and perfect washing performance. After reading these instructions, operating the
appliance will be easy. Before being packaged and leaving the factory, the washing machine
was thoroughly checked with regard to safety and functionality at test stations. Some moisture
or water may remain in the appliance from these tests.
Before using the appliance, please read this user manual carefully. Follow the instructions to
avoid operating errors. Keep the user manual always at hand for reference. Precisely follow
the safety instructions to avoid potential accidents.
Note!
The washing machine is designed for household use only and for washing textiles
and clothes suitable for mechanical washing in washing detergent.
Before you connect the washing machine to power supply,
all transport safety devices must be removed and the washing machine correctly levelled.
The manufacturer reserves the right to make changes which do not affect the operation of
the appliance.
Using the appliance
l Carefully read these instructions before using the washing machine.
l Never use the washing machine outside or in rooms where negative temperatures may
occur.
l The appliance should not be operated by children or persons not familiar with these
operating instructions.
Note! Temperatures below 0°C can damage the appliance!
If the appliance was stored or transported freezing temperatures, let it warm up for 8 hours
in a room with a positive temperature prior to using it.
Declaration of the manufacturer
The manufacturer hereby declares that this product meets the fundamental requirements
of the following European directives:
l Low Voltage Directive - 2014/35/EC,
l Electromagnetic Compatibility (EMC) Directive - 2014/30/EC,
l Ecodesign Directive 2009/125/EC,
and has been marked with the symbol and issued with a declaration of compliance
which was submitted to the market surveillance authorities.

4
SAFETY INSTRUCTIONS
lLaundry
detergents
lLoading
the laundry
Use only laundry and care products intend-
ed for washing machines. In particular in
the COLOUREDS wash programme.
Do not use any solvent-based agents, be-
cause they can cause damage to certain
parts of the washing machine or release
toxic gases. They also involve a risk of
ignition and explosion.
Make sure that no unwanted items get
into the washing machine. Empty all the
pockets, close buttons and zips. Place
small and loose objects in a laundry
washing bag or pillowcase, because they
might otherwise be destroyed or damage
the drum and the inner container. Do not
exceed the loading limit recommended for
the washing machine drum.
If the power cable is damaged, it must be exchanged.
To avoid hazards the exchange must be performed
by the manufacturer or by an expert in an authorized
workshop.

5
lTransport
lNameplate
lBurns
SAFETY INSTRUCTIONS
Disconnect the washing machine from the
power supply before transporting it. The
washing machine must be adequately se-
cured for transport (use transport safety de-
vices). See chapter INSTALL THE WASHING
MACHINE. Transport the washing machine
in vertical position.
The nameplate with the basic data of the
washing machine is attached at the top on
the back of the housing.
Window and door of the washing machine
get hot during operation. Keep children away
from the washing machine when in operation.
lControl
panel
Protect the control panel from water.
Do not deposit wet laundry on the appli-
ance!

6
Checking the stability
After positioning and levelling the washing machine you must
check, if the machine stands rmly on all four feet. To do so,
press down on each corner of the washing machine to see,
if it moves. The correct horizontal position of the washing
machine is an essential condition for a safe, reliable and
smooth operation.
Note! Wait 3 hours before you use the washing for the
rst time. Level the washing machine and remove the
shipping bolts.
Note! An incorrectly levelled and, in particular, unstable
washing machine may move during operation.
SAFETY INSTRUCTIONS

7
SAFETY INSTRUCTIONS
This appliance can be used by children from the age of
eight (8) years or persons with physical, sensory or mental
handicaps, or those who are inexperienced or unfamiliar with
the appliance, provided they are supervised or have been
instructed how to safely use the appliance and understand
the possible hazards. Children must not be allowed to play
with the appliance. Children must not be allowed to play
with the appliance. Children must not be allowed to clean or
maintain the washing machine without supervision.
Children under the age of three should not be allowed near
the washing machine, unless under permanent supervision.
Decommissioning
For safety reasons, a worn washing machine must be made
unusable.
First, unplug the power cable and then cut it off.
The disposal must be done in accordance with the local
waste and refuse disposal regulations.

8
INSTALL THE WASHING MACHINE
I. Remove the transport safety devices (keep the transport safety devices, for
example in case of a removal).
l Unscrew the 4 blocking screws
with a screwdriver.
l Take out the transport supports
together with the washers and inserts
from the rubber and plastic bushings.
Make sure to remove the safety devices before using the washing machine!
l Close the holes with the stoppers
supplied in the bag with the
accessories.
l Do not install the washing machine on a carpet!
l The oor must not be concave or inclined!
l Check the shape of the oor to make sure that the weight
of the washing machine rests on the feet (and not on the housing)!
II. Positioning and levelling of the washing machine
After positioning and levelling the washing ma-
chine, check that it is stable by pressing down
on each corner to see, if it moves!
l Install the washing machine on a hard, even surface.
l Loosen the locknut (2)
l Tighten the locknut (2)
l Level the washing machine by turning the feet with the nuts (1).
2
1

9
The drain hose is at the back of the
washing machine.
Secure the drain hose so that it does
not move back and forth during the
operation of the washing machine (use
the bend – see below). Do not insert the
drain hose too deep into the drainpipe!
III. Water connection
IV. Water discharge
The water supply hose with the seals is in the washing drum.
INSTALL THE WASHING MACHINE
Use new and complete
hoses including the nec-
essary equipment.
Do not re-use old hoses.
V. Connection to the power supply
l The power connection of the washing machine (socket of the electrical
installation) must be located in a visible and accessible place!
l The washing machine must be connected to a correctly installed socket
with earthing pin!
l Never use an extension cord!
l A damaged power cord must be exchanged by an authorized service centre.
l The power grid to which the washing machine is connected must be
rotected by a 10 A fuse.
Min. water pressure 0.05 MPa (0.5 bar), max. water pressure 1 MPa (10 bar).
Supply the washing machine with cold water only.
l After connecting the appliance, check that the hose is not twisted.
l After connecting the hose and the valve check them for leaks.
l Check the condition of the water hose regularly.

10
DESCRIPTION OF THE WASHING MACHINE
Check the symbols on the clothes labels before you select
the programme.
I. Washing
II. Dry-cleaning
III. Tumble-drying
Normal wash
at 90°
Normal wash
at 60°C
Normal wash
at 40°C
DO NOT
wash!
Delicates Handwash
any solvent any solvent
except
trichloroethylene
petroleum
solvent only
DO NOT
dry clean!
normal low heat high
heat
DO NOT
tumble dry!
IV. Ironing
110°C150°C 200°CDO NOT
iron!
EXPLANATION OF THE LAUNDRY SYMBOLS ON LABELS
VON KLEIDUNG
90
Detergent dispenser
Drum
Control panel
Power plug
Drain hose

11
EXPLANATION OF THE LAUNDRY SYMBOLS ON LABELS
Detergent dispenser
Handle
Pump lter Cover
Drain hose
Power plug
Control panel
Detergent dispenser
Accessories
Cover for the
transport
opening
Cover for the
opening
(optional)
Water supply
pipe C
Water supply
pipe H
(optional)
Elbow tting for
the drain hose
(optional)
Accessories:

12
2. Open the door and
put in the laundry.
4. Close the door
9. Select the programme.
8. Push the On/Off button
1. Installation of the washing machine
3. Measure off
the detergent
5. Put down (hang up)
the drain hose. 6. Open the water tap
7. Connect to power supply
10. Push the Start/Pause
button
EXPLANATION OF THE LAUNDRY SYMBOLS ON LABELS

13
DESCRIPTION OF CONTROL PANEL AND DISPLAY
1 2
6
57 8
■
■
■■■■
■
1. Programme button
2. Display
3. On/Off button
4. START/PAUSE
5. Button for the additional function Time delay
6. Button for the selection of the Temperature
7. Button for the selection of the Spin speed
8. Button for the selection of the Function
6+7. Child safety lock
67
+
3
■
4
■

14
DESCRIPTION OF CONTROL PANEL AND DISPLAY
2. Display
When the washing machine is in operation, the display shows the time remaining until the
end of the wash programme. The display also shows the following symbols: Locking of the
door of the washing machine and activated Child Lock function .
The indicated time is an estimated value and can differ from the actual washing duration
depending on the temperature, the water pressure, the load, the amount of detergent etc.
The time is automatically updated during the washing cycle, intermittent freezing and time
leaps are possible.
When the Time delay function is selected, the display shows the time remaining until the
start of the programme.
When setting the spin speed, the display shows the following values:
0 (no spin) - 400 - 600 - 800 - 1000 - 1200 - 1400.
When setting the temperature, the display shows the following values:
- -°C (cold) - 20°C - 30°C - 40°C - 60°C - 90°C.
1. Programme button
The user can select an appropriate wash programme according to the degree of soiling,
the type and amount of the laundry in order to ensure a better and more efcient result.
Once the programme has started, the parameters of the selected wash programme can no
longer be changed by setting the programme button in a different position.
3. Standby button
Switch the washing on/off and abort the wash programme.
4. Start/Pause button
Use the 4Start/Pause button to start or interrupt the wash programme.
When the washing machine is in operation, the symbols “ “ on the display blink. In the
pause mode, the symbols “ “ do not blink but are lit continuously.
The pause function can be used to soak the laundry.
After starting the selected programme, wait about 10 minutes and then push the
Start/Pause button. After the laundry has soaked for the required time, again push the
Start/Pause button and the washing machine will continue the wash programme.
Soaking improves the washing results when the laundry is very soiled.

15
DESCRIPTION OF CONTROL PANEL AND DISPLAY
6. Temperature selection button
The button serves to set the temperature for the respective washing programmes.
When pushing the button , the display shows the available water temperature settings
or cold water options (without preheating) for the relevant wash programme. Depending on
the selected wash programme, the display shows the following setting options: - -°C (cold)
- 20°C - 30°C - 40°C - 60°C - 90°C.
6
6
5. Time delay button
This button serves to delay the start of the wash programme. The delay can be set from 0
to 24 hours.
Note! In case of a power outage during the countdown of the delay time, the function will
resume the countdown as soon as the power supply is restored.
7. Spin speed button
Button serves to set the spin speed during the pumping cycle. Push the button in order
to change the setting. Depending on the selected wash programme, the display shows the
following values - 0 (no spin) - 400 - 600 - 800 - 1000 - 1200 - 1400.
8. Function selection button
The multifunction button can be one of two functions (extra rinse or pre-wash) or both func-
tions can be selected simultaneously. If this function is started, the LED above the symbol
of the selected function lights up.
Attention! The functions Extra Rinse/Prewash and are not available for all washing
programs (see: Program table).
Pre-wash
The pre-wash function prolongs the washing time by about 20 min. The main wash is then
preceded by an additional wash cycle at a temperature of 30°C.
With the pre-wash function very good washing results can be achieved without previously
soaking the laundry. This function is recommended for heavily soiled laundry.
Attention! Before starting the pre-wash function, you have to put detergent in the
detergent dispenser with the symbol “ “.
Extra Rinse
The Extra Rinse function is especially recommended for underwear and for clothes of peo-
ple with sensitive skin. This function consists in an additional rinse of the laundry.
7

16
DESCRIPTION OF CONTROL PANEL AND DISPLAY
Switching the sound signal on / off
In order to activate this function, keep the button 6pressed for about 3 seconds.
The sound signal conrms the activation of this function. In order to re-enable the function,
push the button 6and hold it for about 3 seconds. This setting remains saved until the
next change.
Setting of the programme Individual
In order to set the programme Individual, turn the selector dial to any of the wash pro-
grammes and select the temperature, spin speed and additional functions.
Keep the button 7 pressed for about 3 seconds to conrm the settings of the programme
Individual. The default wash programme is cotton.
6 + 7 Child Lock
The child lock blocks the function buttons, so that children cannot inadvertently change
the settings. In order to activate the child lock during the washing, push the buttons 6
(Temperature selection) and 7(Spin speed) simultaneously and hold them for about 3
seconds. In order to deactivate this function during the wash cycle, again push the same
buttons and hold them for about 3 seconds.
Note 1: When the child lock is activated, the display shows the symbol .
Note 2: The lock is not automatically deactivated at the end of the wash programme.

17
SPECIAL PROGRAMMES
1. Wash programme Baby comfort:
This wash programme is intended for children and persons with sensitive skin. The main
wash is always at 60°C (possible temperatur settings are 90/60/40/30/20—“cold”).
2. Wash programme Mixed laundry:
Standard wash programme at a standard temperature of 40°C with a standard spin
speed of 1000 rotations/minute. This wash programme can be used to wash coloureds,
cotton, synthetics and linen at the same time.
3. Wash programme Quick wash 15’:
These wash programmes serve to refreshen clothes. They include all the wash cycles:
- main wash
- rinse
- spin
4. Coloureds 20:
This wash programme serves for washing at the temperature of 20°C.

18
OPERATING THE WASHING MACHINE
II. Setting of the delayed start of the wash programme
The Time delay function can be used, for example, to benet from preferential electricity
tariffs.
Procedure:
1. Close the door of the washing machine.
2. Set the programme button to the required position (see the table of the wash pro-
grammes further on in the manual).
3. Select additional functions or change the washing parameters, as required.
4. Push the Time delay button.
5. Select the time of delay from 0 to 24 hours. The display shows the setting range from
0h to 24h.
6. Push the Start/Pause button. The washing machine switches to the waiting mode. The
wash programme will start automatically at the end of the delay time.
I. Select the wash programme
1. Set the programme button to the required position (see: table of the wash pro-
grammes further on in the manual).
2. In order to adapt the wash programme to the individual requirements, you can
change the spin speed and the temperature setting.
3. Push the Start/Pause button.
IV. Aborting and changing the wash programme.
In order to abort a wash programme, push the Standby button.
Then switch the washing machine on again, select the required wash programme and
push the Start/Pause button.
V. Display energy-saving mode
About 10 minutes after the end of the wash programme, the display switches to the
energy-saving mode
(instead of “End”, “ ” now blink in the display).
The energy-saving mode remains active also, if within 10 minutes after the washing
machine was switched on with the Standby button, the selector dial is not turned and
no button is pushed.
III. End of the wash programme
1. The end of the wash programme is indicated by “End” in the display and a sound
signal (if this function is active).
2. Close the water tap.
3. Switch the washing machine off with the Standby button.
4. Disconnect the washing machine from the power supply.
5. Open the door and take out the laundry.

19
TABLE OF THE RINSE PROGRAMMES
NOTE: The indicated duration is an estimated value and can differ from the actual washing duration depending on the temperature, the
water pressure, the size of the load etc. The time is automatically updated during the wash programme, intermittent freezing and time
leaps are possible.
Use a detergent or a softener, if required.
l A detergent must be used for efcient washing.
x It is impossible to use a detergent or a softener.
* - Standard cotton wash programmes at 60°C and 40°C.
These wash programmes are suitable for normally soiled laundry. They are also the most efcient wash programmes in terms
of power and water consumption for this type of laundry.
Attention: The actual water temperature can differ from the indicated cycle temperature.
Name of the wash
programme
Max. tem-
perature
[°C]
Max. spin
speed
[rota-
tions/
min.]
Max. load
[kg]
Available additional functions Detergent dispenser Time
[h:min]
Power
con-
sumption
[kWh]
Water
con-
sumption
[l]
Number
of rinses
Recommendations concerning the
type of laundry
Time
delay
Extra
Rinse
Pre-wash Pre-wash Main
wash
Softener
Coloureds Intensive 40° 800 8.0 Option Option Option
l
2:40 1.59 50 2 Heavily or moderately soiled cotton
laundry and children’s wear which
require boil wash.
Coloureds 60* 60° 1200 8.0 Option Option -
Xl
1:47 0.92 49 2 Moderately or heavily soiled cotton
laundry, bed linen, table linen, under-
wear, towels, linen.
Coloureds 40* 40° 1200 8.0 Option Option -
xl
1:32 0.77 50 2 Lightly soiled cotton or linen laundry.
Coloureds 20 20° 1200 2.0 Option Option Option
l
1:13 0.24 50 2 Lightly soiled, sweaty cotton or linen
clothing. Washing at 20°C
Quick wash 15‘ (cold) 800 2.0 Option - -
Xl
0:15 0.21 31 2 Lightly soiled, sweaty cotton and
linen clothing.
Eco-programme (cold) 800 2.0 Option Option Option
l
1:00 0.43 31 2 Lightly soiled, sweaty cotton and
linen clothing. Washing at 40°C
Rinse & Spin
- 1000 8.0 Option - -
X x
0:31 0.06 34 2 Programme for rinsing with care prod-
ucts (e.g. with anti-static agents, sof-
teners). For very delicate fabrics the
spin speed must be reduced.
Spin - 1000 8.0 Option - -
XXX
0:14 0.04 - - Spin, for example after Handwash.
Pump out - - - Option - -
XXX
0:01 - - - Pump out only, no spin.
Wool 40° 400 2.0 Option Option -
Xl
1:06 0.44 38 2 Attention: Wool garments which
cannot be washed in the washing ma-
chine and are marked with the corre-
sponding symbol must not be washed
in the washing machine.
Delicates 30° 600 2.5 Option Option -
Xl
1:00 0.3 35 2 Very delicate fabrics.
Mixed laundry 40° 1000 8.0 Option Option Option
l
1:13 0.64 50 2 Soiled cotton laundry, synthetics,
coloureds, linen.
Easy-care 40° 800 4.0 Option Option Option
l
1:40 0.92 41 2 Heavily soiled laundry, synthetic and
mixed fabrics (nylon, shirts, blouses).
Sportswear 40° 800 4.0 Option Option Option
l
1:19 0.56 41 2 Sportswear.
Baby comfort 60° 1000 4.0 Option Option Option
l
1:39 1.54 50 2 This wash programme serves for washing
clothes of persons with sensitive skin, e.g.
children’s wear.

20
TROUBLESHOOTING
Problem Probable cause / Solution
The washing machine does not
work.
- Open the water tap.
- Clean the lter on the water supply hose.
- Close the door of the washing machine.
- Push the Start/Pause button.
Water runs out - Connect the water hose correctly.
Wet laundry in the drum - Return the laundry into the drum, clean the pump lter.
Unpleasant smell from the drum - Switch on the self-cleaning programme without laundry (see: Table
of the wash programmes).
No water in the drum - The water error is indicated in the display, open the water
tap.
Water remains in the softener
compartment
- Press the “button” in the middle compartment.
The laundry is not well washed - Dose the detergent according to the degree of soiling and the hard-
ness of the water (see instructions on the detergent packaging).
- Clean the pump lter.
The washing machine does not ll
with water
- Open the water tap.
- Check the setting of the wash programme.
- Check the water pressure.
- Reconnect the water hose.
- Close the door of the washing machine.
- Make sure that the water hose is not bent or blocked
Simultaneous inow and outow
of water
- Check, if the endpiece of the drain hose is above the water level in
the washing machine (the hose should be at a height of 0.6 m – 1 m)
The water does not drain off
correctly
- Check the pump lter.
- Check the drain hose.
- Check the height of the drain hose; it should be at a height of 0.6
m – 1 m above the ground.
The washing machine vibrates - Check, if the transport safety devices were removed.
- Level the washing machine.
- Block the feet (tighten the nuts).
Foam forms in the detergent
dispenser
- Reduce the amount of detergent.
- Verify the water hardness and the amount of detergent used, as well
as the type of detergent used in the drum.
The washing machine stops
before the end of the washing
programme
- Check the power supply as well as the inow and outow of water.
Noise caused by the drain pump
after pumping out the water.
- The water was pumped from the drum, but a little water remains
in the pump and the drain hose. The continuous operation of the
drain pump causes an intake of air and a characteristic noise, but
everything is all right.
Brief interruptions during the
wash programme
- The water in the washing machine automatically rells.
- The pause is caused by the elimination of excessive foam.
Table of contents
Other Amica Washer manuals

Amica
Amica AWSM12D User manual

Amica
Amica AWP510L User manual

Amica
Amica AWI714S User manual

Amica
Amica AWN612D User manual

Amica
Amica WMA510 User manual

Amica
Amica AWB510LP User manual

Amica
Amica WT 473 710 User manual

Amica
Amica WA 14690-1 W User manual

Amica
Amica WME612/1 User manual

Amica
Amica AWM712D User manual

Amica
Amica WMS914 User manual

Amica
Amica AWN912DJB User manual

Amica
Amica awi510lp User manual

Amica
Amica AWB814L User manual

Amica
Amica WME610 User manual

Amica
Amica WME712/1 User manual

Amica
Amica IO-WMS-0825 User manual

Amica
Amica WA 484 020 User manual

Amica
Amica AWCM 10L User manual

Amica
Amica WMS814 User manual