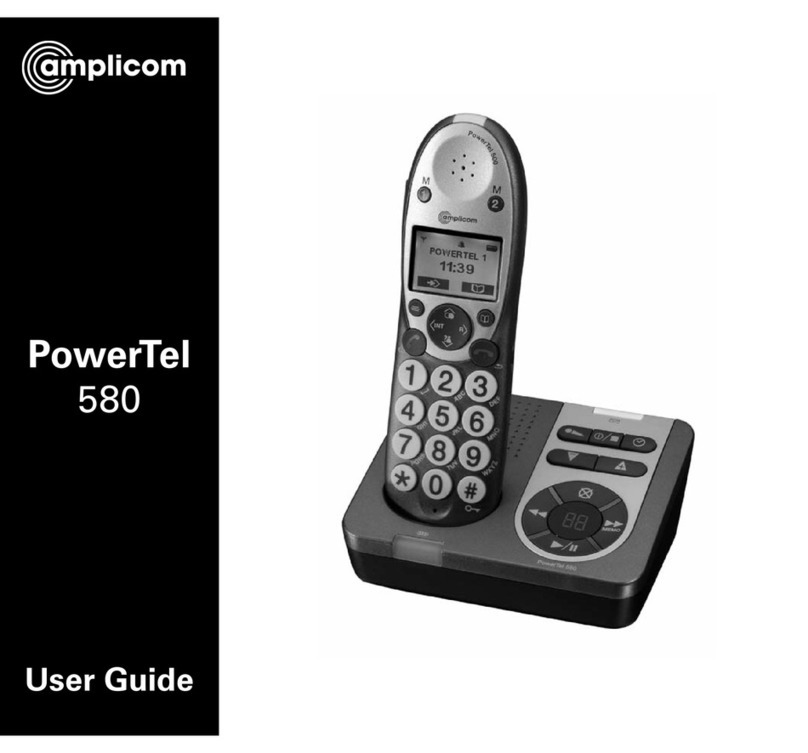
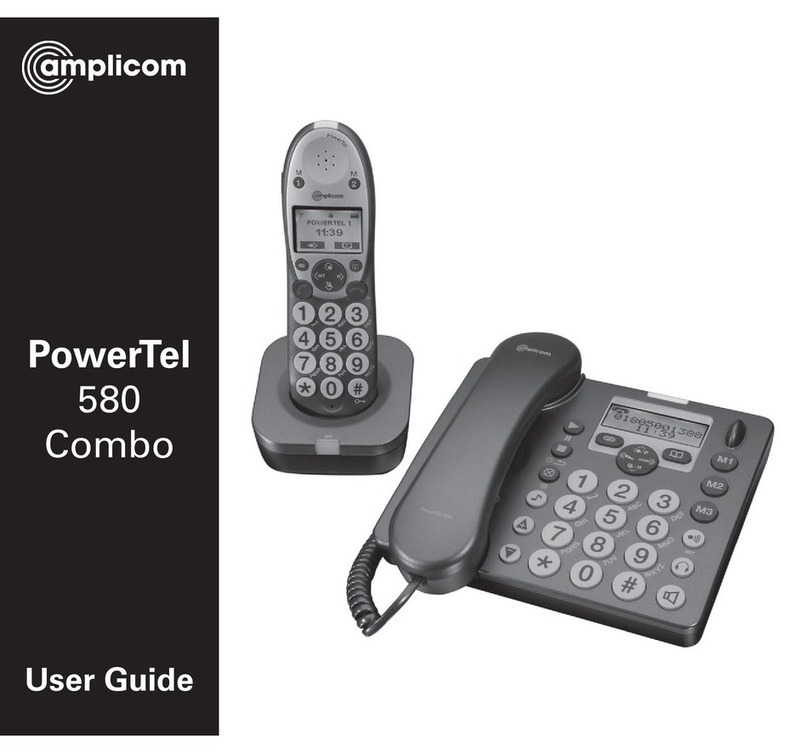
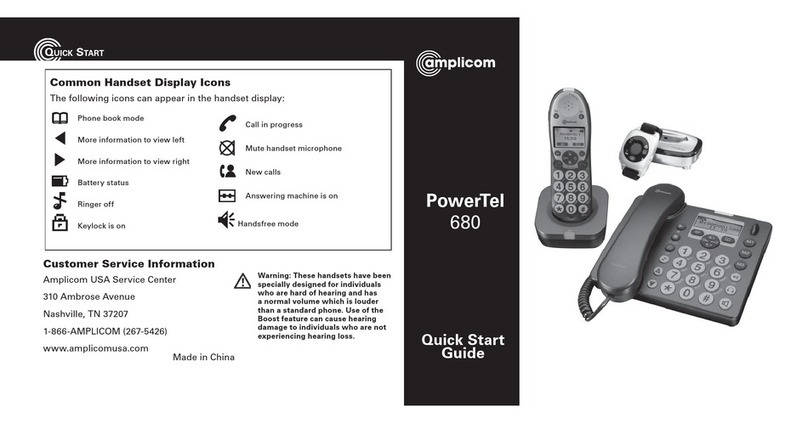
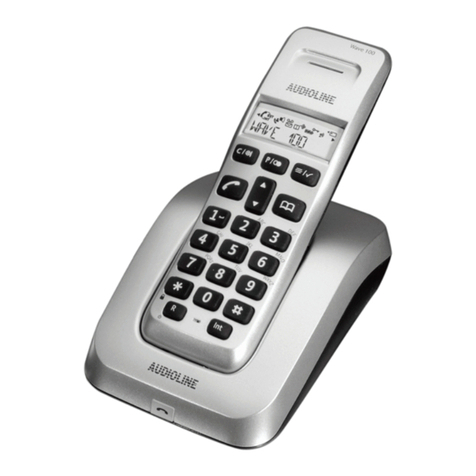
Amplicom PowerTel 580 Combo User manual

User Guide
PowerTel
580
2
CONTENTS
Important Safety Instructions ........... 5
Getting Started ................................... 7
Set Up................................................... 7
Handset Display Icons ........................ 9
Phone Menu and Display Guide....... 10
Calling Functions............................... 11
Menu Options.................................... 15
Changing Menu Settings.................. 17
Changing Clock Settings .................. 18
Changing Base Settings ................... 19
Phone Book........................................ 20
Answering Machine .......................... 26
Adding a Handset.............................. 34
Help and Support .............................. 41
Troubleshooting Guide ..................... 41
Technical Details................................43
Default Settings ...............................44
Maintenance and Warranty..............45
FCC Compliance
Warning: Changes or modications to this equipment not expressly approved by the party responsible for compliance
could void the user’s authority to operate the equipment. NOTE: This equipment has been tested and found to comply with
the limits for a Class B digital device, pursuant to Part 15 of the FCC Rules. These limits are designed to provide reasonable
protection against harmful interference in a residential installation. This equipment generates, uses and can radiate radio
frequency energy and, if not installed and used in accordance with the instructions, may cause harmful interference to
radio communications. However, there is no guarantee that interference will not occur in a particular installation. If this
equipment does cause harmful interference to radio or television reception, which can be determined by turning the
equipment off and on, the user is encouraged to try to correct the interference by one or more of the following measures:
reorient or relocate the receiving antenna, increase the separation between the equipment and receiver, connect the
equipment into an outlet on a circuit different from that to which the receiver is connected, or consult the dealer or an
experienced radio/TV technician for help.
Caution: To maintain the compliance with the FCC’s RF exposure guideline, place the base unit at least 8 inches from nearby
persons.
For body worn operation, this handset has been tested and meets the FCC RF exposure guidelines when used with the
Amplicom accessories supplied or designated for this product. Use of other accessories may not ensure compliance with
FCC RF exposure guidelines.
This equipment complies with Part 68 of the FCC rules. A label on the base unit of this equipment contains, among other
information, the ACTA Product Number and the Ringer Equivalence Number (REN) for this equipment. You must, upon
request, provide this information to your telephone company.
Instructions available in other languages at www.amplicomusa.com.
33
PHONE GUIDE
1
2
3
4
5
7
8
10
6
9
11
12
13
15
14
16
17
18
19
PowerTel 580 Cordless handset
1Incoming
call light
2Memory 1
335dB Boost
4Display
5Enter Menu/
Mute/Delete
6Internal call
7External call/
Handsfree
8/Ringer on/off
9Pause
(long press 0)
10 Microphone
11 Volume up/down
12 Memory 2
13 Up/Redial
14 Headset socket
(Headset not
included)
15 Phonebook/
Save/OK
16 Recall
17 End call
18 Down/Calls list/
Equaliser
19 Keypad
20 #/Keylock
Warning: This Handset has been specially designed for
individuals who are hard of hearing and has a normal
volume which is louder than a standard phone. Use
of the Boost feature can cause hearing damage to
individuals who are not experiencing hearing loss.
20
Service Center
4
1Date/Time
2Answer on/off/Stop/
Answer mode
3Indicator light for new answer
machine messages received
4Outgoing message
5Find handset/Registration
6Incoming call/Charging/
Line in use
7Rewind/Set language
8Play/Pause/OK
9Fast forward/Memo
10 Answer machine message
counter/Status display
11 Delete
12 Volume up
13 Volume down
PowerTel 580 Phone Base
35
7 98
124
13
12
11
6
10
PHONE GUIDE

1-866-AMPLICOM (267-5426) 5
Important Safety Instructions
When using your telephone equipment, basic safety precautions should always
be followed to reduce the risk of re, electric shock and injury to persons,
including the following:
1. Do not use this product near water, for example, near a bath tub, wash bowl,
kitchen sink or laundry tub, in a wet basement or near a swimming pool.
2. Do not use the telephone to report a gas leak in the vicinity of the leak.
3. Use only the power cord and batteries indicated in this manual. Do not
dispose of batteries in a re. They may explode. Check with local codes for
possible special disposal instructions. Save these instructions for future use.
Intended use
This phone is suitable for use on a public telephone network. Any other use is
considered unintended use. Unauthorized modication or reconstruction is not
permitted. Do not open the device and attempt any repair work yourself.
Phone location
Locate the base:
t 0OBESZýBUBOETUBCMFTVSGBDF
t 8IFSFUIFQPXFSDBCMFXJMMOPUCFBUSJQIB[BSE
t 8IFSFJUJTOPUPCTUSVDUFECZGVSOJUVSF
t "UMFBTUUISFFGFFUGSPNPUIFSFMFDUSJDBMBQQMJBODFT
SAFETY
Service Center
6
SAFETY
t "XBZGSPNTNPLFEVTUWJCSBUJPODIFNJDBMTNPJTUVSFIFBUPSEJSFDU
sunlight.
Power failure – What to do
This telephone cannot be used to make calls in the event of a power failure.
Alternative arrangements should be made for access to emergency services.
Medical equipment
Do not use the phone near emergency or intensive care medical equipment, or
during an electrical storm. If you have a pacemaker check with a medical expert
before using this product.
Hearing aid compatibility
This phone works with most popular hearing aids. However, given the wide
range of hearing aids available, the phone may not function fully with every
hearing aid.
Telephones identied with this logo have reduced noise and
interference when used with most T-coil equipped hearing aids
and cochlear implants. The TIA-1083 Compliant Logo is a
trademark of the Telecommunications Industry Association.
Used under license.
Important: The phone will produce high volume when Boost is switched on.

1-866-AMPLICOM (267-5426) 7
Getting Started — Included Equipment
t #BTF
t $PSEMFTT)BOETFU
t #BUUFSZ$PWFS
t #FMU$MJQ
t 1PXFS"EBQUFS
t 5FMFQIPOF$BCMF
t 3FDIBSHFBCMF"""7N"I
NiMH Battery Pack
Set up
1. Connect base
i. Plug the power adapter into the socket marked on the back of the
phone base and the other end into a wall socket.
ii. Plug the telephone cable into the socket on the back of the phone base.
Do not connect phone line to the phone wall socket yet.
Power
wall socket Socket for Vibrate
Pad (PTV100)
available as
an accessory
GETTING STARTED
Important: Use only Power supply model S008CU1200067 supplied by Ten
Pao Industrial Co., Ltd. for Base unit.
Service Center
8
GETTING STARTED
2. Install battery pack
Insert the rechargeable battery pack into the handset and plug it in as shown.
Dispose of battery pack properly. Do not allow battery pack to come into
contact with re or water.
3. Charge handset
Place the handset on its base to charge for a minimum of 15 hours before use.
Important: Only use the rechargeable battery pack model GPHCH73N07, 750mAh
NiMH supplied by GPI INTERNATIONAL LIMITED.
4. Connect telephone cable
After initial charge, plug the telephone cable into the telephone wall socket.
5. Attach belt clip (optional)
Slide the belt clip into the two holes located on either side of the handset.
Your PowerTel 580 is now ready for use!
Caution: Risk of explosion
if battery is replaced by an
incorrect type. Dispose of
used batteries according
to the instructions.

1-866-AMPLICOM (267-5426) 9
Menu
Previous menu
Conrm / OK
Phone book mode
More information to view left
More information to view right
Battery status
Ringer off
Keylock is on
Handsfree mode
Call in progress
Boost receiver volume is on
*DPOXJMMýBTI
Mute handset microphone
New calls
Answering machine is on
Answering machine is off
When steady— handset is in
range
8IFOýBTIJOHIBOETFU
is out of range
Internal call in progress (if
additional handsets are
installed)
Handset Display Icons
The following icons can appear in the handset display:
GETTING STARTEDGETTING STARTED
Service Center
10
Phone Menu and Display Guide
The phone menu display allows access to the full phone functionality.
Open main menu: Press .
Browse sub menu: Open the main menu and then press or .
Select sub menu item: Scroll using or until the menu item desired
is highlighted and press .
Browse a function: Open the sub menu and press or .
Select a function: Scroll using or until the required function is
highlighted and press .
Enter digits or letters: Use the keypad.
Conrm or save an entry or action: Press .
Cancel and return to standby: press .
Note: After 20 seconds, the phone will go into standby mode unless a
button is pressed.
GETTING STARTED
GETTING STARTED

1-866-AMPLICOM (267-5426) 11
Calling Functions
Make a call
1. Enter the phone number.
2. Press to delete a mistaken entry.
3. Dial the number by pressing .
End a call
Press .
Answer a call
1. Lift the handset off the base and speak into the phone.
2. If the handset is off the base, press and then speak into the phone.
Redial a number
The phone stores the last 10 numbers dialed.
1. Open the redial list by pressing .
2. Scroll through the redial list using or until the desired number to
redial is highlighted and press .
CALLING FUNCTIONS
Service Center
12
Call back a previous caller
The phone stores the last 30 incoming phone numbers.
1. Open the incoming calls list by pressing .
2. Scroll to nd the desired number using or , press .
Dial a number in the phone book
1. Open the phone book by pressing .
2. Scroll to nd the desired number using or , press .
Dial a number using the quick dial buttons
1. Choose a quick dial number by pressing or .
2. Press to dial the number.
Adjust the handset earpiece volume
Note: The handset earpiece volume is louder than a standard phone.
To adjust the volume during a call, push the button on the side of the handset
up or down.
Boost the handset earpiece volume
To boost the handset earpiece volume during a call, press the key on the
UPQMFGUTJEFPGUIFIBOETFU"OJNBHFPGBOFBSXJMMýBTIJOUIFEJTQMBZUPTIPX
that boost is on.
CALLING FUNCTIONS

1-866-AMPLICOM (267-5426) 13
CALLING FUNCTIONS
Handsfree feature
Use the handsfree feature to talk to the caller without holding the handset or to
let other people in the room listen to the conversation.
1. Switch on handsfree mode during a call by pressing the key twice.
2. Exit handsfree mode by pressing .
3. To adjust the handsfree volume, use the switch on the right of the handset or
the or buttons.
Note: Boost volume using is not available during handsfree calling.
Use a headset (not included)
Plug a headset into the headset socket on the right side of the handset. This
socket can also be used with an Induction Neck Loop NL100 (not included).
Mute the phone
Muting the phone during a call will silence the mouthpiece on the phone so it
does not transmit any noise to parties on the other end of the line.
To switch off the mouthpiece, press .Mute On will be displayed.
To switch it on again, press . The display will show Off.
Service Center
14
CALLING FUNCTIONS
Switch the handset ringer on and off
To switch the ringer on and off, press and hold for ve seconds.
Lock and unlock the handset keypad
Calls can still be answered as usual when the keypad is locked.
1. To lock the keypad, press and hold for 2 seconds. The icon will
be displayed.
2. To unlock, press and release then immediately, press and release .
Find handset
A missing handset can be located from the base.
1. Press on the base. The handset(s) will beep.
2. Press on the base again or any button on the handset to stop the
handset(s) beeping.

1-866-AMPLICOM (267-5426) 15
Menu Options
Priority/Default Setting
Any changed settings in the menu will be saved as default. The phone also
allows for two separate user proles.
User Proles
The phone can store 2 different user proles with different settings for the
Volume, Boost, and Equalizer features. Each Prole can be given a personalized
name.
Change a prole name
1. Open the menu by pressing , scroll using or until Prole is
highlighted and press .
2. Scroll using or until Prole 1 or 2 is highlighted and press .
3. Scroll using or until Name is highlighted and press .
%FMFUFUIFDVSSFOUOBNFCZQSFTTJOH .
5. Enter a new name (up to ten letters) and press .
MENU OPTIONS
Service Center
16
MENU OPTIONS
Change a prole’s handset Volume, Boost, or Equalizer
1. Open the menu by pressing , then scroll using or until you
highlight Prole and press .
2. Scroll using or until Prole 1 or 2 is highlighted, press .
3. Scroll using or until the desired setting is highlighted, press .
5IFDVSSFOUTFUUJOHXJMMCFEJTQMBZFE
5. Change the appropriate setting using or and press .
Note: Press to exit the menu and return the handset to standby.
Choosing which prole to use
Note: Handset must be used to choose a prole for a call – a prole cannot be
chosen using handsfree.
1. Before answering an incoming call, press or .
2. The display will conrm your choice.
3. Before making a call, press and hold or to select a prole.
Note: Once a prole has been selected to use when making a call, the phone
will return to the default settings after 30 seconds.

1-866-AMPLICOM (267-5426) 17
Changing Menu Settings
Handset ringer melody — There are ten ringer melodies.
Handset ringer volume — There are ve volume levels plus Off.
Tone (“Equalizer”) setting — There are ve tone settings.
Note: To adjust tone while making a call, press the button to
access the equalizer setting, press the or button to adjust the
setting. Press the volume switch on the side of the phone to exit this mode.
Remember boost — When this feature is set to On and the key on
the top left side of the handset is selected, the handset will remember and use
the last boost setting for each call.
Switch keypad beep on or off — Turns on or off the keypad beep.
Change contrast — There are ve screen contrast levels.
Switch “auto talk” on or off — The phone will automatically answer
a call when the handset is removed from its base when Auto Talk is ON. This is
the default setting. If Auto talk is OFF, press the button to answer any calls.
Change backlight timer — $IPPTFCFUXFFOPSTFDPOET
until the backlight timer switches off.
MENU OPTIONS
Service Center
18
MENU OPTIONS
Switch conrmation beep on or off — There is a beep conrma-
tion when a setting is changed. This can be switched on or off.
Change language — There are ve display languages available on the
handset: English,German,French,Spanish, and Italian.
1. Open the menu by pressing , then scroll or until Handset is
highlighted and press .
2. Scroll until the desired menu setting (see options above) is highlighted
and press .
3. The current setting will be displayed.
$IBOHFUIFTFUUJOHVTJOH or and press .
Changing Clock Settings
Change date/time — Enter the Date and Time settings.
Change clock to 12- or 24-hour format — Choose between a
TUBOEBSEIPVSGPSNBUDMPDLPSBIPVSGPSNBUNJMJUBSZUJNF
Set alarm — Set an alarm date, time, melody, and reoccurance.

1-866-AMPLICOM (267-5426) 19
Switch night light on or off — Sets the night light.
Note: The alarm must be set before the night light feature will work.
1. Open the menu by pressing , then scroll or until Handset is
highlighted and press .
2. Scroll until the desired clock setting (see options above) is highlighted
and press .
3. The current setting will be displayed.
&OUFSUIFEFTJSFEEBUFBOEPSUJNFTFUUJOHSFRVJSFEUIFIBOETFUIBTB
hour clock) press .
5. An alarm melody and reoccurance (Once, Every Day, Mon to Fri, or OFF) can
be selected after the alarm time is set.
Changing Base Settings
Change base ringer melody — There are ten base ringer melodies.
1. Open the menu by pressing , then scroll or until Base settings
is highlighted and press .
MENU OPTIONS
Service Center
20
2. Ring tone is highlighted, press .
3. The ringer melody setting (e.g. 8) will be displayed.
$IBOHFUIFSJOHFSNFMPEZVTJOH or and press .
Change base ringer volume — There are ve volume levels plus Off.
1. Open the menu by pressing , then scroll using or until Base
settings is highlighted and press .
2. Scroll until Ringer volume is highlighted and press .
3. The current base ringer volume level (e.g. 5) will be displayed.
$IBOHFUIFCBTFSJOHFSWPMVNFVTJOH or and press .
Phone book
Up to 200 names with phone numbers can be alphabetically stored in the phone
book. To quickly nd a phone book entry, simply enter the rst letter of the
stored name.
Note: Each phone book entry allows for up to 16 letters for any name and up
to 24 digits for any phone number.
Important: Enter the area code for each phone number stored.
MENU OPTIONS

1-866-AMPLICOM (267-5426) 21
MENU OPTIONS
Keypad use for phone book
The keypad contains alpha-numeric keys. Pressing one key multiple times will
scroll through the available letters and numbers which that key represents.
Other useful keys:
t QSFTT for a space
t QSFTT to delete a number or letter entered
t QSFTT to change from upper case (e.g. ABC) to lower case (e.g. abc)
Note: To enter the same letter twice, enter the letter and then pause until
the cursor moves to the next space before entering it again.
Enter a name and number in the phone book
1. Open the phone book by pressing .
2. Press . The display will show New entry, press again.
3. Enter the name to store and press .
&OUFSUIFQIPOFOVNCFSUPTUPSFBOEQSFTT .
5. Scroll using or to choose a ringer for this entry and press .
Service Center
22
Edit a phone book entry
1. Open the phone book by pressing .
2. Scroll using or to nd the entry to edit and press .
3. Scroll to display Edit entry and press .
1SFTT to delete characters, use the keypad to enter new ones, press .
5. Press to delete digits, use the keypad to enter new ones, press .
6. Scroll using or to choose a ringer for this entry and press .
Delete a phone book entry or all entries
1. Open your phone book by pressing .
2. Scroll using or to nd the entry to delete or highlight any entry to
delete all entries.
3. Press to display either Delete entry or Delete all and press .
1SFTT to conrm or to cancel.
MENU OPTIONS

1-866-AMPLICOM (267-5426) 23
MENU OPTIONS
Using quick dial memory buttons
0OFOBNFNBYDIBSBDUFSTBOEPOFUFMFQIPOFOVNCFSNBYEJHJUTDBO
be stored under each of the quick dial memory buttons: and .
1. Press the or quick dial button.
2. Press . The display will show New entry, press again.
3. Enter the name to store using the keypad and press .
&OUFSUIFQIPOFOVNCFSUPTUPSFBOEQSFTT .Saved will be displayed.
Edit a quick dial entry
1. Choose the quick dial entry to edit by pressing either or .
2. Press . The display will show Edit entry, press again.
3. Press to delete characters, use the keypad to enter new ones, press .
1SFTT to delete digits, use the keypad to enter new ones, then
press . The display will show Saved.
Delete a quick dial entry
1. Choose the quick dial entry to delete by pressing either or .
2. Press . Scroll to Delete entry and press .
3. Display will show Delete entry? Press to conrm or to cancel.
Service Center
24
Incoming calls
Note: you must subscribe to your phone service provider’s Caller Display/
Caller ID service for this feature to work.
Incoming call telephone numbers will appear in the calls list. If the caller’s
number is stored in the phonebook, the name will be displayed instead. A
total of 30 incoming calls can be stored in the calls list (16 letters per name
BOEEJHJUTQFSOVNCFS5IFOVNCFSPGOFXDBMMTSFDFJWFEXJMMCFTIPXOJO
UIFEJTQMBZXJUIUIFýBTIJOH icon. If the number does not appear, this is
because the caller’s identication (Call Line ID) has been withheld by the caller.
Open the calls list by pressing the button. Scroll through the calls list by
pressing or . To display more information including the date and time
of the call, press . Other displayed information:
t WITHHELD NUMBER – withheld number, or ID information isn’t available
t INTERNATIONAL – call is from another country or using an internet service
t PAYPHONE – caller is calling from a public payphone
Store numbers from the calls list to the phonebook
1. Press to open the calls list at the most recent entry.
2. Scroll using or to nd the entry to store and press .
3. The display will show Save to phbk, press .
CALLER LIST

1-866-AMPLICOM (267-5426) 25
CALLER LIST
6TJOHUIFLFZQBEFOUFSBOBNFGPSUIJTTUPSFEOVNCFSBOEQSFTT .
5. Edit the number for this name, if needed, and press .
6. Scroll using or to choose the ringer for this entry and press .
Delete a single entry
1. Press to open the calls list at the most recent entry.
2. Scroll using or to nd the listed to delete and press .
3. Scroll until Delete is highlighted and press .
$POåSNPSDBODFMUPEFMFUFUIFDBMMTMJTUFOUSZCZQSFTTJOH or .
Delete all calls list entries
1. Press to open the calls list at the most recent entry.
2. Scroll until Delete all is highlighted and press .
3. The display will show Delete all Calls? Press or to cancel.
Service Center
26
Using the answering machine
After setting up the phone system, use the following steps to set up and use the
answering machine.
Switch answering machine on or off
Press to turn the answering machine off and on.
The current answer mode will be announced.
When new messages are received, the message counter on the base and the
CBTFJOEJDBUPSMJHIUýBTI5IFNFTTBHFDPVOUFSBMTPJOEJDBUFTUIFOVNCFSPG
messages.
Set the language
Choose the answering machine voice prompt language: English, German or
French.
1. Press and hold on the base for 10 seconds until two letters appear in the
message counter display: = English, = French and = German.
2. Repeat the above procedure until the desired language code is displayed.
Adjust the base loudspeaker volume
Increase or decrease the base loudspeaker volume using and .
The volume level is displayed on the base message counter, e.g. LI-5 .
ANSWERING MACHINE

1-866-AMPLICOM (267-5426) 27
Set the answer mode
Choose the answer mode: Answer & Record, Answer only or Answer off. With
the machine in Answer only mode callers will not be able to leave a message.
1. Press to switch the answering machine on.
2. To change the mode between Answer & Record,Answer Only or
Answer Off, press and hold for two seconds.
Check the outgoing message
Press to hear the current outgoing message.
Record an outgoing message
The outgoing message must be less than two minutes long. To change the
default answering message:
1. Press and hold on the base for two seconds. Record the new message
after the beep. The base message counter will display during recording.
2. To stop recording, press . The new message will be played back, and
the base message counter will display .
Note: to return to the default message, press and hold while the
outgoing message is playing.
ANSWERING MACHINE
Service Center
28
Set the answer delay
Choose the number of times the phone will ring before the answering machine
answers an incoming call. Or, choose Time Saver, if no one will be available
to answer the phone. Time Saver is useful if someone will be calling in from
a different phone to listen to messages: if the machine answers after 2 rings,
there are new messages to listen to. If it answers after 5 rings, there are no new
messages. This feature gives the option of hanging up after 3 rings (because
there are no new messages) to save time and avoid being charged for the call.
1. Press and hold (located underneath the base) for two seconds. The
current ring delay setting will be announced and will also be displayed on
the message counter e.g. or (for Time Saver).
2. Use and to select either the number of rings (2 - 9) or Time Saver.
Press to conrm.
Set the day and time
1. Press and hold for two seconds.
2. Choose a day of the week using or . Press to conrm.
3. Choose the hour using or . The digits will also appear on the base
message counter. Press to conrm.
$IPPTFUIFNJOVUFTVTJOHUIF or buttons, the digits will also be shown
ANSWERING MACHINE

1-866-AMPLICOM (267-5426) 29
on the base message counter. Press to conrm.
Check the day and time
1. Press . The current day and time are announced.
Record a memo
Memo messages can be played back like normal messages.
1. Press and hold for two seconds.
2. After the beep, record the memo. The message counter will show
while recording.
3. Press to stop recording. The base indicator light and the message
DPVOUFSXJMMýBTIBOEUIFDPVOUFSXJMMJODSFBTFCZPOFEJHJUFH .
ANSWERING MACHINE
Service Center
30
Listen to messages or memos using the base buttons
Messages and memos are played in reverse order, with newer messages
played rst. The time and date of each message or memo is announced before
playback.
Use the following buttons to control message playback:
t 5PQMBZPSQBVTFQSFTT
t 5PTUPQQSFTT
t 5PSFXJOEQSFTT
t 5PGBTUGPSXBSEQSFTT
Delete a single message or memo
1. Press to play a message or memo.
2. To delete it, press and hold for two seconds while the message or
memo is playing. The message counter will display while deletion is taking
place.
Delete all messages and memos
1. Press and hold for two seconds when no messages are being played.
2. Press again, to conrm the deletions. The message counter will show
to indicate that deletion is taking place.
ANSWERING MACHINE

1-866-AMPLICOM (267-5426) 31
Listen to messages or memos using the handset
1. Open the answering machine menu by pressing .
2. When Ans Machine is displayed, press .
3. Scroll using or to display either Play New Msgs or Play All Msgs,
then press .
1SFTT to return to standby.
Memory full
When the memory is full, the answering machine announces that fact,
automatically stops taking more messages, and switches to Answer Only
mode. Some existing messages or memos must be deleted before any new
messages can be recorded.
Access the answering machine from a remote location
Messages on the answering machine can be listened to from other phones,
including mobile phones.
A PIN (Personal Identication Number) code is required to access the answering
machine. The default code is 000. Change the PIN code to keep messages
secure.
ANSWERING MACHINE
Service Center
32
Change PIN
1. Press and hold (located underneath the base) for two seconds. The
current 3 digit PIN will be announced and the rst new digit requested. Enter
a digit between 0 and 9.
2. Select the new rst digit using or , the digits will also be shown on the
base message counter. Press to conrm.
3. Repeat the above procedure for the 2nd and 3rd new digits.
"GUFSUIFSEEJHJUIBTCFFODPOåSNFEUIFOFX1*/XJMMCFBOOPVODFE
Press at any time to exit the Change PIN code mode and return to stand-
by. The PIN code will remain unchanged.
Call in to check messages
1. Dial the system’s phone number from a remote phone and wait until the
answering machine picks up the call.
2. Press twice, then enter the 3 digit PIN after the voice prompt.
3. Refer to the next section, “Manage messages from another phone” for
additional instructions.
ANSWERING MACHINE

1-866-AMPLICOM (267-5426) 33
Note: if the wrong PIN is entered three times, the answering machine will
hang up, and it will be necessary to call again and enter the correct PIN.
Manage messages using another phone
Use these numbers to manage messages from a remote location.
Press…
1to Rewind
2to Play or Pause your messages
3to Fast Forward through your messages
4to Hear the outgoing message
5to Record outgoing message (6to stop recording)
6to Stop messages
7to Delete current message
8to Turn OFF answering machine
9to Turn ON answering machine
0to Delete all old messages
#to Record amemo (6to stop recording)
ANSWERING MACHINE
Service Center
34
Adding a Handset
Note: The following features are only available to if an additional handset(s)
has been registered to the current phone system.
Register a handset
Only register a handset if it has become de-registered from the base or if it was
purchased separately.
Important: make sure any handset is fully charged before registering.
At the handset:
1. Press and hold for approx 10 seconds until the display shows Press and
hold Page key.
At the base:
2. Press and hold for at least 10 seconds until the display shows Register.
De-register a handset
De-register a handset if too many are currently registered on the phone system,
or if the handset develops a fault and needs to be replaced.
ADDING A HANDSET

1-866-AMPLICOM (267-5426) 35
ADDING A HANDSET
To De-register a handset
1. Open the menu by pressing , then scroll using or until Handset is
highlighted and press .
2. Scroll using or until Registration is highlighted and press .
Then scroll to highlight De-register and press .
3. Enter the PIN code (default PIN 0000) and press .
&OUFSUIFIBOETFUTJOUFSOBMOVNCFSFH1) and press to conrm.
Change handset name
1. Open the menu by pressing , then scroll using or until Handset
is highlighted and press .
2. Scroll using or until Handset name is highlighted and press .
3. Delete the current name by pressing .
&OUFSBOFXOBNFVQUPMFUUFSTBOEQSFTT .
Transfer an external call internally
1. During an external call, press and hold until a short beep is heard, then
enter the internal call number of the handset to transfer the call to.
2. To accept the call on the receiving handset, press .
Service Center
36
Note: If no one picks up the call being transferred, re-answer the call at the
current phone by pressing .
Make an internal call
If two or more handsets are registered to the base internal calls between
handsets can be made. Each handset will have been allocated a handset
number when registered, e.g. HS1,HS2 etc. These calls are free of charge.
1. Press and hold . The display will show Handset? Enter the internal call
number of the handset desired.
2. To accept the call on the receiving handset, press .
3. End the call by pressing .
Make a conference call
1. During an external call, press and hold until a short beep is heard, then
enter the internal call number of the handset to transfer to.
2. To accept the call on the receiving handset, press .
3. Once the call has been received on the other handset , activate the conference call
by pressing and releasing the button.
1MBDFUIFFYUFSOBMDBMMPOIPMECZQSFTTJOH (if necessary).
5. The conference call will end when is pressed.
ADDING A HANDSET

1-866-AMPLICOM (267-5426) 37
ADDING A HANDSET
Copy phone book entries to another registered handset
Note: Phone books can only be copied to another handset if that handset is
registered on the same phone system.
t "TJOHMFFOUSZ$PQZFOUSZ
t &OUSJFTOPUBMSFBEZPOUIFIBOETFUCFJOHDPQZJOHUP$PQZBQQFOE
t "MMFOUSJFT$PQZBMM
Important: when “copy all” is selected, all existing entries on the handset being
copied to will be deleted. To prevent this from happening use “Copy append.”
1. Open the phone book by pressing .
2. Scroll using or to nd the entry or entries to copy and press .
3. Scroll to either Copy entry,Copy append, or Copy all and press .
4DSPMM or to highlight the handset number to copy to and press .
5. Pick up the handset where copying entries to and press .
Copy a prole
1. Open the menu by pressing , then scroll using or until Prole is
highlighted and press .
2. Scroll using or until Prole 1 or 2 is highlighted and press .
Service Center
38
ADDING A HANDSET
3. Scroll using or until Copy is highlighted and press .
4DSPMMVTJOH or until the handset (e.g. 2,3or 4) to copy the prole to
is highlighted, and press .
5. On the copy-to handset, press to conrm or to cancel.
Setting or Changing system PIN code
1. Open the menu by pressing , then scroll using or until Base
settings is highlighted and press .
2. Scroll using or until System PIN is highlighted and press .
3. Enter the old PIN code (default PIN is 0000) and press .
5IFQIPOFXJMMQSPNQUGPSBOFXEJHJU1*/DPEFFOUFSFEUXJDFQSFTT .
Important: Do not change or reset the PIN code unless instructed by customer
service.

1-866-AMPLICOM (267-5426) 39
Use on a private branch exchange
If the phone is on an exchange (e.g. dial 9 to get an outside line), calls can
be transfered or called back by using the Rbutton. Check with the system
administrator for system set-up and instructions. Private exchanges are
normally used in a business-setting.
To set the recall time
1. Open the menu by pressing , then scroll using or until Base
settings is highlighted and press .
2. Scroll using or until Recall is highlighted and press .
3. The current recall timing setting (e.g. Short) will be displayed.
$IPPTFUIFEFTJSFESFDBMMUJNJOHTFUUJOH4IPSUPS-POHVTJOH or
and press .
Insert a dialing pause
Insert a pause before the dial tone if the system requires an outside line which
takes awhile to connect.
To insert a dialling pause, enter the number to reach the outside line and then
press for two seconds. A Pon the display will show dialing pause is active.
Note: A dialing pause can be used with a phone number in the phone book.
USE ON A PRIVATE BRANCH EXCHANGE
Service Center
40
USE ON A PRIVATE BRANCH EXCHANGE
Set the dial mode
There is a choice of two dialing modes: tone and pulse. The default setting is
TONE and this is the correct setting for use within the United States.
To change the dial mode
1. Open the menu by pressing , scroll using or until Base settings
is highlighted and press .
2. Scroll using or until Dial Mode is highlighted and press .
3. The current dial mode setting (e.g. Tone) is displayed.
$IPPTFUIFEJBMNPEFTFUUJOHSFRVJSFE5POFPS1VMTFVTJOH or and
press .
Reset to default settings
Important: Reseting to default will NOT delete phone book entries.
To reset to default settings
1. Press for 10 seconds.
2. Conrm or cancel the reset to default settings by pressing or .
USE ON A PRIVATE BRANCH EXCHANGE
Other manuals for PowerTel 580 Combo
8
Table of contents
Other Amplicom Cordless Telephone manuals

Amplicom
Amplicom PowerTel 680 User manual

Amplicom
Amplicom PowerTel 580 Combo User manual

Amplicom
Amplicom PowerTel 501 User manual

Amplicom
Amplicom PowerTel 500 User manual

Amplicom
Amplicom PowerTel 720 Assure+ User manual

Amplicom
Amplicom PowerTel 580 Combo User manual

Amplicom
Amplicom PowerTel 580 Combo User manual

Amplicom
Amplicom PowerTel 501 User manual

Amplicom
Amplicom PowerTel 500 User manual

Amplicom
Amplicom PowerTel 500 User manual