Amytel AW340 User manual

Operation Manual
使用手冊
Walkie Talkie
對講機
AW340
TALKING AND LISTENING
Read this manual carefully before use.
Your radio has 20 channels. All radios in your group must be set to
the same channel and CTCSS code in order to communicate.
• For maximum clarity, hold
radios 5 to 7 centimeters
from mouth.
• Press and hold PTT and
speak into the microphone
to transmit.
• To receive messages, release PTT.
1. Call Tone Key
• Short press to send a single call
tone
• Long press to send the call tone
maximum 10 times, and returns
to standby mode automatically.
2. PTT Key
• Push to transmit, release to listen
• Pressing PTT has 60 second limit
• In menu mode, push to confirm
selection
3. MENU Key
• Long press to turn radio on or off
• Short press to enter menu mode
-- Press one time to enter MENU mode, press or
to select RF channel.
-- Press two times to enter CTCSS Code Setting mode, press
or to set the CTCSS code.
1

-- Press three times to enter CALL TONE Setting mode, press
or to set the call tone.
-- Press four times to enter VOX Sensitivity Setting mode,
press or to set the VOX sensitivity.
-- Press five times to enter RF SCAN mode, press or
to set RF scan function ON or OFF.
-- Press six times to enter KEY LOCK mode, press or
to set key lock function ON or OFF.
-- Press seven times to enter MONITOR mode, press or
to set volume high or low.
-- Press eight times to exit the menu mode. It will be
automatically exited the menu mode, if you have not
pressed any key for several seconds when you in any mode.
4. Microphone
5. Neck Strap Hold (Neck Strap Included)
P
6. LCD
7/8. /Key
• Increase/decrease volume (volume level flashes and v
displays)
• In menu mode, increase/decrease channe/CTCSS code/call
tone (channel/CTCSS code/call tone number flashes) or toggle
selection Y/N
9. Ear Phone Jack
10. Plug-in Charging Jack (Charger Included with NiMH
Rechargeable Battery Packs)
Batterymeter
Channel display digit
InterferenceEliminator
Code (CTCSS)
Scanning
Keypadlocked
VOX VOX function
Turning Your Radio On And Off
To turn on, press and hold key. Press and hold key
until the display blank to turn off the radio.
Volume
When power up, press or key to adjust your volume.
Select Channel
1. Press key. The channel number will begin to flash.
2. Use or key to change the channel.
3. Press PTT key to set the new channel.
2 3

Channel Freq
(MHz) Channel Freq
(MHz)
1 409.7500 11 409.8750
2 409.7625 12 409.8875
3 409.7750 13 409.9000
4 409.7875 14 409.9125
5 409.8000 15 409.9250
6 409.8125 16 409.9375
7 409.8250 17 409.9500
8 409.8375 18 409.9625
9 409.8500 19 409.9750
10 409.8625 20 409.9875
Select CTCSS Code
The two radios must be of same channel and CTCSS code (you can
disable the CTCSS code by setting it to 0) in order to communicate.
1. Press key twice. The CTCSS code number will begin
to flash.
2. Use or key to change the CTCSS code.
3. Press PTT key to set the new CTCSS code.
Scan
Use scanning to monitor channels for transmissions, or to find
someone in your group who has accidentally changed channels.
1.Press four times until scan icon flashing and “Y” or
“-” display.
2.Press either
Until “Y” displays to turn scanning on.
Until “-” displays to turn scanning off.
3.Press PTT to confirm.
When the radio detects channel activity, it stops scanning and you
can hear the transmission. Press PTT within 5 seconds to respond.
Scan Advance
If scan stops on a channel that you don’t want to listen to, briefly
press or key to resume scanning for the next active
channel.
Key Lock
Use key lock function to avoid accidentally changing the radio
setting.
1.Press five times until key lock icon flashing and “Y”
or “-” display.
2.Press either
Until “Y” displays to turn key lock on.
Until “-” displays to turn key lock off.
3.Press PTT to confirm.
4.In key lock mode, , and keys are all disabled.
However, you can still use PTT and to transmit voice or
call tone.
5. To exit Key Lock, press and hold until an exit tone rings
and the icon dispears.
4 5

Call Tone
A call tone alerts others you want to talk.
To send a call tone to other radios in your group, press .
Your radio has 5 different call tones. To select between the 5 call
tones:
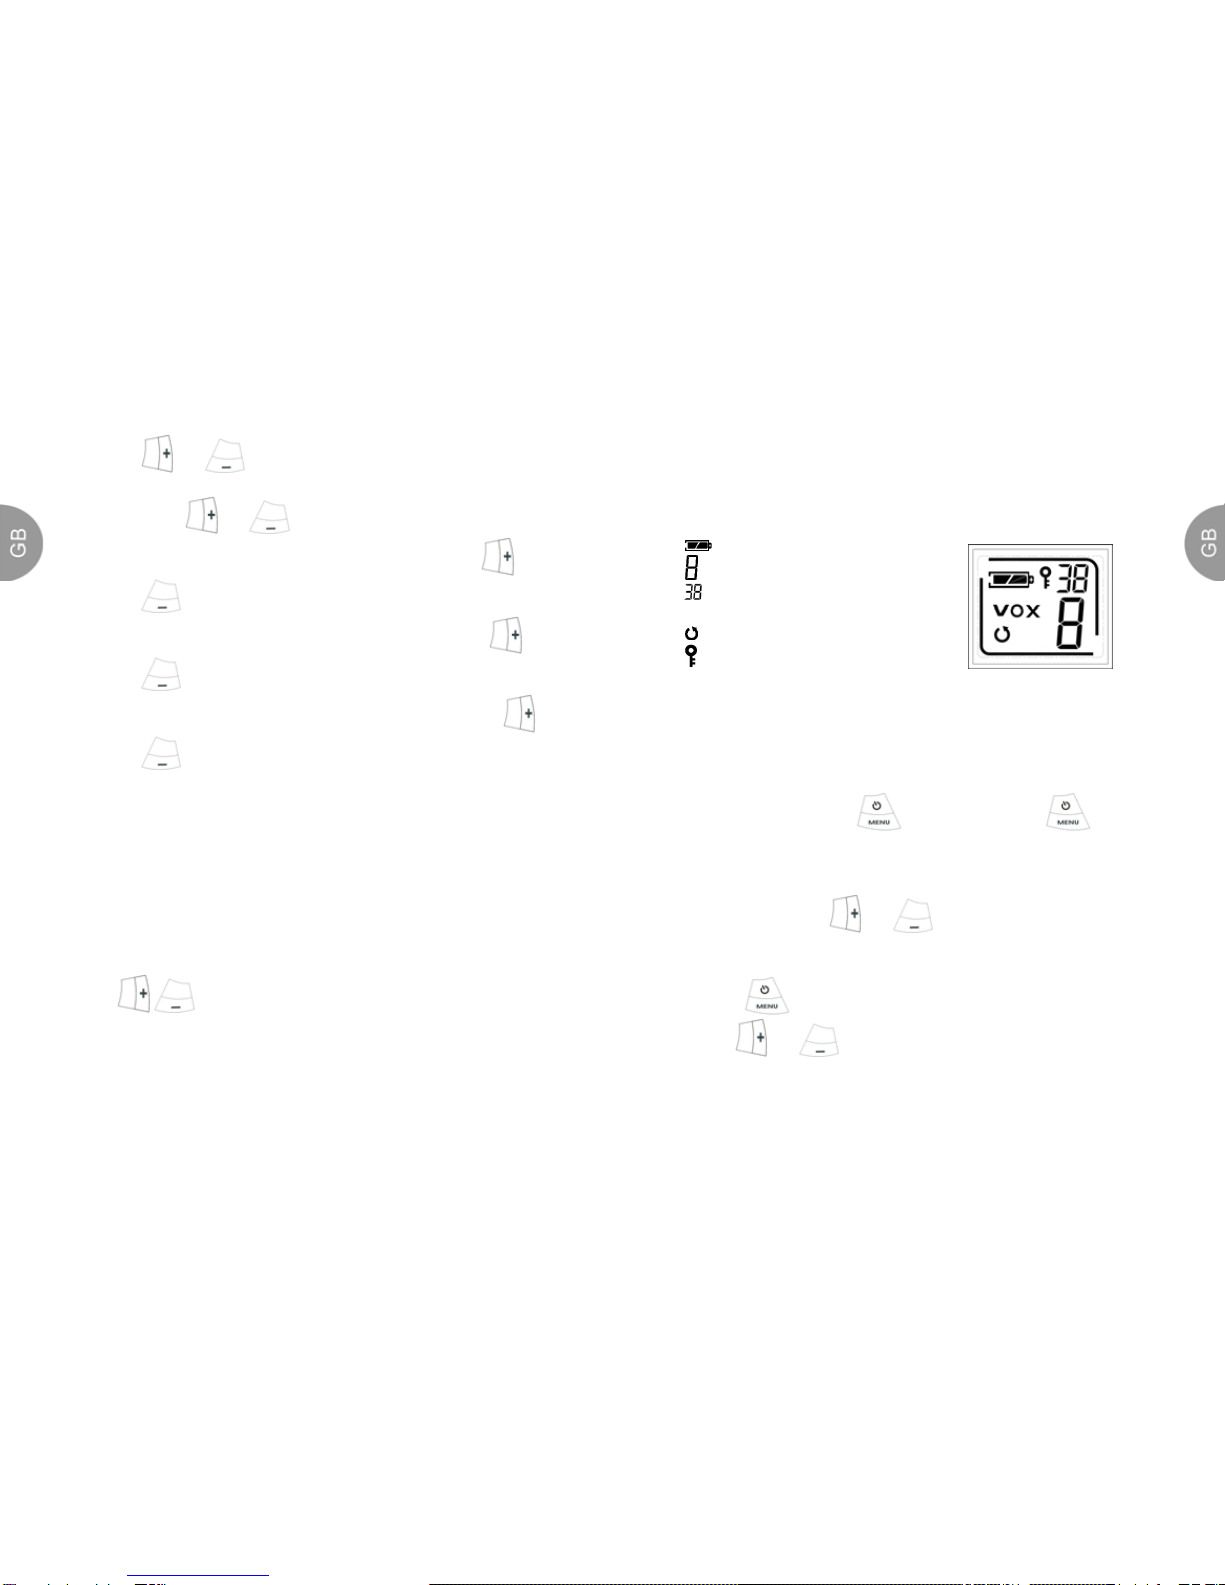
1. Press three times until a “C” displays on the upright;
2. Press or to change the call tone; “0” is no call
tone;
3. Press PTT to confirm
Monitor
Use monitor function to detect the activity of the channel you set.
To enter monitor function, press six times.
You will hear a lot of noise if there is nobody using the current
channel.
To exit the function, press again or press PTT.
目錄
功能說明………………………………………………………7-8
警告…………………………………………………………..9
裝上掛頸繩………………………………………………………...9
安裝電池…………………………………………………………..9
開/ 關對講機……………………………………………………..9
調較音量………………………………………………………….10
通話和收聽……………………………………………………….10
通話範圍…………………………………………………………10
檢查功能…………………………………………………………10
檢查頻道………………………………………………………….11
設定頻道…………………………………………………….........11
掃瞄頻道………………………………………………………11
進一步掃瞄……………………………………………………..12
從頻道檢測清單中刪除頻道…………………………………….13
特別功能………………………………………………………….13
消除干擾密碼…………………………………………………….13
按鍵講話計時器………………………………………………….14
將鍵盤上鎖……………………………………………………….14
傳呼訊號的設定和傳送………………………………………….14
應答鳴聲…………………………………………………………15
話音啟動 / 聲控 (VOX) 配件 (額外選購)………………15
使用聲控(VOX)功能…………………………………………….15
設定敏感度……………………………………………………….16
電量計…………………………………………………………….16
使用耳機配件 (額外選購)…………………………………….17
6

恭喜!你現已擁有一部先進的對講機。
注意: 請仔細閱讀本指南,有助正確使用本對講機。惟本指南
所提供的技術數據可能存在某程度的誤差,僅供參考。
功能說明
1. 傳呼鍵
2. PTT 鍵
3. 目錄鍵
4. 麦克风
5. 頸繩槽(隨機附送頸繩)
6. 液晶體顯示屏
7. 鍵
8. 鍵
9. 耳筒插孔
10. 充電插孔
7 8

警告
切勿試圖自行維修或打開對講機;如對講機出現表面損毁或內
部故障,請向就近特約經銷商或顧客服務中心求助。
裝上掛頸繩
把隨機附送之掛頸繩扣在頸繩槽上,方便攜帶。
安裝電池
本對講機可以使用 3枚AAA 鹹性電池或 1組套裝 Ni-MH 充電
電池(隨機附送)。
如要安裝電池:
1. 先把對講機背向自己;然後,把電池門蓋向下推出。
2. 按照電池廂內的指示,裝上 3枚AAA 鹹性電池或 Ni-MH
充電電池組。
3. 把電池門蓋放回原位,並向上推入,確保蓋子關緊。
4. 如要使用套裝 Ni-MH 充電電池組,請接上隨機附送之 2頭
充電電源適配器進行充電不少於 12 小時。
開/ 關對講機
如要開機,按住 鍵3秒,對講機會發出嘎吱聲,而顯示
屏則會短暫地顯示所有功能圖標。
如要關機,按住 鍵直至顯示屏熄滅。
調校音量
如要調較音量,請按 或鍵去提高或降低至合適的音
量。
通話和收聽
使用前, 請小心閱讀此說明書。
此對講機有 20 個頻道, 若同組組員要互相通話,須把所有對
講機都設定至同一頻道和『消除干擾密碼』。 如該頻道受到干
擾而需更改頻道, 請確定同組組員已轉到新的頻道。
要更清楚的通話,通話時,對講機必須離開嘴部 5-7cm。
要通話便按下 PTT 鍵。
接收訊息, 鬆開 PTT 鍵。
通話範圍
為達致對講機的最佳效果,對講雙方距離不應超過 5千米 及不
少於 1.5 米。
檢查功能
本機有多個頻道供所有使用者輪流使用。若不要通話受到干
擾,便要避免使用別人正在使用的頻道來通話。如要在講話前
檢查某一頻道是否被佔用,請按下 鍵7次進入監聽模
式。如聽到靜電噪音,表示該頻道暢通無阻,可供使用。
9 10

檢查頻道
按下 鍵7次進入監聽模式,可檢查頻道的狀況。
設定頻道
頻道指的是本對講機用以傳送講話的頻率,本機共有 20 個頻道
供選用。
在對講機開啓的情况下,短暫地按 鍵1次,現有的
頻道號碼便會閃動。
按或鍵,選擇頻道。
按PTT 鍵,儲存所選頻道。
掃瞄頻道
使用掃瞄功能來監測頻道和傳送密碼,又或藉以搜尋某個不小
心改變了頻道的組員。
如欲開始掃瞄,短暫地按 鍵5次,然後放開
按、再按 PTT 鍵啓動掃瞄頻道功能。
若你在進行頻道掃瞄時把對講機的『消除干擾密碼』設定
為0 ,對講機便不會理會頻道使用甚麼密碼,逐個頻道掃
瞄有否電波活動。
若對講機的『消除干擾密碼』被設定為 ,它便只會掃瞄
使用密碼為 的頻道,而不會理會使用密碼為 的頻
道。
當對講機使用中, 會顯示於屏幕, 對講機則於頻道中搜
尋。
當對講機探測到頻道活動時,它便會停止掃瞄,這時你便
可收聽講話。
如要回應對方的講話,請在 5秒內按 PTT 鍵。
若該頻道於 5秒內沒有啟動, 對講機會繼續掃瞄。
要停止掃瞄頻道, 重新 鍵5 次,再按 鍵
關閉。
進一步掃瞄
若對講機停在一個你不要收聽的頻道上,請短暫地按壓 或
鍵,然後鬆開,這樣,對講機便會繼續掃瞄下一個活躍的
頻道。
Channel Frequency (MHz) Channel Frequency (MHz) Power -
Watts
1 409.7500 11 409.8750 0.5
2 409.7625 12 409.8875 0.5
3 409.7750 13 409.9000 0.5
4 409.7875 14 409.9125 0.5
5 409.8000 15 409.9250 0.5
6 409.8125 16 409.9375 0.5
7 409.8250 17 409.9500 0.5
8 409.8375 18 409.9625 0.5
9 409.8500 19 409.9750 0.5
10 409.8625 20 409.9875 0.5
1211

從頻道檢測清單中刪除頻道 (消除干擾功能)
若要把某個頻道刪除,好使對講機在檢測時不會停在該頻道
上,請把 或鍵按下最少 3秒,然後放開。這樣,便
可把這個頻道從頻道檢測清單中暫時刪除;若要將之還原,只
需把對講機關掉,然後再重新開啓。
註:在開始檢測頻道時,對講機原先設定的頻道 (即『原頻道』)
是不能刪除的。
特別功能
消除干擾密碼
通過選擇『消除干擾密碼』,有助減低干擾。
把鍵按 2次,直至顯示屏右上角的「消除干擾密碼」
開始閃動為止;
按或鍵以選取該個密碼;
按PTT 鍵儲存所選密碼。
通過這個程序,你可以為每一個頻道設定不同的密碼。
要設定頻道和密碼的組合, 按鍵1次, 然後按
或鍵去選擇頻道。
要設定密碼,再按 鍵1次, 然後按 或去
選擇密碼。
按PTT 離開目錄,並儲存頻道和密碼。
要設定其他頻道和密碼組合, 重覆以上步驟。
按鍵講話計時器
為了預防意外傳送和減省電池的消耗,若持續按下 PTT 鍵60
秒或以上,本對講機便會發出連續不斷的警號聲並停止傳送。
將鍵盤上鎖
為免不小心改動了對講機的設定,請按 鍵6次,按
鍵,再按 PTT 啟動鍵盤鎖。此時 圖標在顯示屏中出現。
鍵盤鎖上後, 、、,以及檢測功能會被鎖
上, 但對講功能則不受影響。
如要令鍵盤解封,只需把 鍵按下 3秒直至上鎖圖標 不
再在顯示屏中出現為止。
傳呼訊號的設定和傳送
你可用這部對講機向同組組員發出不同的傳呼訊號,按
鍵1 次,便可向同組組員發出傳呼訊號提示他們你準備講話。
此對講機有 5種傳呼訊號(按型號而定)選擇。當傳呼訊號設定
“0”時,將停止使用此功能。
如要設定傳呼訊號,請:
在對講機開啓的情况下,按 鍵3次直至字母 ‘C’ 在
顯示屏中出現。
已設定的傳呼訊號開始閃動。
13 14

按或鍵,以改變或接收傳呼訊號 (1-5)。
按PTT 鍵,以儲存新的傳呼訊號。
應答鳴聲 (確認講話訊號)
此功能一旦啓動,當講話傳送完畢時,對講機便會傳送獨特的
鳴聲,就如說‘Roger’ 或‘Over’ 一樣,讓對方知道你已完成講
話。
-如要啓動或關上應答鳴聲功能,請按住 鍵並同時開啟
對講機。
-當應答鳴聲啓動時,圖標會在顯示屏中出現。
-當你把 PTT 鍵鬆開時,便會聽到應答響號。
話音啓動/ 聲控 (VOX)配件 (額外選購)
VOX 功能讓你能在連上額外的 VOX 配件時可以免提講話。
注意: 當使用 VOX 配件時, 請先關上對講機, 然後再把配件
配戴於耳上。
使用聲控 (VOX) 功能
1. 把對講機關上;
2. 把VOX 配件的插頭牢牢地插進對講機的插孔內;
3. 開啓對講機,這時,圖像 “VOX” 會在顯示屏中出現, 表
示聲控功能已經啟動;
4. 如要傳送,請對準附加的 MIC 講話。如要接收對方講話,
請停止講話。
5. 如要把 VOX 功能關上,請按 PTT 鍵,或 把 VOX 配件除下。
設定敏感度
調校對講機的敏感度有助減低噪音觸發意外傳送的機會,有助
對講機接收話音。若配件已插到對講機, 你便可調較 VOX 的
敏感度。若沒有配件插入, 你可調較麥克風的敏感度。
按鍵4次直至 “VOX” 在顯示屏中出現為止。
按或以選擇 1-3 的敏感度。
1. 低敏感度(適用於嘈吵的環境)
2. 中敏感度(適用於大多數環境)
3. 高敏感度(適用於寧靜的環境)
注意:當你調校 VOX 的敏感度時,字母 “E” 會在顯示屏中出
現。
註:當連上VOX 配件時,對講機便會以你最後設定的敏感度為
準。
電量計
電池圖像顯示當前的電量,由 (滿) 至(空)。
當閣下發對講機只可以接收不能傳送、或每次鬆開 “PTT”後對
講機發“嘟嘟” 兩聲。表示電池快將用罄。
註:如打算將對講機收藏起來一段較長的時間,請先把電池卸
下,因為電池經過一段時間後會出現腐蝕現像,甚至會對對講
機造成永久的損壞。
1615

使用耳機配件 (額外選購)
1. 先把對講機關掉,然後,將配件的插頭插進對講機的插孔
裡;
2. 將對講機開啓,在把配件戴在頭上或放進耳朶裡之前,先
把音量調低;
3. 按下 或鍵,把音量調校至合適的水平。
4. 如要傳送,請按配件上的 PTT 按鈕,並對準附加的 MIC
講話。
5. 如要接收對方講話,便把PTT 按鈕放開。
保用証
Warranty Card
閣下購入之“奧美達"產品將於購買日起享有一年免費維修保用(如
需維修,請自攜到本公司維修中心),唯外殼不在保用範圍之內。此
維修保用不適用於產品曾因意外、人為損毀及不適當使用等情況。維
修後換出之零件仍屬“奧美達"所擁有。顧客請妥存此保用証及發票
正本,當需此項服務時出示給本公司維修部。此保用証一經塗改可引
至此証失效。此保用証只適用於香港區域。
This AMYTEL product except housings is covered by 1 year guarantee as
from the date of purchase. This guarantee becomes invalid if the product
is damaged by accident, abuse or improper operation. All parts replaced
after repair remain the property of AMYTEL. Please present this warranty
card, the official purchase invoice, together with this product to AMYTEL
Service Centre whenever service is required.
This Warranty Card is only applicable in Hong Kong. Any unauthorized
alteration may void this warranty card.
型號 編 號
Model AW340 Serial number______________
注意: 此保用証須連同購貨發票正本或禮品換領證明書,方可生效。
REMARKS: This warranty card is valid only when presented together
with original invoice or redemption program certificate.
奧美達(亞洲)有限公司
香港黃竹坑道 37 號利達中心 21-22 樓
21-22/F., Leader Centre, 37 Wong Chuk Hang Rd.,H.K.
網址:http://www.amytel.net 電郵:[email protected]
TEL : 2870 2058
17
Table of contents
Languages:
Other Amytel Two-way Radio manuals