Non-Reinforced Joining Guide (Vertical)
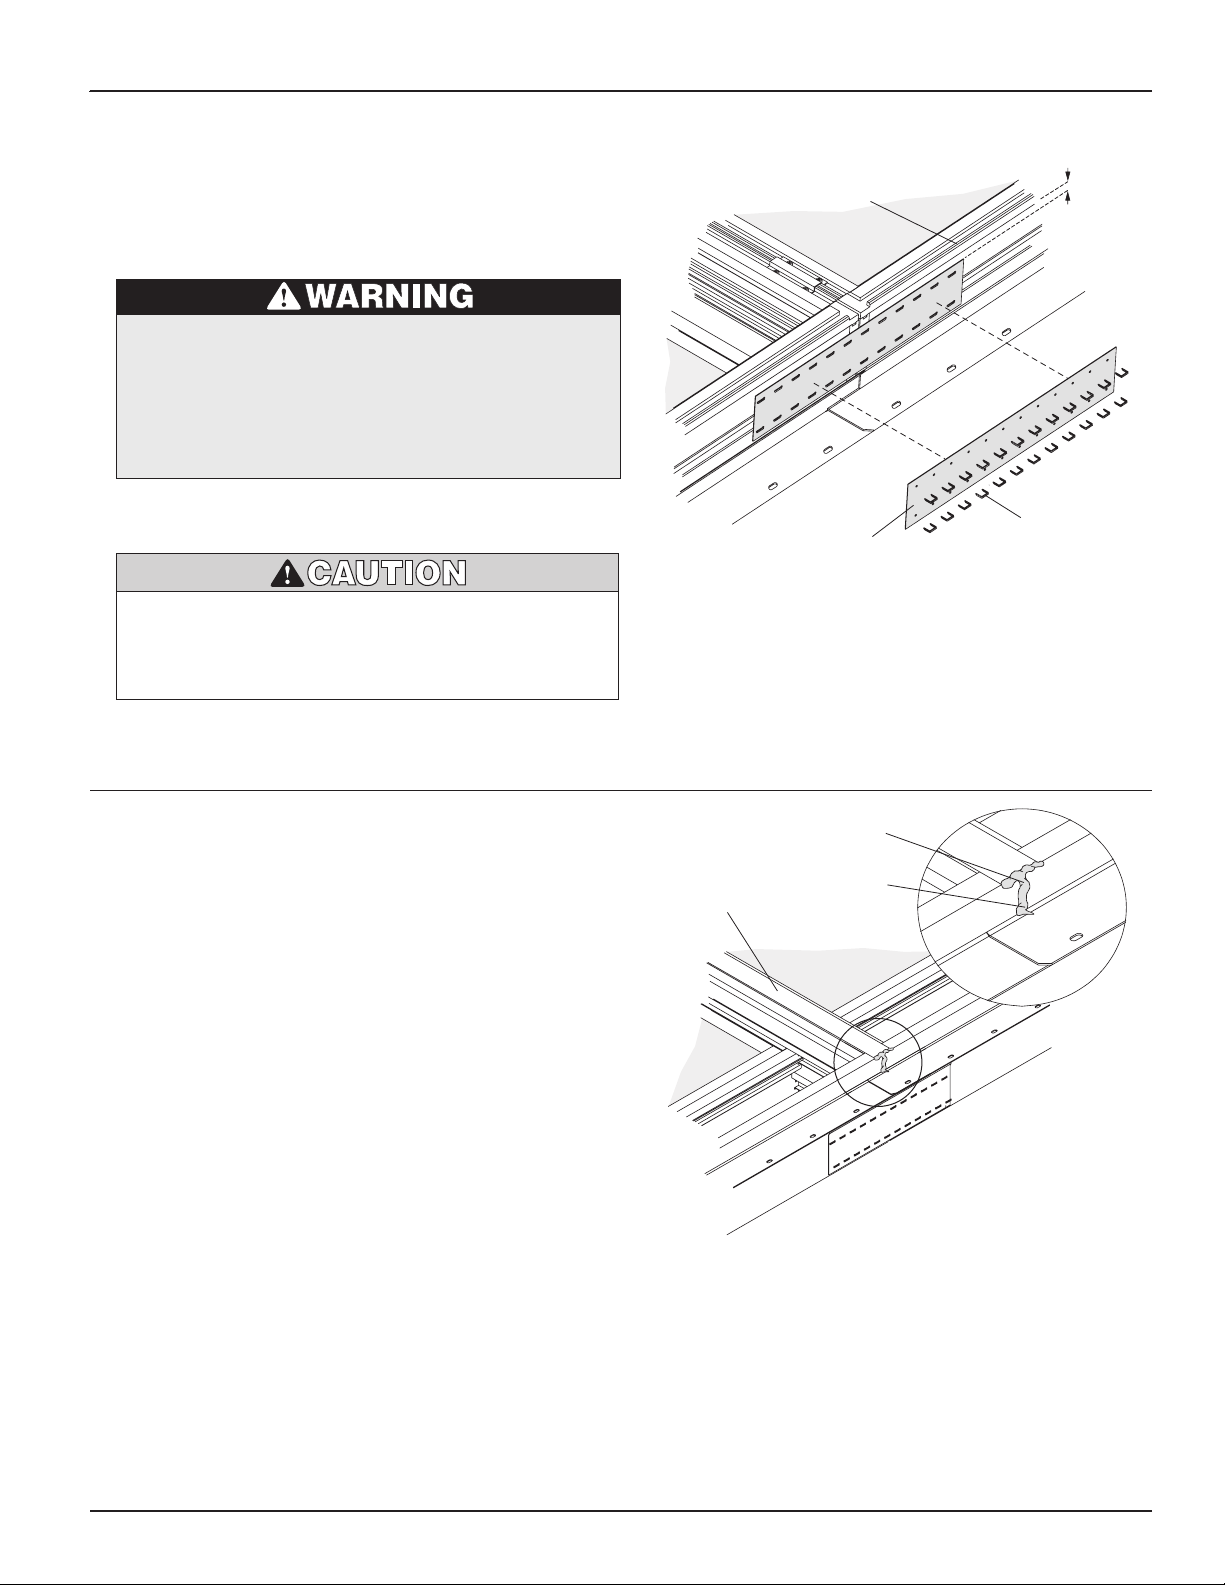
Windows and doors can be heavy.
Use safe lifting techniques and a
reasonable number of people with
enough strength to lift, carry and
install window and door products
to avoid injury and/or product
damage.
Use caution when working at elevated
heights and around unit openings. Follow
manufacturer’s instructions for safe use of
ladder and/or scaffolding. Failure to do so
may result in injury or death.
Follow manufacturer’s
instructions for safe operation
of hand/power tools. Always
wear safety glasses. Failure to
do so may result in injury and/
or product damage.
Every assembly and installation is different (windloads, structural support, etc.). Andersen strongly recommends
consultation with an Andersen supplier or an experienced contractor, architect, or structural engineer prior to the
assembly and installation of any Andersen product. For installation methods not covered in this guide, (i.e. through
jamb) please visit the Architect Detail File on the web (www.andersenwindows.com). Andersen has no responsibility in
regard to the post-manufactured assembly and installation of Andersen products.
Congratulations! You have just purchased one of the many fine Andersen®products. Proper assembly, installation and
maintenance are essential if the benefits of your Andersen product are to be fully attained. Therefore, please read and
follow this instruction guide completely. If your abilities do not match this procedure’s requirements, contact an
experienced contractor. You may direct any questions about this or other products to your local Andersen dealer, found
in the Yellow Pages under “Windows” or call Andersen WindowCare®service center at 1-888-888-7020 Monday through
Friday, 7 a.m. to 7 p.m. Central Time and Saturday, 8 a.m. to 4 p.m. Central Time. Thank you for choosing Andersen.
• Andersen®Installation Flanges DO NOT take the place of standard window and door flashing. Unit must be properly
flashed and sealed with sealant, and full width drip cap for protection against water and air infiltration. Use
non-reflective flashings. Highly reflective flashing tapes can raise the surface temperature of the vinyl to the point
where vinyl deformation and product damage may occur.
• Donotapplyanytypeoflmtoglass.Thermalstressconditionsresultinginglassdamagecouldoccur.
• Useofmovableinsulatingmaterialssuchaswindowcoverings,shutters,andothershadingdevicesmaydamage
glass and/or vinyl. In addition, excessive condensation may result causing deterioration of windows and doors.
Unless specifically ordered, Andersen windows and doors are not equipped with safety glass, and if broken, could
fragment causing injury. Many laws and building codes require safety glass in locations adjacent to or near doors.
Andersen windows are available with safety glass that may reduce the likelihood of injury when broken. Information
on safety glass is available from your local Andersen dealer.
“Andersen” and all other marks where denoted are trademarks of Andersen Corporation. ©2003-2007 Andersen Corporation. All rights reserved.
Non-Reinforced Joining Guide (Vertical)
for Andersen®400 Series Tilt-Wash Double-Hung, Picture,
and Transom Windows
0004372 BB Revised 12/13/07
1