ANJANK AC-199 User manual
AC-199 User Manual
1 Year Warranty
If a faulty product is found when setting up please
Email us at customer01@kerchanstar.com

TIPS:
Battery backup is for saving TIME and ALARM settings
only. It cannot be used to charge your device. Please
keep plugged in!
Please read all the instructions carefully and keep this in
a safe place for future reference.
1
Power Specifications
DC 5V 3A / 9V 2A /

Features
• Wireless Charging (Phone/Watch/Headphone)
• 9 Minutes Snooze
• 1-3 Levels Adjustable Volume
• 6 Levels of the Display Dimmer
• 12/24H Mode
• Battery Backup (Only Memory Function)
• LED indicator light
Package Include
• 1 * 4 in 1 Wireless Charging Station
• 1 * 1.5m USB-C Charging Cord
• 1 * Adapter
• 1 * User manual
• 1 * CR2025 Battery
2

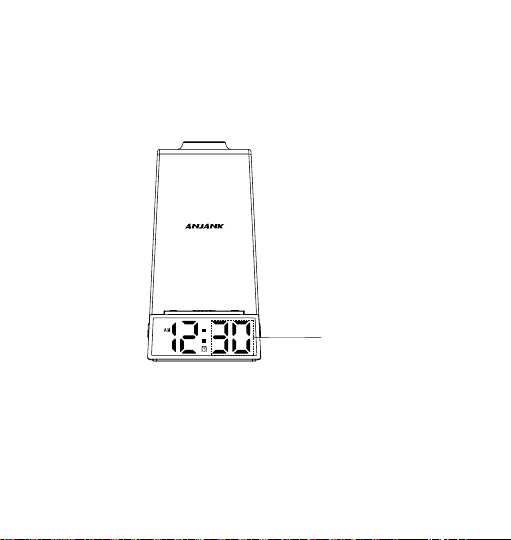
Front View
3
Wireless Charging
Pad for Watch
Snooze
Wireless Charging
Pad for Phone
Time
Up
Down
Alarm
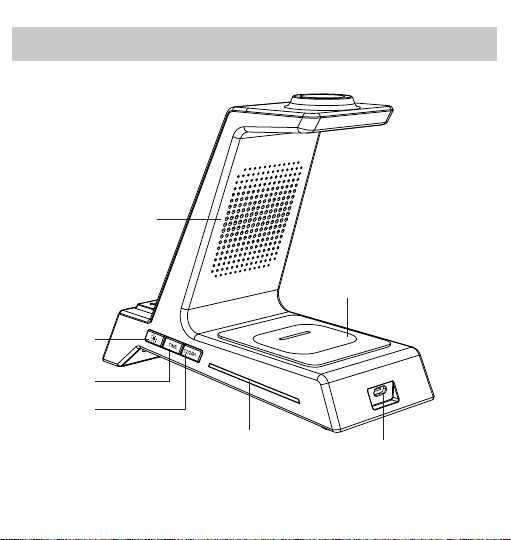
Back View
4
Heat Dissipation
Hole
Wireless Charging
for Headphone
USB-C Port
Dimmer
Time Set
12/24H
Indicator Light
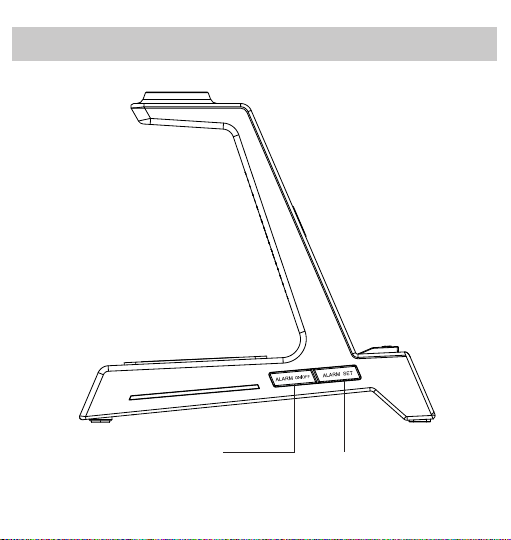
Left View
5
Alarm Set
Alarm On/Off

Getting Started
Bottom View
6
1. Plug the adaptor into a standard household outlet, you
will see 12:00 on the display and the clock is ready to
be set.
2. Please remove the battery tab before use.
4-in-1 Wireless Charging Station
Heat Dissipation Hole
Battery Compartment
(Battery is built in already)

Notice:
Switch Time Format (12/24H)
Press 12/24H button to switch between 12 and 24 hour
mode.
Notice:
In 12 hour mode, “ AM ” will appear in the morning
and“PM” will appear in the afternoon.
7
1. If the display is “ blank ” after plugging in, please press
repeatedly the “ ” button to check whether the
display dimmer is at bright position.
2. Under the battery power, the display will go blank and
preset alarm will not go off.
3. Once the battery is removed and with an interruption of
power, the time and alarm need to be reset when the
power comes back.
8
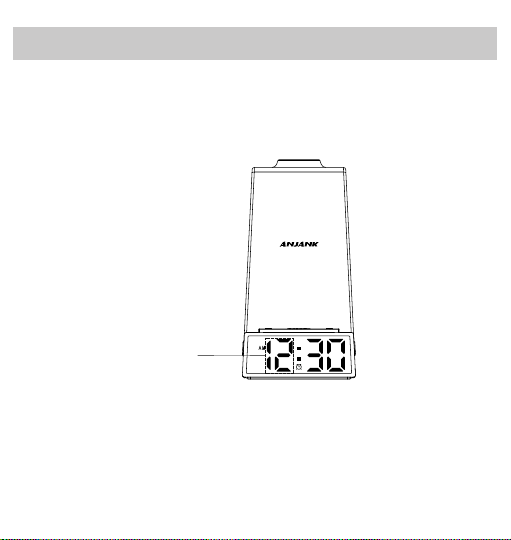
Time Setting
1. Press the “ TIME ” button to enter HOUR setting. The
HOUR digits will flash on the display. Press “+” or “-”
button to advance to the correct hour.
Blink

9
2. Press the“ TIME ” button to confirm and enter MINUTE
setting. When the MINUTE digits flash,press “+” or “-”
button to advance to the correct minute.
3. Press the “ TIME ” button to confirm and exit the time
setting mode.
Blink

Alarm And Alarm Volume Setting
10
1. Press the “ ALARM SET ” button to enter ALARM
HOUR setting. The HOUR digits will flash on the
display. Press “+” or “-” button to advance to the
desired hour.
Blink
11
2. Press the “ ALARM SET ” button to enter ALARM
MINUTE setting. The MINUTE digits will flash on the
display. Press “+” or “-” button to advance to the
desired minute.
Blink

12
4. Press the “ ALARM SET ” button to confirm and exit
the alarm setting mode.
3. Press the “ ALARM SET ” button once again to enter
the ALARM VOLUME setting. A number will be shown
on the display and sounds will be played accordingly to
indicate the volume level ( U1 is LOW, U2 is MEDIUM,
U3 is HIGH). Press the “ + ” or “ - ” button to select the
volume level.
Volume
13
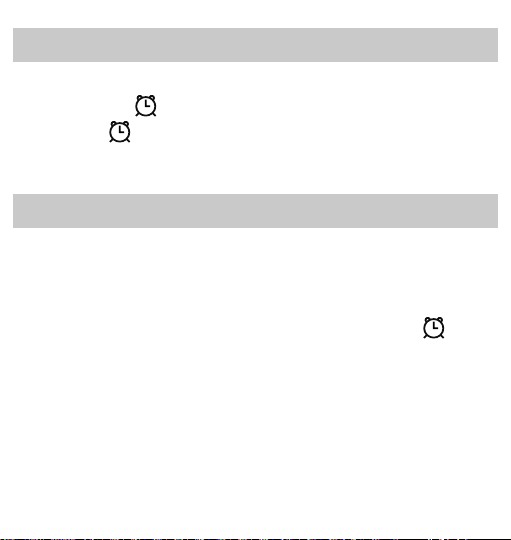
Alarm On/Off
Press the “ ALARM ON/OFF ” button to turn on or off
alarm. If the “ ” icon displays, it means the alarm is
on. If the “ ” icon doesn't display, it means the alarm
is off.
Alarm Pause & Snooze
1. Press any button on the both sides to stop the alarm
when it’s ringing. Alarm will go off on the next day.
Notice:
You can also remove your phone to snooze when the
alarm is ringing.
2. Press the “ SNOOZE ” button to snooze, the “ ”
icon will flash on the display. The alarm will go off
again 9 minutes later.
When the alarm goes off, you have two options:
Wireless Charging Function
Place your device in the correct position, the indicator
light on both sides will light up for 5 seconds and then
turn off.
14
Brightness Control
Press repeatedly the “ ” button to choose the display
brightness of the alarm clock. (It can be adjusted to 1-6
levels)
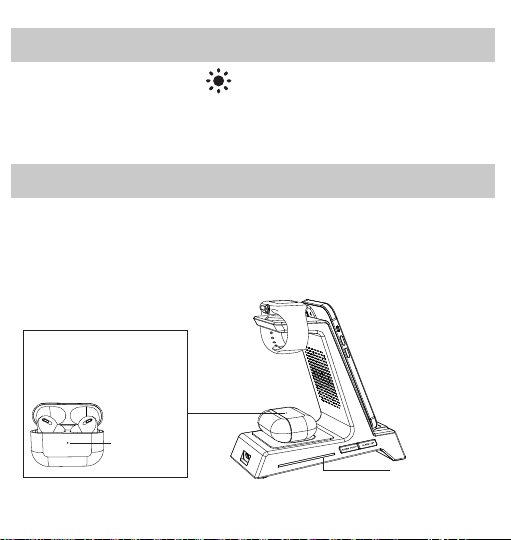
Indicator Light
Headphone’s indicator
light is facing upwards
when charging
Headphone’s
lindicator Light

Wireless Charging Compatible Models
1. Compatible phones : iPhone 13/13 Mini/13 Pro/13 Pro
Max/12/12 Mini/12 Pro/12 Pro Max/11/11 Pro/11 Pro
Max/XS/Max/XS/ XR/ X/8/ 8 Plus, Samsung Galaxy
Note 9/Note8 /S8/ S8 Plus/ S7/ S7 Edge/ S6 Edge
Plus/ S9/S10/ S10 Plus/S10E, LG V30,Nexus 7/6/5,
and other enabled wireless charging phones.
2. Compatible watches : iWatch 7/6/5/SE/4/3/2.
3. Compatible headphone : AirPods 3/2/pro.
15
Notice:
1. The indicator light on both sides will alert you by
flashing if there is a foreign object on the wireless
charging pad.
2. Please remove any protective cases containing
magnets, metal, or materials thicker than 0.19'(5mm).
3. Please make sure that your headphone's indicator light
is facing upwards when charging.

Support
The 4-in-1 wireless charging station comes with one year
warranty. If you have any issue with this wireless charger
station, please contact us at customer01@kerchan-
star.com. We will address your issue within 24 hours.
Battery Backup
Install 1* CR2025 battery into Battery Compartment.
(Battery is built in already)
16
Notice:
1. Battery backup is for saving TIME and ALARM settings
only. It cannot be used to charge your device.
2. Under the battery power, the display will go blank and
preset alarm will not go off.

17
FCC Compliance Statement:
This device complies with Part 15 of the FCC Rules. Operation is subject
to the following twoconditions:
(1) this device may not cause harmful interference, and
(2) this device must accept any
interference received, including interference that may cause undesired operation.
Changes or modifications not expressly approved by the party responsible for compliance could
void the user's authority to operate the equipment.
NOTE: This equipment has been tested and found to comply with the limits for a Class B digital
device, pursuant to Part 15 of the FCC Rules. These limits are designed to provide reasonable
protection against harmful interference in a residential installation. This equipment generates, uses
instructions, may cause harmful interference to radio communications. However, there is no
guarantee that interference will not occur in a particular installation. If this equipment does cause
harmful interference to radio or television reception, which can be determined by turning the
equipment off and on, the user is encouraged to try to correct the interference by one or more of
the following measures:
-- Reorient or relocate the receiving antenna.
-- Increase the separation between the equipment and receiver.
-- Connect the equipment into an outlet on a circuit different from that to which the receiver is
connected.
-- Consult the dealer or an experienced radio/TV technician for help.

18
FCC Radiation Exposure Statement
This equipment must be installed and operated in accordance with provided instructions
and the antenna(s) used for this transmitter must be installed to provide a separation
distance of at least 20 cm from all persons and must not be co-located or operating in
conjunction with any other antenna or transmitter. End-users and installers must be
provide with antenna installation instructions and transmitter operating conditions
for satisfying RF exposure com
Table of contents


