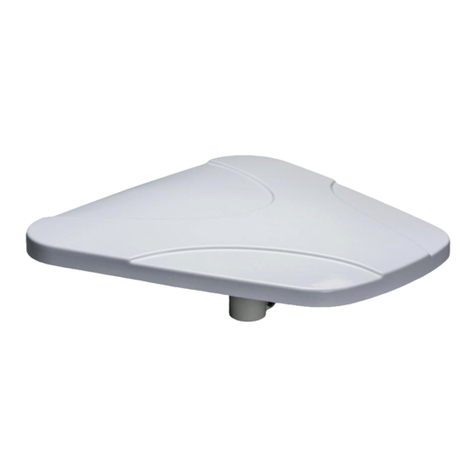
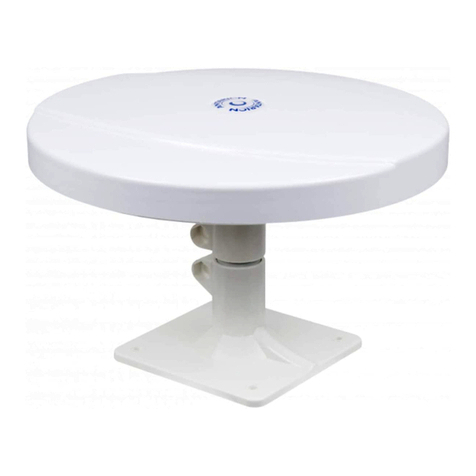
ANTARION AT0100 User manual

N
OTICE D
’
INSTALLATION
/
D
’
UTILISATION
Page 1 / 5
01/2015
Antares Diffusion SAS
Ce document est la propriété d’Antares Diffusion et ne peut être ni reproduit ni communiqué à des tiers sans son autorisation écrite préalable.
MANUEL D’INSTALLATION ET D’UTILISATION DU MAT ANTARION
Chers clients,
Nous vous félicitons de votre achat et nous vous en remercions.
Les produits Antarion, réalisés avec les plus grands soins et utilisant le meilleur des technologies
innovantes vous donneront une entière satisfaction, des années durant.
L’équipe d’Antarès Diffusion
Distributeur exclusif de sa marque déposée « Antarion ».

N
OTICE D
’
INSTALLATION
/
D
’
UTILISATION
Page 2 / 5
01/2015
Antares Diffusion SAS
Ce document est la propriété d’Antares Diffusion et ne peut être ni reproduit ni communiqué à des tiers sans son autorisation écrite préalable.
INSTALLATION
Avertissements :
Antares Diffusion décline tout responsabilité de quelque nature que ce soit, en particulier pour tout accident
ou incident, dus à la non-observation des instructions données, tant au niveau du montage que de
l’utilisation.
Antares Diffusion conseille fortement de s’adresser à un professionnel qualifié pour effectuer le
montage.
Le mât Antarion peut être installé dans la penderie ou dans le cabinet de toilette.
Installez l’antenne assez éloigné des bords du toit, afin qu’elle ne soit pas en saillie lorsque le véhicule
roule. Lors de l’installation de l’antenne, veillez à ce que le toit et la paroi soient suffisamment résistants.
Dans le cas contraire, veuillez les renforcer.
1
Positionnez le gabarit de perçage (A) et percer –veuillez respecter IMPERATIVEMENT les 42 mm
entre le centre du perçage et la paroi-, à l’aide d’une fraise de diamètre 40 mm, tout d’abord la paroi côté
intérieur (B), puis dans un second temps, la paroi extérieure (C).
A
B
C
(Nb : si vous ne disposez ni de gabarit ni de fraise, positionnez le guide tube et dessiner le contour à l’aide
d’un pointeau (D). Effectuez une série de trous afin d’obtenir la découpe dans le toit (E). Et achevez ce
travail à l’aide d’un lime (F) jusqu’à obtenir un trou de diamètre 40 mm.)

N
OTICE D
’
INSTALLATION
/
D
’
UTILISATION
Page 3 / 5
01/2015
Antares Diffusion SAS
Ce document est la propriété d’Antares Diffusion et ne peut être ni reproduit ni communiqué à des tiers sans son autorisation écrite préalable.
D
E
F
Etalez du
silicone et
introduisez le
guide tube.
Percez selon
les trous avec
un foret de
3mm de diam.
Puis bloquez à
l’aide de vis
auto-foreuses
(non fournis)
Mettez la
rondelle et
bloquez le guide
tube à l’aide de
la bague fournie
Positionnez le joint
en caoutchouc
Veuillez enfoncer
suffisamment le
joint afin que
l’embase du guide
tube soit totalement
recouverte
Veuillez mettre un
lubrifiant à
l’intérieur de la
garniture au
niveau du joint
Percez la partie
centrale du
bouchon supérieur
(prédécoupée)

N
OTICE D
’
INSTALLATION
/
D
’
UTILISATION
Page 4 / 5
01/2015
Antares Diffusion SAS
Ce document est la propriété d’Antares Diffusion et ne peut être ni reproduit ni communiqué à des tiers sans son autorisation écrite préalable.
Introduisez le
bouchon dans la
partie supérieure
du mât
Faites pénétrer le
mât dans le tube
doucement
Cf ci-dessous Cf ci-dessous Cf ci-dessous
Positionnez le mât de l’antenne en appui sur l’arrière du bloc de fixation. Le haut du bloc de fixation ne
doit pas être situé à plus de 20 cm du plafond du véhicule (voir schéma ci-dessous).
Vissez, à l’aide d’une visseuse, les 2 vis sur les 2 avant trous épaulés (épaulement – Cf schéma ci-dessous
-) situés sur la gauche du bloc de fixation.

N
OTICE D
’
INSTALLATION
/
D
’
UTILISATION
Page 5 / 5
01/2015
Antares Diffusion SAS
Ce document est la propriété d’Antares Diffusion et ne peut être ni reproduit ni communiqué à des tiers sans son autorisation écrite préalable.
Montez la partie supérieure du bloc de fixation en utilisant la molette (sans serrer à fond).
Puis vissez, à l’aide d’une visseuse, les 2 vis situées sur la droite du bloc de fixation.
Réglage de l’antenne :
1
Une fois l’antenne installée sur le mât, veuillez régler cette dernière en regardant la télé. Dès que l’image
est optimale, veuillez visser la mollette
2
Il est important et nécessaire de baisser l’antenne au maximum lorsque le véhicule roule et bien serrer la
mollette afin que l’antenne ne se puisse pas bouger lors de vos déplacements.
RECYCLAGE : Ne pas jeter cet appareil en fin de vie avec les autres
déchets municipaux, mais dans un centre de recyclage afin de garantir une
meilleure élimination de ceux-ci.

I
NSTALLATION
/
OPERATING INSTRUCTIONS
Page 1 / 5
01/2015
Antares Diffusion SAS
This document is the property of Antares Diffusion and may not be reproduced or communicated to third parties without its prior written authorization.
INSTALLATION AND USER MANUAL FOR THE ANTARION MAST
Dear customers,
We congratulate you on your purchase and thank you for it.
Antarion products, manufactured with the greatest care and using the best innovative technologies, will
give you complete satisfaction for years to come.
The Antarès Diffusion team
Exclusive distributor of its registered trademark "Antarion".

I
NSTALLATION
/
OPERATING INSTRUCTIONS
Page 2 / 5
01/2015
Antares Diffusion SAS
This document is the property of Antares Diffusion and may not be reproduced or communicated to third parties without its prior written authorization.
INSTALLATION
Warnings :
Antares Diffusion declines all responsibility of any kind whatsoever, in particular for any accident or
incident, due to non-observance of the instructions given, both in terms of assembly and use.
Antares Diffusion strongly recommends that you contact a qualified professional to carry out the
assembly.
The Antarion mast can be installed in the closet or in the toilet.
Install the antenna far enough from the edges of the roof so that it does not protrude when the vehicle is in
motion. When installing the antenna, make sure that the roof and wall are strong enough. If not, please
strengthen them.
1
Position the drilling template (A) and drill -make sure to observe the 42 mm between the centre of the
hole and the wall - with a 40 mm diameter cutter, first the inner side wall (B) and then the outer wall (C).
A
B
C
(Note: If you do not have a template or milling cutter, position the tube guide and draw the contour using a
needle (D). Make a series of holes to obtain the cut-out in the roof (E). And complete this work with a file
(F) until you get a 40mm diameter hole)

I
NSTALLATION
/
OPERATING INSTRUCTIONS
Page 3 / 5
01/2015
Antares Diffusion SAS
This document is the property of Antares Diffusion and may not be reproduced or communicated to third parties without its prior written authorization.
D
E
F
Spread silicone
and insert the
tube guide.
Drill according
to the holes
with a 3mm
diameter drill
bit and then
secure with
self-drilling
screws (not
supplied)
Put the puck on
and secure the
tube guide with
the ring
provided.
Position the rubber
seal
Please push in the
gasket sufficiently
so that the base of
the tube guide is
completely
covered.
Please put a
lubricant inside
the seal at the seal
level
Drill the central
part of the upper
cap (pre-cut)

I
NSTALLATION
/
OPERATING INSTRUCTIONS
Page 4 / 5
01/2015
Antares Diffusion SAS
This document is the property of Antares Diffusion and may not be reproduced or communicated to third parties without its prior written authorization.
Insert the plug
into the upper part
of the mast
Gently push the
mast into the tube
See below See below See below
Position the antenna mast against the back of the mounting block. The top of the mounting block must not
be more than 20 cm from the vehicle ceiling (see diagram below).
Screw, using a screwdriver, the 2 screws on the 2 front stepped holes (shouldering - see diagram below -)
located on the left of the fixing block.

I
NSTALLATION
/
OPERATING INSTRUCTIONS
Page 5 / 5
01/2015
Antares Diffusion SAS
This document is the property of Antares Diffusion and may not be reproduced or communicated to third parties without its prior written authorization.
Mount the upper part of the mounting block using the knob (without tightening fully).
Then using a screwdriver screw in,the 2 screws located on the right of the fixing block.
Antenna adjustment:
1 Once
the antenna is installed on the mast, please adjust it by watching TV. As soon as the image is optimal,
please screw in the knob firmly.
2It is important and necessary to lower the antenna as much as possible when the vehicle is moving and
tighten the knob so that the antenna cannot move when you move.
RECYCLING: Do not dispose of this device at the end of its life with other
municipal waste, but in a recycling centre to ensure better disposal.

I
NSTALLATIONS
-
/
B
ETRIEBSANLEITUNG
Seite 1 / 5
01/2015
Antares Diffusion SAS
Dieses Dokument ist Eigentum von Antares Diffusion und darf ohne vorherige schriftliche Genehmigung nicht vervielfältigt oder an Dritte weitergegeben
werden.
INSTALLATIONS- UND BETRIEBSANLEITUNG FÜR DEN ANTARION-MAST
Sehr geehrte Kunden,
Wir gratulieren Ihnen zu Ihrem Kauf und danken Ihnen dafür.
Die Produkte von Antarion, die mit größter Sorgfalt und unter Verwendung der besten innovativen
Technologien hergestellt werden, werden Ihnen über Jahre hinweg höchste Zufriedenheit bereiten.
Das Antarès Diffusion Team
Exklusivvertrieb der eingetragenen Marke "Antarion".

I
NSTALLATIONS
-
/
B
ETRIEBSANLEITUNG
Seite 2 / 5
01/2015
Antares Diffusion SAS
Dieses Dokument ist Eigentum von Antares Diffusion und darf ohne vorherige schriftliche Genehmigung nicht vervielfältigt oder an Dritte weitergegeben
werden.
INSTALLATION
Warnungen :
Antares Diffusion lehnt jede Verantwortung jeglicher Art ab, insbesondere für Unfälle oder Vorfälle, die
auf die Nichteinhaltung der Anweisungen sowohl bei der Montage als auch bei der Verwendung
zurückzuführen sind.
Antares Diffusion empfiehlt dringend, dass Sie sich an einen qualifizierten Fachmann wenden, um
die Montage durchzuführen.
Der Antarion-Mast kann im Schrank oder in der Toilette installiert werden.
Installieren Sie die Antenne so weit von den Dachrändern entfernt, dass sie während der Fahrt nicht
vorsteht. Achten Sie bei der Installation der Antenne darauf, dass Dach und Wand ausreichend stabil sind.
Wenn nicht, verstärken Sie sie bitte.
1
Positionieren Sie die Bohrschablone (A) und bohren Sie - mit einem Fräser mit 40 mm Durchmesser -
die 42 mm zwischen Lochmitte und Wand, zuerst die innere Seitenwand (B) und dann die Außenwand
(C).
A
B
C
(Hinweis: Wenn Sie keine Schablone oder Fräser haben, positionieren Sie die Rohrführung und zeichnen
Sie die Kontur mit einer Nadel (D). Machen Sie eine Reihe von Löchern, um den Ausschnitt im Dach (E)
zu erhalten. Und schließen Sie diese Arbeit mit einer Feile (F) ab, bis Sie ein Loch mit einem
Durchmesser von 40 mm erhalten.)

I
NSTALLATIONS
-
/
B
ETRIEBSANLEITUNG
Seite 3 / 5
01/2015
Antares Diffusion SAS
Dieses Dokument ist Eigentum von Antares Diffusion und darf ohne vorherige schriftliche Genehmigung nicht vervielfältigt oder an Dritte weitergegeben
werden.
D
E
F
Verteilen Sie Silikon am
Rand und setzen Sie die
Schlauchführung ein.
Bohren Sie mit einem
Bohrer (Durchmesser
von 3 mm) die Löcher
und sichern Sie die
Schlauchführung dann
mit selbstbohrenden
Schrauben (nicht
mitgeliefert).
Setzen Sie die
Scheibe auf und
sichern Sie die
Rohrführung mit
dem
Ring.mitgelieferten
Positionieren Sie
die
Gummidichtung
Schieben Sie die
Dichtung so weit
ein, dass der
Boden der
Rohrführung
vollständig
abgedeckt ist
Geben Sie einen
Schmierstoff in
die Dichtung auf
der
Dichtungsebene
ein.
Durchbohren Sie
den mittleren Teil
der oberen Kappe
(vorgeschnitten).

I
NSTALLATIONS
-
/
B
ETRIEBSANLEITUNG
Seite 4 / 5
01/2015
Antares Diffusion SAS
Dieses Dokument ist Eigentum von Antares Diffusion und darf ohne vorherige schriftliche Genehmigung nicht vervielfältigt oder an Dritte weitergegeben
werden.
Stecken Sie den
Stecker in den
oberen Teil des
Mastes.
Schieben Sie den
Mast vorsichtig in
das Rohr.
Siehe unten Siehe unten Siehe unten
Positionieren Sie den Antennenmast an die Rückseite des Montageblocks. Die Oberseite des
Montageblocks darf nicht mehr als 20 cm von der Fahrzeugdecke entfernt sein (siehe Diagramm unten).
Schrauben Sie mit einem Schraubenzieher die beiden Schrauben an den beiden vorderen Stufenlöchern
(siehe Diagramm unten) links vom Befestigungsblock fest.

I
NSTALLATIONS
-
/
B
ETRIEBSANLEITUNG
Seite 5 / 5
01/2015
Antares Diffusion SAS
Dieses Dokument ist Eigentum von Antares Diffusion und darf ohne vorherige schriftliche Genehmigung nicht vervielfältigt oder an Dritte weitergegeben
werden.
Montieren Sie den oberen Teil des Montageblocks mit dem Drehknopf (ohne ihn vollständig anzuziehen).
Dann ziehen Sie die beiden Schrauben, die sich rechts neben dem Befestigungsblock befinden, mit einem
Schraubendreher fest.
Antenneneinstellung:
1 Sobald
die Antenne am Mast installiert ist, stellen Sie sie bitte durch Fernsehen ein. Sobald das Bild
optimal ist, ziehen Sie bitte den Drehknopf fest
2Es ist wichtig und notwendig, die Antenne während der Fahrt so weit wie möglich abzusenken und den
Drehknopf so festzuziehen, dass sich die Antenne beim Fahren nicht bewegen kann.
RECYCLING: Entsorgen Sie dieses Gerät am Ende seines Lebenszyklus
nicht über andere kommunale Abfälle, sondern in einem
Recyclingzentrum, um eine bessere Entsorgung zu gewährleisten.

INSTALLATION
/
ANVÄNDNING
INSTRUKTIONER
Page 1 / 5
01/2015
Antares Diffusion SAS
Ce document est la propriété d’Antares Diffusion et ne peut être ni reproduit ni communiqué à des tiers sans son autorisation écrite préalable.
MATERIALINSTALLATION OCH ANVÄNDNINGSHANDBOK ANTARION
Kära kunder,
Grattis till ditt köp och vi tackar dig.
Antarion-produkter, tillverkade med stor omsorg och använder den bästa av innovativa tekniker ger dig full
tillfredsställelse i flera år.
Teamet av Antares Diffusion
Exklusiv distributör av sitt varumärke "Antarion".

INSTALLATION
/
ANVÄNDNING
INSTRUKTIONER
Page 2 / 5
01/2015
Antares Diffusion SAS
Ce document est la propriété d’Antares Diffusion et ne peut être ni reproduit ni communiqué à des tiers sans son autorisation écrite préalable.
INSTALLATION
Varningar:
Antares Diffusion avslår allt ansvar av vilken som helst art, särskilt för olyckor eller händelser, på grund av
att instruktionerna inte följs, både vad gäller montering och användning.
Antares Diffusion rekommenderar att kontakta en kvalificerad professionell för att göra montering.
Antarion-masten kan installeras i garderoben eller i badrummet.
Installera antennen tillräckligt långt från takets kanter så att den inte sticker ut när fordonet rör sig. När du
installerar antennen, se till att taket och väggen är tillräckligt starka. Om inte, förstärk dem.
1
Placera borrmallen (A) och borra - se IMPERATIVT 42 mm mellan mitten av hålet och väggen - med
en 40 mm diameter skärare, först väggen på insidan (B ), sedan i ett andra steg, ytterväggen (C).
A
B
C
(Observera: Om du inte har en mall eller skärare, placera rörledaren och dra konturen med en nål (D).)
Gör en serie hål för att få utskärningen i taket (E Och slutför detta arbete med en fil (F) tills du får ett hål
med en diameter på 40 mm.)

INSTALLATION
/
ANVÄNDNING
INSTRUKTIONER
Page 3 / 5
01/2015
Antares Diffusion SAS
Ce document est la propriété d’Antares Diffusion et ne peut être ni reproduit ni communiqué à des tiers sans son autorisation écrite préalable.
D
E
F
Sprid silikon och
sätt i
rörledningen.
Borra enligt
hålen med en
borr med 3 mm
diameter. Lås
sedan med
självborrande
skruvar (ingår
inte)
Sätt i brickan
och lås
rörledningen
med den
medföljande
ringen
Placera
gummitätningen
Tryck tillräckligt på
tätningen så att
rörledarens botten
är helt täckt
Lägg ett
smörjmedel inuti
tätningen vid
tätningen
Borra den centrala
delen av den övre
kontakten
(förskuren)

INSTALLATION
/
ANVÄNDNING
INSTRUKTIONER
Page 4 / 5
01/2015
Antares Diffusion SAS
Ce document est la propriété d’Antares Diffusion et ne peut être ni reproduit ni communiqué à des tiers sans son autorisation écrite préalable.
Sätt i kontakten i
mastens övre del
Tryck masten
försiktigt in i röret
Se nedan Se nedan Se nedan
Placera antennmasten på baksidan av monteringsblocket. Den övre delen av monteringsblocket får inte
ligga mer än 20 cm från fordonets tak (se diagram nedan).
Dra åt de två skruvarna på de två främre axelhålen med en skruvmejsel (axel - se diagram nedan) som
finns till vänster om fixeringsblocket.

INSTALLATION
/
ANVÄNDNING
INSTRUKTIONER
Page 5 / 5
01/2015
Antares Diffusion SAS
Ce document est la propriété d’Antares Diffusion et ne peut être ni reproduit ni communiqué à des tiers sans son autorisation écrite préalable.
Montez la partie supérieure du bloc de fixation en utilisant la molette (sans serrer à fond).
Puis vissez, à l’aide d’une visseuse, les 2 vis situées sur la droite du bloc de fixation.
Antenninställning:
1
När antennen är installerad på masten, justera den när du tittar på TV. Så snart bilden är optimal ska du
skruva fast ratten
2
Det är viktigt och nödvändigt att sänka antennen så mycket som möjligt när fordonet rör sig och dra åt
hjulet så att antennen inte kan röra sig när du reser.
ÅTERVINNING: Kassera inte denna apparat i slutet av dess livslängd med
annat kommunalt avfall, utan på ett återvinningscenter för att säkerställa
bättre bortskaffande av dessa.
Table of contents
Languages:
Other ANTARION Antenna manuals
Popular Antenna manuals by other brands

Maxview
Maxview Omnimax Installation & user's instructions

Johansson
Johansson 6550A instruction manual

Hy-Gain
Hy-Gain AV-18VS instruction manual

Hirschmann
Hirschmann MCA 4080 FLEX installation instructions

Ebyte
Ebyte TX4G-JZLW-15 user manual

ZyXEL Communications
ZyXEL Communications ZYAIR EXT-109 - MOUNTING Mounting guide

Mobiltech
Mobiltech MOBILSAT 2016 DISMOUNT MANUAL

Agilent Technologies
Agilent Technologies 8712ET/ES quick start guide

Channel Master
Channel Master Metro CM-4030HD user guide

ADC
ADC FlexWave URH Series installation instructions

Hy-Gain
Hy-Gain THUNDERBIRD TH6-DX instruction manual

Wigersma & Sikkema
Wigersma & Sikkema UNICOM 300 installation manual