Anthos A7 Plus User manual

A7 Plus
SMART TOUCH
EN
97050644
Rev.006
2017.03


33EN
A7 Plus
- OPERATING INSTRUCTION
TABLE OF CONTENTS
1. Safety guidelines ........................................................... 4
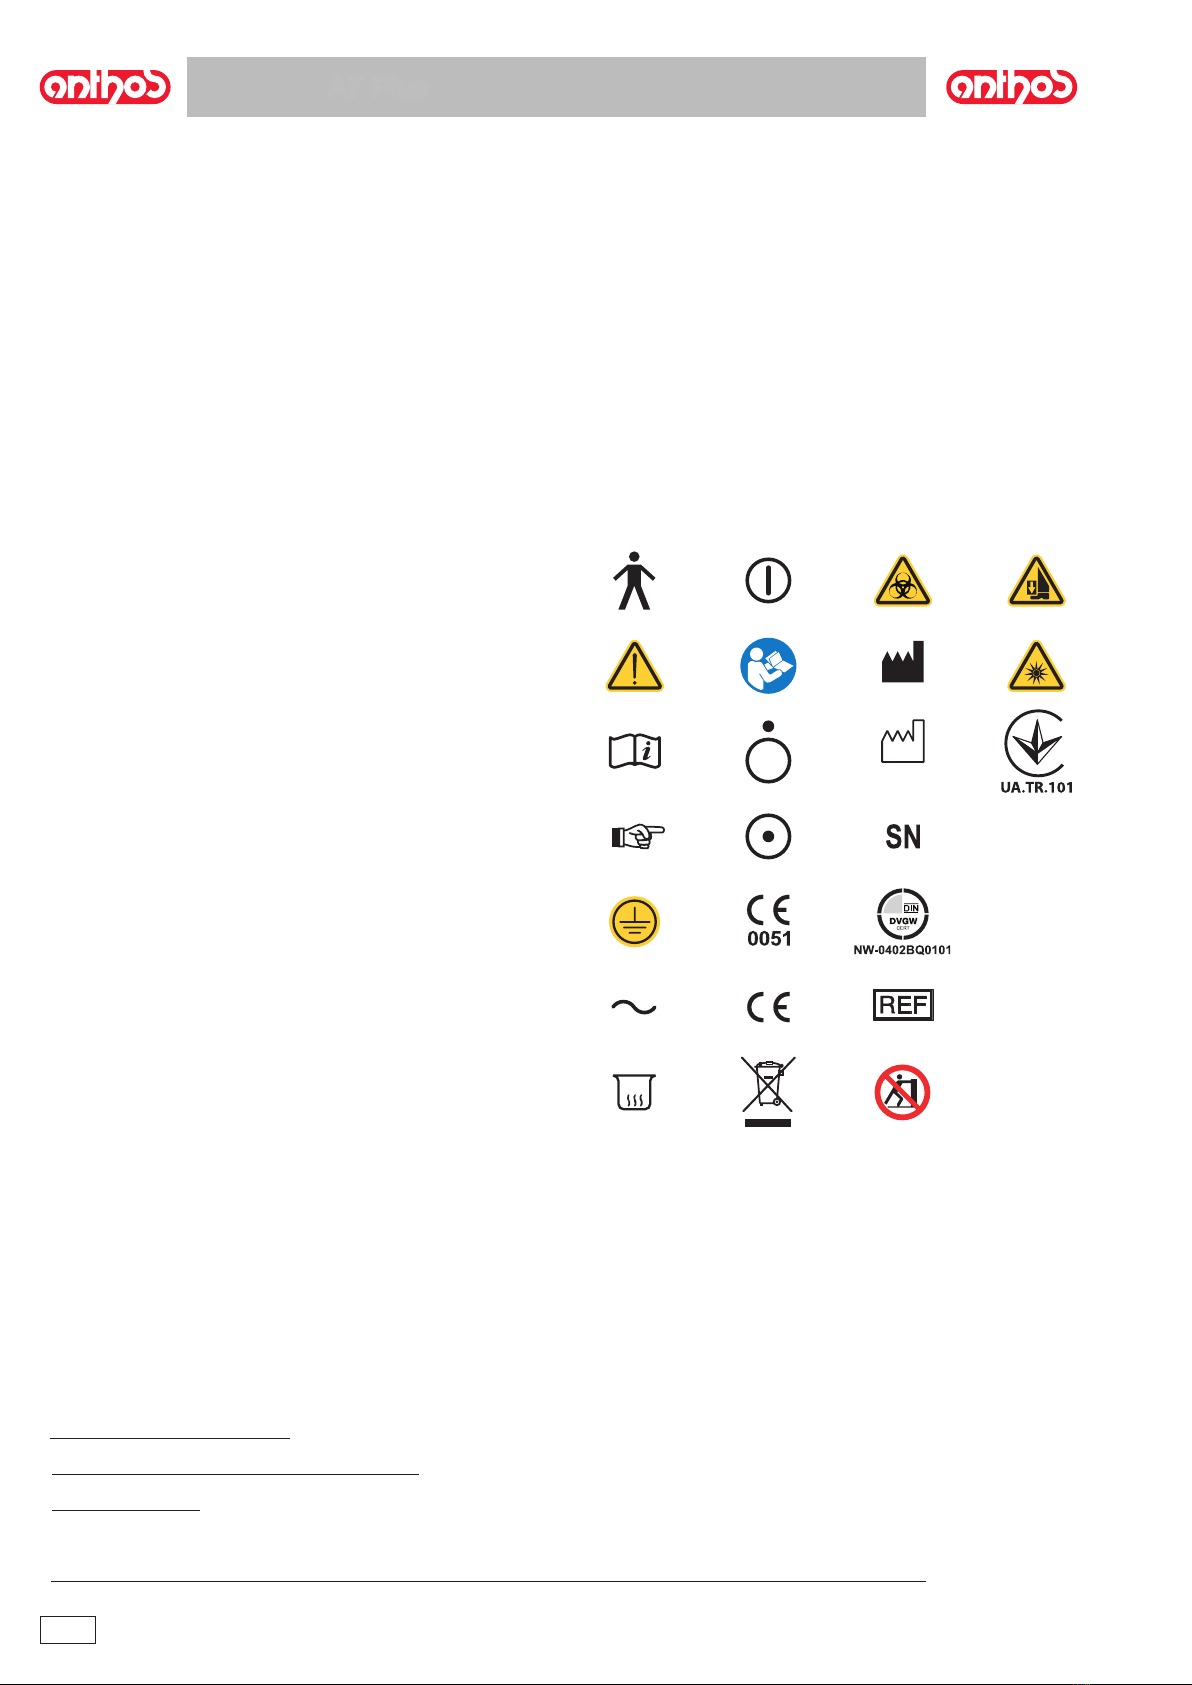
1.1. Symboldenition ............................................................. 4
1.2. Intendeduse.................................................................... 4
1.2.1. Classicationandreferencestandards ........................... 4
1.2.2. Environmentalconditions ................................................ 5
1.2.2.1. Transportandpackagingconditions................................ 5
1.2.3. Warranty .......................................................................... 5
1.2.4. Disposingtheequipmentwhennolongerused............... 5
1.3. Safetyrules...................................................................... 6
1.4. Cleaninganddisinfecting ................................................ 7
2. Description of the equipment....................................... 8
2.1. Nameplate ....................................................................... 8
2.2. Dentalunits...................................................................... 8
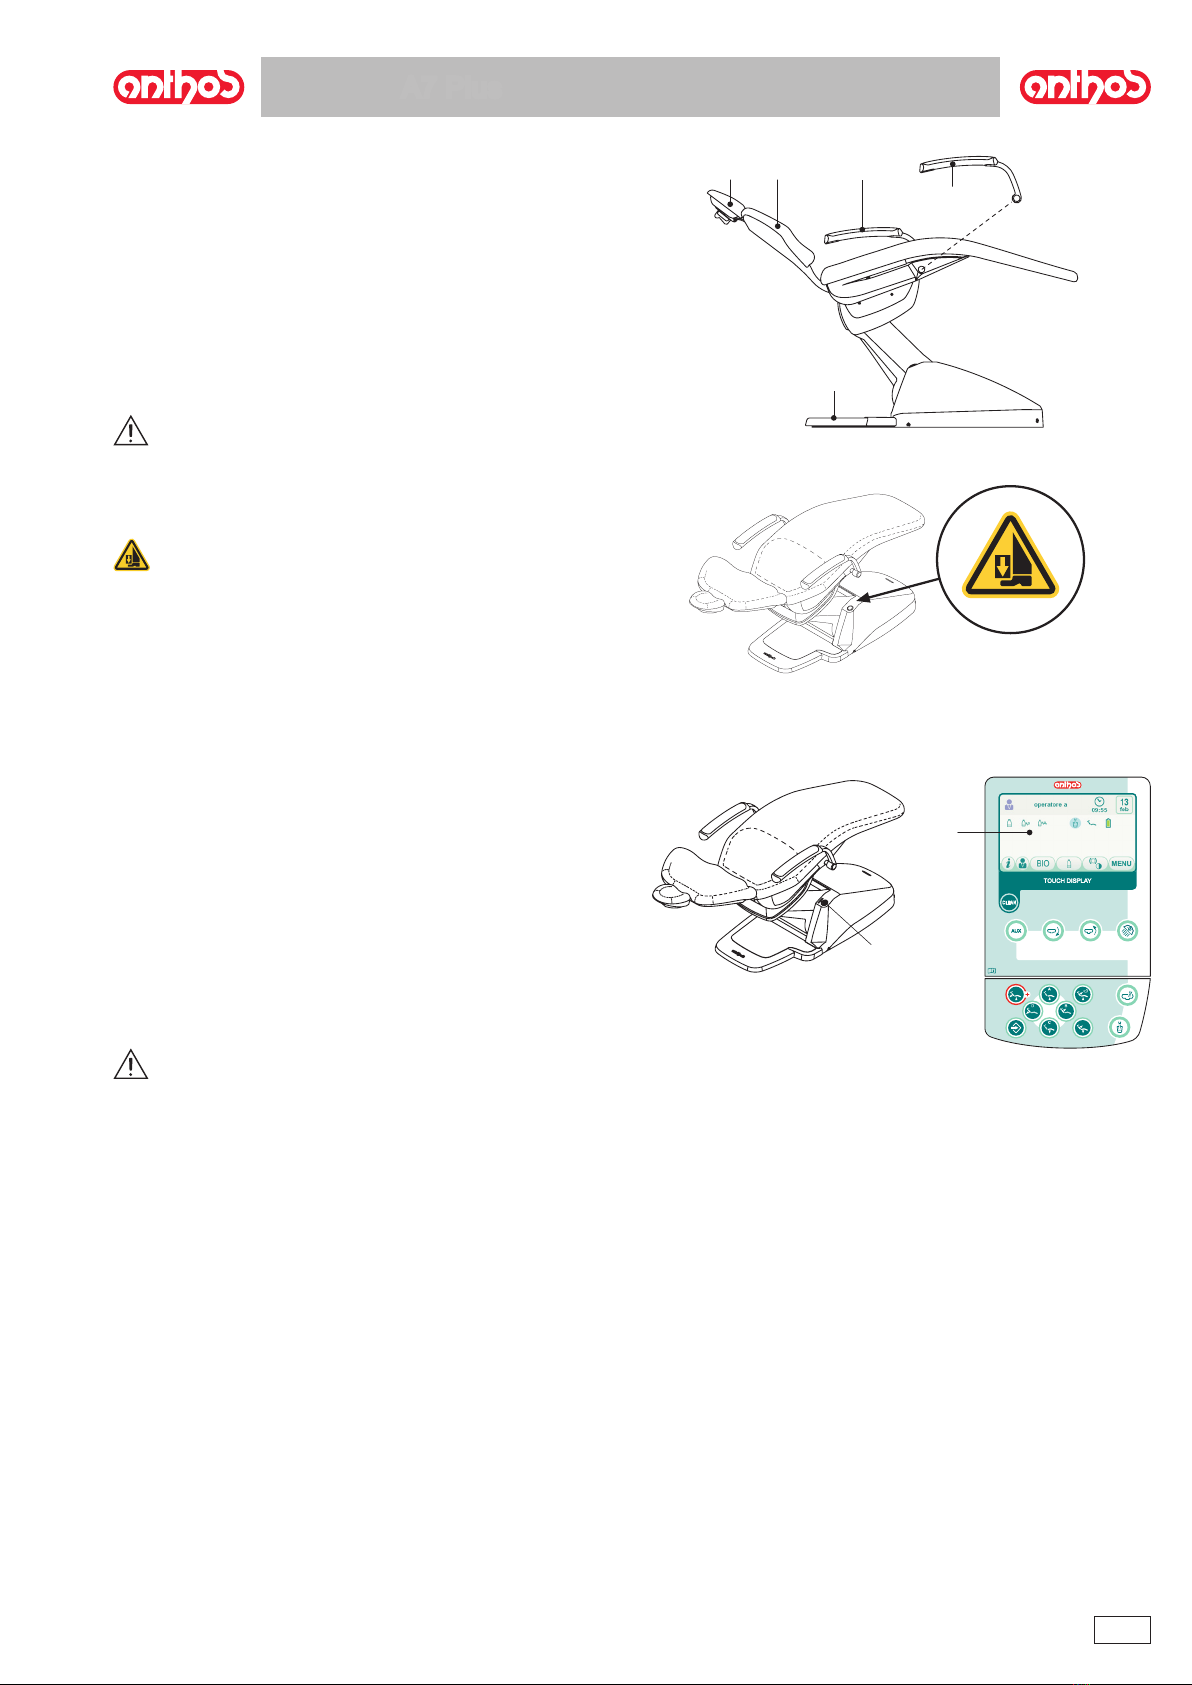
2.3. Dentalchair ..................................................................... 9
3. Turning on the dental operatory................................... 9
4. Dental chair operation .................................................. 10
4.1. Safetydevices ............................................................... 10
4.2. Emergencydevices ....................................................... 10
4.3. Adjustableheadrest........................................................11
4.4. Adjustablearmrest(optional)..........................................11
5. Instrument board operation........................................ 12
5.1. Doctor’scontrolconsole ................................................ 14
5.1.1. Userinterface ................................................................ 16
5.1.1.1. Operatorselection ......................................................... 17
5.1.1.2. Generalsettings ............................................................ 17
5.1.1.2.1. Hygienesystemsettings............................................... 18
5.1.1.2.1.1.BIOSTERdisinfectioncyclesetting .............................. 18
5.1.1.2.1.2.FlushingCYCLESETTING........................................... 19
5.1.1.2.1.3.W.H.E.systemtankemptying ...................................... 19
5.1.1.2.2. Hydrounitsettings......................................................... 20
5.1.1.2.2.1.Bowlwaterdeliverysetting ........................................... 20
5.1.1.2.2.2.Cupwaterdeliverysetting............................................. 21
5.1.1.2.2.3.Automaticbowlmovementsetting ................................ 21
5.1.1.2.3. Footcontroladjustment................................................ 22
5.1.1.2.4. Operatinglampadjustment .......................................... 22
5.1.1.2.5. OtherSettings................................................................ 23
5.1.1.2.6. Timeanddatesetting ................................................... 23
5.1.1.2.7. Chronometer................................................................. 24
5.1.1.2.8. Personalizationoffavouritekeys................................... 24
5.1.1.2.9. Operatordataentry ...................................................... 25
5.1.1.2.10.LANGUAGEselection ................................................... 25
5.1.1.2.11.APEXLOCATORsetting ............................................... 25
5.1.3. ProgrammingthechairpositionsA,B,CandD ........... 26
5.1.4. Emergencystopbutton.................................................. 26
5.1.5. SMARTTOUCHscreendisablebutton. ........................ 26
5.2. Footcontrol.................................................................... 27
5.2.1. "Multifunction”footcontrol ............................................. 27
5.2.2. "Push-pedal”footcontrol ............................................... 28
5.2.3. "PowerPedal"footcontrol............................................. 30
5.2.4. Wirelessfootcontrol...................................................... 32
5.3. Syringe .......................................................................... 34
5.4. Turbine .......................................................................... 35
5.5. Micromotor..................................................................... 37
5.5.1. RESTORATIVEoperatingmode ................................... 40
5.5.2. ENDODONTICoperatingmode .................................... 40
5.5.3. IMPLANToperatingmode............................................. 42
5.5.4. Reductionratiosettingmenu......................................... 43
5.5.5. RECIPROCATINGoperatingmode............................... 44
5.6. Scaler ............................................................................ 45
5.7. TLEDcuringlight.......................................................... 48
5.8 C-U2dentalcamera ...................................................... 51
5.9. ZEN-Xiintegratedsensor ............................................. 55
5.10. Peristalticpump............................................................. 56
5.11. ElectronicAPEXLOCATOR ......................................... 57
6. Assistant’s board operation ....................................... 59
6.1. Assistant’stouchpad...................................................... 59
6.2. Syringeonassistant’sboard ......................................... 60
6.3. Curinglamponassistant’sboard .................................. 60
6.4. Intraoralcameraonassistant’sboard ........................... 60
6.5. Suctiontubes................................................................. 61
6.6. Instrumenttray............................................................... 62
6.7. Hydraulicsalivaejector................................................. 62
7. Hydrogroup operation................................................. 63
7.1. Fillcupandbowl............................................................ 63
7.2 S.H.S.system................................................................ 65
7.3. W.H.E.(WaterHygienizationEquipment)system ........ 66
7.4. BIOSTERautomaticdisinfectionsystem....................... 67
7.5. AutomaticinstrumentFLUSHINGCYCLE(FLUSHING) 69
7.6. ACVSsystem(AutomaticCleaningVacuumSystem)... 70
7.7. Opening/closingthesidehydrogroupcover .................. 71
8. Accessories ................................................................. 72
8.1. Operatinglamp............................................................. 72
8.2. Monitoronlamppole..................................................... 72
8.3. Negatoscopeforpanoramas ......................................... 72
8.4. Air/water/230Vquick-connectcouplers ......................... 72
9. Maintenance ................................................................ 73
9.1. Instrumentmaintenance................................................ 73
9.2. Drainingcondensate...................................................... 73
9.3. Cleaningthesurgicalsuctionlter................................. 73
9.4. Surgicalsuction ............................................................. 74
9.5. CATTANIsurgicalseparator .......................................... 75
9.6 Cleaningtheturbinereturnairlter ............................... 76
9.7. CATTANI amalgamgravityseparator .......................... 76
9.8. METASYSamalgamseparator...................................... 76
9.9. DÜRRamalgamseparator ............................................ 76
9.10. Dentalchair ................................................................... 76
10. Fault messages............................................................ 77
11. Specications .............................................................. 78
11.1. Overalldimensions:A7PlusCONTINENTAL............... 79
11.2. Overalldimensions:A7PlusINTERNATIONAL ........... 80
12. Dental operatory maintenance plan....................................... 81

4
4
EN
A7 Plus
- OPERATING INSTRUCTION
1. Safety guidelines
• These instructions explain how to correctly use the following dental units:
A7 Plus CONTINENTAL, A7 Plus INTERNATIONAL
Carefully read and become familiar with the content of this manual before using the equipment.
•ThedentalunitsdescribedinthismanualaremanufacturedbyCEFLAs.c.-viaSeliceProv.le23/A-40026Imola(BO)Italy,amanufacturer
complyingwiththeEuropeanDirectiveondevices.
• Theseinstructionsdescribealltheversionsoftheoperatingunitswiththemaximumpossibleaccessories,thereforenotalltheparagraphsare
applicabletotheunityouhavepurchased.
•Nopartofthismanualistobereproduced,storedinaretrievalsystemortransmittedinanyformorbyanymeans,i.e.electronic,mechanical,
photocopying,translationorotherwise,withoutthepriorwrittenpermissionofCEFLAs.c.
•Theinformation,specicationsandillustrationscontainedinthispublicationarenotbinding.
CEFLAs.c.reservestherighttomaketechnicalimprovementsandchangeswithoutmodifyingtheinstructionscontainedherein.
•Themanufacturerhasacompanypolicyofcontinualdevelopment.Althougheveryeortismadetokeeptechnicaldocumentationup-to-dateatall
timesthemanualmaynotcorrespondexactlytocurrentspecications.Themanufacturerreservestherighttomakechangeswithoutpriornotice.
•TheoriginalversionofthismanualiswritteninItalian.
•Thisequipmentisequippedwithadevicethatpreventsliquidbackup
•Themanufacturer’swebsitecontainsalistofauthorisedagentsofthevariouscountries.
Listofsymbolsusedinthisdocumenttodenotecertainconditions:
1) Typeofprotectionagainstdirectandindirectcontact:ClassI.
Typeofprotectionagainstdirectandindirectcontact:TypeB.
2) WARNING!
Failuretoobservemayresultinequipmentdamageorinjurytothe
userand/orpatient.
3) "Consulttheinstructionmanual".
Meansthatit is advisable to consult the instruction manual before
usingthatpartofthedevice.
4) NOTE:
Identiesinformationthatisespeciallyimportantfortheuserand/or
assistant.
5) Earthground.Functionalearthconnection.
6) Alternatingcurrent.
7) Partsterilisedinasteamautoclaveupto135°C.
8) ON/OFFbutton.
9) "Refertotheinstructionmanual".
Meansthatforreasonsofsafetyyouneedtoconsulttheinstruction
manualbeforeusingthedevice.
10) Open(apartoftheunit).
11) Closed(apartoftheunit).
12) EquipmentinaccordancewithessentialrequirementsofdirectiveEEC
93/42andsubsequentchanges(ClassIIaequipment).
Notiedbody:IMQspa.
13) Equipment in accordance with essential requirements of directive
EEC93/42andsubsequentchanges(ClassImedicalequipmentfor
ordinaryuse).
14)WastedisposalsymbolinaccordancewithDirective2012/19/EU.
15) “Warningbiologicalhazard”.
Itprovidesinformationaboutpossiblerisksofcontaminationderiving
fromcontactwithuids,storageofinfectedbiologicalwaste.
16) Manufacturer.
17) Monthandyearofconstructions.
18) Apparatusserialnumber.
19) DVGWmark(qualityassurancekitemarkregardingsupplyofdrinking
water).
20) Product/equipmentidenticationcode.
21)Donotpush.
22)Footcrushinghazard.
23)DeviceequivalenttoClass2lightsource.
24) Ukrainiannationalsymbolofconformity.
1.2. Intended use
•TheA7PLUSseriesofoperatoriesaremedicaldevicesintendedfordentaltreatment.
•Theinstrumentboardmayholdupto6instruments.
•Theassistant’sboardcanhold2suctiontubesand3instruments.
•Thisequipmentmustbeusedonlybyadequatelytrainedpersonnel(doctorsandparamedics).
•Thedeviceisintendedfornon-continuous operation(seetheoperatingtimesoftheindividualpartsinthededicatedsections).
•Thedeviceisclassiedaspollutiondegree2.
•Overvoltageclass:II.
• MEDICALDEVICESclassication
ClassicationofthedentalunitinaccordancewiththeindicationsgiveninannexIXofdirective93/42/EECandsubsequentchanges:Class IIa.
• ELECTRICALMEDICALEQUIPMENTclassication
ClassicationofthedentalunitinaccordancewithstandardI.E.C.60601-1forsafetyofmedicalequipment:Class I - Type B.
• Referencestandards
A7PLUSseriesoperatoryunitsaredesignedandconstructedincompliancewithIEC60601-13.aEd.-2007,IEC60601-1-63.aEd.-2010,IEC
623661.aEd.-2007,IEC80601-2-601.aEd.-2012,IEC60601-1-23.aEd.,ISO68753.aEd.-2011,ISO7494-12.aEd.-2011andEN1717(typeAA
andAB)standardsasfarasthewatermainssafetydevicesareconcerned.
• ClassicationofRADIODEVICESANDCOMMUNICATIONTERMINALS(onlywhentheWIRELESSfootcontrolispresent)
EquipmentclassicationaccordingtoDirective99/05/ECArt.12:Class I.

55
EN
A7 Plus
- OPERATING INSTRUCTION
1.2.2. Environmental conditions
Theequipmentistobeinstalledinroomsthatsatisfythefollowingrequirements:
•temperaturebetween10and40°C.
•relativehumiditybetween30and75%.
•atmosphericpressurerangingfrom700to1060hPa.
•altitude≤3000m;
•airpressureenteringequipmentrangingfrom6to8bar.
•waterhardnessenteringequipmentnotover60mg/l.
•waterhardnessattheequipmentinletmustnotbeabove25°f(Frenchdegrees)or14°d(Germandegrees)foruntreateddrinkingwater.Forwater
withahigherhardnessdegree,itisrecommendedtosoftenwateruntilitreachesahardnessdegreebetween15and25°f(Frenchdegrees)or
between8.4and14°d(Germandegreees);
•waterpressureenteringequipmentrangingfrom3to5bar.
•watertemperatureenteringequipmentnothigherthan25°C.
1.2.2.1. Transport and packaging conditions
•Temperature:from-10to70°C;
•Relativehumidity:from10%to90%;
•Atmosphericpressure:from500to1060hPa.
1.2.3. Warranty
CEFLAs.c.standsbehinditsproductswarrantingsafety,reliabilityandperformance.
Thewarrantyisvalidonlyunderthefollowingterms:
•Theconditionsgivenonthewarrantycerticateareobserved.
•Theequipmentisusedonlyasinstructedinthismanual.
•TheelectricalwiringintheroominwhichtheequipmentisinstalledmustconformtoIEC60364-7-710(standardsforelectricalwiringinmedical
anddentaloces).
•A3x1.5mm2lineprotectedbyabi-polarcut-outthatconformstoapplicablestandards(10A,250V,distancebetweencontactsatleast3mm)must
beusedtofeedtheequipment.
WARNING!
The color of the three wires (POWER, NEUTRAL and EARTH) should satisfy the requirements of current standards.
•Installation,repairsand,ingeneral,anyotheroperationsrequiringthecasingtobeopenedaretobeperformedexclusivelybypersonnelauthorized
by ANTHOS.
1.2.4. Disposing the equipment when no longer used
AssetoutinDirectives2011/65/ECand2012/19/EC,ontherestrictionsoftheuseofcertainhazardoussubstancesinelectricalandelectronic
equipmentalongwithcollection,treatment,recyclinganddisposalofwasteelectricalandelectronicequipmentthelattermustbetreatedasmunici-
palwaste,thereforesortedandcollectedseparately.Whennewequipmentofequivalenttypeispurchasedthewasteequipmentshouldbereturned
tothedistributoronaone-to-onebasisfordisposal.Asfarasreuse,recyclingandotherformsofwasterecoverymentionedaboveareconcerned,
themanufacturerisresponsiblefortheactionsspeciedbyindividuallocallaws.Ecientcollectionofsortedwasteseparatelytorecycleandtreat
wasteelectricalandelectronicequipmentaidsinpreventingnegativeenvironmentalimpactswhileprotectinghumanhealth.Inadditionitfacilitates
recyclingofthematerialsusedtoconstructtheequipment.Illegalwastedisposalcarriesheavynesdenedbylocallaws.
WARNING!
The crossed out wheeled bin placed on the equipment indicates that the waste equipment must be collected separately from other waste.

66
EN
A7 Plus
- OPERATING INSTRUCTION
1.3. Safety rules
WARNING!
• All equipment is permanently installed.
CEFLA s.c. shall not be held liable for any personal injury or equipment damage resulting from failure to heed the precaution given above.
• Floor condition
Theoorconditions(continuoustype)mustmeetdesignloadstandardssetforthinDIN1055sheet3.
Theweightofthedentalunitincludingapatientweighing190Kg,isapproximately350Kg/mq.
SeetheInstallationmanualforfurtherdetailsaboutinstallation.
•Thisdevicemaynotbemodiedinanywaywithouttheauthorisationofthemanufacturer.
Ifthedeviceismodied,appropriateexaminationsandtestsneedtobeconductedinordertoensurecontinuedsafeuse.
CEFLA s.c. shall not be held liable for any personal injury or equipment damage resulting from failure to heed the precaution given above.
• Dental chair
Themaximumchaircapacityis190Kg.Thisweightmustneverbeexceeded.
• Tray holders
Themaximumweightsthatcanbeheldmustneverbeexceeded:
-Instrumenttrayattachedtotheinstrumentboardmaximumallowableload2Kg,evenlydistributed.
-Instrumenttrayattachedtotheinstrumentboardmaximumallowableload1Kg,evenlydistributed.
• Connections to external instruments
TheequipmentcanbehookeduponlytootherinstrumentsthatbeartheCEmark.
• Electromagnetic interferences.
UseofelectricalequipmentthatdoesnotcomplytostandardIEC60601-13.aEd.-2007intheoceornearbymaycauseelectromagneticorother
typesofinterferencesresultingindentalunitmalfunctions.
Inthesecases,shutopowertothedentalunitbeforeusingthisequipment.
• Replacing the chucks
Operatetheturbinereleaseandcontraangleonlyoncethechuckhascometoacompletestop.Onthecontrary,thelockingsystemwillweardown
andthechuckscanslipocausinginjury.Useonlyhighqualitychuckswithgaugeddiameterattachment.Tocheckthestateofthelockingsystem,
makecertainthechuckisrmlysecuredtotheinstrumenteverydaybeforestartingwork.Lockingsystemdefectscausedbymisuseareeasily
identiedandnotcoveredbythewarranty.
• Patients with pace makers and/or hearing aids.
Whentreatingpatientswithpacemakersand/orhearingaids,takeintoconsiderationtheeectstheinstrumentsmayhaveonpacemakersand/
orhearingaids.Carefullyreadtechnical-scienticinformationavailableonthissubject.
• Implants.
Ifthedentalunitisusedforimplantoperationsusingseparateequipmentdesignedforthispurpose,shutopowertothedentalchairtoavoid
unwantedmovementsresultingfromfaultsand/oraccidentalstartupofthecontrols.
•Donotforgettoturnotheoce’swatersupplyandmasterswitchontheequipmentbeforeleavingthesurgery.
•Theequipmentisnotprotectedagainstliquidpenetration(IPXO).
•Thisequipmentisnotsuitableforuseinthepresenceofamixofinammableanaestheticgaswithoxygenornitrousoxide.
•Thisequipmentmustbestoredproperlysothatitiskeptintopworkingorderatalltimes.Themanufacturershallnotbeheldresponsibleformisuse,
carelessnessorimproperuseoftheequipment.
•Thisequipmentistobeusedexclusivelybyqualiedpersonnel(doctorsandparamedics)withthepropertraining.
•Theusermustbepresentatalltimeswhentheequipmentisturnedonorreadyforstart-up.Inparticular,neverleavetheequipmentunattendedin
thepresenceofchildren/thementallydisabledorotherunauthorisedpersonnelingeneral.
Anycompanionsmustkeepoutoftheareainwhichtreatmentisperformedandinanycaseundertheresponsibilityoftheoperator.Theareain
whichtreatmentisperformedreferstothespacearoundthedentalunitplus1.5meters.
• Quality of the water delivered by the dental unit.
Theuserisresponsibleforthequalityofthewaterdeliveredbythedentalunitandmustadoptmeasurestomaintainit.
Toensurethatyoumeetthewaterqualityrequirements,CEFLAs.c.advisesyoutoequipthedentalunitwithaninternalorexternaldisinfectionsystem.
Onceinstalled,thedentalunitisexposedtocontaminantsoriginatingfromthewatersupply.Forthisreason,itisrecommendedtoinstallandputit
intooperationonlywhenyoubeginusingitdailyandtoperformthedecontaminationproceduresdescribedintherelativechaptersrightfromtherst
dayofinstallation.
Ifthedentalunitisequippedwithadeviceforseparationfromtheopenwatersupplysystem(EN1717),makesurethatitalsocontinuouslyadds
disinfectantasrequiredandcheckthattherelativetankcontainsanadequatequantity(seetherelativeparagraph).
NOTE: Contact your local dealer or Dental association for more detailed information about national laws and requirements.
• Applied Parts.
Thepartsofthedevicethatduringnormalusenecessarilycomeintocontactwiththepatientforthedevicetobeabletoperformitsfunctions
are:Dentalchairupholstery,armrest,polymerisinglampbreoptics,terminalpartofthesyringe,single-usecameraprotection,scalerbits,drill
handpieces,cannulasuctionterminals.
Nonappliedpartsthatmaycomeintocontactwiththepatientare:dentalchairarmrestsupport,dentalchairlowercasing,patient-sidehydrounit
casing,cupwaterdeliveryspout,bowl,suctiontubes,handpiecebody.
• WARNING! Moving the dental chair.
Makesurethatthepatientisreadytocollaborate:askhim/hertokeephis/
herhandsandfeetclose,avoidingincorrectpostures.
Checkthatthepatientissittingproperlywhenmoving the dental chair
(seegure).

77
EN
A7 Plus
- OPERATING INSTRUCTION
1.4. Cleaning and disinfecting
Cleaningistherststepofanydisinfectingprocess.Physicallyscrubbingwithdetergentsandsurface-activesubstancesandrinsingwithwater
removesaconsiderableamountofmicroorganisms.Ifasurfaceisnotcleanrst,thedisinfectingprocesscannotbesuccessful.Ifasurfacecannot
beadequatelycleaned,itshouldbeprotectedwithbarriers.
TheouterpartsoftheequipmentmustbecleanedanddisinfectedusingaproductforhospitalusewithindicationsforHIV,HBVandtubercolocide
(medium-leveldisinfectant)specicallyforsmallsurfaces.
Thevariousdrugsandchemicalproductsusedindentist’ssurgeriesmaydamagethepaintedsurfacesandtheplasticparts.
Researchandtestsrunshowthatthesurfacescannotbefullyprotectedagainsttheharshactionofallproductsavailableonthemarket.Wetherefore
recommendprotectingwithbarrierswheneverpossible.Theharshactionsofchemicalproductsalsodependontheamountoftimetheyarelefton
thesurfaces.Itisthereforeimportantnottoleavetheproductonthesurfaceslongerthanthetimespeciedbythemanufacturer.
Itisrecommendedtousethespecicmedium-leveldisinfectant,STER1PLUS(CEFLAs.c.),whichiscompatiblewith:
• Coated surfaces and plastic parts.
• Upholstery.
WARNING!
Any splashes or spots of mordant will stain the MEMORY FOAM upholstery. Immediately rinse with plenty of water if acid spatters on the
upholstery.
• Uncoated metal surfaces.
IfyoudonotuseSTER1PLUS,itisrecommendedtouseproductsthatcontainatmaximum:
• Ethanol. Concentration: maximum30gper100gofdisinfectant.
• 1-propanol (N-propanol, propyl alcohol, N-propyl alcohol). Concentration:maximum20gper100gofdisinfectant.
• Combination of ethanole and propanole.Concentration:thecombinationofthetwoshouldbemaximum40gper100gofdisinfectant.
WARNING!
• Do not use products containing isopropyl alcohol (2-propanol,iso-propanol).
• Do not use products that contain sodium hypochlorite (bleach).
• Do not use cleaners that contain phenol.
• Do not spray the selected products directly on the surfaces.
• All products must be used as directed by the manufacturer.
• Do not mix the STER 1 PLUS disinfectant with other products.
WARNING!
The products suggested are compatible with the materials of the equipment, however damages may occur to surfaces and materials re-
Cleaning and disinfecting instructions.
Cleananddisinfectwithsingle-usenon-abrasivepaper(avoidusingrecycledpaper)orsterilegauze.
Donotusespongesorinanycase,anymaterialthatcanbereused.
WARNING!
• All material used to clean and disinfect must be thrown away.

8
8
EN
A7 Plus
- OPERATING INSTRUCTION
2. Description of the equipment
2.1. Nameplate
Dental units model:
A7 Plus CONTINENTAL,
A7 Plus INTERNATIONAL.
TheIDplateislocatedonthelinkbetweenpatientchairandunitbody.
Thenameplateisfoundontheoorbox.
Datagivenonplate:
•Manufacturer’sname
•Nameofequipment
•Voltage
•Typeofcurrent
•Frequency
•Maximumpowerabsorbed
•Serialnumber
•Monthandyearofconstruction
2.2. Dental units
DentalunitsA7PLUSareavailableinthefollowingversions:
A7 PLUS CONTINENTAL version.
“CONTINENTAL”versioninstrumentboard(instrumentswillreturntotheir
originalpositionthroughthepullingactionofthe spring-operatedarms)
attachedtoadoublesupportingarm,oneofwhichisarticulatedwhilethe
otherisautobalancing.
Description of equipment.
a Hydrogroup
b Adjustablearm
c Instrumentboard
d Doctor’sconsole
e Trayholder
f Assistant’sboard
g Assistant’scontrolconsole
h Utilityservicecenter
i Multifunctionfootcontrol
l Watertocup
m Bowl
n Autobalancingarm
zANTHOS A2.7 dentalchair
A7 Plus INTERNATIONAL version.
TavolettamedicoversioneINTERNATIONAL(glistrumentisonoinseriti
verticalmente in apposite sedi) applicata su doppio braccio di cui uno
articolatoedautobilanciato.
Descrizionedellevarieparti:
“INTERNATIONAL”versioninstrumentboard(instrumentsplacedvertically
inhousings)attachedtoadoublesupportingarm,oneofwhichisarticulated
whiletheotherisautobalancing.
Description of equipment.
a Hydrogroup
b Adjustablearm
c Instrumentboard
d Doctor’sconsole
e Trayholder(optional)
f Assistant’sboard
g Assistant’scontrolconsole
h Utilityservicecenter
i Multifunctionfootcontrol
l Watertocup
m Bowl
n Autobalancingarm
q Instrumenttrayonassistant’sboard(optional)
r X-raylmviewerforpanoramicx-rays(optional)
zANTHOS A2.7 dentalchair

9
9
EN
A7 Plus
- OPERATING INSTRUCTION
2.3. Dental chair
Description of the chair
a Headrest
b Back
c Fixedarm(optional)
d Movablearm(optional)
e Safetyfootboard
Operating times
Theoperatingandresttimesareasfollows:
work 25 sec. - rest 10 min.
Maximum weight capacity.
Themaximumchaircapacityis190Kg.
WARNING!
Do not exceed this value.
Warnings for use.
WARNING: FOOT CRUSHING HAZARD
.
3. Turning on the dental operatory
Dental units model:
A7 Plus CONTINENTAL,
A7 Plus INTERNATIONAL.
Pressthemainswitch(f1)onthedentalchaircasingandcheckonthe
controlconsolethat:
•
-equipmenton
-pneumaticsystemconnected
-watersystemconnected.
•
-equipmento
-pneumaticsystemdisconnected
-watersystemdisconnected
WARNING!
The main switch must be pressed by hand.

10
10
EN
A7 Plus
- OPERATING INSTRUCTION
4. Dental chair operation
Thedentalchaircanbemovedasfollows:
•Chairseatup/down
•Backup/downwithinclinationofthechairseat(Trendelemburgcompen-
sated)
Thedentalchaircanbeoperatedfromthefollowingplaces:
•Instrumentboard(a )(seepar.5).
•Multifunctionfootcontrol(b )(seepar.5.2).
•Assistant’sboard(c )(seepar.6).
Dental chair movement shutdown
Withtheinstrumentsinrestposition,youcandisablethedentalchair
movements(seeparagraph5.1.1.2.5.).
Themovementdisablingisshownonthecontrolpaneldisplaybythe
relevanticon(A).
4.1. Safety devices
A7 Plus series dental units.
•Theoorboxisequippedwithadevice(l)thatimmediatelystopsthe
dentalchairfrommovingdowninthepresenceofanobstacleandauto-
maticallyliftsituptofreetheobstacle.
•Thechairbackisequippedwithasafetydevice(m )thatimmediately
stopsthechairbackfrommovingdownifanobstacleisencounteredand
automaticallymovesituptocleartheobstacle.
•Thesupportarmsoftheassistant’smodulefeatureasafetydevice(n)
whichstopsdownwardchairmovementifanobstacleisencountered.
Thechairwillthenautomaticallymoveupwardssotheusercanremove
theobstruction.
•Dentalchairmovements:
-withtheinstrumentextractedNOTworking:manualmovementsallowed,
automaticmovementsinhibited,butiftheyarealreadyinprogressat
themomentofextractiontheyarenotinterrupted;
-withinstrumentextractedandworking:allthedentalchairmovements
areinhibited.
4.2. Emergency devices
WARNING!
Use the devices below when movement of the equipment needs to
be blocked:
• Dental chair control buttons ( a ) or ( c ).
Pressinganydentalchairbuttonblocksallmovementsareblocked.
• Foot control ( b ).
Whenthefootcontrolisactuated,allmovementsoftheequipmentare
blocked.
• Foot board ( i ).
Footboardactivated:allmovementsareblocked.

11
11
EN
A7 Plus
- OPERATING INSTRUCTION
4.3. Adjustable headrest
Theheadrestmaybeoftwotypes:
1withmanualcushionlocklever
2withpneumaticcushionlocklever
Adjusting headrest height.
• withmanuallocking (1 ):
Theheadrestbladeispositionedthroughamagneticclutch.Theoperator
shouldpullupand/orpushdowntheheadrestuntilitisinthedesired
position.
• with pneumatic locking (2 ):
Pressandholddownthelockingbutton(u)topositiontheheadrestas
desired.Onceyouhavereachedthedesiredposition,releasethebutton
(u)tolocktheheadrestinplace.
Adjusting the cushion:
•withmanuallock(1 ):rotatethelockknob(k )anti-clockwise,position
thecushionasdesiredandthenretightenthelockknob.
•withpneumaticlock(2 ):pressthelockbutton(u )andkeepitpressed
asyouadjustthecushionasdesired.Oncethecushionisorientedas
desiredjustreleasethebutton(u )tolockinplace.
Proper positioning of the headrest.
WARNING!
Forcorrectuseoftheheadrest,positionthepatient'sheadasshowninthe
gure.
Important information.
WARNING!
• Maximum on-headrest load: 30 Kg.
• Do not attempt to move cushion while patient is resting against it.
•
releasing the lock mechanism.
• The pneumatic locking device is active only when the air circuit is
pressurized and the dental unit is on.
4.4. Adjustable armrest (optional)
Pushing down the adjustable armrest.
Turntheadjustablearmrestclockwisetomoveitdownsothatthepatient
canmoreeasilygetonandothechair.
Putthearmrestinaverticalpositionandpullito.
WARNING!
Maximum weight supported by armrest: 68 kg.

12
12
EN
A7 Plus
- OPERATING INSTRUCTION
5. Instrument board operation
Layout of instruments.
Thepositionstheinstrumentsareplacedinontheboardaredetermined
bythecustomeratthetimeoforder.
Starting the instruments.
•Thesyringeisalwayson(seeparagraph5.3.).
•Thecuringlightisturnedonwiththekeywhentheinstrumentiswithdrawn
(seeparagraph5.7.).
•Intraoralcameraturnonwhentheinstrumentisextracted(seeparagraph5.8.).
•The ZEN-Xi integrated sensor is started by turning its support to the
“ACTIVE”position(seeparagraph5.9andZEN-Xiinstructionsforuse).
•Oncepickedup,alltheinstrumentsareoperatedwiththefootcontrol.
(seeparagraph5.2.).
Simultaneous use of the instruments.
Adeviceseesthattheinstrumentscannotbeusedsimultaneously.
Therstinstrumentremovedisoperativewhilethoseremovedthereafter
aredeactivatedbythisdevice.
Thisdeviceallowsthechucktobereplacedinoneinstrumentwhileanother
isusedonthepatient.
Putting the instrument board place.
Theinstrumentboardcanbemovedinalldirections.
Toadjusttheheightoftheboardand/ordirectithorizontally,simplygrasp
thehandle(a ).
NOTE CONTINENTAL version: Grasp the handle placing your
thumb on point (A) to release the air lock for the pantograph arm.
NOTE INTERNATIONAL version: To adjust the height, rst press
the release button (see paragraph 5.1.).
Instrument return arm stopping device (only for CONTINENTAL
version instrument boards).
Ifthisdeviceisprovided,theinstrumentreturnarmcanbelockedinthe
instrumentextractedposition.
Whenthedeviceisusedaclickisheardabout2/3ofthetotalarmtravel.
Togobacktotheoriginalcondition,simplymovethearmtotheendofits
travel(B ).
Tray holder module for CONTINENTALversion dentist’s instrument board.
Thetrayholdermodule(f)ismadeofstainlesssteelandcaneasilybe
removedfromitssupport.
WARNING!
Maximum permitted load on the tray holder module ( f ): 2 kg
distributed.
Tray holder module for INTERNATIONALversion dentist’s instrument board.
WARNING!
Maximum permitted load on the tray holder module ( e ): 2 kg
distributed.

13
13
EN
A7 Plus
- OPERATING INSTRUCTION
Cleaning the dentist’s instrument board.
Cleanthedentist’sinstrumentboardusingasuitableproduct(seepara-
graph1.4).
NOTE for CONTINENTAL version dentist’s instrument boards:
the instrument holder ( x) can be removed to facilitate the cleaning ope-
rations; to remove it, simply pull it out of its seat as it is only secured with
magnets.The silicone instrument holder ( u) can also be sterilized in an
autoclave up to 135°C.
Removable instrument cords
Alltheinstrumentshaveremovablecordstoeasecleaning.
NOTE for CONTINENTAL version dentist’s instrument boards:
to remove the tubings you rst need to remove the instrument holder and
then unscrew the relative plastic fastening ring nuts.
NOTE for INTERNATIONAL version dentist’s instrument bo-
ards: to remove the tubings, unscrew the relative plastic fastening ring
nuts below the dentist’s instrument board.
WARNING!
pressing and holding down the relative air and water buttons directly
on the bowl until water spray is no longer present.
• The cords of the TURBINE, MICROMOTOR and SCALER contain
water, therefore hold the end of the cord on the handpiece side over
the bowl when removing the cord.
• When putting a cord back on, make certain the contacts are perfectly
dry and the plastic ring nut is tight.
• Each cord may be remounted only in the position for the correspon-
ding instrument.
Cleantheinstrumentcordusingasuitableproduct(seeParagraph1.4).
WARNING!
The instrument cords are NOT suitable for autoclave or cold disin-
fection.

1414
EN
A7 Plus
- OPERATING INSTRUCTION
5.1. Doctor’s control console
TheA7PLUSseriesdentalunitshaveaSMARTTOUCH“hybrid”denti-
st’sconsoleconsistingofamembranepushbuttonpanelandaresistive
touchscreendisplay.4.3”WidecolourTFTdisplaywithLEDbacklighting,
resolution480x272pixelsand262kcolours.
Pushbuttonpanelforthefollowingmodels:
A7 Plus CONTINENTAL
Pushbuttonpanelforthefollowingmodels:
A7 Plus INTERNATIONAL
Description of the buttons:
Dentist’sinstrumentboardbrakereleasebutton
(INTERNATIONALmodels)
SMARTTOUCHscreendisablebutton
Operatorylighton/obutton
Watertocupbutton
Auxiliaryfunctionbutton(available)
Bowlcounter-clockwisebutton
(activeonlywithpoweredbowl).
Bowlclockwisebutton
(activeonlywithpoweredbowl)
Watertobowlfunctionbutton
Dentalchairfunctionssavebutton
Emergencypositionbutton.
Automaticreturnbutton.
Rinsepositionbutton.
Chairseatupandsetposition“A”button.
Chairbackupandsetposition“B”button.
Chairseatdownandsetposition“C”button.
Chairbackdownandsetposition“D”button.
NOTE: Operation of dental chair buttons:
• Buttonpressedshortly:setpositionautomaticallyreached.
• Buttonhelddown:positionedreachedbyhand.

1515
EN
A7 Plus
- OPERATING INSTRUCTION
Warning icons.
Touchingtheiconbutton onthetouchdisplay,youcanatanytime
viewthewarningiconsthatshowtheoperatingstatusofthedentalunit.
Thewarningiconsviewablearethefollowing:
WHEsystemrunning.
Feedingwithdistilledwateractivated.
Feedingwithmainswateractivated.
Peristalticpumpinsertedwiththedeliveredquantityofsalinesolution
equalto1.
Distilledwaterlevellow.
Lowdisinfectantliquidinthetanktubing.
BIOSTERcycleinprogress.
Suctiontubesbeingwashed.
Suctionstoppedduetofullcanister.
Green:wirelessfootcontrolbatterycharged.
Orange:wirelessfootcontrolbattery50%charged.
Red:wirelessfootcontrolbatteryat.
Green:wirelessfootcontrolconnectedandactive.
Orange:wirelessfootcontrolconnectedbutnotactive.
Red:searchingforconnectiontothewirelessfootcontrol.
Pantographarmbrakeengaged.
Blue:COLDwater-to-glass.
Orange:WARMwater-to-glass.
Red:HOTwater-to-glass.
DentalchairpositionautomatedprogrammeA.
DentalchairpositionautomatedprogrammeB.
DentalchairpositionautomatedprogrammeC.
DentalchairpositionautomatedprogrammeD.
Dentalchairmovementsblocked.
Rinseautomatedprogrammechairposition.
Homeautomatedprogrammechairposition.
Emergencyautomatedprogrammechairposition.
Dentalchairsavefunctionon.
Chairpositionmanuallysetup.

16
16
EN
A7 Plus
- OPERATING INSTRUCTION
5.1.1. User interface
Whenturnedon,thedentalunitperformsabriefautodiagnosiscyclethatends
whenthemainscreencontainingthenameoftheoperatorlastsetisdisplayed.
Asofthismomentanumberofsettingscanbeeditedfromuser-friendly
menus(seediagram).
Menu scrolling control.
•Toaccessthesettingmenu,touchtheiconbutton .
•Toaccessthevarioussubmenus,touchtherelativeiconbutton.
•Tochangeasettinginamenu,touchtherelativeiconbutton.
• Tochangeanumericalvalueinamenu,touchtheiconbuttons or .
• Toexitfromamenu,touchtheiconbutton .
Layout of the user interface menu.
Theuserinterfacemenuisstructuredasshowninthediagramandincludes
thefollowingmenus:
5.1.1.1. Operatorselection.
5.1.1.2. GENERALSETTINGS.
5.1.1.2.1. HYGIENESYSTEMSETTING.
5.1.1.2.1.1. BIOSTERdisinfectioncyclesetting.
5.1.1.2.1.2. FLUSHINGcyclesetting.
5.1.1.2.1.3. WHEsystemtankemptying
5.1.1.2.2. HYDROUNITSETTINGS.
5.1.1.2.2.1. Bowlwaterdeliverysetting.
5.1.1.2.2.2. Cupwaterdeliverysetting.
5.1.1.2.2.3. Bowlmovementcontrol.
5.1.1.2.3. FOOTCONTROLADJUSTMENT.
5.1.1.2.4. OPERATINGLAMPADJUSTMENT.
5.1.1.2.5. OTHER SETTINGS.
5.1.1.2.6. TIME AND DATE SETTING.
5.1.1.2.7. CHRONOMETER.
5.1.1.2.8. FAVOURITE BUTTONS CUSTOMISATION.
5.1.1.2.9. OPERATORDATAENTRY.
5.1.1.2.10. LANGUAGESELECTION.
5.1.1.2.11. APEXLOCATORsetting.
Error messages.
Duringtheinitialself-diagnosticcycle,thedentalunitmaydetectsomemal-
functionsintheinternalsystem.
Inthiscase,anerrormessageisshownonthedisplay(seeparagraph10)
whichremainsvisibleuntiltheoperatortouchestheTOUCHDISPLAY.
Ifthemalfunctionisnothazardous,thedentalunitwillcontinuetooperate.
Stand-by mode.
Thedentalunitgoesintopowersavingmode(stand-by)afterapproximately
10minutesofnon-use;thismodeisshownbytheANTHOSlogoonthe
controlpaneldisplay.
Normal operating conditions are restored as soon as any operation is
performed.

1717
EN
A7 Plus
- OPERATING INSTRUCTION
5.1.1.1. Operator selection
TheSMARTTOUCHconsoleoftheA7PLUSseriesdentalunitsallows
managing3dierentoperators.
Thefollowingdatacanbesetforeachoperator:
• Operator'sname.
• Turbineandscalerpoweradjustment.
• 3electricmicromotoroperatingmodes
• 4scaleroperatingmodes.
• Turningonandadjustmentofthebreopticsofeachinstrument.
• IncrementalorON/OFFcontroloftheturbineandthescalerpower.
• Automaticdentalchairmovementprograms.
• Hydrounitcongurationparameters
Operator selection.
Fromthemainpage,repeatedlytouchtheiconbutton untilndingthe
desiredoperator.
NOTE: the operator is changed cyclically.
5.1.1.2. General settings
Fromthemainpage,carryoutthefollowingoperations:
•Touchtheiconbutton toaccesstheGENERALSETTINGSmenu
containingthefollowingiconbuttons:
HYGIENESYSTEMSETTINGS
(onlyifatleastahygienesystemispresent)
HYDROUNITSETTINGS
FOOTCONTROLADJUSTMENT
OPERATINGLAMPADJUSTMENT
OTHER SETTINGS
TIME AND DATE SETTING
CHRONOMETER
PERSONALIZATIONOFFAVOURITEKEYS
OPERATORDATAENTRY
LANGUAGESELECTION
APEXLOCATORSETTINGS
(ifAPEXLOCATORisinstalled,only)
ACCESS SERVICE MENU
(
forTechnicalService,only)

1818
EN
A7 Plus
- OPERATING INSTRUCTION
5.1.1.2.1. Hygiene system settings
NOTE: menu available only if at least a hygiene system is present.
From the GENERAL SETTINGS menu touch the icon button to
access the HYGIENE SYSTEM SETTINGS submenu containing the
followingiconbuttons:
BIOSTERdisinfectioncyclesetting
(onlyiftheBIOSTERsystemispresent)
FlushingCYCLESETTING
(onlyiftheFLUSHINGsystemispresent)
WHEsystemtankemptying
(onlyiftheWHEsystemispresent)
5.1.1.2.1.1. BIOSTER disinfection cycle setting
Thissettingissharedbyallusers.
From the HYGIENE SYSTEM SETTINGS menu carry out the following
operations:
•Touchtheiconbutton toaccesstheBIOSTERDISINFECTION
CYCLESETTINGsubmenu.
NOTE: this submenu can be entered also by pushing at least for
2 seconds the BIO key on the assistant’s module.
NOTE: This submenu cannot be entered if the disinfectant liquid
tank is low (see paragraph 7.4.), an instrument is removed or the W.H.E.
system is in an error state. An acoustic signal (BEEP) will signal the
impossibility to enter the submenu.
•Setthedisinfectantdwelltimebytouchingtheiconbuttons or .
NOTE: time setting ranges from a min. of 5 minutes to a max. of
10 minutes with intervals of 30 seconds.
WARNING!
Recommended permanence time with PEROXY Ag+: 10 minutes.
Recommended time 3% hydrogen peroxide (10 volumes) should be
left in: 10 minutes.
•Withdrawtheinstrumentstobetreated(thecorrespondingiconwillappear
onthedisplay):
S1:syringeoninstrumentboard.
A:instrumentinpositionA
B:instrumentinpositionB
C:instrumentinpositionC
D:instrumentinpositionD
S2:syringeonassistant’sboard.
F:instrumentonassistant'sboard.
CA:suctiontubes.
BC:watertocupduct.
NOTE: pressing the CUP WATER DELIVERY button, you can
select/deselect disinfection of the cup water duct.
NOTE: if the ushing system of suction cannulas is present, it is
possible to select their ushing by simply putting them into the specially
provided connect couplers (see paragraph 7.5.).
•Tostartthedisinfectioncycle,touchtheiconbutton (seeParagraph
7.4).
NOTE: the disinfection cycle can be started also by briey pushing
the BIO key on the assistant’s module.

19
19
EN
A7 Plus
- OPERATING INSTRUCTION
5.1.1.2.1.2. Flushing CYCLE SETTING
Thissettingissharedbyallusers.
From the HYGIENE SYSTEM SETTINGS menu carry out the following
operations:
•Touchtheiconbutton toaccesstheFLUSHINGCYCLESETTING
submenu.
NOTE: this submenu cannot be entered if the distilled water tank
is low (see paragraph 7.2.). A message on the control panel display and an
acoustic signal (BEEP) will signal the impossibility to enter the submenu.
•Settheushingtimebytouchingtheiconbuttons or .
NOTE: the time may range from at least 1 minute to at most 5
minutes, with 1 minute intervals.
NOTE: for the distilled water tank, it is advisable not to set a time
longer than 2 minutes.
•Withdrawtheinstrumentstobetreated(thecorrespondingiconwillappear
onthedisplay):
S1:syringeoninstrumentboard.
A:instrumentinpositionA
B:instrumentinpositionB
C:instrumentinpositionC
D:instrumentinpositionD
S2:syringeonassistant’sboard.
F:instrumentonassistant'sboard.
NOTE: the Flushing CYCLE does not start if at least one instrument
is not selected.
•TostarttheFLUSHINGcycle,touchtheiconbutton (seeparagraph
7.6.).
5.1.1.2.1.3. W.H.E. system tank emptying
ThisfunctionisusedtoemptytheW.H.E.system’swatercircuit(seepa-
ragraph7.3.)ifthedentalunitisnotgoingtobeusedforseveraldaysor
ifyouwanttodrainthewaterpresentinthesystem.
PerformthefollowingstepsfromtheDISINFECTINGSYSTEMSETTINGS
menu:
•Touch the icon button to access the W.H.E. SYSTEMTANK
EMPTYINGsubmenu.
•Placethecup(e)providedunderthewaterfountain.
•Touchtheiconbutton tostarttheemptyingcycle.
NOTE: the emptying cycle does not start if the S.H.S. system is active or
the W.H.E. system is in an error state.
•Oncethedrainagecycleiscomplete,youcanturnothedentalunitto
resetthesystemshouldyouwishtoresumework.

2020
EN
A7 Plus
- OPERATING INSTRUCTION
5.1.1.2.2. Hydro unit settings
FromtheGENERALSETTINGSmenutouchtheiconbutton toaccess
theHYDROUNITSETTINGSsubmenucontainingthefollowingiconbuttons:
Watertobowlsettings
Watertocupsettings
Automaticbowlmovementsetting
(onlywithmotor-drivenbowl)
5.1.1.2.2.1. Bowl water delivery setting
FromtheHYDROUNITSETTINGSmenutouchtheiconbutton to
access the BOWL WATER SETTING submenu containing the following
iconbuttons:
Bowlushingcontroller
withdentalchairbroughttorinseposition
Bowlushingcontroller
withdentalchairbroughttoresetposition
Cuspidorbowlushingautomatism
withreturnfromtherinsepositionforthechair
ABowlushingcontrollerwithcupcall
SettingoftimedorON/OFFbowlushing
Bowlushingtime(inseconds)
•Toselect/deselectafunction,touchtherelativeiconbutton.
• Tochangethebowlushingtime,touchtheiconbuttons or .
• Toconrm the selected settings,it is sucient toexit this submenu by
touchingtheiconbutton .
Other manuals for A7 Plus
1
Table of contents
Other Anthos Dental Equipment manuals