Apex Digital ACC500-DLX User manual
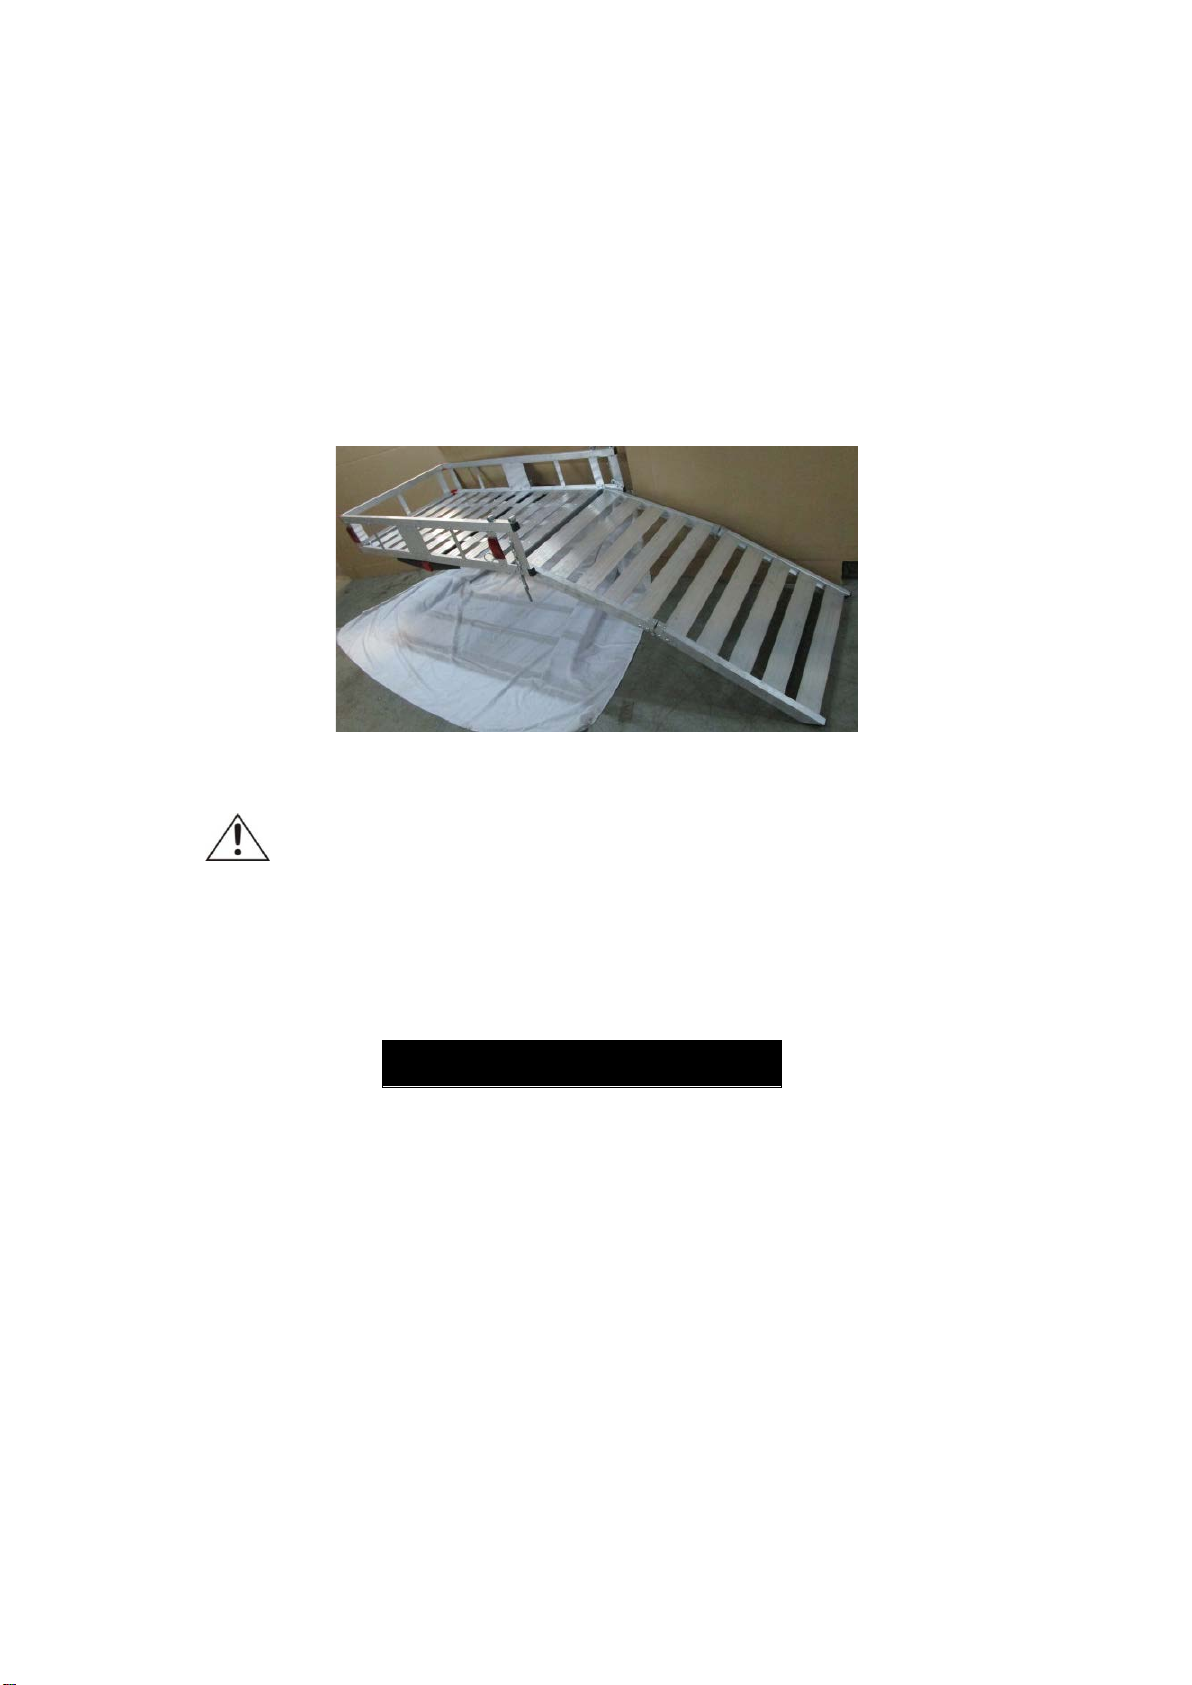
ALUMINUM CARGO CARRIER WITH
FOLDING RAMP
OWNER’S MANUAL
WARNING:
Read carefully and understand all ASSEMBLY AND OPERATION
INSTRUCTIONS before operating. Failure to follow the safety rules and other
basic safety precautions may result in serious personal injury.
ACC500-DLX

Page of 6
2
Thank you very much for choosing the ACC500-DLX Aluminum Cargo Carrier with Folding
Ramp ! For future reference, please complete the owner’s record below:
Model: _______________ Purchase Date: _______________
Save the receipt, warranty and these instructions. It is important that you read the entire
manual to become familiar with this product before you begin using it.
This equipment is designed for certain applications only. The manufacturer is not
responsible for issues arising from its modification and strongly recommends that it not be
modified and/or used for any application other than that for which it was designed. If you
have any questions relative to a particular application, DO NOT use the equipment until you
first contact the place of purchase to determine if it can or should be performed on the
product.
TECHNICAL SPECIFICATIONS
Capacity
500 lbs. (227kg)
Construction
Extruded aluminum carrier and ramps. Formed steel hitch and hitch
plate. Carbon steel hardware. Thermoplastic end caps.
Vehicle Hitch
Receiver Size
2in. (5cm) (Vehicle hitch requires a Class III or Class IV tow rating.)
GENERAL SAFETY RULES
WARNING:
Read and understand all instructions.
Failure to follow all instructions
listed below may result in serious injury.
CAUTION:
Do not allow persons to operate or assemble this aluminum cargo
carrier
until they have read this manual and have developed a thorough understanding of
how the aluminum cargo carrier
works.
WARNING:
The warnings, cautions, and instructions discussed in this instruction
manual cannot cover all possible conditions or situations that could occur.
It must be
understood by the operator that common sense and caution are factors which cannot be
built into this product, but must be supplied by the operator.
SAVE THESE INSTRUCTIONS
WORK AREA
•
Keep work area clean,
free of clutter and well lit.
Cluttered and dark work areas can
cause accidents.

Page of 6
3
•
Keep children and bystanders
away while operating the aluminum cargo carrier.
Distractions can cause you to lose control, so visitors should remain at a safe distance
from the work area.
•
Be aware of all power lines, electrical circuits,
water pipes and other mechanical
hazards in your work area, particularly those hazards below the work surface hidden
from the operator’s view that may be unintentionally contacted and may cause personal
harm or property damage.
•
Be alert of your surroundings.
Using the aluminum cargo carrier in confined work areas
may put you dangerously close to cutting tools and rotating parts.
PERSONAL SAFETY
•
Stay alert,
watch what you are doing and use common sense when using the aluminum
cargo carrier. Do not use the aluminum cargo carrier while you are tired or under the
influence of drugs, alcohol or medication. A moment of inattention while operating an
aluminum cargo carrier may result in serious personal injury.
•
Dress properly.
Do not wear loose clothing, dangling objects, or jewelry. Keep your hair,
clothing and gloves away from moving parts. Loose clothes, jewelry or long hair can be
caught in moving parts.
•
Use safety apparel and equipment.
Use safety goggles or safety glasses with side
shields which comply with current national standards, or when needed, a face shield.
Use as dust mask in dusty work conditions. This applies to all persons in the work area.
Also use non-skid safety shoes, hardhat, gloves, dust collection systems, and hearing
protection when appropriate.
ALUMINUM CARGO CARRIER USE AND CARE
•
Do not modify the aluminum cargo carrier
in any way.
Unauthorized modification may
impair the function and/or safety and could affect the life of the equipment. There are
specific applications for which the aluminum cargo carrier was designed.
•
Always check of damaged or worn out parts before using the aluminum cargo carrier
.
Broken parts will affect the aluminum cargo carrier operation. Replace or repair
damaged or worn parts immediately.
•
Do not exceed the aluminum cargo carrier
load capacity.
•
Distribute the load evenly.
Uneven loads may cause the aluminum cargo carrier to tip,
resulting in personal injury to the operator or others. To minimize the effects of dynamic
loading, make sure the load is centered on the carrier.
•
Use the aluminum cargo carrier
on flat and level surfaces
capable of supporting the
aluminum cargo carrier and its maximum load. Pulling or pushing a load on a slanted or
uneven surface can result in loss of control.
•
Prior to transporting a load
, make sure the Ramp of the carrier is folded and secured.
The load itself must also be properly secured to the carrier.
•
Store idle the aluminum cargo carrier.
When the aluminum cargo carrier is not in use,
store it in a secure place out of the reach of children. Inspect it for good working
condition prior to storage and before re-use.
WARNING!
Flammable cargo can ignite from exposure to heat.
Be aware of the
possible fire risk and property damage resulting from the vehicle’s exhaust system
pointing at or running near the cargo in the carrier. Do not use if this condition exists.

Page of 6
4
ASSEMBLY
Carrier Assembly
1. Place the Carrier (32) on a solid work surface.
2. Attach the two Reflectors (21) to the back side of Carrier Platform using Spring Wash-
ers (20) and Nuts (19).
3. Attach Ramp Lock Pin Seat (33) to the back side rail of Carrier (32), using 2 Screw (33).
4. Slide the U Safe Pin (6) through the holes on U handle seat on the top of rail near the
ramp and secure with split pin (8), refer to the Parts List and Assembly Diagram, repeat
for another U Safe Pin (2).
5. Assemble 4 Tie-Down Hooks (2) to sides of Carrier platform, using Washers (3) and
Lock Nuts (4).
6. With assistance, set the Carrier upside down on a flat, level, floor surface.
Caution:
The Carrier Basket and Ramps are heavy and can be difficult to maneuver. Be
careful not to pinch fingers and feet when moving the Carrier and when folding and
unfolding the Ramps.
7. Attach Support Bar Assembly (26) to underside of Carrier (32) using Bolts (22&25), Big
Washer 6 (23) and Lock Nuts (24). Make sure that Hitch Bar protrudes out the front of
Carrier and Reflectors are at the back of Carrier.
8. The Aluminum Cargo Carrier is now ready for mounting to Car’s hitch receiver.
Mounting carrier to Hitch Receiver
1. Remove the Hitch Pin (17) and the Safety Pin (18) from the Hitch Tube (26).
2. Slide the Anti-Tilt Bracket (14) over the end of the Hitch Tube. Make sure the large open
end of the Anti-Tilt Bracket need to face hitch receiver on car,
and the bolts is
downwards.
3. With assistance, lift the empty Carrier and slide the open end of the Hitch Tube into the
hitch receiver, and secure them with the Hitch Pin (17) and the Safety Pin (18).
4. Slide the Anti-Tilt Bracket (14) up against the hitch receiver. Tighten the two bolts
against underside of hitch receiver collar.
OPERATION
1. Pull the Pin (6) to unlock the Ramp.
2. Then turn down the Ramps and be sure the end of the Ramp (36) must rest flat on a solid,
level, and flat surface when loading and unloading an object. Then secure the load in
place using appropriate tie-downs, ropes, etc. (not included).
Do not exceed the 500
Lbs. maximum weight capacity. Weight inside the Carrier should be evenly distributed.
3. Turn up the Ramp, fold it and lock by U Safe Pin (6) and Split Pins (8).The Carrier is now
ready to transport a load.
4. When the Carrier is not in use, the two Ramps can be folded to the vertical position, or
the two Ramp sections can fold to lie into the Carrier Basket, make sure lock the ramps
in position securely.
IMPORTANT: Maintain labels and nameplates on the Carrier. These carry important safety
information. If unreadable or missing, contact your supplier for a replacement.
WARNING: NEVER impede or block vehicle exhaust. Always keep clear exhaust
pipe and exhaust path.
1. This Carrier has a maximum weight capacity of
500 pounds.
Do not exceed the 500
pound capacity.
2. Do not exceed 55 MPH while the Carrier is attached.

Page of 6
5
3. Always secure the Carrier as close to your vehicle as possible, minimizing the
distance of the Carrier and its load from your vehicle.
4. Beware of dynamic loading! Dropping or bouncing a load may briefly create excess
load, causing personal injury and/or product failure.
5. Inspect before use, including all bolts and nuts in the Carrier. Do not use if damaged.
6. Turn off the vehicle’s ignition and set the parking brake before loading an object
onto the Carrier or unloading.
7. Make sure to read and understand all instructions and warnings set forth by the
manufacturer of the vehicle that the carrier will be used with.
8. The ends of the Carrier’s Ramps must rest flat on a solid, level, and flat surface
when loading and unloading an object.
9. Keep the Carrier clean and dry at all times.
10. This product is not a toy. Keep it out of reach of children.
11. Never ride a motorized object (powered scooters, lawn tractors, ATV’s, etc.) onto or
off the Carrier. Only load/unload with the motorized object empty of cargo and
people.
12. Follow D.O.T. (Department of Transportation) guidelines for installation and use.
13. Make sure to secure the load or on the Carrier with ropes, and/or tie-downs (not
included) before transporting.
14. Only use the Carrier with a properly installed
Class III or Class IV
2 inch
hitch
receiver capable of supporting the Carrier and its load.
15. The warnings, precautions, and instructions discussed in this manual cannot cover
all possible conditions and situations that may occur. It must be understood by the
operator that common sense and caution are factors which cannot be built into this
product, but must be supplied by the operator.
16. WARNING!
Flammable cargo can ignite from exposure to heat.
Be
aware of the possible fire risk and property damage resulting from the
vehicle’s exhaust system pointing at or running near the cargo in the
carrier. Do not use if this condition exists.
MAINTENANCE
•
Maintain your aluminum cargo carrier.
It is recommended that the general condition of
any aluminum cargo carrier
be examined before it is used. Keep your aluminum cargo
carrier
in good repair by adopting a program of conscientious repair and maintenance.
If any abnormal vibrations or noise occurs, have the problem corrected before further
use. Have necessary repairs made by qualified service personnel.
•
BEFORE EACH USE,
inspect the general condition of the Carrier. Check
misalignment, loose or damaged parts and any other condition that may affect its
safe operation.
•
BEFORE EACH USE,
make sure any dirt, debris, oil, grease, etc. are cleaned off the
Carrier. Clean the Carrier with a clean, moist cloth. Do not use solvents.
•
PERIODICALLY,
check all hardware for tightness.
Page of 6
6
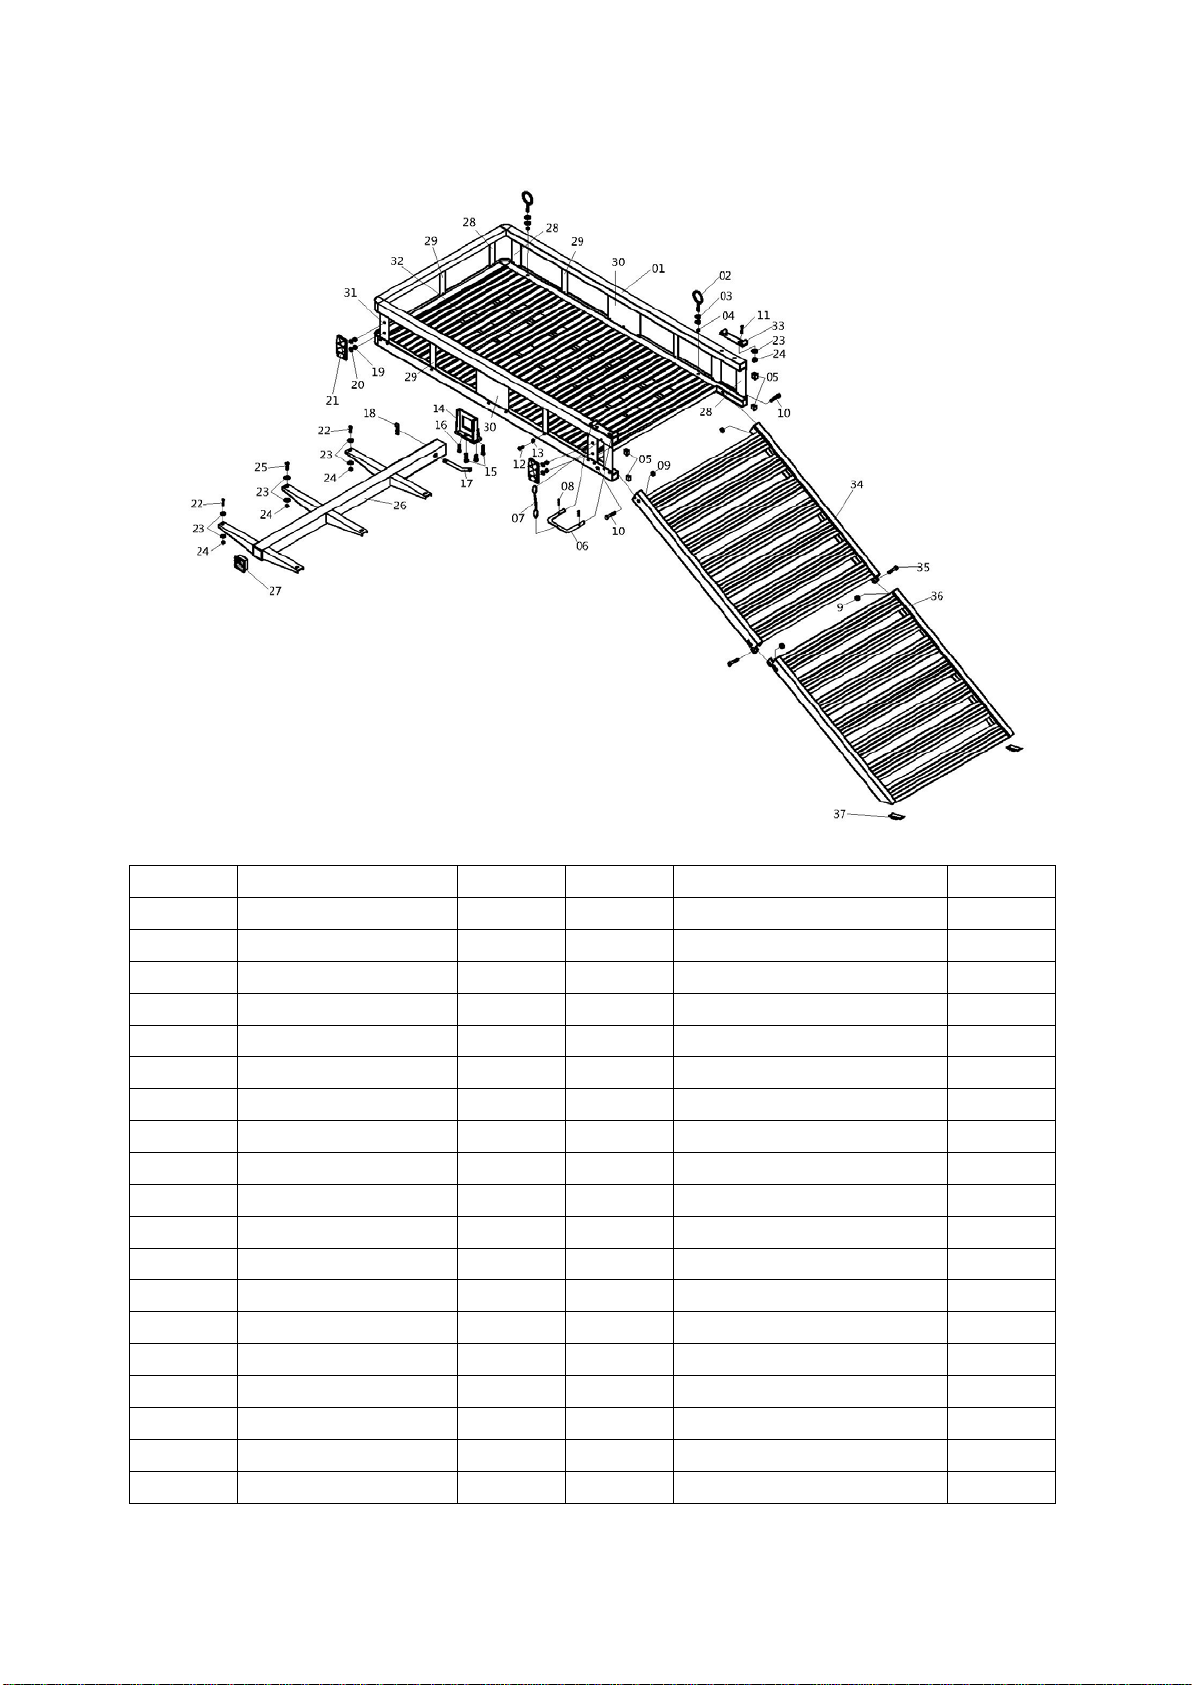
DIAGRAM & PARTS LIST
Part NO. Description QTY. Part NO. Description QTY.
1 Top Frame 1 20 Spring Washer 4
2 Tie Down Hook 4 21 Reflector 2
3 Washer 8 22 Bolt 4
4 Nut 4 23 Washer 16
5 Cap 4 24 Nut 10
6 U pin 2 25 Bolt 2
7 Chain 2 26 Hitch Bar 1
8 Clip 4 27 End Cap 1
9 Nut 4 28 Middle Support 6
10 Bolt 2 29 Small Support 5
11 Bolt 4 30 Big Support 2
12 Screw 54 31 Support With Reflector 2
13 Nut 54 32 Carrier Bed 1
14 Anti-Tilt Bracket 1 33 Connect Plate 2
15 Bolt Long 2 34 1st Ramp 1
16 Bolt Short 2 35 Bolt 2
17 Hitch Pin 1 36 2nd Ramp 1
18 Clip 1 37 Foot Rubber 2
19 Nut 4
Table of contents
Popular Carrier Board manuals by other brands


NXP Semiconductors
NXP Semiconductors Freescale TWR-TWRPI-BD quick start guide

Seco
Seco COM-Express CCOMe-C96 user manual

WinSystems
WinSystems ITX-M-CC452-T10 product manual

Reflex Marine
Reflex Marine FROG-XT6-P user manual

Multitech
Multitech QuickCarrier USB MT100UCC Series Developer's guide

Power Fist
Power Fist 8681835 User manua
