Apollo C15 DD Owner's manual

1
Apollo C15 DD - Delta Jet 2 - R912
weight shift controlled (WSC) aircraft
OPERATING/SERVICING MANUAL
2012
ATTENTION!
H A L L E Y Apollo Ultralight Aircraft Ltd
H-3300 E G E R, M e s t e r Street 3., HUNGARY (mailing address)
H-3301 E G E R Pf.: 425. HUNGARY (mail box)
Phone / Fax: +36/313-830; 36/320-208
home page: www.halley.hu

2
ALL PILOTS OPERATING APOLLO WSC AIRCRAFTS ARE
TO KEEP ALL THE RULES AND MEASURES PBLISHED IN
THEIR MANUAL WITH SPECIAL RESPECT TO
OPERATIONAL LIMITATIONS AND OTHER
PRESCRIPTIONS IT.
(Aerobatics of any kind, over banked turns, whip stalls, etc. are
prohibited)
ALL RESPONSIBILITIES FOR INJURIES AND DAMAGES
HAVING BEEN OCCURRED AS A CONSEQUENCE OF
DISREGARDING LIMITATIONS AND MEASURES OF THIS
MANUAL ARE REFUSED BY APOLLO
HALLEY LTD, EGER
Content
1. Introduction……………………………………………………………… 3
2. Identifications of Apollo WSC aircrafts………………………………. 4
3. How to use this MANUAL……………………………………………… 5
4. Amendment record sheet……………………………………………… 6
5. Aircraft general description …………………………………………… 6
6. Normal operation …..………………………………………….……..10
7. Emergency procedures……………………………………….……… 25
8. Operational limitations……………………………………………….. 29
9. Handling service and maintenance………………………………… .32
10. Technical parameters………………………………………………… 36

3
1. Introduction
In the past 25 years experts of the HALLEY LTD, EGER have designed and
developed approximately 40 types of weight shift controlled (WSC) UL aircrafts,
while basically applying the experiences obtained during manufacturing and
operating the WSC aircraft types Apollo CX and Apollo C15 Racer GT but the
knowledge gained on the other, more than 10 types produced in preceding period
were of course utilized, also. Due to streamlining the cockpit aerodynamically
advantageous and aesthetically favorable designs were produced, while the
introduction of telescopes on all wheels, hidden tanks, topless wing structure, higher
motor selection, vibration dampers, strutted wings and other improvements made
Apollo aircrafts successful examples of advanced engineering.
The purpose of these changes was an aerodynamically favorable design with a high
glide ratio resulting an increase in speed and a decrease of fuel consumption. As a
result of all these developments the Apollo C15 DD - Delta Jet 2 –912 WSC
aircraft type of today is a safe, high performance, economic, durable, comfortable
and easily controllable aircraft on the top of the international UL market, applicable
on the whole range of UL operation from hobby to competition flying, which have
proved its capabilities on several international championships.
Please read this manual and get convinced that you can apply all what concerns
your Apollo C15 DD - Delta Jet 2 –R912 ultralight even before initiating its
operation.
Regular maintenance is required to keep your ultralight in a safe condition.
Maintenance requirements are listed in this Manual. Please refer to these parts of
this document to ensure that the airworthiness of your ultralight is maintained
continuously.
The operating procedures published in this Manual are the result of Apollo
knowledge and experience gained since 1979. Not only for legal flying
circumstances but also for the safety of your body, your aircraft and the environment
of your flights please, keep these procedures,

4
2. Apollo C15 DD - Delta Jet 2 –912 aircraft identifications
Amendments in the data of operation
Apollo WSC
Aircraft
identification:……………………………………….
Apollo WSC
Aircraft CODE:…………………………………………………
Serial number
Type
CODE
Wing
Trike
Motor
Prop
BRS
Owner:
………………………………………………………………………………….
Address:……………………………………………………………………….…….
……………………………………………………………………………………….
Operator:
………………………………………………………………………………….
Address:……………………………………………………………………….…….
……………………………………………………………………………………….

5
3. How to use the MANUAL
This manual is an official document prepared by Apollo Ltd, and must not be
amended or altered without the permission of the company. This manual is intended
neither to teach the owner how to fly the aircraft, nor to publish detailed information
about the basics of strength, control and stability of weight shift controlled (WSC)
aircrafts. Training is to be accomplished by a flying instructor licensed and rated to
instruct on this type of aircraft.
This manual is the property of the aircraft owner with the identification marks listed in
Chapter 2. At every flight this document is to be held in the appropriate pocket of the
cockpit and is to be presented to the authorities if requested.
This manual contains factory recommended procedures and instructions for
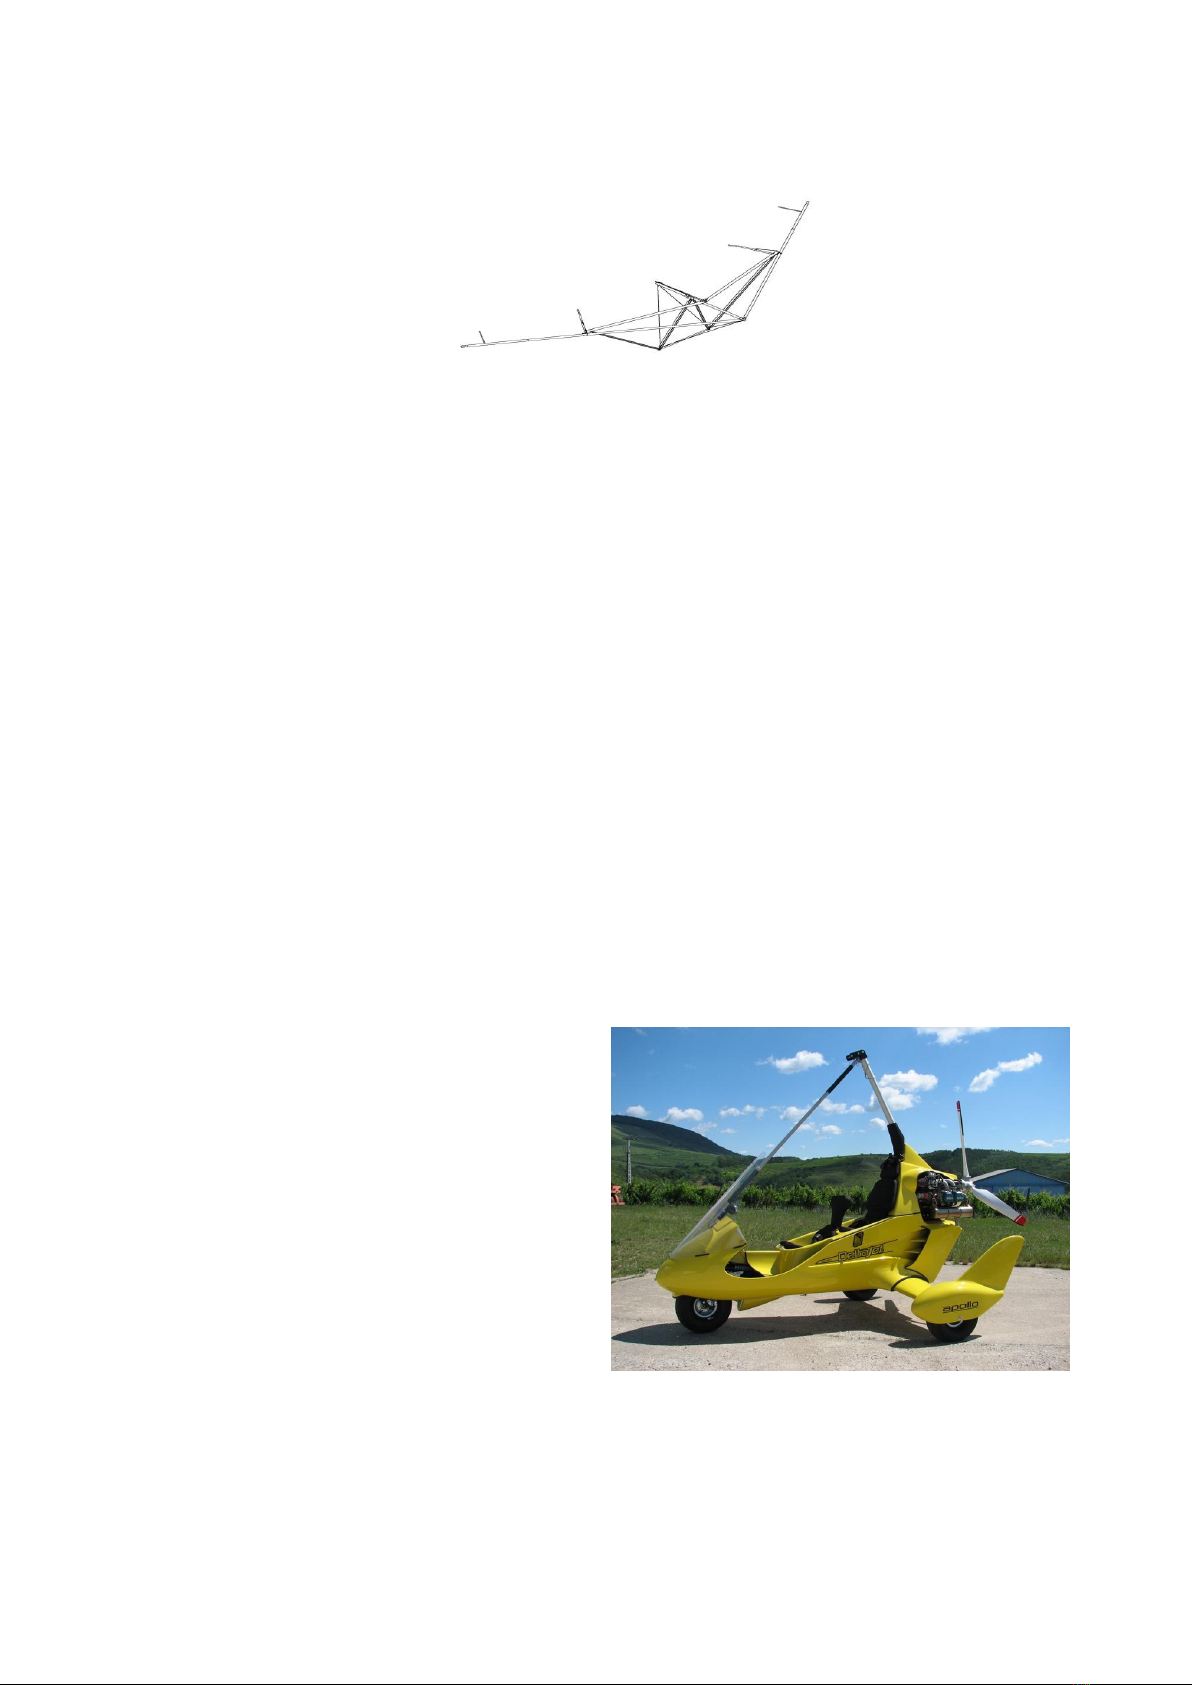
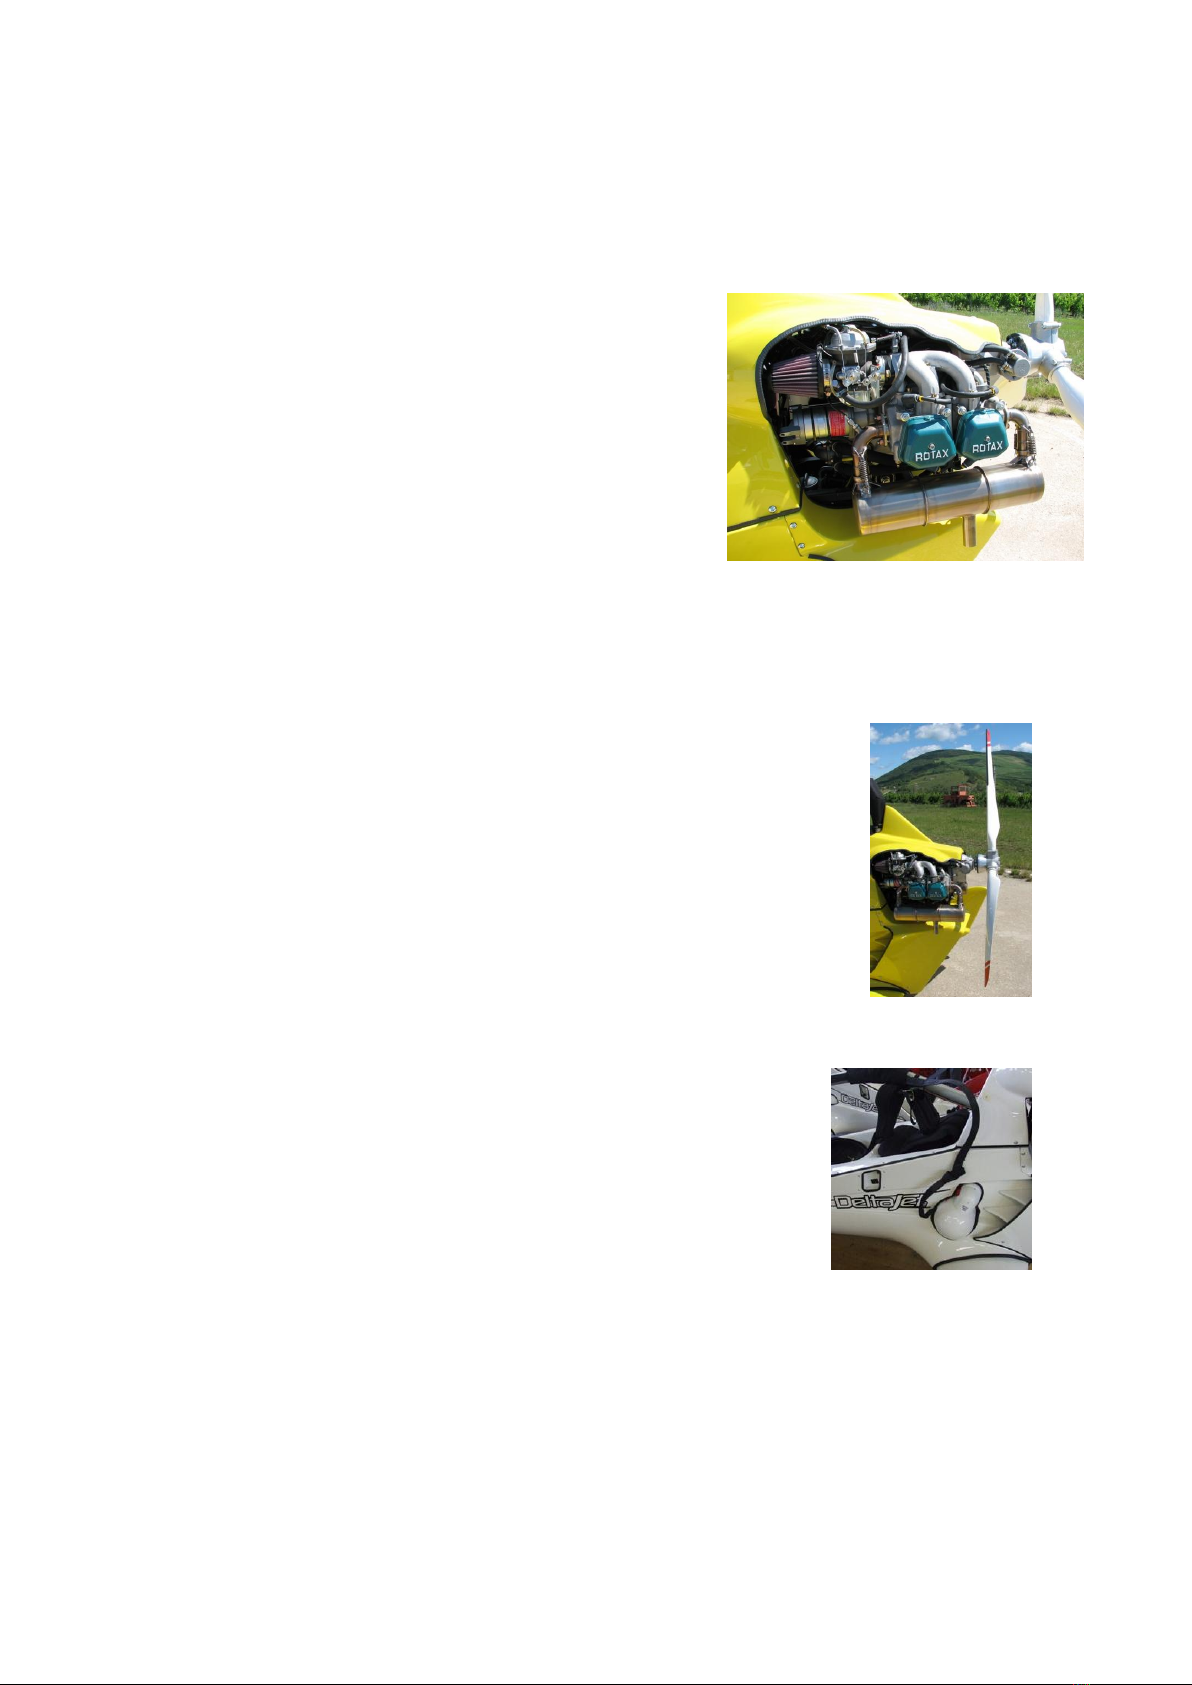
servicing, inspecting, maintaining and altering. Apollo C15 DD - Delta Jet 2 –912
WSC ultralight aircraft. The procedures described in it are to be used in addition to
the regulations of the particular governing body for each country where the aircraft is
flown. The handbooks of some Aircraft Primary Structures complete this present
basic manual, see Annexes. Legally these complementary manuals are of the same
value and of the same purpose as this present basic manual. Any problem emerges
covered neither by the rules in this Manual, nor the rules of the particular governing
body of the relevant country the prescriptions of the British Civil Aviation Regulations
Chapter „S” is to be referred to.
The information in this manual is based on the data that was available at the time of
its publication. The latest amendments to this manual will be mailed to the operators
either directly or via persons keeping constant contact with Apollo (Dealers and Type
managers, see: 5.3)together with the instructions on the actions to be done, and on
the way of annexing the amendment leafs to the aircraft basic Manual of the aircraft
owner. The AMENDMENT RECORD SHEET (see: Chapter 4) should at that time be
updated with the appropriate details and data. If any errors or omissions are found in
this Manual please, advise the factory.
It is assumed that only people with an adequate skill level will perform maintenance
on this aircraft. A sound understanding of mechanical systems, experience with the
necessary tools and procedures and knowledge of the specific flight mechanics of
WSC aircraft is required as the airworthiness of the aircraft depends on the
competence of the person performing the maintenance. If there are any doubts
regarding the required and appropriate maintenance then let Apollo Ltd or its dealer
be contacted for the correct procedures and/or servicing.
Before the beginning of operation the level of skill of the operator is to be controlled
by examiners designated either by Apollo (he may be the „dealer” if entrusted by
Apollo), or officials licensed and rated in the legal way valid in the country to state
and sign the relevant type-rating into the flight log book of the aircraft owner.
Warranty of Apollo is lost by any aerial operation, inspection, maintenance and
alteration action contradicting to any of the measures of this MANUAL. Warranty is
upheld only if measures of the MANUAL do not got offended.

6
4. Technical Amendments Record Sheet
No
Registration number of
the instruction
prescribing the
amendment
Effected points of
the Manual
Date and
Subscription
Registration of
measures
made
The sheet is annexed to this Manual.
5. General description of Apollo WSC aircraft
5.1 Aircraft Primary Structures (AP Structures)
All WSC aircraft is a combination of the Aircraft Primary Structures, that is
wing, trike, engine, propeller, BRS (optional)
Practice has proved that AP Structures can be of different types. A certain WSC
aircraft type is a defined variation of four airworthy AP structures (only the fifth being
optional). This way a wing can be paired with different trike, motor and propeller.
The aircraft composed of a defined variation of AP structures is airworthy only if
Apollo declares this fact, after fulfilling the relevant prescriptions of the authorities.
This present Manual defines one aircraft type with the following AP structures:
- Apollo C15 DD wing,
- Delta Jet 2 trike,
- Rotax 912 motor,
- PPP propeller.
- BRS (optional)
The airworthiness of Apollo C15 DD - Delta Jet 2 - R912 aircraft-type is declared on the
title page of this present Manual. The identification marks of the owner’s machine are
designated in Chapter 2.
As any change within a set of AP structures may alter the characteristics of the aircraft
with special attention to the operation limitations the airworthiness (see: 8) of the new
variation is to be declared by Apollo. If an owner intends to operate his aircraft with a set
of AP structures containing one or several AP structures outside of the set approved to
the type, he is to request the permission of the Apollo Ltd. As a response the Apollo
- insert a note into the Manual on page Technical Amendments Record Sheet, with the
leaflet describing the variation annexed, or
- publishing a new manual with altered LIMITATIONS,
- or may refuse its approval.
An alteration of this kind may generate a number of technical modifications, control
measurements and test flights together with the necessary documentation the price of
which all may charge the operator.

7
5.2 Aerial and Ground Operation
5.2.1: Aerial Operation
Aerial Operation (flying) of Apollo WSC aircrafts is considered to be legal by Apollo
only if the pilot disposes of a valid WSC licence with the relevant type rating.
5.2.2 Ground Operation (GO)
Concerning ground operation Apollo defines here two types of activity:
Heavy Ground Operation (H)—any maintenance, inspection, repair, or alteration,
which Apollo designated to be „heavy” ones, and require
- specific training and licensing (e.g. flight mechanic), or
- professional equipment (e.g. sail stitching tools) or
-special facilities (e.g.: workshop)
The pilot cannot make these activities independently. To find the proper way to carry
out the tasks excluded from the pilot’s activity appropriate licensed and type-rated
assistance is to be used.
Light Ground Operation (L)—any repair, maintenance, scheduled checks, servicing,
inspections, or alterations, which are not designated to be heavy ones by Apollo.
As the items of a Pre-flight Check are not qualified as „Heavy” ones, the pilot may do
them. This right of him terminates if during the Pre-flight Check a component is
discovered which requires special means.
5.3 Assistance for Ground Operation
To handle questions emerging while planning aircraft maintenance, inspection,
repair, or alteration Apollo stays at the disposal of the costumer by keeping contact
with him either directly, or by a Contact Person.
Contact Person for a costumer from a foreign country operating his/her aircraft
privately is the Dealer. The Dealer is the sole and exclusive representative of Apollo
Ltd in this country. The basic purpose of the assistance provided by the Dealer is the
fulfillment of the prescriptions of the Apollo while the regulations of WSC aircraft
operation valid in the county are also complied with, if possible simultaneously.
Description of this assistance is detailed in the Certificate of Appointment prepared
by Apollo for the dealer.
Contact Point for a costumer operating his/her aircraft under the supervision of an
Operating Organization is the Type Manager appointed by the relevant technical
leader of the Organization (mostly the Chief Engineer). Detailed description of this
assistance is an agreement between Apollo and the Operating Organization only if
such a document is required by any of the parties.

8
5.4 Aircraft Secondary Structures (AS Structures)
All AP Structures are composed of AS Structures. An AS Structure may operate with
different Components (Parts), however an AS Structure is airworthy only with the parts
ordered and received directly from Apollo or are declared by Apollo to be applicable.
Any change on an AP or an AS Structure without the approval of the Apollo Ltd may
generate legal consequences, especially if an aircraft accident or flying incident occurs
and the investigation reveals causes in connection with aircraft airworthiness.
In order to find the way among the actions which are to be followed during inspection,
maintenance and repair AS Structures are listed in 5.4.1 –5.4.5. together with their
ground operation type (Heavy/Light, requirements see: 5.2). For the sake of discovering
hidden damages, faults or discrepancies when preparing any inspection the aircraft is to
be precedingly cleaned and attended.
When inspecting, maintaining, repairing and altering the data in 9.3.5 Component
replacement schedule is to be considered.
5.4.1 WING
The wing Apollo C15 DD is the primary structure of the WSC aircraft type Apollo
C15 DD - Delta Jet 2 - R912 producing lift. Structure, strength, stability and
controllability are part of the thematic of the theoretical course for WSC licence. The
publisher of this Manual supposes that the pilot has already been educated in basic
flight mechanics and wants to inform the user primarily about the aerial and ground
operation of the type as a basis for referring to.
Apollo maintains the right to express his opinion both on the thematic and on the
requirements of obtaining type rating to the relevant authorities.
The wing consists of the sail and a skeleton structure composed of the following AS
Structures:
1. Sail with fasteners, tuning and stretching elements
1. Wing keel and assemblies
2. Leading edge tubes and assemblies including
Dive sticks and wash out tips
3. Cross tube and cross bar and assemblies
Including wing stretching device
4. A-frame and assemblies
5. King post and assemblies
6. Cabling system including main flying wires,
top rigging and luff lines
7. Struts and assemblies
8. Hang block assembly
9. Battens

9
Skeleton:
For Inspection and Maintenance of the wing the items are to be checked according
to the type of the maintenance (L, H):
1. Sail repair H/L for damages with influence/without influence on the strength of
the sail
2. Skeleton structure: general maintenance, washing, corrosion prevention, cable
checks L
3. Full tubing H, junctions, fasteners inspection L
4. Battens/Ribs and Batten Tips and Trailing Edge Tips or Cords L
5. Alterations:
No alteration of the wing structure is allowed except by Apollo, H
5.4.2 TRIKE
For Inspection and Maintenance of the trike the items are to be checked according to
the type of the maintenance (L, H):
1. Cockpit L
2. Battery L
3. Engine cradle and Mounts H
4. Front and rear wheels L
5. Front Fork H
6. Fairings, cowlings L
7. Mast/Pylon, front strut L
8. Universal Hang Block Assembly H
9. Base Tube/Trike Keel H
10.Seat Frame H
11.Seats, harnesses L
12.Safety cables L
13.Brakes, L
14.Battery L

10
5.4.3 Engine
For Inspection and Maintenance of Engine please follow instructions provided by
Rotax Ltd., in connection with the AS Structures (see: www. Rotax–aircraft–
engines.com):
1. Leaks (fuel, oil, exhaust, hydraulics)
2. Torque of Engine Components
(induction, exhaust, cylinder heads
cooling radiator)
3. Fuel System (lines, hoses, and clamps)
4. Induction Inlet Boots
5. Cylinder compression
6. Motor mounts, vibration dampeners
7. Engine Controls
8. Carburetors
9. Exhaust pipes
10. Nacelle and Cowling
5.4.4 Propeller
For Inspection and Maintenance of Propeller follow instructions provided by propeller
manufacturer, such as:
1. Propeller Assembly cracks and nicks.
2. Torque propeller and gearbox
3. Propeller Balance, Pitch and Track
5.4.5 BRS
For maintenance of Ballistic Recovery System please follow instructions provided by
BRS manufacturer, such as:
1. Mounts
2. Bridle
3. Securing and Activation
4. Re-Packing
6. Normal Operation
6.1 Storage
Store the aircraft in hangar whenever possible to prevent the damages occurring
when setting up or de-rigging the aircraft (joints wear, sail tears and easily gets hurt).
As WSC aircraft can easily be partly or completely dismantled we do not recommend
storing the aircraft in ready to fly state in open air.

11
In the case of partial dismantling only the wing is taken off and in a closed place it
will stand on the A-frame with the nose on the floor, or in open air it will be laid onto
the A-frame. If the the wing is laid onto the A-frame on the ground it must be
anchored to the ground in order to defend this device, with a relatively big surface
and light weight, against becoming a toy of the wind and suffering serious damages.
Do not store your wing in this state for a long time.
Do not leave your wing on the trike for a long period in strong winds, because it will
decrease the life of the sail, and the joints and frame of your wing. We recommend
that you do not expose your wing to any more direct sunlight than unconditionally
necessary.
Because of all these the advantages of storing the aircraft in a roofed place are
evident. If there is not enough room the wing is to be disassembled, put into its sack,
place it onto two supports with its back downwards, both supports being 1,5 meter
form the ends of the sack. Supports are to be carefully padded.
When packing the wing use the appropriate padding prepared to defend the wing
tips, the A-frame corners and the WinG-wing main joint (the „cardan”), put the
battens into their sack and find an appropriate situation for the wires against getting
worn or causing damage
Never store the wing when wet, or if this is not possible air the wing and dry it as
soon as possible.
Trike can be stored with the main beam standing, which can be bent down if the
room is not enough. When getting prepared for a longer storing it is advisable to
place the trike onto supports with the wheels in the air to save the rubber tires from
deformation
In order to prepare the motor for an extended period of storing consult the Rotax
Manual.
6.2 Transportation
The aircraft can be transported on a light trailer made by Apollo to be used by WSC
aircrafts for transportation in folded up state. Trike is to be fixed to the trailer by tying
it down at the wheels. If the main beam of the trike is bend down use a short support
in the place of the nose tube to save the joints of the trike. The wing may be
transported in its waterproof bag, which offers protection from mechanical damage,
soiling and rain. The wing may be carried either on the roof rack of a car or on the
trailer supported by pads in both cases so as when storing.
During transportation, use attachment straps that are sufficiently secure to eliminate
the possibility of damage from vibration and movement. Flat straps should be used
for tie downs to avoid damage to leading edge Mylar.
When transporting the trike use trike and prop covers to protect your ultralight. Tie
the propeller to the trike to stop it from rotating at speed.

12
6.3 Wing Assembly Procedure
The following procedural descriptions are not intended to be a substitute for the
familiarization procedure of your dealer at the time the wing is delivered.
The aircraft is advised to be assembled by two persons, however even one person
can setup the wing and the complete aircraft, also, if necessary
The set up procedure should be carried out on a clean, not abrasive surface,
however if such a surface is not available a canvas or folia can be laid onto the
ground.
Place the glider on its back, zip upwards, and nose into the wind. In this position the
package is supported by the leading edge strengthening foam.
Undo the zip, untie the Velcro straps, remove the sack with the battens and put
aside. Open the A-frame and assemble it. At the A-frame corners secure the bolt
and the pushpin. Securings are to look towards the tail. Set the A-frame into
standing position by fitting the lower longitudinal wires with the nose wire stretcher
into the rail on the nose plate. Stretch the lower wires with the handle on the
stretcher and secure it with the pushpin.
With the sack of the sail still on rotate the wing into prone position so that the wing
now stands on the control bar. Remove the sack, carefully open the two half wings to
a small extent and assemble the struts. Unfold the sail along the leading edges,
open the wing to its maximum extent and secure the strut attachment mountings.
Select the right and left hand battens from the batten sack according to their color of
the end of the batten and row them on the ground according to their length behind
the trailing edge. Carefully slide the upper sail bent battens in their respective
pockets from the center towards the wing tips and tension the sail with the batten
stretcher strings along the trailing edge. Fit the wash out tips into their fittings on the
end of the wing spar and secure them. Fit the D-stick into its place and push the
cross battens into their sack. Stretch the sail with the sail stretcher handle by pulling
the handle backwards and fitting it’s mounting onto the rail on the back of the keel
and secure it. Lean the wing with its nose on the ground or mount it onto the trike.
Push the lower battens on their sack. Control the nose batten and adjust it if
necessary. Fix the nose cone with its Velcro fittings. The wing is now completely
mounted, however a control by walking around it is advised to eliminate possible
shortcomings discovered.
6.4 Fitting the wing to the trike.
Turn the wing precisely in front of the wind. Push the trike behind the wing.
Dismantle the nose bar and bend down the main beam. Roll with the nose wheel
across the control bar and lay the nose bar onto the ground behind the rear wheels
of the trike in order to prevent the trike to move backwards. Lift the vertical main
beam up, fit the head of it into the bracket of the trike-wing universal joint and push
the cross bolt into the hole of the bracket.

13
Secure the nut on the bolt and assemble the safety wire hook by guiding it with one
hook before the king post and one hook behind it. Do not forget to secure it.
Roll the trike backwards until the control bar gets before the nose wheel. Lift the
wing while the vertical mast of the trike is being lifted also. Fit the nose bar into its
place and secure its bolts. Now it is advised to tie the control bar with the seat belt to
the seat frame in order to fix a small angle of attack to the aircraft while parking on
the ground. Let always the wing tip towards the wind be on the ground or turn the
trike in front of the wind and fix the control bar in a pulled in position. Against rolling
unintentionally on the ground use the parking break or use brake blocks at the
wheels.
Fill in the tank with the amount of fuel necessary for the intended flight. The aircraft
is now completely assembled, however it will only be ready to fly if the pre-flight
check has been carried out.
6.5 Flight Preparations
The Apollo WSC aircraft can be flown by its pilot if he disposes of a valid pilot licence
with the relevant type rating obtained either from an instructor entitled officially to
donate type rating for the Apollo C15 DD - Delta Jet 2 - R912 WSC type, or directly
from Apollo. If these conditions are fulfilled the entire Aerial Operation this WSC
aircraft is in the hand of its pilot. On the contrary, Ground Operation of these
aircrafts is limited. The pilot may carry out only the daily tasks in connection with the
daily aerial operation, pre-flight checks, see: 6.6 and post-flight checks, see
6.7.12 are included.
Excluded from pilot’s activity are the tasks designated by Apollo as HGO (Heavy
Ground Operation, see 5.2), such as the ones the repair of which requiring licensed
technicians If the pilot discovers a failure of this category the aircraft cannot fly until
professional repair has not been completed. The aircraft cannot fly either, when the
preceding post-flight check stated such a failure and the professional repair has not
yet been completed. It is the pilot’s obligation to document such failures discovered
and the measures done into the aircraft’s logbook.
6.6 Pre flight check point by point
Check the aircraft with surveying, touching the components surveyed; moving them
by hand if seems to be necessary, while referring to 8.3 General Safety
Prescriptions. Do the repairs, which can be managed instantly, on the spot, without
the use of any special tools. If a repair requires tools other than the ones needed to
dismantle or to fix standard joints, the repair cannot be qualified as preflight check
and after finishing with the action the check is to be repeated from the beginning. A
full pre-flight inspection should precede every flight you make, not just the first flight
of the day.

14
6.6.1 Go around the wing and control the next items:
Check all self-locking nuts of the nose, the clevis pin and the safety ring which
secure the lock of the bottom front wires.
Along the left leading edge
- Carefully check the entire length of the leading edge pocket to insure that the
Mylar insert is lying flat in the pocket. If any section of the Mylar is folded under,
de-tension the crossbar, remove the batten closest to the area of distortion, and
unfold the Mylar.
- Open the crossbar junction access zipper and look inside, making sure that side
wires are properly secured to the crossbar, that the thimbles are not cocked on
the tang. Check the splint pin and the nut, which secures the leading edge –
crossbar junction. Check that the sail is not caught on the crossbar end, or on
any of the hardware. Check the mountings of the strut, the fittings of the Dive-
stick and the cross batten
- Remember to close the access zipper.
At the left wingtip:
- Check the fastening of the sail. Look into the sail at wing tip, and check that the
tip batten is properly seated and fixed.
- Check that the washout tip is properly secured in position supporting the batten,
and that the washout tip access zipper is properly closed

15
Along the trailing edge, left wing:
- Check that there are no tears in the sail material along the trailing edge.
- Check that all battens are properly tied out and stretched.
- Check that the bluff lines are properly fitted.
-Check the trailing edge for any cuts, tears or broken stitching.
From the rear keel
- Check that the sweep back wires are tight and secured on the hook on the keel
tube.
- Check the kingpost top for proper attachment of the bridles and condition of the
top rear wire and bridle wires.
- Check the keel mount webbing, and bottom rear wires are safely secured to the
keel tube.
Along the trailing edge, right wing
Same as for the left wing.
At the right tip
Same as for the left tip.
Along the right leading edge
Same as for the left leading edge.
Under the wing at the control bar:
- Check the cables at the control bar corners, making sure there are no kinks or
twisted thimbles. Inspect each Nico press sleeve for slippage and/or corrosion.
- Check each thimble for distortion, flattening or wear where it touches a bolt,
shackle or tang.
- Check for proper installation of all nuts and safety rings at the control bar corners.
Check that the downtubes are straight and undamaged.
- Unzip the center zipper. Check that all bottom surface battens are under the
leading edge tube.

16
At the keel:
- Check the crossbar center plates assembly including the sweep wire/X-bar
junction and the center bolt.
- Also, visually inspect the crossbars by sighting along the length of the crossbars
looking for any evidence of damage.
- Check all bolts, nuts and the safety rings, which secure the downtubes to the
channel. Make sure that the channel and hang detail are secured.
- Check the universal joint bracket position and general condition.
-Fit the nose cone over the front of the keel and attach the Velcro at the top rear
of the nose cone. Pull the bottom corners of the nose cone back until the nose
cone is tight around the nose and secure the Velcro on the bottom of the nose
cone.
Now your wing is ready for mounting it onto the trike.
WARNING! Don’t fly without the nosecone!
6.6.2 Go around the trike and control the next items:
- Check the streamlining polyester cowling and its fastenings for possible damages. Pay
a special attention is to the position and fastenings of the sensors of the instruments
(Pito- and Ventouri tubes)
-Check the bolts, nuts and their securing on the nose tube.
- Check the condition of the wind screen and its fastening. Clean it if necessary
-Check the fork of the nose wheel, its mountings and the nose wheel. Check the
pressure of the tire by considering its flattening on the ground. Pump if necessary.

17
-Test the right landing gear, its supporting strut and the telescope, together with the
polyester cowling. No cracking in tire treads, or evidence of cracking around the rim.
Wheels are secured. Check the pressure of the tire by considering its flattening on the
ground. Pump if necessary.
- Check the universal joint (wing-trike joint), the mounting and securing of the safety
hook
- Test the left landing gear, see: right landing gear.
-Check the seat frame and the harnesses. Seat belt attachments are secure
-Check the foot throttle, the choke and the ignition switch and their control cables.
6.6.3 MOTOR
Check:
- Leaks from oil system and engine
- Fuel filter clean and operational.
- Sufficient fuel for flight.
- Coolant is level.
- Radiator mounts secure and operational.
- Oil level is operational
- Mountings of the fuel tank are unhurt,
-Fuel hoses are unhurt
- Motor cradle and settings are fixed and unhurt
- Reductor is fixed and unhurt
- Carburetor and air filters are fixed and intact
- Controlling bowdens are intact and are moving freely.
- Vibration dampers are unhurt
6.6.4 PROPELLER
Check:
Splitting, denting or delaminating. Damages are to be repaired according to Propeller
Manual. For easier damage discovery clean the surface.
Bolts are tightened. If necessary torque them
Propeller hub assembly secure and tie wired

18
6.6.5 Ignition Check
Before the flight an ignition check is to be completed
Turn the aircraft directly in front of the wind and sit into the seat. The propeller wind may
disturb nobody. Either brake blocks are to be placed before the wheels or assistants are
to be asked to hold the aircrafts to prevent any forward movement of it. (Wheel brakes are
weak for that). Check if anybody stays either in circuit of the propeller, nor in the danger
zone of it. Start the engine
Get prepared to switch off the ignition at very short notice if an emergency should
arise. The two ignition circuits should be tested with the engine running at 4000 rpm.
Ignition one should be switched off and the RPM drop should not exceed 300 rpm.
Now both ignitions should be in the ON position and ignition two should be turned
off. The RPM drop should not exceed 300 rpm again. Ensure both switches are in
the ON position after ignition testing.
Stop the engine, get off the seat, fix the control bar to the seat frame with the harness
belt,. Tank the aircraft if necessary and document the test into the Aircraft Log Book.
Designate the start point and check the run up path.
The aircraft is ready to fly now and can fly with the fulfillment of other conditions.
CAUTION
BEWARE OF LOOSE STONES IN THE RUN UP AREA. THE PROPELLER AND
CAUSE SEVERE PROPELLER OR SAIL DAMAGE CAN SUCK UP LOOSE STONES.
RUN-UPS ARE BEST CONDUCTED ON A CLEAR SEALED SURFACE OR ON
GRASS, NEVER ON GRAVEL
WARNING
DO NOT LEAVE THE AIRCRAFT PREPARED TO FLY UNGUARDED. OTHERWISE
THE PRE FLIGHT CHECK IS TO BE REPEATED.
6.7 REPÜLÉS
6.7.1 Before taking off
- Stand onto the waiting point beside the parking aircraft:
- Check l wind direction and strength.
- Brief the passenger (if there is any). Check hair and cloth not to get sucked into
the prop.
- Control the place and fastenings of the packages if there are any,
- Guide the passenger to sit into its seat. Adjust his/her harness and helmet.
- Sit in. Check the fuel gauge; fuel is enough, fuel tap is open.

19
- Set the trim device to the required position.
- Remove the safety lock from the parachute
- Control the free movability of the control bar and the brake handles.
- Set the altimeter to zero. Control and adjust all other instruments.
- Set the choke.
- Turn the main switch on. Push the starter button. If the engine refuses to start
switch off the ignition before any investigation.
- When the engine starts, increase the engine RPM to a little above idle and
release the chokes. Oil pressure should indicate within 10 seconds.
-Warm the engine. Minimum Temperature should be reached before take off. Operate
for 2 min at 2000 rpm; continue at 2500 rpm until minimum temperature of 50 deg C is
reached.
- If any unusual behavior is experienced stop the motor and document this fact into
the aircraft logbook. Do not fly unless you have corrected a given problem and
recorded the correction in the log.
6.7.2. Take off
- Roll onto the Start Line
- Check wind direction and strength
- Check if run up path and the airspace is unobstructed.
- Push the gas pedal gradually ahead until RPM goes up to maximum and
allow the aircraft to accelerate. Keep running direction with the nose wheel.
- Allow the control bar to move slowly ahead, when reaching stall speed lift the
nose wheel up from the ground, then hold it and accelerate the aircraft while
rolling on the main wheels.
- When the main wheels leave the ground also, pull the control bar back and
accelerate the aircraft close to the ground up to cruising speed.
- At this speed begin to climb and keep the speed.
- The motor can run at maximum RPM only and generally for 30 seconds,
therefore adjust back the gas within this period (according to Engine Manual).
Take off is prohibited if:
- Either the run up path or the air in the direction of the take off is busy
- There is obstruction on the ground which is higher than 15 meter within 300
meters of the take off line,
- Seat harnesses are not on.
- The amount of fuel in the tank is less than the one enough for a 15 minutes flight.
- Instrument is out of service.
- Engine runs incorrectly, irregular vibration or sound is experienced.
- At the take off run direction is not kept as necessary.
- Weather characteristics are over their limits.
- While rolling and running up any irregularity is experienced.

20
6.7.3 Climbing
Climb with the speed belonging to the optimum climb, provided the weather is
optimal, also. In turbulent, gusty wind climb with a bigger speed. Very steep
climbs are dangerous and can result in a stall followed by a severe pitching of
the nose forward, should the motor stop.
Note that maximum RPM can be used only for 30 sec, climbing RPM can be
used only for 5 minutes. Watch the thermometer and decrease the speed if
necessary! For the sake of the long life of the motor and the safety of flight
continuous climbing is allowed only under the allowed temperature.
(Parameters of motor operation are included in the Manual of the motor.)
6.7.4 Cruising
When changing to horizontal flight from climb set the variometer to zero by
adjusting RPM with the gas pedal. Cruising is allowed with a speed over the
proposed one however the limits set to the parameters of the motor and to the
allowed speeds of the aircraft are to be kept. Keep direction and the
horizontal position of the wing. Turbulence may disturb this but the proper use
of controls the horizontal straight flight with constant speed can be upheld,
frequent modification of the RPM is not necessary. Keep the direction with
watching a characteristic point on the horizon, and control it with the
compass. Keep the altitude with holding needle of the variometer on zero.
WARNING
Never fly your ultralight over habitations, at altitudes, or under any circumstances
from which a successful engine-off landing cannot be attempted.
NOTE
The Warning above is especially important when taking off and climbing.
6.7.5 Turning
Before initiating a turn adjust the speed to the preplanned one. Preceding fix
the planned new direction on the horizon and bank the aircraft with the control
bar. When the planned bank and angular velocity is attained apply contra-
banking to stabilize the turn. Stable turn requires a control bar position a little
bit ahead of the cruising position. Calculating with some impulse take the
aircraft out of the turn before attaining the planned new direction. A spiral
does not differ from the turn only yawing may surpass 360º.
This manual suits for next models
2
Table of contents
Other Apollo Aircraft manuals