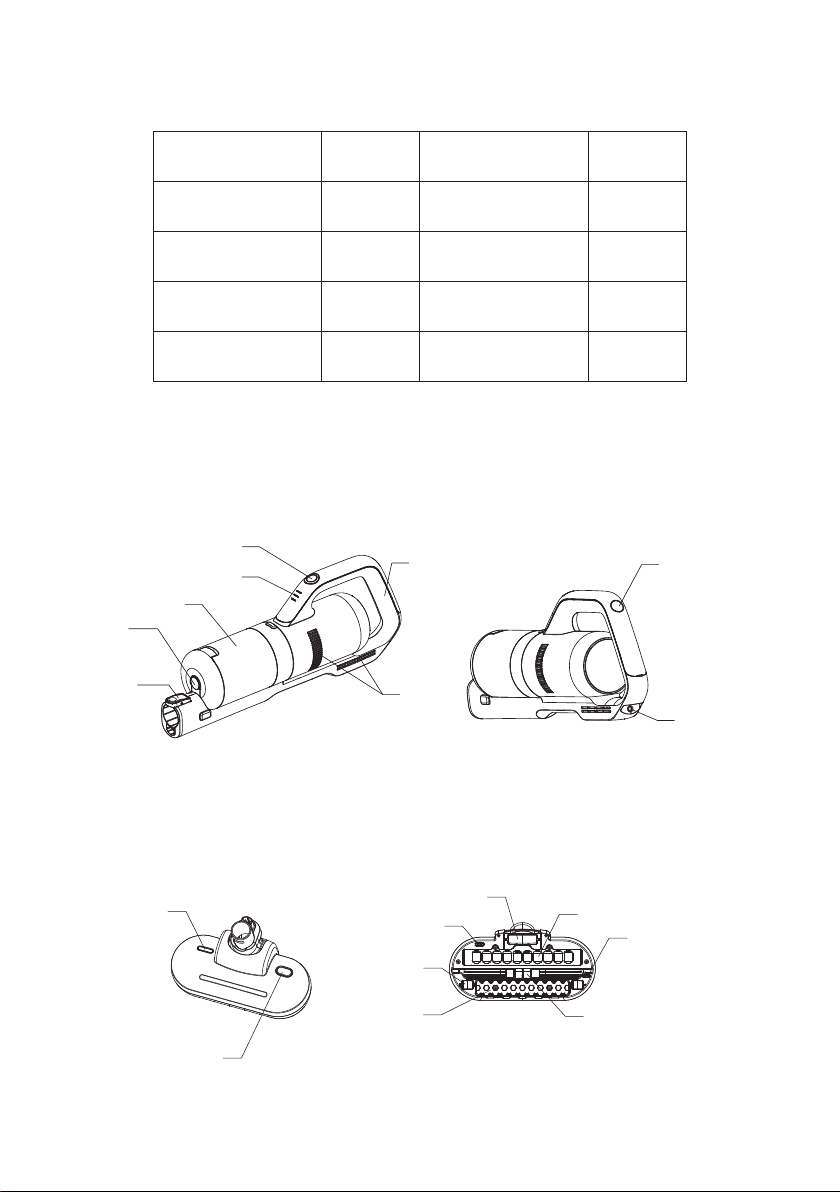
IMPORTANT SAFEGUARDS
When using your vacuum cleaner, basic safety precautions should always
be followed. Read all below instructions before using.
1. Please read all the contents of this manual carefully before using the product.
2. Any operation that does not conform to the instructions may result in serious personal injury,
property loss or damage to the product itself.
3. Our company is not liable for the loss caused by failing to operate in accordance with the instruc-
tions of this product.
Using Environment
1. The product is not waterproof. Do not let it inhale water or wet dust.
2. The product is a household vacuum cleaner. Please do not use it to absorb construction waste or
dust of heavy metal. It should not be used in industrial occasions.
Personnel Safety
1. Please operate cautiously to avoid danger when the product is working.
2. Do not stand or squat on this product.
3. Do not store the product in a high place to avoid the danger of accidental fall.
Safety Instructions for Product
1. This product can be used by children aged from 8 years and above and persons with reduced
physical, sensory or mental capabilities or lack of experience and knowledge if they have been
given supervision or instruction concerning use of this device in a safe way and understand the
hazards involved.
2. This product is only suitable for working in dry environment. Do not use it in humid environment.
3. Do not let it inhale high temperature substances (cigarette ends, matches or hot ash), superfine
substances (such as lime, cement, wood chips, gypsum powder, ash, carbon powder, etc.), large
pieces of sharp debris (such as glass, nails, pins, etc.), dangerous substances (such as solvents,
scale eliminators, etc.), chemical substances (such as acidic substances, detergents), flammable
and explosive liquids (gasoline, alcohol products).
4. Please keep the air inhalation duct and moving part away from hair, plush clothing, fingers and
other parts of body.
5. Please check the cleaning area before use. If pieces of paper, paper balls, plastic cloth or sharp
objects and things larger than the diameter of the suction pipe are found, please clean up them in
advance so as to avoid blockage of the suction pipe which affects the use of the product.
6. If electric leakage, excess temperature of motor, abnormal sound, overheating of main body,
abnormal smell or weak suction is found while using, users are supposed to stop using immediately.
01