HEADQUARTERS:AndersonPowerProducts®,13PrattsJunctionRoad,Sterling,MA01564-2305USAT:978-422-3600F:978-422-3700
EUROPE:AndersonPowerProducts®Ltd.,Unit3,EuropaCourt,EuropaBoulevard,Westbrook,Warrington,Cheshire,WA57TNUnitedKingdomT:+44(0)1925428390F:+44(0)1925520203
ASIA / PACIFIC: IDEALAndersonAsiaPacificLtd.,Unit922-928TopsailPlaza,11OnSumStreet,ShatinN.T.,HongKongT:+(852)26360836F:+(852)26359036
CHINA:IDEALAndersonTechnologies(Shenzhen)Ltd.,BlockA8TantouWesternIndustrialPark,SonggangBaoanDistrict,Shenzhen,PR.China518105T:+(86)75527682118F:+(86)75527682218
TAIWAN:IDEALAndersonAsiaPacificLtd.,TaiwanBranch,4F.-2,No.116,Dadun20thSt.,SitunDistrict,TaichungCity407,Taiwan(R.O.C.)T:+(886)423106451F:+(886)423106460
www.andersonpower.com
SPECPak™HighPowerPlug
Page2
PATENTS AND TRADEMARKS 1S6558 REV 00
Step 5 Block Powerpole®housing together
• OrientPowerpole®housingswithhoodsdown(SeeFigure4)
• BlockPowerpole®housingsbyinterlockingdovetailstocreateindividualrows(SeeFigure5)
• Ifmorethanonerowisrequired,blockrowstogetherbyinterlockingdovetails
Step 6 Insert Powerpole®block into Powerpole®Holder
• WithHooddown,slidePowerpole®blockintotheholderhalfmarkedwithon
theleftside,aligningtheholderpostswiththegroveinPowerpole®(SeeFigure6)
• Orienttheremainingholderhalfwithontheleftside(SeeFigure6)
• Slideremaininghalfintotheassembly,insertingtheholderpostsintothePowerpole®
groveandaligningthetonguesandgroovesontheholderhalves
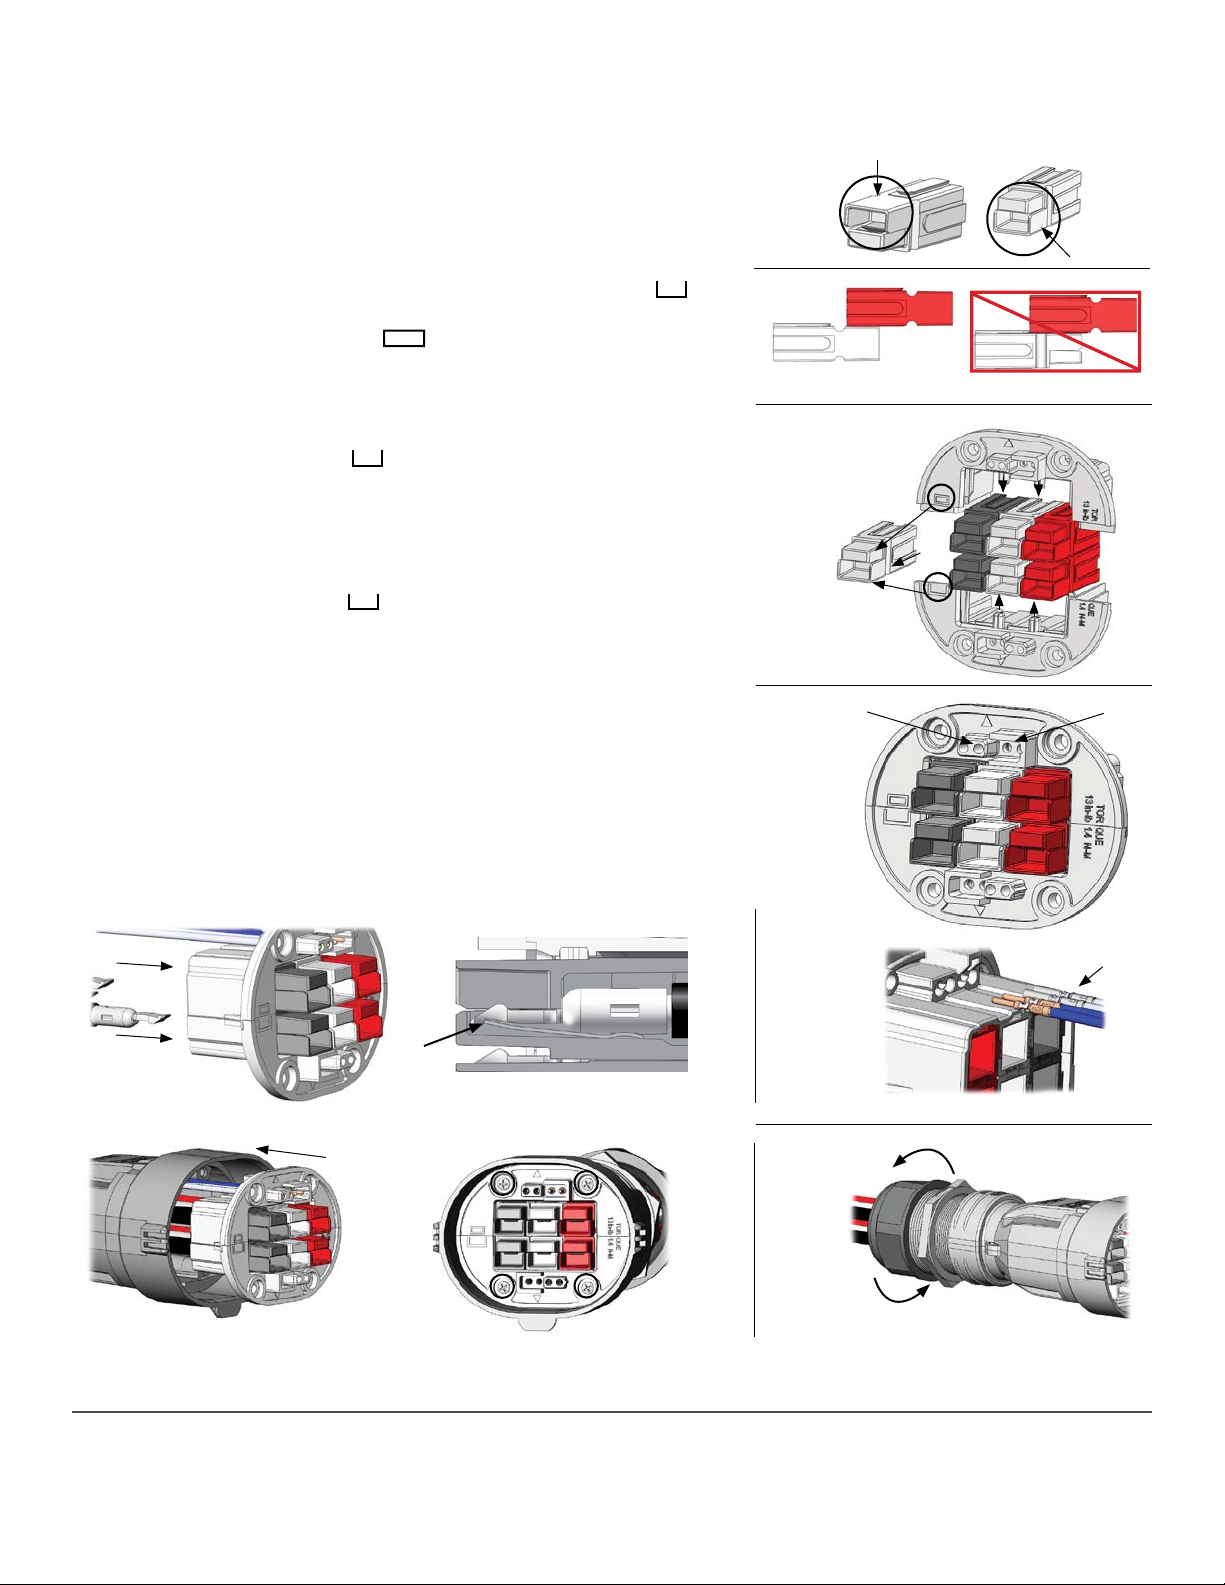
Step 7 Install Crimped Signal Contacts into the Connector Housings:
• Orienttheinsertholderwiththetotheleft
• Snapthecrimpedsignalcontactsintotheappropriateholesinthebackoftheholder
halves(SeeFigure7).Atactilesnapwillbefeltwhencontactislatched.
• Repeatuntilallsignalcontactshavebeeninstalledintothehousing
Step 8 Install Crimped Power Contacts into the Connector Housings
• Orienttheinsertholderwiththetotheleft
• InsertcrimpedpowercontactsintotheappropriatePowerpole®housinguntilthecon-
tactlipsnapsovertheedgeofthespring(SeeFigure8)
• Repeatuntilallpowercontactshavebeeninstalled
Step 9 Install insert holder into the plug shell
• Secureinsertholdertotheplugbytighteningthescrewsinanalternatingmanner.
Torque:13in-lb(1.4N-M)(SeeFigure9)
Step 10 Tighten Sealing Nut on Gland
• Handtightenuntilsnug,tightenadditional½-¾turnwithawrench(SeeFigure10)
REGISTRATION
“AndersonPowerProducts”,“APP”areregisteredU.S.andforeigntrademarkofAndersonPowerProducts®,213PrattsJunctionRoad,Sterling,MA01564-2305USAwww.andersonpower.com
Figure 4
Figure 5
Figure 6
Figure 7
Figure 10
Correct
Incorrect
PinsSockets
Signal Pin & Socket
Figure 8
Figure 9
HoodUp
HoodDown
Suggest Hood
Orientation for Plug
Grove


