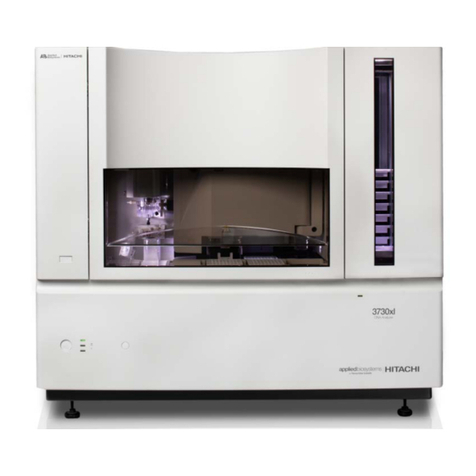
Applied Biosystems 3500 User manual

For Research Use Only. Not for use in diagnostic procedures.
Applied Biosystems™3500/3500xL Genetic
Analyzer
USER GUIDE
with 3500 Series Data Collection Software 3.1
Catalog Numbers 4405186, 4405187
Publication Number 100031809
Revision C

Life Technologies Holdings Pte Ltd | Block 33 | Marsiling Industrial Estate Road 3 | #07-06, Singapore 739256
For descriptions of symbols on product labels or product documents, go to thermofisher.com/symbols-definition.
The information in this guide is subject to change without notice.
DISCLAIMER: TO THE EXTENT ALLOWED BY LAW, THERMO FISHER SCIENTIFIC INC. AND/OR ITS AFFILIATE(S) WILL NOT BE LIABLE FOR SPECIAL,
INCIDENTAL, INDIRECT, PUNITIVE, MULTIPLE, OR CONSEQUENTIAL DAMAGES IN CONNECTION WITH OR ARISING FROM THIS DOCUMENT,
INCLUDING YOUR USE OF IT.
Important Licensing Information: These products may be covered by one or more Limited Use Label Licenses. By use of these products, you accept
the terms and conditions of all applicable Limited Use Label Licenses.
Revision Date Description
C 25 October 2018 Update company name to Thermo Fisher Scientific. Clarify that capillary arrays have been
verified for use for 160 injections with Thermo Fisher Scientific reagents. Indicate 8 maximum
number of freeze/thaw cycles for Hi‑Di™Formamide. Change Part. No. to Cat. No. Change figure
callouts to numbers. Correct definitions for Read Length and Basepair Accuracy (Read Length
Accuracy).
B 01 June 2017 Add 'Radio compliance'. Update conformity symbols. Update licensing information. Update
branding.
A March 2015 New information for version 3.1 software: Change buffer and polymer limits to 14 days.
Updates: Information for 96-sample polymer pouches. Instruction to ensure CBC septum is
properly seated. New run modules.
Corrections: Remove sample limits on buffer. Correct part numbers for 3500/3500xL Sequencing
Standards, BigDye™Terminator v1.1 and 3500/3500xL Sequencing Standards, BigDye™
Terminator v3.1. Change instruction to seal 384-well plates from film to septum. Update
description in “Evaluate fragment install standard data“.
TRADEMARKS: All trademarks are the property of Thermo Fisher Scientific and its subsidiaries unless otherwise specified.
Dell and OptiPlex are trademarks of Dell Inc.
Microsoft, Windows, and Word are trademarks of Microsoft Corporation.
©2018 Thermo Fisher Scientific Inc. All rights reserved.

Contents
■CHAPTER 1 Instrument and software description ................... 14
Instrument and software description ............................................. 14
Overview ................................................................. 14
Precautions for use ........................................................ 15
Instrument interior components ............................................. 15
Instrument parts and functions .............................................. 16
Instrument front panel indicators ............................................ 17
Instrument and computer requirements .......................................... 17
Windows™software requirements ........................................... 17
Antivirus software requirements ............................................. 17
Other software ............................................................ 17
Instrument firmware ....................................................... 18
Theory of operation ............................................................ 18
Preparing samples ......................................................... 18
Preparing the instrument ................................................... 18
During a run .............................................................. 18
Results ................................................................... 19
Materials for routine operation .................................................. 19
Instrument consumables handling, usage limits, and expiration ..................... 19
Buffers ................................................................... 19
Polymer .................................................................. 20
Conditioning reagent ....................................................... 21
Capillary arrays .......................................................... 21
Hi‑Di™Formamide ......................................................... 22
Important notice regarding use of consumables that exceed supported limits ..... 22
Overview of the 3500 Series Data Collection Software 3.1 ........................... 23
About the software ........................................................ 23
Dashboard ............................................................... 23
Workflow ................................................................ 24
Maintenance workflow ..................................................... 25
Library workflow .......................................................... 25
SAE menu ................................................................ 26
Tools menu ............................................................... 26
Manage menu ............................................................. 26
Preferences menu ......................................................... 27
3500/3500xL Genetic Analyzer User Guide—Data Collection Software v3.1
3

Help menu ................................................................ 27
Use the software without an instrument ...................................... 27
■CHAPTER 2 Start the system .......................................... 28
Workflow ..................................................................... 28
Start the computer and instrument ............................................... 29
Start the software .............................................................. 30
Step one: Start the Server Monitor ........................................... 30
Step two: Start the 3500 Series Data Collection Software 3.1 .................... 31
Step three: Log in .......................................................... 31
Check system status in the Dashboard ............................................ 32
Check calendar reminders .................................................. 32
Check consumables status ................................................. 33
How the polymer sample and injection counters calculate usage ................. 34
Check for leaks and spills ................................................... 34
Check buffer fill levels ...................................................... 34
Replenish consumables .................................................... 35
Ensure proper installation of CBC septa ...................................... 35
Set preferences (optional) ....................................................... 36
Overview ................................................................. 36
System preferences ........................................................ 37
User preferences .......................................................... 37
■CHAPTER 3 Set up and run ............................................ 40
Setup workflow ................................................................ 41
Prepare the instrument ......................................................... 41
Create or import a plate ........................................................ 42
About plate templates ...................................................... 42
Create a plate from a template .............................................. 42
Import a plate ............................................................. 44
Assign plate contents ........................................................... 44
Access the Assign Plate Contents screen ..................................... 45
Name samples and assign sample types in the plate view ....................... 47
Assign assay, file name convention, and results group in the plate view ........... 49
How file location in file name conventions and results groups work .............. 50
Print the plate layout ....................................................... 50
Prepare and load sample plates .................................................. 50
Capillary-to-plate mapping ................................................. 51
Allelic ladder run requirements ............................................. 51
Results group for one allelic ladder per run folder ............................ 52
Prepare sample plates ..................................................... 52
Prepare the plate assembly ................................................. 53
Contents
4
3500/3500xL Genetic Analyzer User Guide—Data Collection Software v3.1

Load the plate in the instrument ............................................. 56
Link the plate ............................................................. 57
Quick Start a run ............................................................... 58
Load plates for run and create the injection list .................................... 59
Link a plate (if a plate is not linked) .......................................... 61
Link a plate from the Recent Plates or Recent Runs tab ......................... 62
Review and modify the injection list in Preview Run ................................ 62
Start the run from Preview Run .................................................. 64
Monitor the run ................................................................ 65
Check sequence or sample quality and re-inject samples ........................... 67
Check sequence or sample quality ........................................... 67
Re‑inject samples from the Monitor Run screen ............................... 69
If you select a protocol other than the original ................................. 70
How re-injections are displayed in the plate view .............................. 70
Re-inject HID allelic ladder samples ......................................... 71
Review completed injections in Review Results .................................... 72
Pause, resume, or stop a run .................................................... 72
Pause and resume ......................................................... 72
Abort or terminate ......................................................... 72
More features in Assign Plate Contents ........................................... 73
Name samples in the plate view ............................................. 73
Customize the plate view ................................................... 74
View the capillary-to-plate map ............................................. 75
Use the table view ......................................................... 75
Sort by one or multiple columns ............................................. 76
Customize a table .......................................................... 76
Add assays, file name conventions, and results groups to a plate ................ 77
Create a plate import template .............................................. 77
Create a plate import file ................................................... 78
Edit a plate ................................................................ 79
Import and export a plate ................................................... 79
Create a plate template ..................................................... 79
Specify the default plate type for the Open Plate dialog box ..................... 80
Save electronic version of reports ............................................ 80
More features in Monitor Run .................................................... 80
Review the Instrument Run views ............................................ 80
Array view ................................................................ 81
Sample view .............................................................. 81
EPT view .................................................................. 81
■CHAPTER 4 Review sequencing results .............................. 82
Workflow ..................................................................... 82
Access the View Sequencing Results screen ....................................... 82
Review results for the currently running sequencing plate .......................... 83
Contents
3500/3500xL Genetic Analyzer User Guide—Data Collection Software v3.1
5

Review previously run sequencing samples ....................................... 84
Review sequence quality ........................................................ 84
Review traces ................................................................. 86
Display thumbnails ........................................................ 87
Understand Quality Values (QVs) ................................................. 88
Quality value ranges ....................................................... 88
Pure base versus mixed base QVs ............................................ 88
Quality values (QV) and probability of error (Pe) ................................ 88
Re‑inject samples from Review sequencing results ................................. 89
View, print, and save (.pdf) trace quality reports .................................... 89
View Trace Reports ........................................................ 89
Report options ............................................................ 90
Export sequencing results ...................................................... 90
Modify sequence data ........................................................... 90
■CHAPTER 5 Review fragment/HID analysis results ................. 91
Workflow ..................................................................... 91
Access the View Fragment/HID Results screen ..................................... 92
Review results for the currently running fragment/HID analysis plate ................ 93
Review previously run fragment analysis/HID samples .............................. 94
Review sample quality .......................................................... 94
Review normalized data ......................................................... 96
How normalization is applied ................................................ 96
Normalization factor in secondary analysis ................................... 96
Review plots ................................................................... 97
Zoom on data .............................................................. 97
Change plot settings ....................................................... 97
Overlay samples ........................................................... 98
Label peaks ............................................................... 98
View thumbnails ........................................................... 99
Rename samples .......................................................... 99
Sort by one or multiple columns ............................................ 100
Review sizing ................................................................. 100
Set up the sizing table ..................................................... 100
Examine the size standard plot ............................................. 100
Overlay the sizing curve ................................................... 101
Re-inject samples from Review fragment results ................................. 101
View, print, and save (.pdf) sample quality reports ................................. 101
Report options ........................................................... 101
Export sizing results .......................................................... 102
Modify fragment analysis or HID data ............................................ 102
Contents
6
3500/3500xL Genetic Analyzer User Guide—Data Collection Software v3.1

■CHAPTER 6 Run calibrations and install checks ................... 103
Section 6.1 Run spatial and spectral calibrations .................................. 104
Run a spatial calibration ....................................................... 104
Spatial calibration overview ................................................ 104
When to perform a spatial calibration ....................................... 104
Perform a spatial calibration ............................................... 104
Evaluate the spatial calibration profile ...................................... 105
Example spatial profiles ................................................... 106
Export spatial calibration results ........................................... 106
View and print a calibration report .......................................... 107
Save historical reports (.pdf) for record keeping .............................. 107
Run a spectral calibration ...................................................... 107
Spectral calibration overview .............................................. 107
When to perform a spectral calibration ...................................... 107
Estimated run time ....................................................... 108
Prepare for spectral calibration ............................................ 108
Perform a spectral calibration .............................................. 111
Spectral Quality Values and Condition Numbers .............................. 113
Evaluate the spectral calibration data ....................................... 114
What you see during a spectral calibration ................................... 115
Capillary information sharing .............................................. 116
Example spectral calibration data .......................................... 118
Export spectral calibration results .......................................... 119
View and print a calibration report .......................................... 119
Save historical reports (.pdf) for record keeping .............................. 120
View the spectral calibration history ........................................ 120
Section 6.2 Run an install check ................................................ 121
Run a Sequencing install check ................................................. 121
When to perform a sequencing install check ................................. 121
Estimated run time ....................................................... 121
Prepare for the sequencing install check .................................... 121
Perform a sequencing install check ......................................... 123
What you see during a sequencing install check .............................. 125
Pass/fail criteria for the optional spectral calibration ......................... 126
Pass/fail criteria for the sequencing install check ............................. 127
Evaluate sequencing install standard data ................................... 128
Example sequencing install check results ................................... 129
View previously run install standards ........................................ 129
View and print an install check report ....................................... 130
Save historical reports (.pdf) for record keeping .............................. 130
Run a fragment/HID install check .............................................. 130
When to perform a fragment/HID install check ............................... 130
Estimated run time ....................................................... 130
Prepare for the fragment/HID install check ................................. 130
Perform the fragment/HID install check ..................................... 133
Contents
3500/3500xL Genetic Analyzer User Guide—Data Collection Software v3.1
7

What you see during a fragment install check ................................ 134
Pass/fail criteria for the fragment/HID install check .......................... 135
Evaluate fragment install standard data ..................................... 135
Example fragment install standard results ................................... 136
Example HID install standard results ........................................ 136
View previously run install standards ........................................ 136
View and print an install check report ....................................... 137
Save historical reports (.pdf) for record keeping .............................. 137
■CHAPTER 7 Manage library resources .............................. 138
Overview of libraries .......................................................... 138
Factory-provided template and locked items ................................. 139
General library procedures ..................................................... 139
Access libraries .......................................................... 139
Create a new entry from a factory-provided template or locked entry ............ 140
Delete a library entry ...................................................... 140
Edit a library entry ........................................................ 140
Import and export a library entry ........................................... 141
View audit and e‑signature histories for library entries ........................ 141
Sort and search library entries ............................................. 141
Customize a table ......................................................... 142
Plates library ................................................................. 142
Plate overview ........................................................... 142
Create a new plate ........................................................ 143
Define plate properties .................................................... 144
Assays library ................................................................ 144
Assay overview .......................................................... 144
Create a new assay ...................................................... 145
Assay settings ............................................................ 146
File Name Conventions library .................................................. 147
File name convention overview ............................................. 147
Create a new file name convention .......................................... 148
File name convention settings .............................................. 150
Results Group library .......................................................... 152
Results Group overview ................................................... 152
Allelic ladder location (HID analysis) ........................................ 152
Create a new Results Group ................................................ 153
Results group settings .................................................... 155
Results group example 1: store files by plate name ........................... 157
Results Group example 2: store re-injections in separate folders ............... 158
Results Group example 3: store one allelic ladder per run folder (8-
capillary instruments) ..................................................... 160
Contents
8
3500/3500xL Genetic Analyzer User Guide—Data Collection Software v3.1

Instrument protocol library .................................................... 161
Instrument protocol overview .............................................. 161
Create a new instrument protocol ......................................... 162
Instrument protocol settings ............................................... 163
Dye sets library .............................................................. 165
Dye set overview .......................................................... 165
Create a new dye set ...................................................... 166
Dye set settings .......................................................... 167
Create a new dye set using the AnyDye template .............................. 168
Size standards library ......................................................... 170
Size standard overview .................................................... 170
Normalization size standards provided ...................................... 171
Create a new size standard ................................................ 171
Modify a factory-provided normalization size standard ........................ 172
Basecalling protocols library (primary analysis—sequencing) ...................... 173
Basecalling protocol overview .............................................. 173
Create a new basecalling protocol ......................................... 173
Basecalling protocol—Analysis settings ..................................... 176
Basecalling protocol—QV settings .......................................... 178
Sizecalling protocols library (primary analysis—fragment) ......................... 178
Sizecalling protocol overview ............................................... 178
Create a new sizecalling protocol ........................................... 179
Sizecalling protocol—Analysis settings ...................................... 181
Sizecalling protocol—QC settings ........................................... 184
QC protocols library (primary analysis—HID) ..................................... 185
QC protocol overview ...................................................... 185
Create a new QC protocol .................................................. 185
QC protocol—Analysis settings ............................................. 187
QC protocol—QC settings .................................................. 190
■CHAPTER 8 Use Security, Audit, and E-Sig functions
(SAE Module) ............................................................ 191
Administrators ............................................................... 191
Administrators overview of system security auditing and electronic signature .... 191
Configure the security system .............................................. 192
Manage user accounts .................................................... 195
Manage auditing .......................................................... 201
Generate audit reports .................................................... 204
Contents
3500/3500xL Genetic Analyzer User Guide—Data Collection Software v3.1
9

Manage electronic signature (E-sig) ......................................... 211
Export and import user accounts security audit and electronic signature settings 217
Users ........................................................................ 218
Users overview of System Security Audit Trail and E-Signature ................. 218
Security ................................................................. 219
Audit .................................................................... 221
Electronic signature ...................................................... 221
■CHAPTER 9 Maintain the Instrument ................................ 223
Maintenance schedule ......................................................... 223
Review calendar reminders ................................................ 223
Daily instrument maintenance tasks ........................................ 224
Weekly instrument maintenance tasks ...................................... 225
Monthly instrument maintenance tasks ...................................... 225
Quarterly maintenance tasks ............................................... 226
Annual planned maintenance tasks ......................................... 226
As-Needed instrument maintenance tasks ................................... 226
Use the maintenance calendar .................................................. 226
Create calendar entries ................................................... 227
View the Planned Maintenance Report ....................................... 227
Review the Notifications Log ................................................... 228
Clean the instrument .......................................................... 229
Install buffers ................................................................ 229
Install the anode buffer container (ABC) ..................................... 229
Install the cathode buffer container (CBC) ................................... 230
Replenish, change, flush, and store polymer ...................................... 232
Precautions for use ....................................................... 232
Replenish polymer or change polymer type .................................. 232
Store partially used polymer ............................................... 234
Fill capillary array with fresh polymer ....................................... 234
Change and store a capillary array .............................................. 235
Install or change the capillary array ......................................... 235
Store a capillary array ..................................................... 236
Maintain the pump ............................................................ 236
Avoiding damage to the pump assembly ..................................... 236
Remove bubbles from the polymer pump .................................... 237
Wash the pump chamber and channels ...................................... 237
Flush the water trap (pump trap) ........................................... 238
Shutdown move and reactivate the instrument .................................... 240
Shutdown the instrument .................................................. 240
Move and level the instrument .............................................. 241
Reactivate the instrument ................................................. 242
Contents
10
3500/3500xL Genetic Analyzer User Guide—Data Collection Software v3.1

Maintain the computer ......................................................... 242
Back up the datastore during software uninstall .............................. 242
Archive, purge, and restore data ............................................ 243
Monitor disk space ........................................................ 245
Manage software licenses ...................................................... 246
Create an email address for license activation and renewal .................... 246
Obtain and activate a software license ....................................... 246
Renew a software license .................................................. 248
Service Log and Usage Statistics ................................................ 249
■APPENDIX A Troubleshoot ........................................... 250
Restart the instrument and the computer ........................................ 251
Instrument components ....................................................... 252
Instrument troubleshooting .................................................... 254
RFID troubleshooting .......................................................... 258
Error messages .............................................................. 259
Dashboard troubleshooting ..................................................... 261
Software troubleshooting — general ............................................ 262
Run, re-run, or re-inject troubleshooting ......................................... 264
Data/electropherogram troubleshooting ......................................... 264
Review Results troubleshooting ................................................. 267
Link/load plate troubleshooting ................................................. 269
Assign Plate Contents troubleshooting ........................................... 270
Spatial calibration troubleshooting .............................................. 271
Spectral calibration troubleshooting ............................................. 272
Sequencing install standard troubleshooting ..................................... 274
Fragment/HID install standard troubleshooting .................................. 275
Monitor Run troubleshooting ................................................... 276
Audit troubleshooting ......................................................... 277
Electronic signature troubleshooting ............................................ 277
Manual commands troubleshooting ............................................. 278
Troubleshooting procedures .................................................... 278
Run Troubleshooting Utility.bat ............................................. 278
View the log files ......................................................... 278
View instrument sensor details ............................................. 279
Review error message details .............................................. 280
Reset the instrument ...................................................... 280
Contents
3500/3500xL Genetic Analyzer User Guide—Data Collection Software v3.1
11

■APPENDIX B Run modules and dye sets ........................... 281
Run modules ................................................................. 281
Dye sets .................................................................... 284
Sequencing analysis dye sets ............................................... 284
Fragment analysis dye sets for all applications ............................... 284
HID analysis dye sets ...................................................... 285
■APPENDIX C Instrument specifications ............................. 286
Instrument specifications ...................................................... 286
Environmental requirements ................................................... 287
Power and communication connections .......................................... 288
■APPENDIX D Catalog numbers ....................................... 289
Plates bases retainers and septa ............................................... 289
Instrument consumables ...................................................... 290
Sequencing analysis reagents and consumables .................................. 290
Fragment and HID analysis reagents ............................................ 291
■APPENDIX E Limitations .............................................. 292
General ...................................................................... 292
Computer .................................................................... 292
Instrument and consumables ................................................... 293
Calibration and install checks .................................................. 293
Security Audit and E-sig ....................................................... 293
Review results ................................................................ 294
■APPENDIX F Radio Frequency Identification (RFID) technology .. 295
Precautions for use ........................................................... 295
Locations of RFID read/write units .............................................. 296
Function ..................................................................... 296
Specifications ................................................................ 297
Troubleshooting .............................................................. 298
■APPENDIX G Normalization .......................................... 299
Overview of the normalization feature ........................................... 299
When to use the normalization feature ........................................... 300
Contents
12
3500/3500xL Genetic Analyzer User Guide—Data Collection Software v3.1

■APPENDIX H Safety ................................................... 301
Symbols on this instrument .................................................... 301
Conformity symbols ...................................................... 302
Safety alerts on this instrument ................................................. 303
Location of safety labels on this instrument .................................. 303
Instrument safety ............................................................. 304
General ................................................................. 304
Physical injury ........................................................... 304
Electrical safety .......................................................... 305
Cleaning and decontamination ............................................. 305
Laser ................................................................... 306
Safety and electromagnetic compatibility (EMC) standards ......................... 306
Safety (compliance) ....................................................... 306
EMC .................................................................... 307
Environmental design ..................................................... 307
Radio compliance ......................................................... 307
Chemical safety ............................................................... 308
Biological hazard safety ........................................................ 309
■Documentation and support ........................................... 310
Related Documentation ........................................................ 310
Customer and technical support ................................................ 310
Obtaining support ............................................................. 310
Limited product warranty ...................................................... 311
■Additional instrument symbols ........................................ 312
Index ..................................................................... 313
Contents
3500/3500xL Genetic Analyzer User Guide—Data Collection Software v3.1
13

Instrument and software description
■Instrument and software description .................................... 14
■Instrument and computer requirements ................................. 17
■Theory of operation .................................................. 18
■Materials for routine operation ......................................... 19
■Instrument consumables handling, usage limits, and expiration ............ 19
■Overview of the 3500 Series Data Collection Software 3.1 .................. 23
Instrument and software description
The Applied Biosystems™ 3500/3500xL Genetic Analyzer with 3500 Series Data
Collection Software 3.1 is a uorescence-based DNA analysis instrument using
capillary electrophoresis technology with 8 or 24 capillaries.
The 8-capillary model (Cat. No. 4405186) and the 24-capillary model
(Cat. No. 4405187) is shipped with the following components:
• 8-capillary or 24-capillary array and POP™ polymer
• Reagents and consumables for your application and for system qualication
• Computer workstation and monitor
• Integrated software for instrument control, data collection, quality control,
basecalling, and sizecalling of samples
1
Overview
14
3500/3500xL Genetic Analyzer User Guide—Data Collection Software v3.1

IMPORTANT! The protection provided by the equipment may be impaired if the
instrument is operated outside the environment and use specications, the user
provides inadequate maintenance, or the equipment is used in a manner not specied
by the manufacturer (Thermo Fisher Scientic).
IMPORTANT! Observe current good laboratory practices when using this instrument.
WARNING! Radio frequency identication (RFID) could possibly disrupt the
operation of patient-worn and/or implanted active medical devices. To
minimize such eects, do not come within 8 inches (20 cm) of this instrument if
you have a patient-worn and/or implanted active medical device.
1
2
3
4
5
7
6
8
9
Figure 1 Instrument interior
1Detection cell heater block
2Polymer delivery pump (PDP)
3Anode buffer container (ABC)
4Polymer or conditioning pouch
5Cathode buffer container (CBC)
6Oven door
7Capillary array
8Oven condensation reservoir
9Autosampler
Precautions for
use
Instrument
interior
components
Chapter 1 Instrument and software description
Instrument and software description
1
3500/3500xL Genetic Analyzer User Guide—Data Collection Software v3.1
15

Instrument parts and functions
Part Function
Anode buffer container
(ABC)
Contains 1X running buffer to support all electrophoresis applications on the
instrument. Has a built-in overflow chamber to maintain constant fluid height.
Autosampler Holds the sample plates and cathode buffer container (CBC) and moves to align the
plates and CBC with the capillaries.
Capillary array Enables the separation of the fluorescent-labeled DNA fragments by electrophoresis. It
is a replaceable unit composed of 8 or 24 capillaries.
Cathode buffer container
(CBC)
Contains 1X running buffer to support all electrophoresis applications on the
instrument.
Detection cell heater block Holds the detection cell in place for laser detection and maintains the detection cell
temperature of 50°C.
Oven/oven door Maintains uniform capillary array temperature.
Oven condensation
reservoir
Collects condensation from the oven.
Polymer delivery pump
(PDP)
Pumps polymer into the array and allows for automated maintenance procedures.
Includes the displacement pump chamber, polymer chambers, piston water seal,
capillary array port, check valve fitting, water trap waste container, buffer valve, anode
electrode, buffer gasket, and holds the anode buffer container.
Polymer pouch or
conditioning reagent pouch
•Polymer pouch—Supplies polymer to the polymer delivery pump.
•Conditioning reagent pouch—Used for priming the polymer pump, washing the
polymer pump between polymer type changes, and during instrument shut down.
Has adequate volume for a one-time use.
Radio frequency
identification (RFID) (for
more information, see
Appendix F, “Radio
Frequency Identification
(RFID) technology“).
RFID tags on the following primary instrument consumable labels are detected by
read/write units in the instrument interior:
• Capillary array
• Cathode buffer container (CBC)
• POP™polymer
• Anode buffer container (ABC)
The instrument reads and tracks the following information:
• Lot numbers
• Serial numbers
• Dates (expiration)
• Capacity (usage)
RFID tags are read and written in response to a user action (for example, running a
wizard or starting a run). All dashboard values are updated when RFID tags are read
and written. The days on Instrument is also updated automatically every 6 minutes.
Chapter 1 Instrument and software description
Instrument and software description
1
16
3500/3500xL Genetic Analyzer User Guide—Data Collection Software v3.1

Instrument front panel indicators
Indicator Status
All lights off Instrument off
Green light Idle
Green light (blinking) Run is in progress
Note: You can only abort an injection when the green light is flashing, not when it is solid
green.
Amber light (blinking) Power-up self-test is in progress
Instrument has paused. If the door is open, close it. If the amber light is still blinking, restart
the software, then repeat the run.
Amber light Standby
Red light Self-test failed or instrument failure. Restart the instrument and computer (see “Restart the
instrument and the computer“ on page 251).
Instrument and computer requirements
IMPORTANT! Do not modify the instrument hardware or software without notifying
Thermo Fisher Scientic. Any modications must be made by Thermo Fisher
Scientic under change control.
For minimum computer requirements, see “Instrument specications“ on page 286.
The computer provided with the instrument contains validated software and seings.
Do not update the Windows™ operating system or rewall seings.
The computer provided with the instrument does not include antivirus software
because customer preferences and network requirements vary.
We recommend Norton Antivirus, which has been tested and approved for use with
the Applied Biosystems™ 3500/3500xL Genetic Analyzer with 3500 Series Data
Collection Software 3.1.
CAUTION! Do not install additional software on the computer other than
antivirus software. Changes to the congured software could void the
instrument warranty and cause the instrument software to be non-operational.
IMPORTANT! Do not rename the computer after the 3500 Series Data Collection
Software 3.1 is installed. The instrument computer has been assigned a unique name.
Changing the name may cause the 3500 Series Data Collection Software 3.1 to
malfunction.
Windows™
software
requirements
Antivirus software
requirements
Other software
Chapter 1 Instrument and software description
Instrument and computer requirements
1
3500/3500xL Genetic Analyzer User Guide—Data Collection Software v3.1
17

Instrument rmware is to be updated only by a Thermo Fisher Scientic
representative.
Theory of operation
When DNA samples are prepared for sequencing and fragment analysis on the
instrument, uorescent dyes are aached to the DNA.
Two calibrations are required to prepare the instrument for sample runs:
•Spatial calibration—Determines the position of the image from each capillary on
the CCD array. For more information, refer to page 104.
•Spectral calibration—Generates a matrix for each capillary that compensates for
dye overlap and is used to convert the 20-color data into 4-, 5-, or 6-dye data. For
more information, refer to “Perform a spectral calibration“ on page 111.
During a run, the instrument:
• Prepares the capillaries by pumping fresh polymer solution under high pressure
from the polymer delivery pump to the waste position in the cathode buer
container (CBC).
• Electrokinetically injects the sample into the capillaries by briey applying a low
voltage.
• Washes the capillary tips in the rinse position of the CBC, then returns the
capillary to the buer position of the CBC.
• Ramps the voltage up to a constant level.
A high electric eld is created between the ground end of the anode buer
container (ABC) and the negative voltage applied to the load header of the
capillary array. This eld pulls the negatively charged DNA through the
separation polymer. The smaller fragments migrate faster than the larger
fragments and reach the detector rst.
To ensure optimal separation and maintain denaturation of the DNA, the
capillaries are thermally controlled in the oven and in the detection cell. The oven
has a Peltier heat unit and fan-circulated air.
In the detection cell, the dyes aached to DNA are excited by a narrow beam of
laser light. The laser light is directed into the plane of the capillaries from both
the boom and top. A small amount of laser light is absorbed by the dyes and
emied as longer wavelength light in all directions.
• Captures the uorescent light on the instrument optics while blocking the laser
light. The light passes through a transmission grating, which spreads the light
out. The light is imaged onto a cooled CCD array. For each capillary, 20 zones on
the CCD are collected to provide 20-color data for each capillary.
• Converts the 20-color data into multi-dye data for the entire run. For sequencing
applications, 4 dierent dyes are used to determine the 4 bases A, G, C and T. For
fragment analysis applications, up to 6 dyes can be used in a single run for higher
throughput.
Instrument
firmware
Preparing
samples
Preparing the
instrument
During a run
Chapter 1 Instrument and software description
Theory of operation
1
18
3500/3500xL Genetic Analyzer User Guide—Data Collection Software v3.1

The software generates an electropherogram (intensity plot) for each dye based on the
migration of DNA fragments over the run and generates primary analysis results:
• For sequencing applications, the electropherogram is adjusted to compensate for
slight mobility dierences due to the dyes, then basecalling is performed and
quality values are assigned.
• For fragment and Human Identication (HID) analysis, the software uses the
internal size standard to assign a fragment size and a sizing quality value to each
peak.
Materials for routine operation
All materials for routine operation are provided when the instrument is installed. For
more information:
• See Appendix D, “Catalog numbers“
• Contact your local Thermo Fisher Scientic representative
Instrument consumables handling, usage limits, and expiration
IMPORTANT! Before handling chemicals, read and understand all applicable Safety
Data Sheets (SDSs) and use appropriate personal protective equipment (gloves,
gowns, eye protection, etc). To obtain SDSs, see “Documentation and support“ on
page 310.
Containers and pouches are ready-to-use. Labels include a radio frequency
identication (RFID) tag that the instrument uses to track usage and expiration date.
For application-specic reagents, consumables, and run modules, see Appendix B,
“Run modules and dye sets“.
Buffers
Cat. No. Description Storage
4393927 Anode Buffer Container (ABC) 1X running
buffer, 4 containers
2–8°C
The 1X running buffer has been qualified to ship at
ambient conditions. For a description of the
qualification, go to
http://find.thermofisher.com/ce/ambientbuffers/
email?CID=fl-we18868.
4408256 Cathode Buffer Container (CBC) 1X running
buffer, 4 containers
Results
Chapter 1 Instrument and software description
Materials for routine operation
1
3500/3500xL Genetic Analyzer User Guide—Data Collection Software v3.1
19

Instrument On-instrument supported limits
Lower of: Guidelines
8-capillary 14 days, 240 injections, or expiry date The buffer has been verified for use for
up to 14 days on the instrument.
The software displays a warning
message when a usage limit is met and
allows you to continue running. Before
doing so, see “Important notice
regarding use of consumables that
exceed supported limits“ on page 22.
24-capillary 14 days, 100 injections, or expiry date
Polymer
Cat. No. Description Storage
A26070 POP-4™Polymer (96‑sample) 2–8°C
4393715 POP-4™Polymer (384‑sample)[1]
4393710 POP-4™Polymer (960‑sample)[1]
A26071 POP-6™Polymer (96‑sample )
4393717 POP-6™Polymer (384‑sample)
4393712 POP-6™Polymer (960‑sample)
A26073 POP-7™Polymer (96‑sample)
4393708 POP-7™Polymer (384‑sample)
4393714 POP-7™Polymer (960‑sample)
[1] The polymer has been validated for HID applications.
IMPORTANT! For the POP-4™ and POP-7™ Polymers (Cat. Nos. A26070, 4393715,
4393710, A26073, 4393708, and 4393714), the on-instrument supported limit is 14 days
only when the instrument operating temperature is 15–25°C. When the instrument
operating temperature is > 25°C, the supported limit is 7 days.
For the POP-6™ Polymers (Cat. Nos. A26071, 4393717, and 4393712), the
on-instrument supported limit is 14 days when the instrument operating temperature
is 15–30°C.
Chapter 1 Instrument and software description
Instrument consumables handling, usage limits, and expiration
1
20
3500/3500xL Genetic Analyzer User Guide—Data Collection Software v3.1
This manual suits for next models
1
Table of contents
Other Applied Biosystems Measuring Instrument manuals