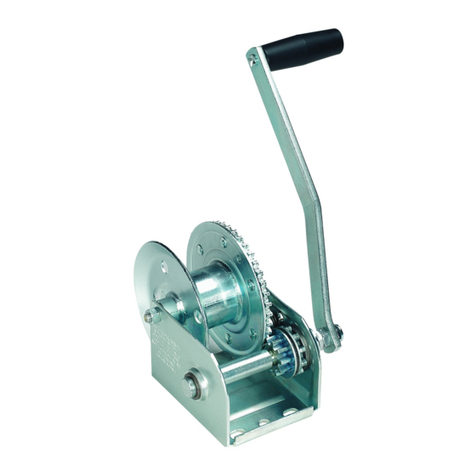
Applied L-16 Series User manual

Operation Manual
722 Blue Crab Road Newport News VA 23606
800-883-0008 www.appliednn.com
Applied L-16 Series
Hand Winch Lifts
November 2019
➢ Three Section 16’ Hand Winch Lift
➢ Certified Load: 500 lbs. at any height
➢ Loading Height: 6-1/2’
➢ Maximum Lift Height: 16’
➢ Footprint: 84”
➢ Folded Dimensions: 12.5” x 12.5” x 77”
➢ Weight: 95 lbs.
➢ Cable: 3/16" Steel


1
THIS IS NOT A PERSONNEL
LIFT AND NEVER SHOULD BE
USED FOR HOISTING OR
MOVING PEOPLE.
OPERATOR SAFETY INSTRUCTIONS
IMPORTANT Read and understand this
instruction manual prior to operating or
performing maintenance on this lift!
1. INSPECT THE EQUIPMENT
Prior to each use of the unit, check all
moving parts and wire rope to ensure that
they are in proper operating condition.
If a unit has visible damage or does not
transfer up and down smoothly during
pre-operation, do not use the unit!
If cable is kinked, worn, frayed, damaged,
or has any debris on it that would obstruct
its rotation around the pulley wheels, do
not use the unit!
Each unit should have a complete set of
caution decals and a legible Operators
Manual. Contact Applied if any of these
items are missing.
Do not misuse the unit. Perform only the
functions for which the unit is designed.
Never attempt to operate the equipment
at more than the recommended capacity.
DO NOT EXCEED RATED CAPACITY!
KEEP HANDS AWAY FROM
ALL MOVING PARTS WHILE
OPERATING UNIT.
NEVER ATTEMPT TO WORK ON
CABLE OR PULLEY SYSTEM
UNLESS MAST ASSEMBLY IS IN
THE LOWEST POSSIBLE
POSITION.
Use only Applied replacement parts.
Non-OEM parts will severely compromise
the quality and safety designed into this
lift.
2. WORK AREA HAZARDS
Never operate during high wind
conditions. Lifting loads during high winds
can result in the lift tipping over and the
possibility of operator injury.
Operate only on level surfaces. Use the
unit on smooth and level surfaces to
avoid unit tipping over and the possibility
of operator injury. Do not operate from an
unstable platform.
Always watch for and avoid overhead
wires and obstructions when using the
unit or moving unit to and from the event
site.
Do not use unit to support ladders, for
climbing, hoisting or people moving.
Do not use unit outside in thunder,
lightning or severe weather.

2
ASSEMBLING THE LIFT
1. WINCH INSTALLATION
Figure 1
2. WINCH CABLE ATTACHMENT
Wrap at least two turns of cable around
the drum of the winch.
Feed at least 5” of cable through the hole
on the right side of winch drum, same
side as the handle.
With your thumb, bend a loop in the
cable, as illustrated.
Loosen the capture nut and carefully feed
the loop through the catch and tighten the
capture nut with a wrench.
See Figures 2 & 3
The L-16 lift and winch assembly are
packaged separately. The lift is shipped
with the steel cable installed. Take care
when removing the winch from the carton
as the lift leveling feet and other small
parts are packaged with the winch.
Attach winch to the platform mounting
channel using (3) 3/8” x 1-1/4” bolts
provided. See Figure 1
Figure 2
Figure 3
3. LEG ASSEMBLY
Install leveling feet to the bottom of each
fold-out leg, threading the leveling foot
into the threaded insert. Adjust the lock-
nut to set your leveling height. Press the
black plastic cap into the end of the leg
tube.
See Figure 4
Figure 4

3
OPERATING PROCEDURE
Remove locking pin holding each leg in
the folded position. Fold the legs down
and re-insert locking pins through the leg
braces.
The central mast is the main load
supporting element.
Adjust the leveling feet at the end of each
leg so that the lift is vertically straight and
level. Make sure to eliminate any slack
between the legs and braces.
When used indoors, leveling feet should
be adjusted so that the central mast rests
solidly on the floor.
When used outdoors, leg feet MUST be
supported to prevent sinking that could
cause lift to tip. Plywood pads or other
solid material must be used to assist in
the leveling of the lift. Supports must be
stable.
Inspect the cable to make sure that none
of the wires are frayed or that the cable
itself has not been crushed.
Test the lift to see that no damage has
been incurred that would bind the moving
pieces of the system.
Be sure to secure the load to the lift with
proper hardware.
If multiple lifts are being used
simultaneously, all lifts must be raised
evenly.
Three safety pins are provided for use
when raising and lowering the lift.
These must be used to insure safety in
the event of cable failure. As you raise
the lift, insert a safety pin into the first
hole in the 2” tube. Then insert a 2nd
pin into the next hole down as it
becomes visible. When the 3rd hole
becomes available, remove the first
safety pin and insert it into the 3rd hole.
Continue to alternate pins through the
holes until the second stage begins to
rise. Leave a pin in the last hold of the
2” tube. Using the two remaining pins,
repeat the above procedure inserting
pins in the 3” tube for lifts above 12 ft.
To lower the system, follow the above
procedures in reverse order.
NOTE: Make sure that the winch is
ratcheting as you turn the winch handle. If
this fails to happen, lower the lift slightly
and then raise it again until you hear it
click before releasing the handle. If this
occurs, the winch may need to be
adjusted internally.
WARNING: KEEP HANDS FREE OF
UPPER TUBES WHILE RAISING
AND LOWERING LIFT!
WARNING: FAILURE TO HAVE A
SUFFICIENT LOAD (50 LB. MIN)
CAN RESULT IN DAMAGE TO LIFT
MECHANISM. DO NOT EXCEED RATED
CAPACITY OF 500 LBS.

4
LIFT MAINTENANCE
The steel cable deserves and requires the
most attention as it is the means by which
the load is able to move up and down.
The proper cable for this application is
supplied, but it is up to you to inspect and
maintain it regularly.
Keep the cable lubricated periodically to
avoid oxidation. Any light duty oil or
silicone based lubricant will do just fine.
Lubricate the pulleys frequently to prevent
premature wear. The same lubricant used
on the cable will be sufficient for this
application.
If the cable shows any sign of fraying,
wear, or deformation – order a replace-
ment from your authorized Applied
Electronics dealer or distributor.
Inspect the ball and shank that is swaged
to the top of the cable. As of 2019, all
cables have a secondary safety swag at
the end of the cable. Note the cable
should always remain flush to the end of
the safety swag. The secondary safety
swag should NOT be in contact with the
ball and shank swag. If there is no gap
between the safety swag and the ball and
shank, or if the cable is not flush with the
safety swag, remove the lift from service.
Always replace any bent or broken parts
immediately. These parts are available
and should be purchased through the
Applied Electronics dealer network.
Individually push the 2” and the 3” tubes
to one side in both directions and check
the gap between the tube and the
bushing material that surrounds the tube
at the top of each larger tube. If the gap
ever becomes greater than .035”, then
new material should be ordered to
replace the worn material. This gap can
be measured quickly and effectively with
a standard feeler gauge.
To replace the cable, follow the cable
routing diagram in Figure 5. Be sure to
keep the tubes in the same alignment
orientation. Termination of the cable to
the winch should be done as shown in
Figure 6.
Do not oil or grease winch brake
mechanism.

5
CABLE ROUTING
Figure 5
Figure 6

6
WINCH PARTS BREAKDOWN
ITEM
NO. DESCRIPTION PART
NO.
ABase 404900
BBushing 204012
C“E” Ring 205116
DDrive Shaft 306061
ESpring 204364
FHandle 9-3/8” 5703103
GNut 205033
HPressure Plate 204362
JRatchet Wheel 404164
KPressure Washer 404163
LBushing 206328
MNut 205316
NBolt 205332
PRope Clamp Kit 5243506
QGear Cover “G” Series 406114
SReel 306075
TLocknut 204803
UBolt 205167
VFlat Washer 205055
WPawl 404166
XSpacer 404166
YSpring 204363
ZReel Spacer 207183
AB Bolt 203161
AC Reel Spacer 204807
AH Lockout Lever optional 404579
AJ Spacer optional 404166
AL Base 404896
AM Bushing 204009
AQ Gear Cover optional 5240122
AR Spacer Washer 204360
AS Reel 304754
BJ Drive Hub optional 304562
BP Special Nut optional 404970

7
ITEM
NO. DESCRIPTION SIZE REFER.
NO. QTY
1L-16 2” Mast Top Mast 90-112 1
2Lower Bushing 3/8” x 1-3/4” 91-334 6
3Sheet Metal Screw #8 x 1/2” 91-066 16
4Cable Pulleys 2-1/2” 91-024 1
5Pin - Clevis 1/2” x 1-1/2” 91-310 1
6Pin - Slotted Roll 5/32” x 3/4” 91-304 2
7L-16 Steel Lock Collar Sheet Metal Part 96-000 1
8L-16 Thumbscrew 3/8”-16 x 1-1/4” 91-328 1
9Top Plastic Insert Machined Square
HDPE 4” 91-039 1
L-16 REPLACEMENT PARTS
L-16 TOP MAST PARTS SHEET

8
L-16 REPLACEMENT PARTS
L-16 MIDDLE MAST PARTS SHEET
ITEM
NO. DESCRIPTION SIZE REFER.
NO. QTY
1L-16 3” Mast Middle Mast 90-113 1
2Pin - Slotted Roll 5/32” x 3/4” 91-304 3
3Pin - Clevis 1/2” x 1-1/2” 91-310 3
4SAE Hex Nut - Nylock 5/16”-18 Thread 91-063 2
5SAE Hex Cap Bolt 5/16”-18 x 4” Grd 5 91-081 2
6Machine Screw #8-32 x 5/8” Lg Zinc 91-074 12
7Sheet Metal Screw #8 x 1/2” Lg Zinc 91-066 12
8Lower Bushing 3/8” Width 2-7/8” 91-335 2
9Lower Bushing 3/8” Width 1-7/8” 91-334 4
10 Upper Bushing with Nut 3/8” Width 1-7/8” 91-336 6
11 Cable Pulleys 1-1/2” Lg 91-023 2
12 Cable Pulleys 2-1/2” Lg 91-024 1

9
ITEM
NO. DESCRIPTION SIZE REFER.
NO. QTY
1L-16 4” Mast Bottom Mast 90-114 1
2L-16 Leg Leg Assembly 92-500 4
3L-16 Outrigger Leg Brace/Outrigger 92-501 4
4L-16 Threaded Leg Insert 1-3/4” x 1-3/4” x 3/4” 92-504 4
5L-16 Screw Foot 3/8”-16 Threaded Leveler 91-025a 4
6Leg Pin - T-Handle 3/8” x 3-1/2” 91-300 4
7Cable Pulley 2-1/2” Lg 91-023 2
8Pin - Clevis 1/2” x 1-1/2” Lg 91-310 2
9Machine Screw #8-32 x 5/8” Lg 91-074 12
10 Upper Bushing with Nut 3/8” Width 1-7/8” 91-336 4
11 Upper Bushing with Nut 3/8” Width 2-7/8” 91-337 2
12 Pin - Slotted Roll 5/32” x 3/4” Pin 91-304 2
13 Winch DLB1200A 92-505 1
14 SAE Hex Cap Bolt 3/8”-16 x 3.5” Grd 8 92-078 7
15 SAE Hex Nut - Nylock 3/8”-16 Thread 91-060 8
16 SAE Hex Cap Bolt 5/16”-18 x 5” Grd 5 91-082 2
17 Caster Wheel Sleeve 1/2” Dia x 1-1/2” 91-610 2
18 Caster Wheel 3/8” x 1-1/4” 91-601 2
19 Flat Washer 3/8” Standard Flat Washer 91-010 2
20 Plastic Tube Cap 2” Square Cap - Black 91-317 4
21 Flat Washer 3/8” Stainless Steel Thin 91-012 16
22 SAE Hex Cap Bolt 3/8”-16 x 6-1/2” Grd 8 91-068 1
23 SAE Hex Nut - Nylock 3/8”-16 Thread 91-060 1
24 Plastic Tube Cap 1-1/2” x 2” Cap - Black 91-316 4
Wheel Kit 2 Wheels, 2 Wheel
Sleeves, Axle and Hdwr 91-022 1
L-16 REPLACEMENT PARTS
L-16 BOTTOM MAST PARTS SHEET

10
L-16 REPLACEMENT PARTS
L-16 BOTTOM MAST PARTS SHEET continued

L-16 HAND WINCH LIFT DETAIL
Other manuals for L-16 Series
2
Table of contents
Popular Winch manuals by other brands

Harken
Harken Performa 35.2 PTP Installation and maintenance manual

KStrong
KStrong AFT75108 User instruction manual

Wallenstein
Wallenstein FX66 Operator's manual

Dr. Nano
Dr. Nano 12,000 LBS user manual

Cycle Country
Cycle Country 25-9012 Assembly & owners manual

Ingersoll-Rand
Ingersoll-Rand EU Product information

jakob
jakob HIT-TRAC 8B user guide

Perel
Perel WHW420 user manual

Tractel
Tractel tirak X 300 P Series Original assembly and operating instructions manual

haacon
haacon 1098 operating manual

Laubjerg vinsch
Laubjerg vinsch LV-P2000 Assembly & operating instructions

Red Winches
Red Winches HAWK - UTV Technical manual