manuals.online logo
Brands
  1. Home
  2. •
  3. Brands
  4. •
  5. APRILIA
  6. •
  7. Motorcycle
  8. •
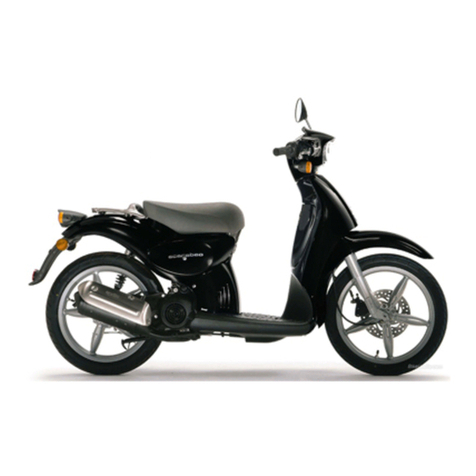
  9. APRILIA SCARABEO 150 User manual

APRILIA SCARABEO 150 User manual

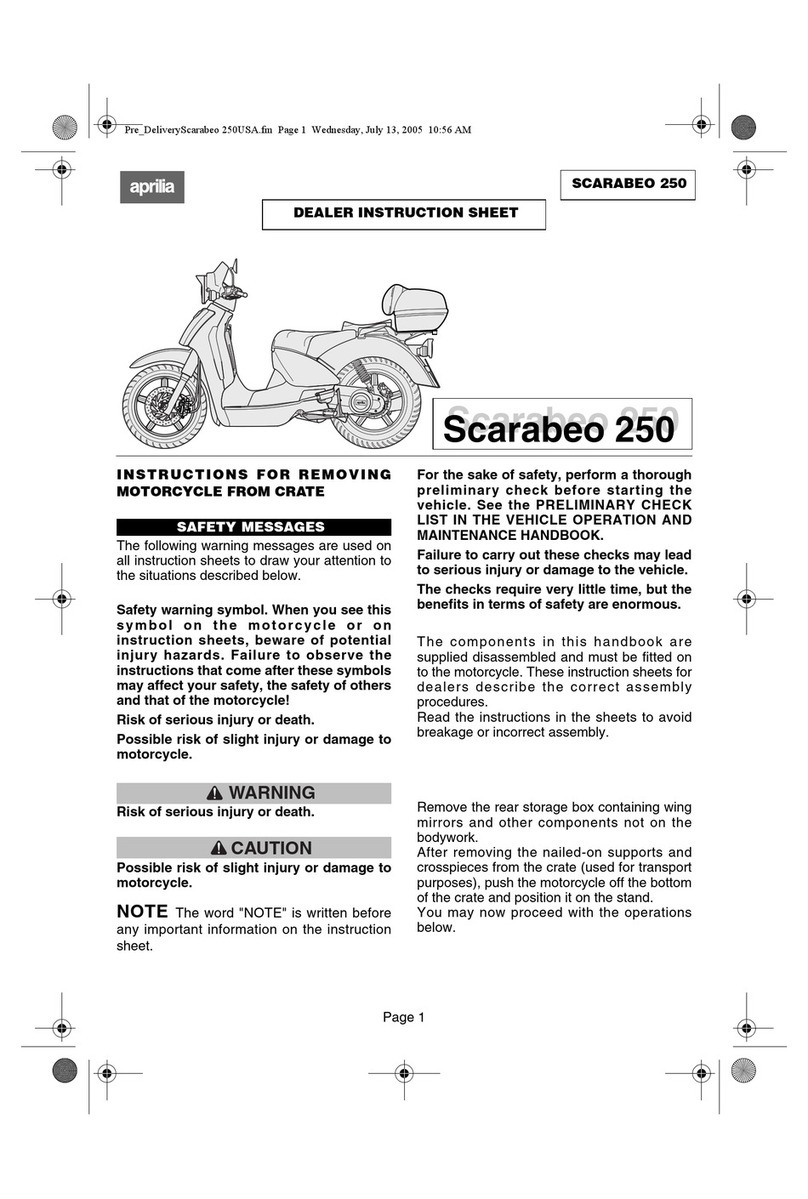
SCARABEO 150
apriliaaprilia SCARABEO 150
DEALER INSTRUCTION SHEET DEALER INSTRUCTION SHEET
Pag. 1
aprilia part #8104289 - 10/00 - USA
Scarabeo150
Scarabeo150
Pag. 4
CAUTION
After reassembling check the front brake by
pulling the brake lever repeatedly.
Check the tightening torque, the centering and
the balance of the wheel.
CAUTION
DANGER
2
1
3
4
11
2
3
FITTING THE FRONT WHEEL
Before carrying out any maintenance operation or
inspection of the front wheel, if possible hoist the
vehicle onto a solid and level surface with suitable
equipment.
When disassembling and reassembling the front
wheel, take extra care not to damage the brake
lines, discs or pads.
IMPORTANT To fit the front wheel, you may require a
helper.
MFit the disc between the calipers in the correct
position; fit the spacer (1) and wheel pin between
the wheel and the fork (2) from the opposite side.
MPosition the trip odometer transmission (3) into the
housing with transmission teeth.
MFit the pin wheel as far as it will go and tighten.
Wheel pin tightening torque: 57.6 ftlb (8.0 kgm).
MSecure the screw (4) TCEI (M6x20) of the wheel pin
clamp.
Screw (4) tightening torque: 7.2 ftlb (10 Nm) FITTING THE STORAGE BOX
Follow the assembly instructions for the stor-
age box.
MFit the three screws TBEI M6x40 (1) and spacer
bushes (2).
MFit the storage box ands secure to the support with
the nuts (3) provided.
3
If this operation is difficult, remove the calipers, fit
the wheel, then replace the calipers.
SAFETY MESSAGES
The following warning messages are used on all the
instruction sheets to draw your attention to the situations
described below.
DANGER
Safety warning symbol. When you see this
symbol on the motorcycle or instruction sheets,
beware of potential injury hazards.
Failure to observe the instructions following these
symbols may affect your safety, the safety of
others and that of the motor cycle!
Risk of serious injury or death.
Possible risk of slight injury or damage
to motor cycle.
Risk of serious injury or death.
Possible risk of slight injury or damage to motor
cycle.
For the sake of safety, before starting the
vehicle, carry out a thorough preliminary check.
See the PRELIMINARY CHECK LIST IN THE
VEHICLE OPERATION AND MAINTENANCE
HANDBOOK.
Failure to carry out these checks may lead to
serious injury or damage to the vehicle.
Very little time is required, and the benefits in terms
of safety are enormous.
The components in this handbook are supplied
disassembled, and have to be fitted to the motor cycle.
These instruction sheets for dealers describe the
correct fitting procedures.
Read the instructions in the sheets to avoid
breakages or incorrect assembly.
Remove the rear storage box containing wing mirrors
and other components not on the bodywork.
After removing the nailed-on supports and crosspieces
from the crate (used for transport purposes), push the
motor cycle off the bottom of the crate and position it
on the stand.
You can now proceed with the operations
described below.
INSTRUCTIONS FOR REMOVING
MOTORCYCLE FROM CRATE
IMPORTANT
The word “IMPORTANT”is written before any important
information on the instruction sheet.
CAUTION
DANGER
IMPORTANT
SCARABEO 150
apriliaaprilia SCARABEO 150
DEALER INSTRUCTION SHEET DEALER INSTRUCTION SHEET
Pag. 2
4
5
2
1
MAX
MIN
Pag. 3
SX DX
2
1
2
FITTING THE CUP
MFit the cup (1).
MSecure it with the 4 screws TBEI M5x25 (2).
FITTING THE MIRRORS
Fit the mirrors as follows.
MFit the mirror into its housing and secure with the
block nut, as shown.
MDo the same for the righthand mirror.
The right nut has a slot, to show that it tightens
anti-clockwise.
CAUTION
Always connect up the battery breather hose to
ensure that sulfuric acid fumes do not corrode
electric plant, paintwork, rubber parts and gaskets.
CAUTION
BATTERY
Battery electrolyte is toxic, caustic and the contact
with the skin may cause serious burns, since it
contains sulfuric acid. Wear protective clothing, a
face shield and/or tight fitting goggles when
working around the battery. In case of contact with
the skin, flush immediately with plenty of water.
In case of contact with the eyes, flush with plenty
of water for at least 15 minutes. Immediately
consult an oculist.
If the electrolyte is accidentally swallowed, drink
large quantities of water or milk, and then milk of
magnesia or vegetable oil. Immediately consult a
health professional. The battery gives off noxious
and explosive gases; keep it away from cigarettes,
flames, sparks and any other source of heat.
During the recharging or the use, make sure hat
the room is properly ventilated and avoid inhaling
the gases released during the recharging.
KEEP AWAY FROM CHILDREN.
Do not tip the vehicle too much, or tip the battery
too much, to avoid electrolyte leaking out.
The battery liquid is corrosive. Do not pour or
sprinkle it, particularly on plastic parts. When the
battery has been removed it must be placed in a
safe place out of the reach of children. The battery
is very dangerous and may cause serious injury
or death.
INITIAL BATTERY CHARGING
MFill the battery with electrolyte to a level between the
“MIN” and “MAX” lines.
To top up the electrolyte use only distilled
water. Do not fill higher than the “MAX” level,
because the level rises during recharging.
MTop up with distilled water.
MMake sure the level is between “MIN” and “MAX”
printed on the side of the battery.
FITTING THE BATTERY
MMake sure the ignition
key is in the “ “ position.
MPlace the battery into its housing.
MFirst connect the positive cable (+) then the negative
(-).
MUse a neutral grease or vaseline to grease terminals.
MConnect the petrol breather hose (1).
MFit the battery support (2) using the screw (3) TCEI
M6x16.
MTighten the front hood (5) with the screws (4).
CAUTION
CAUTION FITTING THE BATTERY AFTER FIRST
RECHARGE
Wait 5-10 minutes after recharging and then fit the
battery, since it continues to produce gas for a
period after recharging.
CAUTION

This manual suits for next models

1

Other APRILIA Motorcycle manuals

APRILIA PEGASO 650 IE - PART3 11-1999 User manual

APRILIA

APRILIA PEGASO 650 IE - PART3 11-1999 User manual

APRILIA SCARABEO 50 I.E - 2002 User manual

APRILIA

APRILIA SCARABEO 50 I.E - 2002 User manual

APRILIA RSV 1000 R - 2003 User manual

APRILIA

APRILIA RSV 1000 R - 2003 User manual

APRILIA NA Mana 850 User manual

APRILIA

APRILIA NA Mana 850 User manual

APRILIA RS 50 Technical manual

APRILIA

APRILIA RS 50 Technical manual

APRILIA RALLY 50 - 2002 User manual

APRILIA

APRILIA RALLY 50 - 2002 User manual

APRILIA Pegaso 650 I.E. User manual

APRILIA

APRILIA Pegaso 650 I.E. User manual

APRILIA PEGASO 650 -  2009 User manual

APRILIA

APRILIA PEGASO 650 - 2009 User manual

APRILIA Mana GT ABS 2012 User manual

APRILIA

APRILIA Mana GT ABS 2012 User manual

APRILIA CAPONORD 1200 Guide

APRILIA

APRILIA CAPONORD 1200 Guide

APRILIA SCARABEO 500 User manual

APRILIA

APRILIA SCARABEO 500 User manual

APRILIA SR 50 - 1998 User manual

APRILIA

APRILIA SR 50 - 1998 User manual

APRILIA SCARABEO 50 2T - 2005 User manual

APRILIA

APRILIA SCARABEO 50 2T - 2005 User manual

APRILIA RX 50 - 2007 User manual

APRILIA

APRILIA RX 50 - 2007 User manual

APRILIA RS 125 User manual

APRILIA

APRILIA RS 125 User manual

APRILIA RS 50 Parts list manual

APRILIA

APRILIA RS 50 Parts list manual

APRILIA RSV MILLE User manual

APRILIA

APRILIA RSV MILLE User manual

APRILIA ETV 1000 Caponord User manual

APRILIA

APRILIA ETV 1000 Caponord User manual

APRILIA MX 50 - 07-2002 User manual

APRILIA

APRILIA MX 50 - 07-2002 User manual

APRILIA RSV 1000 R User manual

APRILIA

APRILIA RSV 1000 R User manual

APRILIA Pegaso 650 2005 User manual

APRILIA

APRILIA Pegaso 650 2005 User manual

APRILIA SR 150 User manual

APRILIA

APRILIA SR 150 User manual

APRILIA RS 125 - 01-2007 User manual

APRILIA

APRILIA RS 125 - 01-2007 User manual

APRILIA RS 50 User guide

APRILIA

APRILIA RS 50 User guide

Popular Motorcycle manuals by other brands

Suzuki Intruder VL1500B manual

Suzuki

Suzuki Intruder VL1500B manual

Yamaha XT250X 2008 Service manual

Yamaha

Yamaha XT250X 2008 Service manual

Yamaha WR250F(W) Owner's service manual

Yamaha

Yamaha WR250F(W) Owner's service manual

Yamaha TT-R230B owner's manual

Yamaha

Yamaha TT-R230B owner's manual

KTM Freeride E-XC owner's manual

KTM

KTM Freeride E-XC owner's manual

Husqvarna 2016 FE 250 owner's manual

Husqvarna

Husqvarna 2016 FE 250 owner's manual

Triumph Scrambler 1200 XC Service manual

Triumph

Triumph Scrambler 1200 XC Service manual

Yamaha FZ6-SS Assembly manual

Yamaha

Yamaha FZ6-SS Assembly manual

Panther EASY RIDER user manual

Panther

Panther EASY RIDER user manual

Yamaha WR25RK owner's manual

Yamaha

Yamaha WR25RK owner's manual

Yamaha MT-10 2023 owner's manual

Yamaha

Yamaha MT-10 2023 owner's manual

Suzuki Intruder VS1400 owner's manual

Suzuki

Suzuki Intruder VS1400 owner's manual

Yamaha Moto matrix YZF-R6S Service manual

Yamaha

Yamaha Moto matrix YZF-R6S Service manual

Yamaha YZ85 2017 owner's manual

Yamaha

Yamaha YZ85 2017 owner's manual

Yamaha YBR125ED owner's manual

Yamaha

Yamaha YBR125ED owner's manual

Bajaj Auto Pulsar RS 200 owner's manual

Bajaj Auto

Bajaj Auto Pulsar RS 200 owner's manual

Suzuki DR200SE Service manual

Suzuki

Suzuki DR200SE Service manual

Yamaha YZ250FXM 2021 Owner's service manual

Yamaha

Yamaha YZ250FXM 2021 Owner's service manual

manuals.online logo
manuals.online logoBrands
  • About & Mission
  • Contact us
  • Privacy Policy
  • Terms and Conditions

Copyright 2025 Manuals.Online. All Rights Reserved.