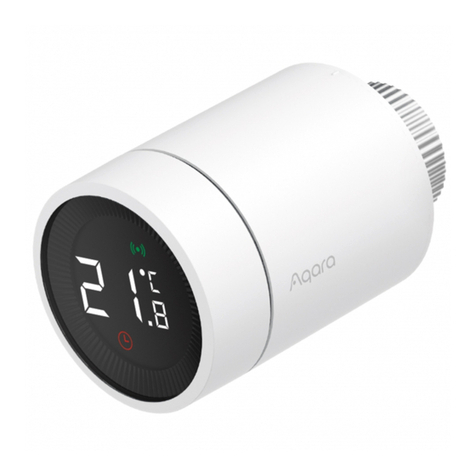
Aqara E1 User manual

Please read this manual carefully and keep it
Smart Radiator Thermostat E1
User Manual


Smart Radiator Thermostat E1 User Manual
01
Терморегулятор батареи E1 Руководство пользователя28
Manuale d'uso del Termostato da radiatore E1
56
Manuel d'utilisation de la Tête Thermostatique Intelligente E1
84
111 Smart Heizkörperthermostat E1 Benutzerhandbuch
Manual de usuario del Cabezal Termostático Inteligente E1
Smart Radiatortermostat E1 Användarmanual
164
138
Głowica Termostatyczna E1 Instrukcja obsługi
190
216 Slimme Radiatorknop E1 Gebruikershandleiding

Smart Radiator Thermostat E1 is a thermostatic radiator valve (TRV) powered
by dry (alkaline) batteries applicable to water heating radiators, featuring no
wiring and convenient installation. It can realize satisfactory temperature
control effects. This product, with a built-in low-power Zigbee wireless
communication module and an LCD display, can be used alone or added to
the Aqara Home app through the Aqara hub, becoming an intelligent
thermostat that can be set and checked in the app. It can realize automatic
temperature adjustment and window-open detection supported with the
Aqara Temperature and Humidity Sensor and the Aqara Door and Window
Sensor.
Product Introduction
-01-

* An Aqara Zigbee 3.0 hub is required for smart functionality.
* To work with HomeKit, a specific hub is required. Visit www.aqara.com/support for more
details.
* This product is for indoor use only.
LCD screen
Knob button
Note: Short press, long press, and rotation
operations are available.
Valve interface
-02-

Smart Radiator Thermostat E1 × 1, User Manual × 1, 1.5V AA Battery × 2,
Adapter (RA/RAV/RAVL) × 3
Note: Batteries have been installed before leaving the factory. Please pull out the insulating
tab before use.
What's in the Box
Please read this manual carefully and keep it
Smart Radiator Thermostat E1
User Manual
-03-

Description of Knob Button Functions
Screen status
Any status Long press for 10 seconds
Press for 3
consecutive times
Short press for 1 time Switch module
Enable/disable child lock function
Adjust temperature
Long press for 3 seconds
Rotate
Valve calibration (before calibration,
ensure that the thermostat has been
properly installed on the valve
interface)
Network joining/network resetting
Function Description
-04-

Screen Status Description
The screen will display the status as shown in
the figure every time batteries are loaded. At this time, install the
thermostat into the valve interface as soon as possible, and then
press the button 3 consecutive times or click "More Settings" in
the app to calibrate the valve.
This is designed for usage when you are
away for an extended period, to protect the water pipe from
freezing at low temperature.
The user can rotate the knob or set the target
temperature on the app as needed.
To Be Installed
Anti-Freezing Mode
Manual Mode
Note: Ensure that the thermostat is properly installed on the valve interface
before calibration.
-05-

Icon Description
The valve will be closed to stop heating, which is suitable
for service in the summer when there is no heating needed.
Temperature control fault
Low battery
Set temperature
Window-open detection
Intelligent schedule Manual mode
Installation
Networking
Child lock
Off
-06-

Low battery
Set temperature
Window-open detection
Intelligent schedule
Manual mode
Installation
Networking
Child lock
In case of low battery. Replace the batteries as soon as possible.
Display the set temperature.
When the window-open detection function is activated.
When the intelligent schedule function is activated.
When the thermostat is in manual mode.
When the thermostat is in installation status.
Status of networking:
*Icon normally on: normal network connection
*Icon off: offline/disconnected.
To prevent children from touching by mistake, long press
for 3 seconds to enable or disable the function.
Temperature control fault In case of abnormal temperature control. Refer to the
"Troubleshooting" in the manual for troubleshooting.
-07-

Installation Instructions
1. Please pull out the insulating tab before use, and confirm that the device is
turned on.
-08-

2. It is recommended to install the thermostat on the radiator valve interface
within 5 minutes aer the TRV starts up.
1.Horizontal installation 2.Vertical installation
-09-

a. The Thermostat supports both horizontal and vertical installation methods.
However, the vertical installation method may result in inaccurate
temperature readings caused by the built-in temperature sensor being
close to the radiator.
Note: in any of these methods, an external Aqara Temperature and Humidity Sensor is
required to make temperature control more accurate.
12
-10-

b. Align the thermostat interface nut with the radiator valve, and rotate the
nut until it is tightened.
Note: Installation of [M30*1.5 mm] valve interface is shown in the figure.
-11-

c. Press the thermostat button 3 consecutive times to calibrate the valve.
During calibration, the screen displays the [F12] symbol.
d. The [F12] symbol disappears in about 10 seconds, and the screen displays
the currently set temperature, indicating the completion of installation.
Note: the valve must be calibrated; otherwise it may cause abnormal temperature
control. Follow the above steps or click "More Settings" in the app to calibrate the valve.
-12-

Installation with Other Adapters:
Adapter:
RA
Connect the RA adapter with the
valve, tighten the screw to
complete the connection, then
align the thermostat interface nut
with the RA adapter, and rotate
the interface nut until it is
tightened. 1
2
3
-13-

Adapter:
RAV
Connect the RAV adapter with
the valve, tighten the screw,
insert the pushrod into the valve
thimble to complete the
connection, then align the
thermostat interface nut with
the RAV adapter, and rotate the
interface nut until it is tightened.
1
2
3
4
-14-

Adapter:
Connect the RAV adapter with the
valve, tighten the screw, insert the
pushrod into the valve thimble to
complete the connection, then
align the thermostat interface nut
with the RAV adapter, and rotate
the interface nut until it is
tightened.
1
2
RAVL
-15-

Quick Setup
Adding the Device to the Aqara Home app:
Before using the product, please ensure that the Aqara Home app has
been downloaded and an Aqara Zigbee 3.0 hub has been installed.
Start the app, click "+" in the upper-right corner of the home page to enter
the "Add Device (Accessories)" page, select "Smart Radiator Thermostat
E1", and operate according to the prompts on the page.
Effective distance verification: aer the successful network configuration,
adjust the thermostat at the preselected installation position and observe
whether the status in the app is synchronized.
* If the device is not added, please move it closer to the hub and try again.
1
2
-16-

Battery Replacement
Rotate the housing in the direction of the arrow at the bottom and pull it
out until it is unlocked.
1
2
1
-17-
Other manuals for E1
7
Table of contents
Languages:
Other Aqara Thermostat manuals