manuals.online logo
Brands
  1. Home
  2. •
  3. Brands
  4. •
  5. Aqua Lung
  6. •
  7. Diving Instrument
  8. •
  9. Aqua Lung GripLock 428230 User manual

Aqua Lung GripLock 428230 User manual

This manual suits for next models

1

Other Aqua Lung Diving Instrument manuals

Aqua Lung Outlaw User manual

Aqua Lung

Aqua Lung Outlaw User manual

Aqua Lung EA-4500 LW User manual

Aqua Lung

Aqua Lung EA-4500 LW User manual

Aqua Lung i330R User manual

Aqua Lung

Aqua Lung i330R User manual

Aqua Lung ODYSSEA User manual

Aqua Lung

Aqua Lung ODYSSEA User manual

Aqua Lung i550 User manual

Aqua Lung

Aqua Lung i550 User manual

Aqua Lung i300C User manual

Aqua Lung

Aqua Lung i300C User manual

Aqua Lung MISTRAL FIRST STAGE User manual

Aqua Lung

Aqua Lung MISTRAL FIRST STAGE User manual

Aqua Lung Calypso User manual

Aqua Lung

Aqua Lung Calypso User manual

Aqua Lung LPIS User manual

Aqua Lung

Aqua Lung LPIS User manual

Aqua Lung BC1760101UV User manual

Aqua Lung

Aqua Lung BC1760101UV User manual

Aqua Lung SEA MK User manual

Aqua Lung

Aqua Lung SEA MK User manual

Aqua Lung i770R User manual

Aqua Lung

Aqua Lung i770R User manual

Aqua Lung i100 User manual

Aqua Lung

Aqua Lung i100 User manual

Aqua Lung 63093 User manual

Aqua Lung

Aqua Lung 63093 User manual

Aqua Lung i300 User manual

Aqua Lung

Aqua Lung i300 User manual

Aqua Lung Calypso User manual

Aqua Lung

Aqua Lung Calypso User manual

Aqua Lung GORSKI G2000SS User manual

Aqua Lung

Aqua Lung GORSKI G2000SS User manual

Aqua Lung MDB User manual

Aqua Lung

Aqua Lung MDB User manual

Aqua Lung i750TC User manual

Aqua Lung

Aqua Lung i750TC User manual

Aqua Lung SEA LW User manual

Aqua Lung

Aqua Lung SEA LW User manual

Aqua Lung FIRST STAGE User manual

Aqua Lung

Aqua Lung FIRST STAGE User manual

Aqua Lung PHODS User manual

Aqua Lung

Aqua Lung PHODS User manual

Aqua Lung SEA LV2 User manual

Aqua Lung

Aqua Lung SEA LV2 User manual

Aqua Lung Reflector Kit User manual

Aqua Lung

Aqua Lung Reflector Kit User manual

Popular Diving Instrument manuals by other brands

Sherwood Amphos manual

Sherwood

Sherwood Amphos manual

Zeagle N2ition owner's manual

Zeagle

Zeagle N2ition owner's manual

OCEANS S1 Supersonic manual

OCEANS

OCEANS S1 Supersonic manual

SUBMERSIBLE SYSTEMS Spare Air 600 owner's manual

SUBMERSIBLE SYSTEMS

SUBMERSIBLE SYSTEMS Spare Air 600 owner's manual

Apeks BLACK SAPPHIRE Maintenance manual

Apeks

Apeks BLACK SAPPHIRE Maintenance manual

Omer SP2 instructions

Omer

Omer SP2 instructions

Dräger PAS AirPack 1 Instructions for use

Dräger

Dräger PAS AirPack 1 Instructions for use

Dive Lab KIRBY MORGAN KMB 18 USER, OPERATOR COURSE

Dive Lab

Dive Lab KIRBY MORGAN KMB 18 USER, OPERATOR COURSE

Ratio Computers iDive user manual

Ratio Computers

Ratio Computers iDive user manual

Oceanic PROPLUS X operating manual

Oceanic

Oceanic PROPLUS X operating manual

CFA MSA G1 Reference manual

CFA

CFA MSA G1 Reference manual

Tusa Q 1203 CE Start guide

Tusa

Tusa Q 1203 CE Start guide

Sherwood Scuba Insight Manual guide

Sherwood Scuba

Sherwood Scuba Insight Manual guide

TREND GAUGE/60 manual

TREND

TREND GAUGE/60 manual

Tusa B.C.J. owner's manual

Tusa

Tusa B.C.J. owner's manual

Dräger Panorama Nova Dive Instructions for use

Dräger

Dräger Panorama Nova Dive Instructions for use

heinrichs weikamp OSTC 2 user manual

heinrichs weikamp

heinrichs weikamp OSTC 2 user manual

Genesis Centauri manual

Genesis

Genesis Centauri manual

manuals.online logo
manuals.online logoBrands
  • About & Mission
  • Contact us
  • Privacy Policy
  • Terms and Conditions

Copyright 2025 Manuals.Online. All Rights Reserved.

GRIPLOCK™ CYLINDER BAND
Installation of GripLock™ Cylinder Band
1Remove the bail from the cylinder band. Insert the open end of the
cylinder band through the left slot in the BC, weave it through and out
the right BC slot (Fig. 1 & 2).
READ ALL INSTRUCTIONS PRIOR TO ASSEMBLY
NOTE: Before removing the original cylinder band, examine how it is woven through the
BC. It is critical to weave the GripLock™ cylinder band in the same fashion.
Figure 2
Figure 1
428230 - Wrapture Version
428210 - Non-Wrapture Version
3Push the lever forward until it stops in the pre-locked position (this
keeps you ngers from being caught in lever) (Fig. 10).Push the lever
down into the locked position. Verify the lever is secured in the locked
position (Fig. 11). Once the cylinder band is set up, further adjustment is
typically not needed.
4Check the cylinder band is secure by pulling on the band while holding
down the cylinder at the valve. If the cylinder band moves, it is too loose.
Check the macro adjustment is set for the correct size cylinder. Repeat steps
1-4 of Securing the GripLock™ Cylinder Band to tighten and secure the
cylinder band.
Rev. 11/12
If you have any questions regarding the GripLock™ cylinder band or the
information found in this manual, please contact your regional Aqua Lung
Dealer or Distributor. Distributor information is available on the Aqua Lung
website at: www.aqualung.com
Figure 11
Figure 10
GripLock™ Components
MICRO
ADJUSTMENT BAIL LEVER
BAIL
SLOT
MACRO
ADJUSTMENT
Threading the GripLock™ Cylinder Band
WARNING: Verify the tension of the cylinder band prior to every dive. Failure to do
so may result in the cylinder tension slipping during the course of a dive.
2For optimum cylinder retention, center the GripLock™ buckle assembly
on the curve of the cylinder. Connect the bail into the bail slot of the lever
(Fig. 9). Hold the lever and pull the GripLock™ patch end of the webbing
to tighten the micro adjustment. Secure the hook and loop webbing on the
micro adjustment.
WARNING: Check the macro adjustment is set for the appropriate size cylinder.
Failure to do so may result in the cylinder slipping during the course of a dive.
1Make sure the cylinder valve
air outlet is facing the back of
the BC. Secure the valve strap (if
equipped) around the base of the
cylinder valve. It does not need to
be cinched all the way, just enough
to keep the cylinder vertical and
the back of the BC straight, parallel
with the cylinder. (Fig. 8).
NOTE: There is no need to wet the GripLock™ cylinder band prior to securing it
to the cylinder. When properly adjusted, the cylinder band will retain it’s tension. If
adjustment is necessary for a larger or smaller size cylinder (pre-set for use on an
aluminum 80 cf cylinder 7.25 inch / 184 mm), follow the procedure in the section:
Adjusting the GripLock™ Cylinder Band.
NOTE: Pull the micro adjustment only until it is snug against the cylinder. If the lever
is difcult to close, the micro adjustment is too tight. Loosen the micro adjustment and
close the lever to secure GripLock™ band to cylinder. If it is difcult to remove the
GripLock™ band from the cylinder, this is an indicator that the micro adjustment was
too tight when installed.
Securing the GripLock™ Cylinder Band
Figure 9
Figure 8
Adjusting the GripLock™ Cylinder Band
WARNING: The BC must be completely deated of air before adjusting the GripLock™
cylinder band. Failure to do so may result in the cylinder slipping during the course
of a dive.
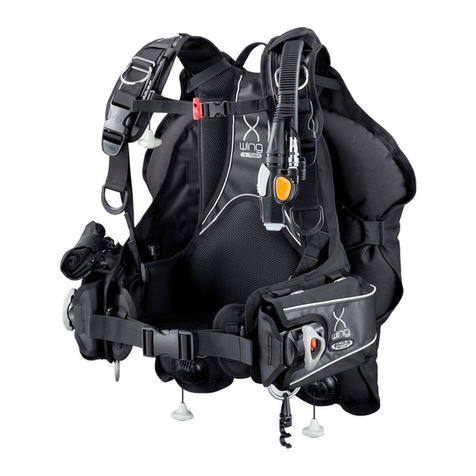
NOTE: The GripLock™ cylinder band adjusts for all standard cylinder diameters and
is ready for use with an aluminium 80 cf (7.25 inch / 184 mm) cylinder when the BC
leaves the factory.
1
There are three diameter settings for cylinder size A. large cylinder
B. AL 80 cf (7.25 in / 184 mm) C. smaller cylinder (Fig. 5).Adjust
the macro adjustment for the proper size cylinder (Fig. 6). Secure hook
and loop on the band to retain macro preset (Fig. 7).
Macro Presets
ABC
Figure 6
Figure 5
Figure 7
2Insert the open end of the cylinder band into the large opening of the bail,
around the slide bar and out the small opening of the bail (Fig. 3). Secure
the hook and loop on the band to hold the bail in place (Fig. 4).
Figure 4
Figure 3
NOTE: Your BC may come equipped with a valve strap. This strap allows you to place
the BC in the proper position for perfect tank placement. Place the valve strap over
the cylinder valve and adjust as needed.