manuals.online logo
Brands
  1. Home
  2. •
  3. Brands
  4. •
  5. Aquacentrum
  6. •
  7. Water Dispenser
  8. •
  9. Aquacentrum AquaVolta NANO User manual

Aquacentrum AquaVolta NANO User manual

Enhanced
NANO-BUBBLES
NANO
Hydrogen-Water
Booster 5th generation
MANUAL
By Karl H. Asenbaum
Version 2021/08
2 -What is AquaVolta®?
•The brand name Aquavolta ® is composed of the Latin term for
water (
Aqua
) and the name of the inventor of the battery,
Alessandro
Volta
. It stands for electrically-activated water.
•In Germany, it was originally referred to as electrolyte water,
later as "active water". In the English-speaking world it is often
referred to as "reduced", "ionized" or "hydrogen-rich" water.
•The characteristic of AquaVolta® is that it has a negative
electrical voltage with respect to a measuring electrode, a so-
called
negative redox potential
.
•The lower the redox potential, the higher the readiness of the
water to give up electrons. For every 0.018 volts (18 millivolts)
lower redox potential, this readiness doubles. AquaVolta®
water has a 400 to 800 millivolts lower redox potential than tap
water or bottled mineral water.
•Due to its high readiness to release electrons, AquaVolta® is
also called
antioxidant water.
However, it is not only used by
doctors for therapy, but is also establishing itself as a modern
everyday drink due to its pleasant taste.
•From today's scientific point of view, the
dissolved hydrogen
(dH2)
content is
mainly responsible for the antioxidant power
of AquaVolta®.
AquaVolta® NANO
was developed to enhance
this. It reflects the state of the art in 2021.
3 -NANO: The 5th generation
of hydrogen boosters
•Hydrogen gas, H2,was not recognized by medical
research as the "gas of life" until the 21st century.When
drunk dissolved in water, it can produce antioxidant, anti-
inflammatory and anti-apoptotic effects.In recent years, a
mitohormetic effect has also come into focus, which has
similar benefits to athletic training.
•When people began to understand this, an industry first
developed that pressed hydrogen at high pressure into
aluminum cans or bags, where the H2content could be
preserved for several months.This is not only very
expensive, but also causes
major waste problems
.
•Effervescent tablets were also developed that could produce
hydrogen-rich water.However, they are also relatively expensive and
have an acidic aftertaste that is rather annoying.
•European consumers in particular therefore preferred ado-it-
yourself solution, for which Karl H. Asenbaum coined the term
"hydrogen booster" in his book "Electrically oactivated Water",
published in 7 languages.
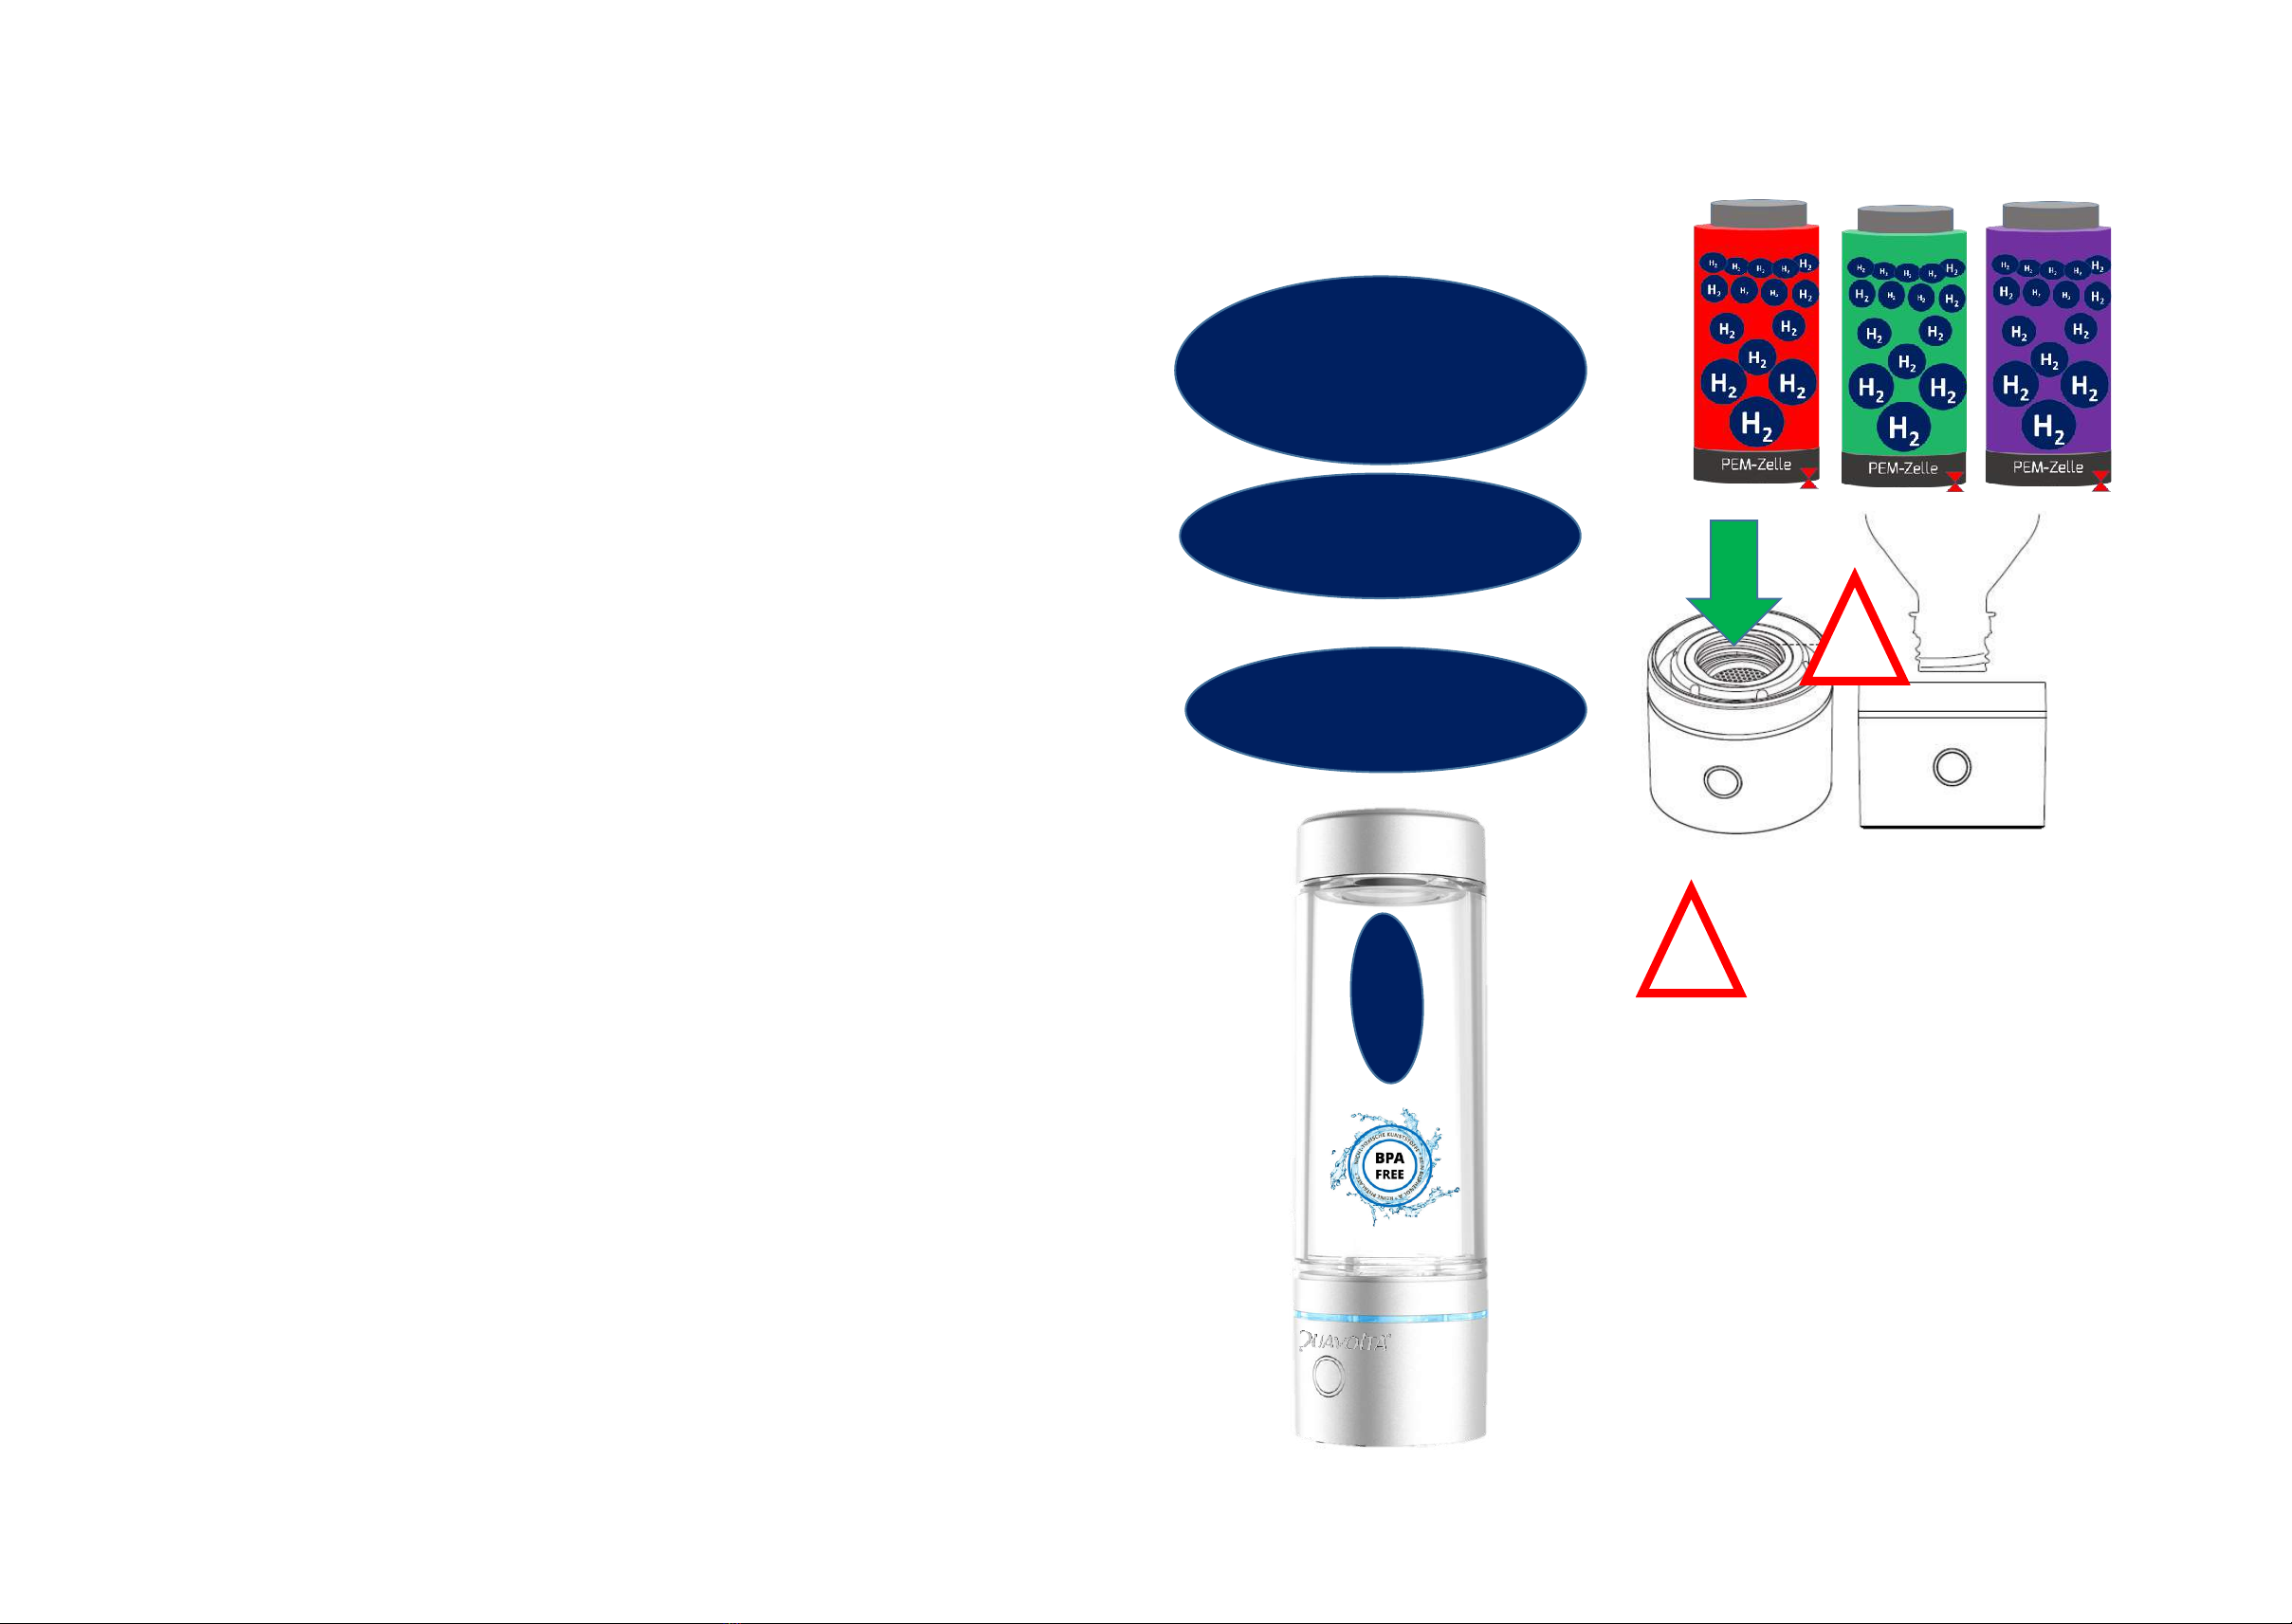
•The basis of the do-it-yourself solutions is always the electrolysis of water.
Stationary water ionizers work with a diaphragm electrolysis, while mobile
electrolysis devices work with a so-called PEM cell, in which the electrolysis
gases H2and O2are cleanly separated and only the hydrogen accumulates in
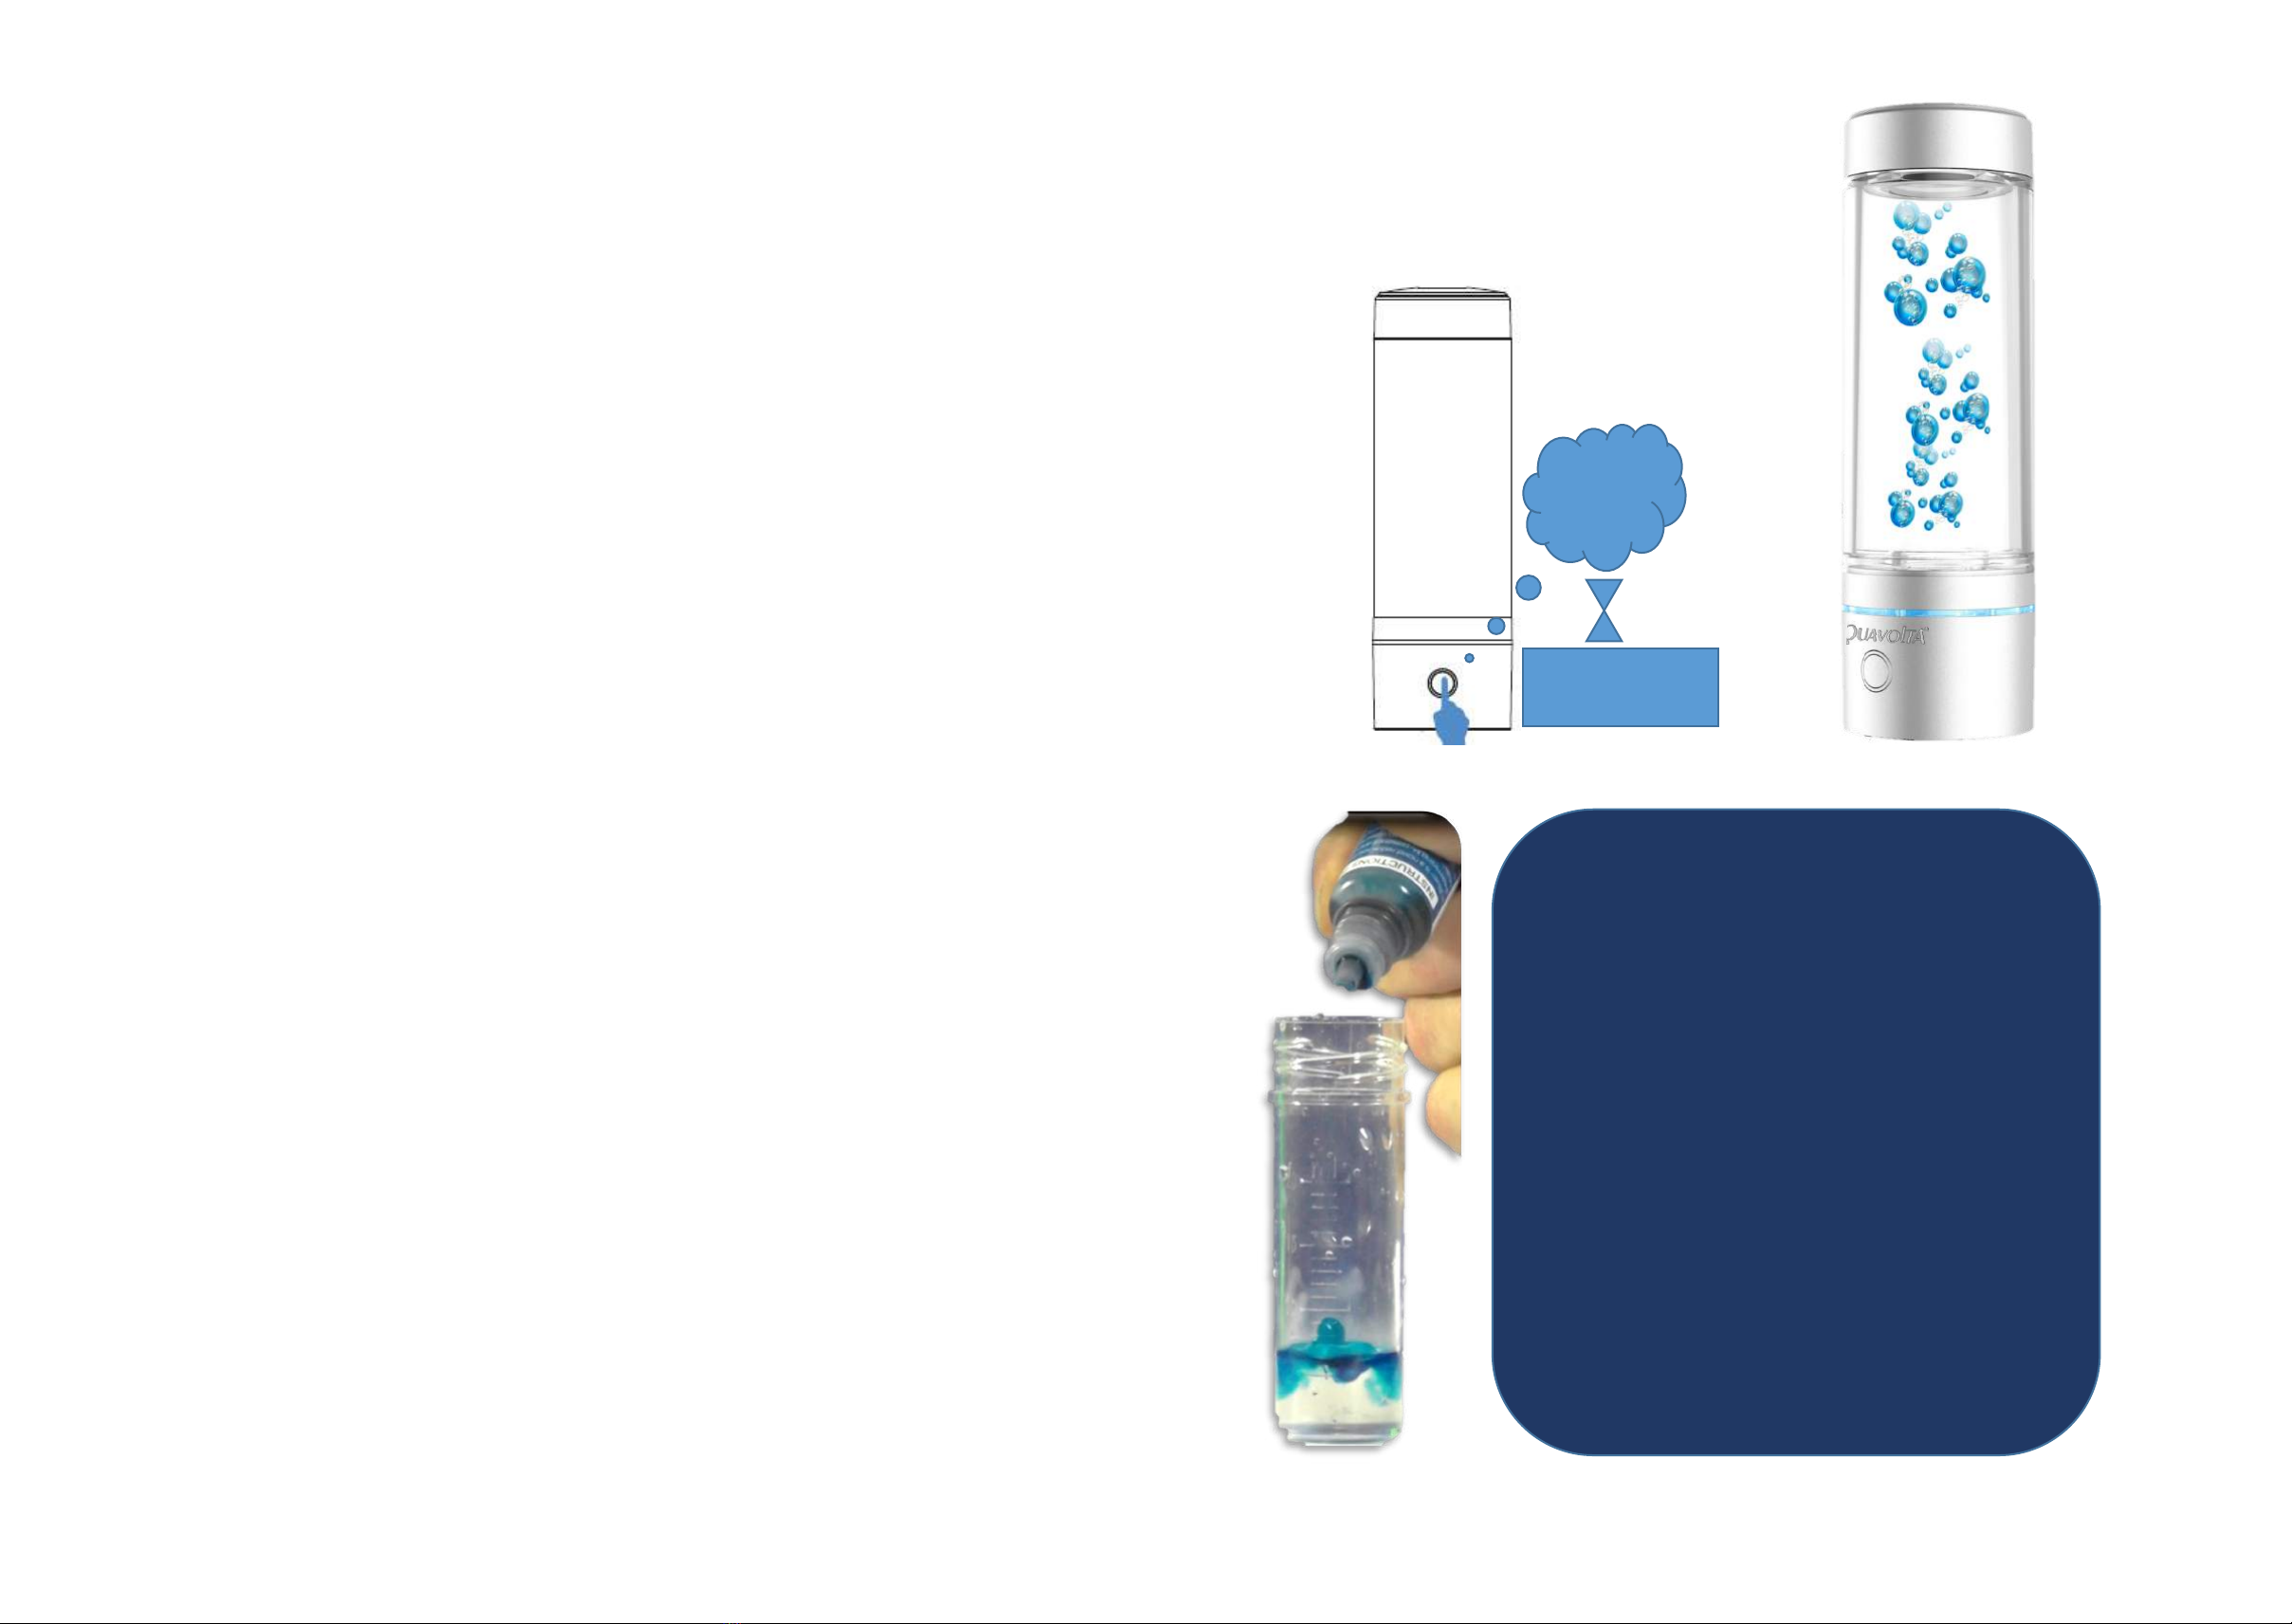
the water.In addition, boosters like the Aquavolta® NANO use pressure
systems to dissolve as much H2as possible in the water.In the 5th booster
generation, it has now been possible to keep the gas bubbles so small that the
efficiency of the booster has been significantly increased.
4 -Always fresh hydrogen
(almost) free water selection
You can always use your booster on the go, thanks to its
long-lasting battery.
We have designed the
AquaVolta® NANO Hydrogen
Booster so
that you do not have to rely on asingle type
of water.If you don't trust the tap water you have on the
way,
you can fill filtered tap water and even water
from areverse osmosis system (RO water) into your
booster
.
You can also fill the BPE-free Tritan container with your
favourite mineral water.It is even possible to unscrew the
Tritan container and screw on amineral water bottle
with a30 mm thread (plastic bottles only!) instead.
Important limitation:
The water must not contain any carbonic acid
.
Otherwise the gas pressure will exceed the capacity of
the overpressure system and the booster could be
damaged or even burst.
RO water
fit!
Drinking
water
Any type
Bottle-
fit!
!
Tritan
!
As bottles do not have
pressure equalisation
holes, this method is
always 2nd choice.
Maximum production
time 2x5 min.
5 -Unit description / scope of delivery
Screw-in production
container 240 ml made
of Tritan Bottle thread for 30
mm bottles
USB-C cable
USB-C Power supply (not
included)
Pressure equalisation holes
in the screw cap
Do not block!
Seal
!
Screw cap
Pressure equalisation
hole in the base part.
Do not block.
Drops
can
escape
here.
Base
part
As bottles do not have
pressure equalisation
holes, this method is
always second choice.
Max. Production time 2x5
min.
!
6 -Note
1. Remove the orange silicone plug before commissioning
and keep it. With a new unit, there may still be residual
water under the plug for membrane protection. Pour this
away and rinse with clean water.
2. If you do not use the unit for more than a week, fill water
into the electrolysis cell to a height of max. 1 cm and close
it with the silicone plug.
Tips
•Before first use, fill the production vessel with water for at
least 30 minutes to soak the electrolysis membrane. Then
pour the water away.
•The production vessel should be kept moist at all times.
•Water filled in must never be above 60oC.
•Never immerse the unit in water.
•Do not start the hydrogen production several times in a row
without opening the lid in between.
!
➢Only operate the appliance if you have read and
understood the operating instructions.
➢Before you switch on the appliance, the water tank
must be filled with water. Otherwise, the electrolytic
cell will be damaged and the warranty will be
invalidated.
➢You must not fill water above 60 degrees C.
➢Only use the power supply unit with 220 volts.
➢Ensure that children do not have access to the unit.
➢Never put the appliance under water. A damp cloth is
sufficient for cleaning. Do not use chemical cleaning
agents.
➢Never drop the unit.
➢Use cold water max. 30°C)
➢Do not expose the unit to direct sunlight or
temperatures below 0 or above 50 degrees C.
➢Do not place the unit in damp or dirty rooms.
7 -General instructions for use
➢Do not place the unit outdoors
➢Do not use the USB-C cable if it is damaged or the
cable has been bent.
➢Do not place heavy or pointed objects on the mains
cable.
➢Do not touch any parts connected to the mains with
wet fingers.
➢Only use water of drinking quality if you want to
drink the water afterwards.
➢You must not use carbonated water (sparkling
water). This could cause the appliance to explode.
➢Do not open the power supply unit or the base unit
and do not attempt any repairs in the event of a
defect. In the event of a defect, disconnect the unit
from the mains immediately and inform your dealer.
➢Do not dispose of the appliance in household waste.
8 - Preparation for operation and charging
1. Place the unit on a dry flat surface.
2. Insert the USB-C plug of the power supply and charging unit into
the socket. Before first use, the battery must be fully charged.
3. The LED starts flashing red.
4. Before
first use,
fill the glass container with max. 60o C warm
water and let it stand for
at least 2 hours to
moisten the
membrane cell completely. Finally, renew the water and shake
for about one minute.
5. Then you can fill in the water that you want to enrich with
hydrogen and drink. You should only fill in so much water that
the water level does not touch the pressure cap, so that no water
penetrates there.
6. At the end of the charging process, the LED lights up
permanently green.
7. Remove the plug from the mains and charging part and close
the tab. The generator must not be operated during the first
charging.
8. If the LED starts flashing during operation, the mains and
charging unit must be reconnected until the battery is charged.
1
ok
2-3 hrs.
2
It is normal for there to be some water/moisture in the
production tank when the unit is delivered, as the
membrane between the electrodes should always be
kept moist.
9 -Produce hydrogen water for drinking
Important:
the device must be filled with drinking water before
you press the start button.
Press the start button for 3 seconds. A beep indicates the start.
The light goes on and you can recognize the hydrogen
production by the fine rising bubbles. One production process
takes 5 minutes.
•If you want to stop a running production, press the start
button again for 3 seconds.
•If the light changes to red and flashes, the device should be
charged soon. During the charging process, the LED lights
up permanently until a green light indicates that the battery
is fully charged. Hydrogen water can also be produced at
the same time during the charging process.
•
Each 5-minute production phase ends automatically with
a beep. This can also be seen from the fact that the LED
goes out and the formation of bubbles has stopped.
•
You are we lc o me to rep e at th e p rodu cti o n cyc l e a
second time WITHOUT opening the lid, if even higher
hydrogen values are desired.
•With the H2measuring drops available as accessories,
you can test which production time you have to set for
your target value for hydrogen concentration for the water
you are using.
Why better use the standard
container with 240 ml content and
not screwed-in bottles?
•Because this is an amount that
anyone can drink in 10 minutes.
•Remember: hydrogen
outgasses quickly!
•Do not produce in advance, but
often drink small amounts
immediately.
3
Sec.
5 min.
10 -Cleaning / Equipment hygiene / Technical data
•The inside of the glass container and the grid-shaped
round minus electrode that produces the hydrogen must
be cleaned with 1 teaspoon of citric acid dissolved in
lukewarm
water
if there are visible traces of limescale.
•Close the screw cap and shake vigorously for 30 seconds.
Leave the citric acid solution to soak in for 1 hour and then
rinse the container with lid and the electrode several times
with warm water.
•This cleaning is also
necessary for
hygienic reasons
at
least every 2 weeks
or if unpleasant odors are noticeable
in the unit. In this case, the water should be approx. 50 -
60 degrees C hot.
•Wipe the exterior of the unit with a damp soft cloth.
•Yo u c a n a l s o re m o ve c o a r s e s o i l i n g b y h a l f -filling the
pressure vessel with warm water and shaking it vigorously.
Then pour away the rinsing water.
•Store the unit at room temperature and out of direct
sunlight.
11 - Error Check/Service/Warranty
Problem
Root cause
analysis
Solution
Booster does
not work (no
bubble
development)
Battery charged?
Foreign body in the
pressure vessel?
Connect the power supply
unit if necessary
Unscrew the production
container and cover and
clean them separately
LED does not
light up
Battery
charged?
Load
again
Charging
does
not
work
Check
plug and
cable
If the USB
-C cable is
defective. substitute.
Leakage
Check the fit and
condition of the seals
Adjust seals, otherwise
contact your dealer
Battery
life is
low
Less than 10
production cycles?
Recharge fully 1 hour after
charging (green)
Smell
in the lid
Unscrew
the cover
Treat the lid recess with
disinfectant
Your retailer is responsible for and the contact person for
warranty services. This applies in particular to promises that
exceed the two-year legal warranty. All warranty
commitments are therefore listed on your retailer's proof of
purchase (invoice).
Manufacturer (general importer and service centre):
Aquacentrum, owner Yasin Akgün
Münchener Str. 4 a
D-85748 Garching near Munich
www.aquacentrum.de
•Aquavolta®is a word trademark protected by the
German Patent and Trademark Office and the
EUIPO
•Waste electrical equipment register: WEEE reg. No.
DE 93599565

Popular Water Dispenser manuals by other brands

Hydrotech 785HE Quick setup manual

Hydrotech

Hydrotech 785HE Quick setup manual

Follett 7UC100A Installation, operation and service manual

Follett

Follett 7UC100A Installation, operation and service manual

Ugur USS 85 operating manual

Ugur

Ugur USS 85 operating manual

vitapur VWD9506W-POU Use & care guide

vitapur

vitapur VWD9506W-POU Use & care guide

Culligan Premium Aqua-Cleer RO Installation and operation instructions

Culligan

Culligan Premium Aqua-Cleer RO Installation and operation instructions

Lacor 69298 Instructions for use and maintenance

Lacor

Lacor 69298 Instructions for use and maintenance

East Midlands Water Company SUMO manual

East Midlands Water Company

East Midlands Water Company SUMO manual

Curtis Thermopro Airpot TLXA22 instructions

Curtis

Curtis Thermopro Airpot TLXA22 instructions

Follett chewblet 15CI100A Installation, operation and service manual

Follett

Follett chewblet 15CI100A Installation, operation and service manual

Everpure EV941000 Specification sheet

Everpure

Everpure EV941000 Specification sheet

LaMotte DirectFlo 1026 manual

LaMotte

LaMotte DirectFlo 1026 manual

North Star NST30ED Installation and operation manual

North Star

North Star NST30ED Installation and operation manual

Primo Water 900162 user manual

Primo Water

Primo Water 900162 user manual

Breville URN6 Instructions for use

Breville

Breville URN6 Instructions for use

Aqua Computer aquaero 3.07 owner's manual

Aqua Computer

Aqua Computer aquaero 3.07 owner's manual

CSI CM24 Installation & operation manual

CSI

CSI CM24 Installation & operation manual

Kenmore SOFTENERS-275-280 owner's manual

Kenmore

Kenmore SOFTENERS-275-280 owner's manual

Cosmetal UV Connect 28 A Installation, use and maintenance handbook

Cosmetal

Cosmetal UV Connect 28 A Installation, use and maintenance handbook

manuals.online logo
manuals.online logoBrands
  • About & Mission
  • Contact us
  • Privacy Policy
  • Terms and Conditions

Copyright 2025 Manuals.Online. All Rights Reserved.