AquaCraft Rio 51 User manual

ASSEMBLY AND OPERATION MANUAL
WARNING:
1. Never attempt to swim after a stalled R/C boat.
2. Never operate your R/C boat while standing in the water.
3. Never operate your R/C boat in the presence of swimmers.
4. Always use a Personal Flotation Device (PFD) when boarding and operating your retrieval
craft, i.e. Jon boat or duck boat. NOTE: Because of the sharp running hardware included
with this R/C boat, we do not recommend using a rubber blow up raft.
5. The engine and exhaust system become very hot during operation. Avoid coming in contact
with any part of the motor, cooling system or exhaust during or after operation.
6. R/C boat running hardware is very sharp. Be very careful when working on and around the
metal parts.
7. While the engine is running, pay close attention to the propeller. Do not come in contact
with the propeller at any time the engine is running or serious injury will result.
8. AquaCraft products are to be used by ages 14 and over.
Entire Contents © Copyright 2007 AQUZ1004 for AQUB43** V1.0
™
™
™

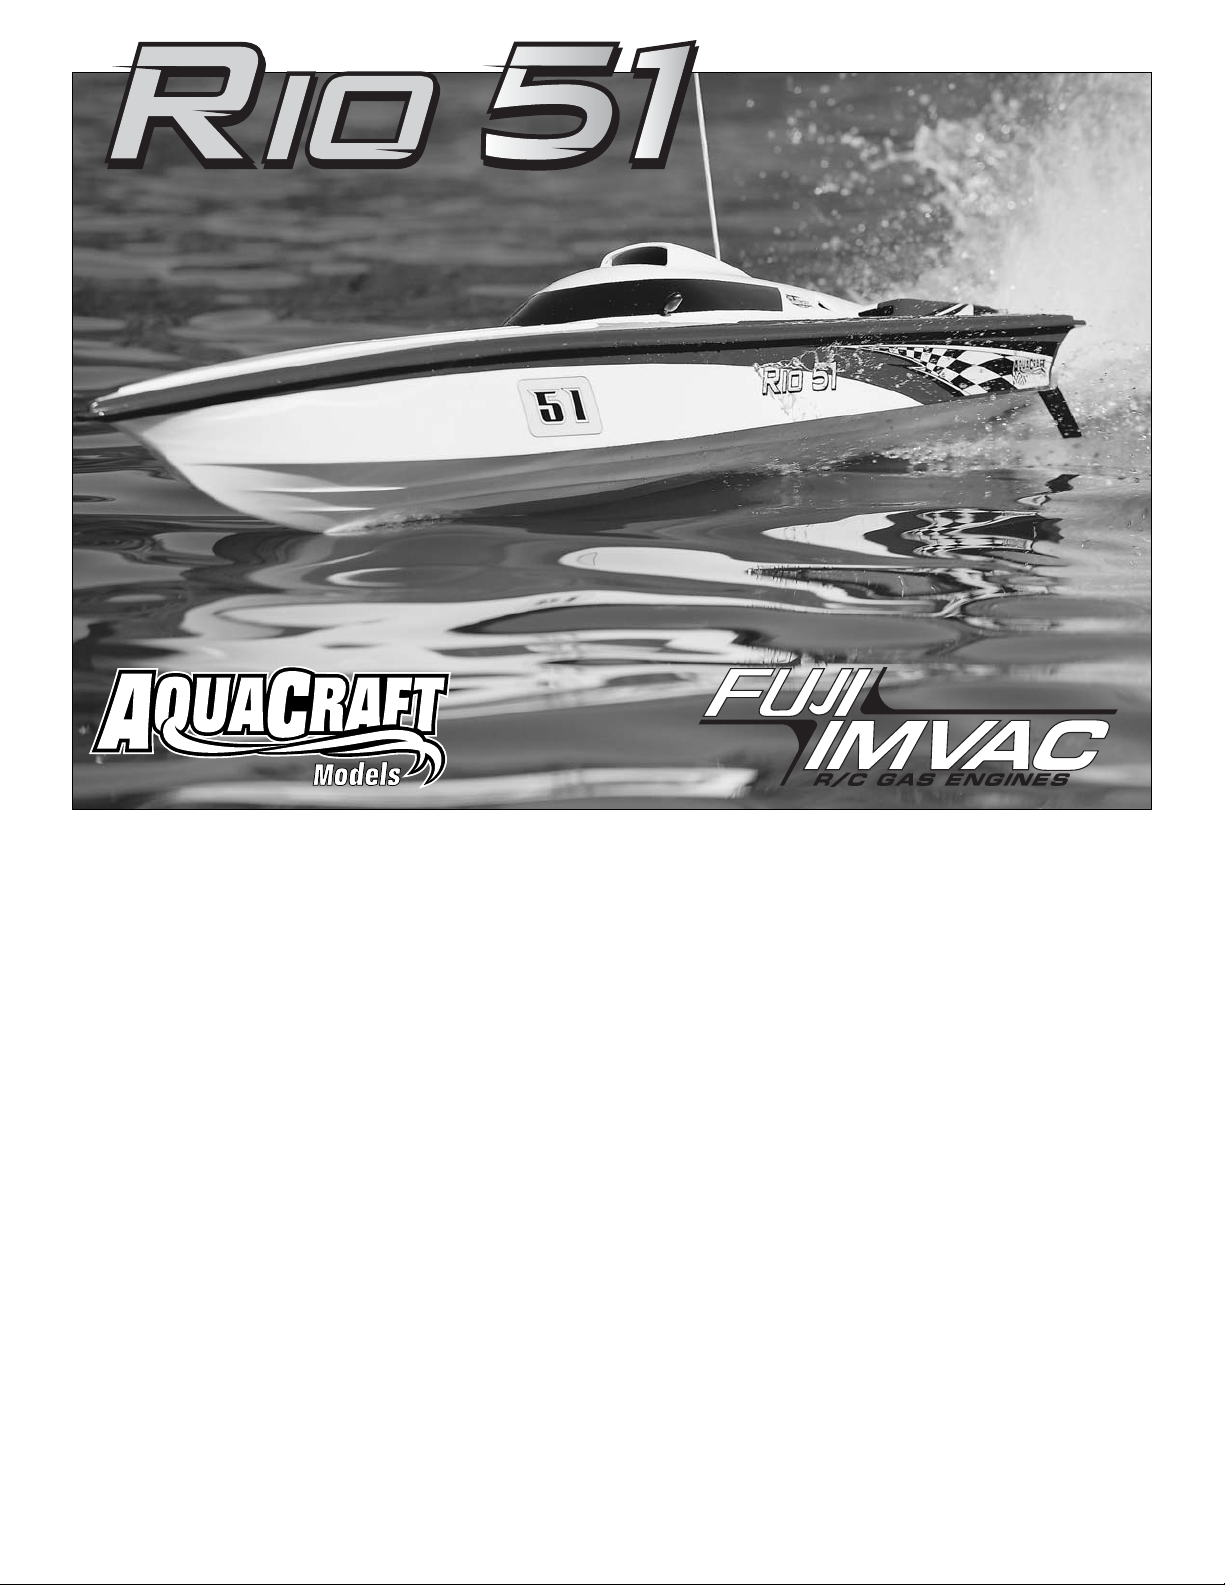
THANK YOU! Thank you for purchasing the Rio 51! We at
AquaCraft know how exciting a new R/C boat purchase
can be and we know you’re anxious to get started. Please
take time first to read this manual carefully and completely
before attempting to operate your model. This manual
contains the instructions you need to safely operate and
maintain your boat. Remember as with any hobby, there is
a possibility of injury if this product is misused, so please
be careful.
If for any reason you think that this model is not for you,
return it to your local dealer immediately. PLEASE NOTE:
Your hobby dealer cannot accept a return on any model after
the final assembly sequence has begun.
MANUAL SPECIFICATION &
DESCRIPTION CHANGES
All pictures, descriptions, and specifications found in
this instruction manual are subject to change without
notice. AquaCraft™and Fuji-Imvac™Engines maintain no
responsibility for inadvertent errors in this manual.
SAFETY PRECAUTIONS
Never ever attempt to swim after a stalled R/C boat. Do not
get in the water for any reason to retrieve your boat. To aid
you in retrieving a stalled R/C boat, set up a fishing reel with
a tennis ball tied to the end of the line. Or better yet, get
yourself a small Jon boat so you can row out and pick up your
boat. Remember to use a PFD (personal flotation device) any
time you enter your retrieval craft.
AquaCraft products are to be used by ages 14 and over.
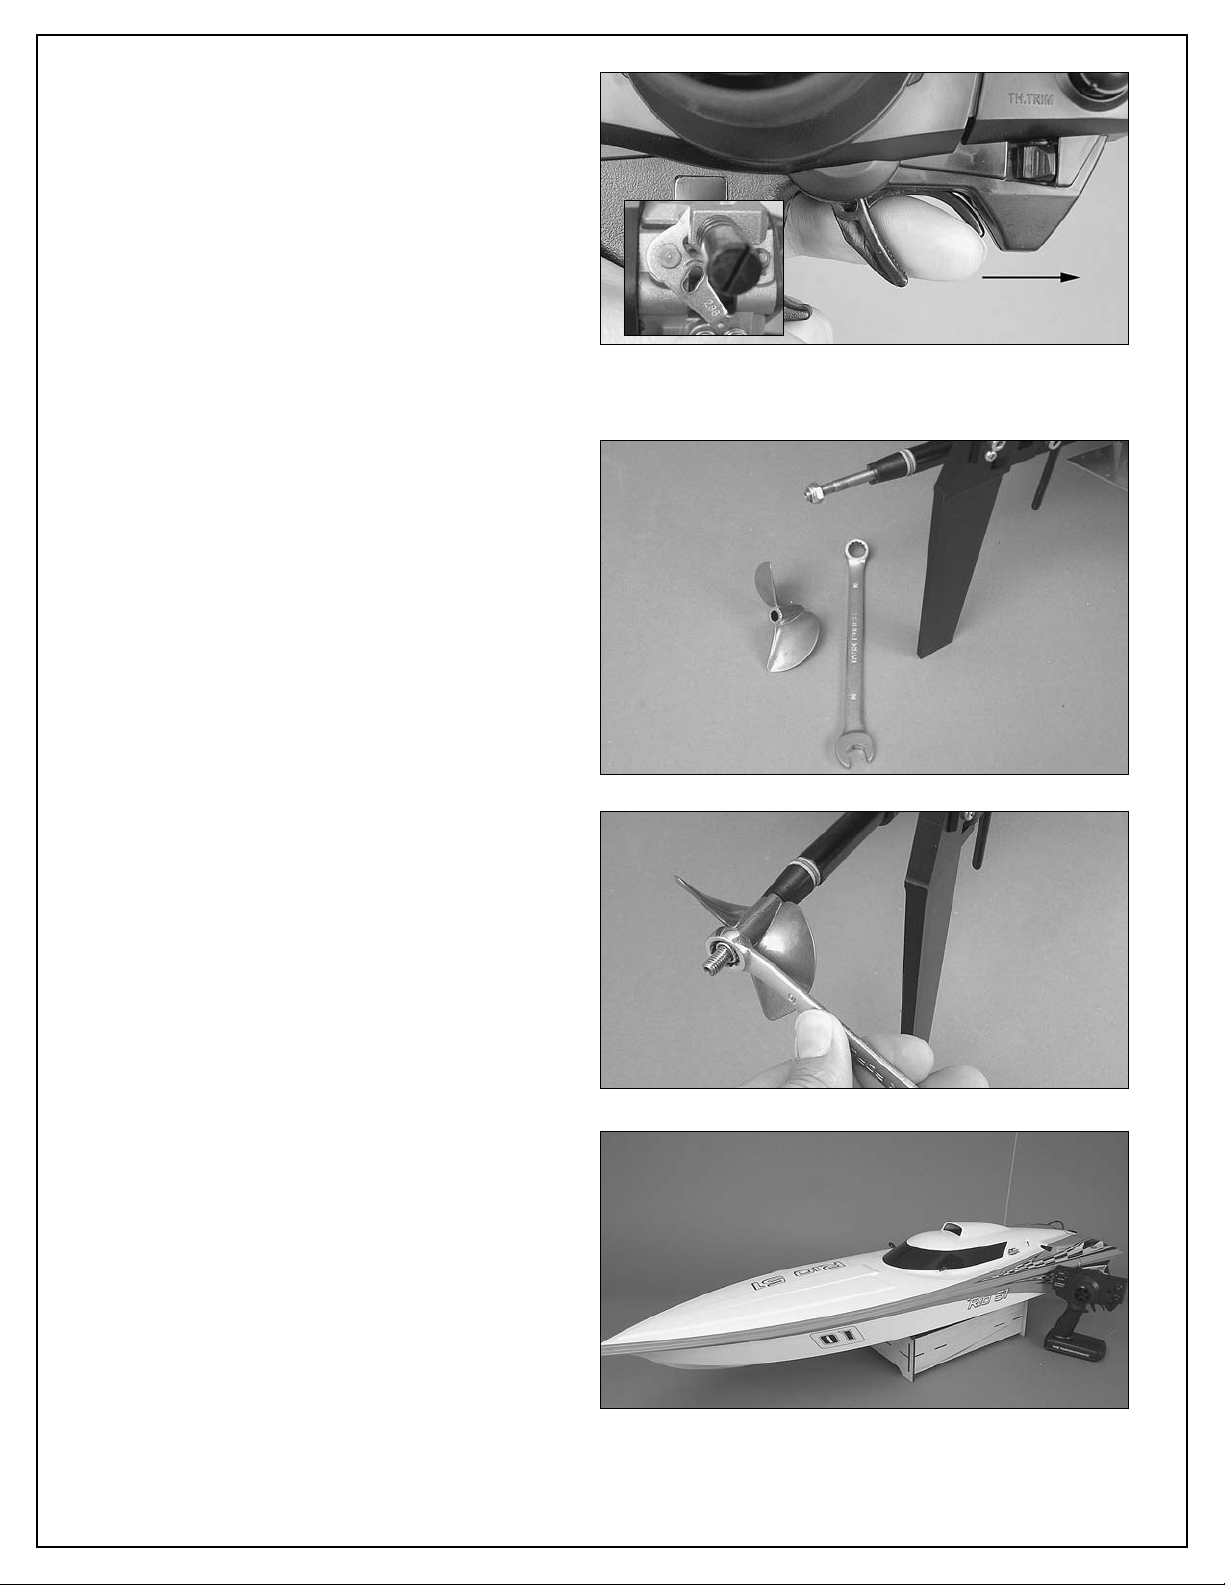
Do not touch the propeller anytime the engine is running.
Pay equally close attention to items such as loose clothing,
shirtsleeves, ties, scarves, long hair or anything that may
become entangled in the spinning prop. If your fingers,
hands, etc. come in contact with the spinning propeller,
you may be severely injured.
The speed and mass of this boat can inflict property
damage and severe personal injury if a collision occurs.
Never run this boat in the presence of swimmers or where
the possibility of collision with people or property exists.
Model engines generate considerable heat. Do not touch
any part of your engine until it has cooled. Touching the
muffler, cylinder head, or exhaust header may result in a
serious burn.
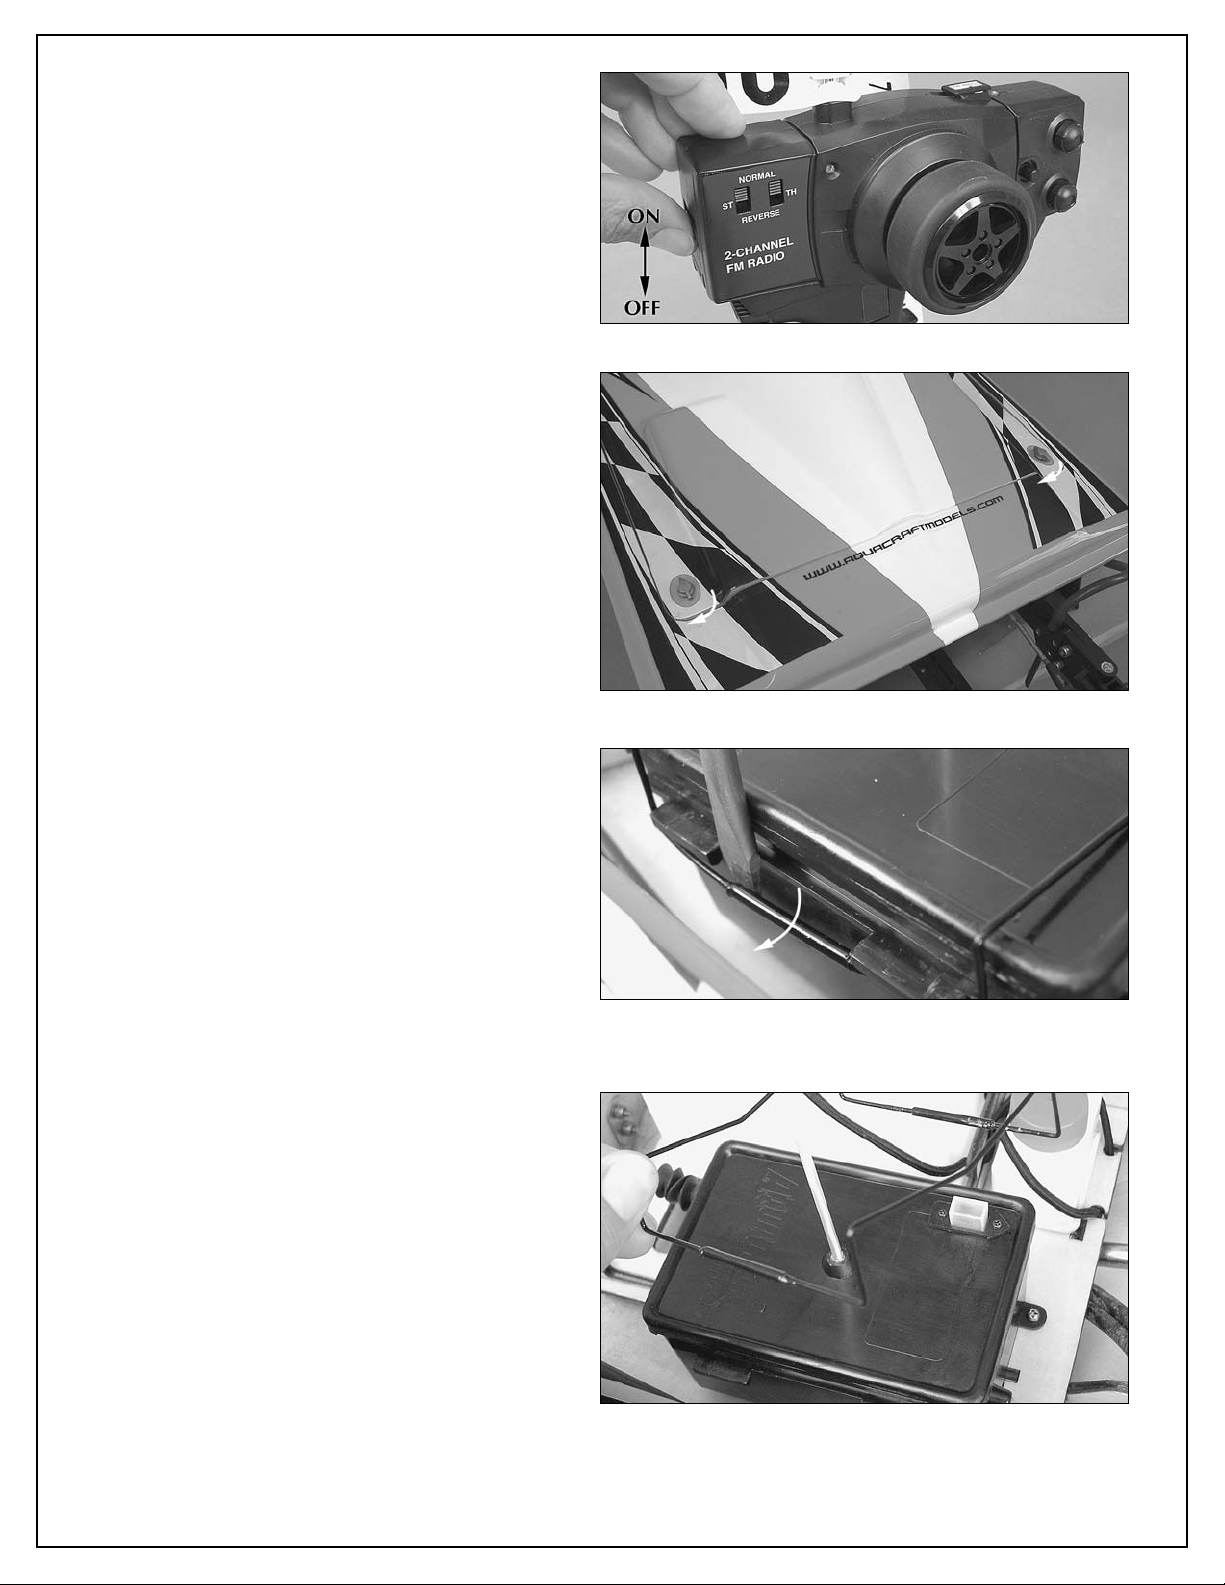
This boat is controlled by radio signals, which are
susceptible to possible interference from other R/C
transmitters, paging systems, or other electrical noise.
Before turning your radio transmitter and receiver on,
make sure no one else in the area is operating a radio on
the same frequency (channel).
Gasoline is poisonous. Do not allow it to come into contact
with the eyes or mouth. Always store gasoline in an appropriate
labeled container and out of the reach of children!
Gasoline is highly flammable. Keep it away from open
flame, excessive heat, sources of sparks, or anything else
that might ignite it. Do not smoke or allow anyone else
to smoke in close proximity to open gasoline containers.
Make sure that gas lines are in good condition so that
gasoline will not leak onto a hot engine causing a fire.
Never operate your engine in an enclosed space. Model
engines, like automobile engines, exhaust deadly carbon
monoxide. Run your engine only in an open area.
R/C models produce vibrations which will cause screws,
nuts, bolts, etc, on your model to become loose over time.
It is important to make sure that all hardware is secure
before operating your model.
In the event that weeds become entangled in the propeller,
stop the engine before attempting to remove them.
If your Rio 51 should happen to stall, water currents will
slowly carry it to shore. The bad news is that the boat
could be carried to the opposite shore. When surveying
areas to run your Rio 51, keep variables in mind such as
wind direction, size of the lake, etc. It is not advisable to
run R/C boats on any free-flowing bodies of water such as
creeks or rivers.
It’s a good idea to use eye protection when starting and
running your Rio 51.
SPECIFICATIONS
RIO 51 BOAT SPECIFICATIONS
51.5" long [130cm]
57" over all length [145cm]
13.5" beam [34cm]
8" tall [21cm]
13" overall height [33cm]
13.75 lbs (220oz) [6.372 Kilo]
26 oz fuel capacity [768cc]
80 dB operating level
30 minute run time per tank
FUJI-IMVAC BT-28M ENGINE SPECIFICATIONS
Stroke: 1.182 in [30mm]
Bore: 1.357 in [34.5mm]
Displacement: 28cc (1.7 cubic in)
Horsepower: 3.5
Ignition Style: Spark
RPM: 10,000
Fuel: Gasoline/Oil mix 32:1
Weight: 3.2 lb [1450g]
RADIO SPECIFICATIONS
Transmitter: Tactic™TTX210 FM with servo reversing
and dual rate functions
Receiver: Tactic TRX310 FM
Servos: Tactic TSX200 Throttle servo
(56 oz-in at 6 volts)
Tactic TSX201 Steering servo
(90 oz-in at 6 volts)
2

WARRANTY SERVICE
AquaCraft will warrant your Rio 51 for 90 days after
purchase from defects in materials or workmanship of
original manufacture. AquaCraft, at their option, will
repair or replace at no charge the incorrectly made part.
This warranty does not cover damage caused by crash,
abuse, misuse, alteration or accident. To return your boat
for repairs you need to provide proof of purchase. Your
store receipt or product invoice will suffice.
IN NO EVENT SHALLTHE PURCHASER BE ENTITLEDTOANY
INCIDENTAL, SPECIAL, INDIRECT OR CONSEQUENTIAL
DAMAGES, WHETHER RESULTING FROM THE USE, MISUSE
OR INABILITY TO USE THE PRODUCT OR FROM DEFECTS
IN THE PRODUCT.
This warranty gives you specific legal rights and you may
also have other rights, which vary from state to state.
FUJI-IMVAC ENGINES BT-28M
3-YEAR LIMITED WARRANTY
USA AND CANADA
FJIG0128 BT-28M
Manufactured by FUJI-IMVAC INC.
Worldwide Distributor (except Japan): Hobbico, Inc.
Champaign, IL 61826 USA
http://www.fuji-imvac.com
Fuji-Imvac Engines warrants this engine to be free from
defects in materials and workmanship for a period of three
(3) years from the date of purchase. During that period, Fuji-
Imvac Engines will, at its option, repair or replace without
charge any engine deemed defective due to those causes.
The warranty does not cover damage caused by customer
disassembly, tampering, use of substandard fuel, use of
incorrect accessories (spark plug, prop, etc.), or any use of
the engine for which it is not specifically intended. Such
uses will automatically void the warranty. If there is damage
resulting from these causes within the stated warranty
period, Fuji-Imvac Engines will, at its option, repair or
replace it for a service charge not greater than 50% of the
current manufacturer's suggested retail list price.
For service on your Fuji-Imvac Engines product, either in
or out of warranty, please send it post paid and insured
to Hobby Services. Along with your engine and proof
of purchase date, please include a complete written
explanation detailing the problem(s). Please include your
name, return address and daytime phone number so that
you may be reached if needed.
Outside USA and Canada, contact local importer for
warranty information.
Hobby Services
3002 N. Apollo Drive, Suite 1
Champaign, Illinois 61822
Attn: Service Department
Phone: (217) 398-0007
9:00 am - 5:00 pm Central Time M-F
E-mail: hobb[email protected]
STANDARD REPAIR SERVICE
After the 90-day warranty has run out, you can still have
your Rio 51 repaired for a service fee by the experts at
AquaCraft. To speed up the repair process, please follow
these four simple steps:
IMPORTANT NOTE: For standard repair service you must
specify whether you wish the charges to be billed COD or
if you wish to be notified of the charges so you can send
a check.
1. It is best (recommended) to return the ENTIRE system,
boat, radio and engine.
2. Make sure batteries are removed from the transmitter
and receiver. Also make sure any gas and oil is drained
from the tanks.
3. Send written instructions which include a list of all items
returned and a THOROUGH explanation of the problem or
problems needing service. Be sure to include your return
address and daytime phone number. If you have access to
e-mail please provide us with your e-mail address to help
speed communication.
4. Send to the address as follows:
Hobby Services
3002 N. Apollo Drive, Suite 1
Champaign, Illinois 61822
Attn: Service Department
BOAT TERMINOLOGY
BOW: The front of the boat.
STERN: The back of the boat.
PORT: This is the left side of the boat when aboard and
facing the front (bow). An easy way to remember this is
that port and left both contain four letters.
STARBOARD: This is the right side of the boat when aboard
and facing the front (bow).
HULL: The body of the boat.
DECK: The top of the boat.
TRANSOM: The back of the boat.
KEEL: The center of the bottom of the boat.
STRAKE: Lift rail(s) located on the bottom of the boat.
RUDDER: The hinged vertical plate mounted at the stern
that controls steering.
STRUT: The propeller support bracket mounted on the
transom of the boat.
3

4
PREPARING TO OPERATE YOUR RIO 51
SPARK PLUG
The recommended spark plug is a NGK CMR6A (FJIG7475).
To avoid possible engine damage, do not use any other
type of spark plugs. The plug gap should be .025" to .030”.
If the plug gap is incorrect, adjust it with a spark plug
gapping tool. This spark plug uses a 5/8” [16mm] spark
plug wrench to remove and install the plug.
GASOLINE
Your Fuji-Imvac BT-28M engine requires a 32:1 gasoline
to 2-cycle oil mix ratio for best engine performance and
sustained engine life.
Follow the mixing direction on the oil container. Always
use high-quality oil intended for 2-cycle engines. Prepare
only the amount of gasoline oil mix needed. Aged gasoline
could damage the engine and cause it to overheat. We
find that gasoline mix over 3 months should be discarded
and replaced.
Use only low octane, alcohol-free gasoline. The carburetor
diaphragm will gradually deteriorate if you use gasoline with
alcohol. You will need to replace the diaphragm after about
80 hours of operation if you use gasoline with alcohol.
Gasoline can go bad. Store your gasoline out of the
sunlight and in a cool place. Bad gasoline is one of the
most difficult problems to diagnose in engines. If you have
tried everything you can think of to remedy an engine that
is not running correctly, try using some fresh gas/oil mix.
BREAKING IN THE ENGINE
To ensure long life and good performance from your
Fuji-Imvac BT-28M Marine engine, you MUST break it in
properly. To break-in your BT-28M Marine, you need to
run the boat for about an hour with a rich needle setting.
Patience is important here; the boat will run slowly during
the break-in process and the engine’s output power will
increase gradually over the first few tanks. Note: Please do
not use a hanging I-V bag style water cooling system for
breaking in your engine. It is best to get the boat on the
water running to break in your engine.
Do not run at full power (full throttle) for extended periods
of time while breaking in your engine. It’s best to break in
the engine using a variety of throttle settings.
Make sure that the engine has adequate cooling. With the
boat in motion, look at the port side of the boat for water
spraying out the cooling exit. It’s a good idea to get in the
habit of looking for water exiting the cooling exit each and
every lap.
THE FOLLOWING TOOLS ARE REQUIRED (NOT INCLUDED)
TO ASSEMBLE AND INSTALL THE BATTERIES IN YOUR RIO 51
❏5.5mm Nut Driver (HCAR1112)
❏7mm Nut Driver (HCAR1116)
❏3mm Hex Driver (HCAR1156)
❏#2 Phillips Screwdriver (HCAR1024)
❏#2 Slotted Screwdriver (HCAR1002)
❏10mm Wrench
NECESSARY COMPONENTS FOR OPERATING YOUR RIO 51
❏Small personal retrieval system. This might be as simple
as a tennis ball tied to the end of a fishing reel, or a
fully equipped AquaCraft Hammer EP RTR (AQUB10**)
towing a tennis ball behind a 10 foot line. Better yet,
use a small Jon boat and personal flotation device (PFD,
preferred!) so you can row out and properly retrieve
your boat.
❏Good friend or buddy to help you start and launch the
boat. Besides, R/C boating is the most fun when you
have a friend with you.
❏12 “AA” batteries
❏Approved one gallon gasoline fuel can (with standard
pump gas)
❏2-cycle oil
❏Graduated mixing cups (GPMR8056)
❏Small funnel
❏GrimRacer™50 weight cable oil (AQUB9550)
❏GrimRacer Speed Grease drive cable lubricant (AQUB9500)
EXTRA SUPPLIES YOU MIGHT WANT TO HAVE WITH YOU
DURING THE OPERATION OF YOUR RIO 51
As with any hobby, it is a good idea to assemble a useful
collection of tools and accessories to bring along when
you head out to the pond. Here are some items you will
want to keep handy:
❏Extra “AA” Batteries
❏RX Balloons (AQUB9504)
❏ Threadlocking Compound (GPMR6060)
❏Pliers (HCAR0625)
❏Hobby Knife (HCAR0109)
❏Metric hex wrench set (HCAR0521)
❏Stubby Metric hex wrench set
❏5/8 [16mm] inch spark plug wrench
OTHER USEFUL ITEMS TO HAVE ON HAND:
❏Hobbico Duster™compressed air (HCAR5500)
❏Waders or rubber boots
❏Paper Towels
❏Spray-On Cleaner
❏Sunglasses
❏Sunblock
❏Folding table
❏Lawn chairs
❏First-Aid kit
❏Cooler with plenty of ice and soda
❏Canopy or shelter
4

555
FINAL ASSEMBLY & OPERATION
Some decals are installed on your boat for you. Extra decals provided in your kit allow you to customize your Rio 51.
Simply peel and stick! See the photos on the box for decal placement example.
TRANSMITTER FEATURES
1. ON/OFF Switch
2. Servo Reversing Switches
3. Power Light (LED)
4. Dual Rate Adjustment Knob
5. Steering Trim Knob
6. Throttle Trim Knob
7. Throttle Trigger
8. Steering Wheel
INSTALLING THE TX BATTERIES
❏ 1. Slide off the battery door on the bottom of the
transmitter.
❏ 2. Install eight (8) fresh “AA” batteries into the bottom of
the transmitter in the configuration molded into the
battery holder.
❏ 3. Reinstall the battery door onto the bottom of the
transmitter.

❏ 4. Turn the transmitter “ON” using the switch on the
transmitter’s left side. The battery level indicator light
(LED) should glow red. If the light is flashing, the batteries
are low and need to be replaced.
INSTALLING THE RX BATTERIES
❏ ❏ 1. Locate the cowl locks at the rear of the hatch.
Turn the lock 1/4 turn to remove the hatch.
❏ 2. Using a standard screwdriver, remove the wire
radio box lid retainer by gently prying the wire over
the holding tabs on the side of the box.
❏ 3. Remove the box lid retainer and set to the side.
6

❏ 4. Slide the receiver antenna into the top of the radio
box cover by gently pushing it in place.
❏ 5. It is only necessary to push the antenna in to the
point it is even with the back side of the cover.
❏ 6. Place four (4) new “AA” batteries into the receiver
battery holder. Be sure to follow the polarity diagram
molded into the battery holder.
❏ 7. Replace the battery holder inside the radio box. Make
sure that it will not interfere with any of the control linkages.
7

88
❏ 8. Replace the radio box cover and radio box lid retainer.
Use your screwdriver to install the retainer.
❏ 9. Using the screwdriver, carefully pry the retainer over
the tabs.
INSTALLING THE RUDDER BLADE
❏ 1. Remove the 3mm and 4mm nuts and bolts from the
rudder pivot bracket.
❏ 2. Insert the rudder into the rudder control arm assembly
as shown. Replace the 4 x 15mm screw and 3 x 15mm screw
and secure them with the 4mm and 3mm nuts, respectively.

CHECK THE RADIO SYSTEM
❏ 1. Stand behind the boat with both the transmitter
and receiver turned on. Rotate the steering wheel to the
left. The back of the rudder should move to the left.
❏ 2. Move the steering wheel to the right. The back
rudder should move to the right. If this is not the case,
simply move the steering servo reverse switch located
on the front of the transmitter (2) to the other position.
❏ 3. Squeeze the throttle trigger on the transmitter; this
should open the throat of the carburetor. This is the proper
throttle arm position for full throttle.
❏ 4. Idle position.
9

❏ 5. Off or stop position. If this is not the case, move the
steering servo reverse switch located on the front of the
transmitter (2) to the other position. Note: You might have
to readjust the position of the throttle arm of the throttle
servo to properly get the carburetor to match the pictures.
INSTALLING THE PROPELLER
❏ 1. Use a 10mm wrench to remove the prop nut from the
stub shaft.
❏ 2. Install the propeller on the shaft; replace the nut,
making sure it is tight.
❏ 3. Assembly is now complete.
10

11
STARTING THE ENGINE AND LAUNCH
PROCEDURE
There are several simple steps to starting the engine. It is
a good idea to have another person hold the boat in place
while you start the engine.
STARTING PROCEDURE
IMPORTANT: The propeller will begin spinning as soon
as the engine starts! Be certain that the propeller is
unobstructed; failure to do so will damage the prop.
❏ 1. Carefully fill the fuel tank with the appropriate fuel/
oil mix.
❏ 2. Carefully fill the oil tank with GrimRacer Cable
Oil (AQUB9550).
❏ 3. Turn on the transmitter and receiver (in that order).
❏ 4. Depress the priming bulb until you see fuel enter the
clear bulb.
❏ 5. Remove the spark plug wire from the top of the
spark plug.
❏ 6. Close the choke and pull the recoil starter briskly
five (5) times.
❏ 7. Open the choke and replace the spark plug wire.
❏ 8. Open the oil shut off clip.
❏ 9. Pull the recoil starter to start the motor.
❏ 10. If your engine does not start, repeat the starting
procedure, making sure fuel is in the fuel bulb.
❏ 11. With the engine started, put the hatch cover back in
place. Secure the cowl by pushing down on the cowl locks.
BE CAREFUL NOT TO TOUCH THE SPINNING PROP!
TIPS & HINTS FOR DRIVING YOUR RIO 51
The ST. D/R knob (4) located on the front of the transmitter is
the steering dual rate adjustment. Turning the knob increases
or decreases the rudder movement. Your Rio 51 does not
require a lot of steering movement to allow the boat to turn.
Keep this in mind as you learn to drive your boat.
Due to prop rotation, it is the nature of model boats to
make smoother right turns than left turns. Unlike full-scale
boats, model boats like the Rio 51 race and turn best in a
clockwise direction.
Launch the boat in water that is at least 12" deep and free
of obstacles. Be sure to stay clear of the spinning prop
during the launch. It is best to have a buddy launch your
boat for you.
Slowly advance the throttle and note if the boat has a
tendency to turn right or left. Adjust the steering trim knob
(5) on your transmitter until the boat runs in a straight line
when the steering wheel is at neutral.
When finished running, push back on the throttle trigger
to stop the engine. Retrieve the boat, remove the cowl,
lock the oil shut off clip and turn off the receiver and
transmitter (in that order).
Take caution to not overheat the engine. Keep an eye on
the water outlet on the port side of the boat. You should
see water exiting the outlet when the boat is underway.
It is normal for the water to take a few seconds to start
flowing after launch.
If your engine should ever become submerged, remove the
spark plug and pull the handle of the recoil starter several
times until water has been expelled from the engine. Once
you are positive that all water has been removed from
the engine and the spark plug is completely dry, reinstall
the spark plug and perform the starting procedure. This
may take several attempts. Make sure you get the engine
running again as this will remove any remaining water
from the inside of the engine.
Be sure to keep your driveshaft well-lubricated. Failure
to do so may cause the cable to break. Remove and
re-lubricate the driveshaft after each day of running.
Do not use silicone fuel line as gasoline line. Use vinyl or
neoprene rubber gasoline line instead.
Total run time of the Rio 51 is approximately 25 to 35
minutes (assuming you begin with a full tank of fuel).
When you notice an increase in power, it means the fuel
tank is nearly empty and it’s time to head for shore.
Windy conditions cause rough water that will affect the
performance of your Rio 51 and increase the chances of
capsizing. Take it easy in rough water until you learn to
drive the boat.
ENGINE ADJUSTMENTS
WARNING: Never run an R/C boat engine at full throttle
(over rev) with the boat out of the water. Damage can
result.
Always make high- and low-speed needle adjustments when
the boat is out of the water and the engine not running.
Your Fuji-Imvac BT-28M comes preset from the factory, but
due to altitude changes and the fuel you are using, your
carburetor might need adjusting.
11

12
Understanding your carburetor and learning how to adjust it:
A. High-Speed Needle (HSN). The needle located on the
right side of the carburetor when viewing the boat
from behind.
B. Low-Speed Needle (LSN). The needle located on the
left side of the carburetor.
C. Idle Adjustment Needle. It is located near the top of
the carburetor.
D. Primer Bulb, located under the carburetor.
E. Choke lever, located on the front of the carburetor.
F. Fuel Inlet.
G. Fuel Return.
It is not necessary to change the needle settings if the
engine runs smoothly. Normally only the (A) high-speed
needle (A, HSN) will need adjustment from time to time
and only by a small amount.
Factory carburetor settings are:
A. HSN 1-1/4 turns from the closed position
B. LSN 2-1/2 turns from the closed position
If you run into problems tuning your engine settings, it is best
to re-set the needles to the above settings and start over.
IDLE STOP ADJUSTMENT
IMPORTANT: The idle adjustment needle (C) is set from
the factory to allow the boat to shut off when the throttle
trigger is pushed back. Do not adjust your idle using the
idle adjustment needle located on the motor. You must
use the throttle trim knob (#6, TH.TRIM) located on the
front of the transmitter to set the idle.
TROUBLESHOOTING
Problem:
The engine hesitates when accelerated rapidly.
The RPM increases at idling.
Solution:
Your (B) LSN is adjusted to lean. Open it up about 1/8th of
a turn and try again.
Problem:
The idle is not steady.
Solution:
Your (B) LSN is adjusted is too rich. Close it 1/8th of a turn
and try again.
Problem:
Engine stops at full throttle.
Engine sags when accelerated rapidly.
Engine sags with the boat at full speed
Solution:
Your (A) HSN is too lean. Open it up 1/16th of a turn and
try again.
Problem:
Your engine does not reach full RPM.
Carbon build-up appears consistently on your spark plug.
Solution:
Your (A) HSN is too rich. Turn it in 1/16th of a turn and
try again.
MAINTAINING THE RIO 51
When you are through operating your boat for the day,
be sure to perform these basic maintenance procedures.
This will prolong the life of the Rio 51 and help to ensure
trouble-free running.
ENGINE MAINTENANCE AND STORAGE
After a day of running, start your engine and choke it
while it is running to get a lot of fuel into the engine. Run
it for about 30 seconds, constantly choking the engine.
Afterwards it is a good idea to cover the inlet to the
carburetor to keep foreign materials out and moisture
from entering the motor.
For long term (winter) storage it is a good idea to flood the
engine as described above as well as coating the inside of
the engine with GrimRacer After Run Oil 8 oz (AQUB9551)
Before transporting your model, remove all of the gasoline
from the tank and lines and make sure your oil line shut
off clip is locked.
RADIO BOX MAINTENANCE
When finished running, open the radio box and leave the
radio box lid off overnight to allow any water to evaporate.
Should moisture gain access to the radio box, all
connections should be dried thoroughly. Hobbico
“Duster” Compressed Air (HCAR5500) will provide a blast
of air capable of blowing moisture out of connectors.
1212

BASIC MAINTENANCE
Remove standing water by pulling out the drain plug and draining away any water that might have entered the hull.
Remove the hatch cover. Open the radio box, remove and toss out the old batteries.
Remove the driveshaft by loosening the two 4mm screws
from the outer strut housing.
Slide the inner strut assembly with shaft out of the boat.
Wipe away any oil and grease.
Re-grease the shaft using GrimRacer Speed Grease.
Re-install the shaft and inner strut housing, making sure
the two 4mm screws are tight.
Wipe down the entire boat, inside and out, with spray-on cleaner and a paper towel. If water is in the boat for a week or
so, the water vapor will get into the engine, potentially causing the piston ring to rust.
Leave the cowl off the boat overnight to let any water evaporate from the hull.
1313

14
HULL TUNING TIPS
As an initial starting point, try running the Rio 51 with a
neutral propeller thrust angle. This can be checked by
placing a straightedge along the bottom of the hull and
checking its relation to the prop shaft. To change the
thrust angle use a 4mm Allen wrench to loosen the two
large screws on the side of strut mounting brackets.
Once loose you can rotate the strut up or down depending
on the type of handling you are looking to achieve.
Neutral Propeller Thrust: This setting provides thrust without
letting it affect the ride attitude of the hull (the bow’s
tendency to ride up or down).
Positive Propeller Thrust: This setting causes the bow to
run high. This makes the boat run faster but looser at the
same time. In rough water this can cause the boat to blow
off (crash by having the bow of the boat lift off the water).
Negative Propeller Thrust: Causes the bow to run low (flat
on the water). This reduces speed and may cause the boat
to stuff (crash by having the boat’s bow tuck under water).
14

15
ADJUSTING THE TRIM PLATES
You can also use the trim plates to adjust the ride of the
boat. Bending the plates down will help keep the boat
from proposing (the front bouncing up and down). Bending
them up will make for a looser (faster) ride but at the
same time make the boat unstable. It is best to make
small adjustments one at a time.
You can use a large pair of pliers to adjust the trim plates.
Remember, just tweak the plates as a very small adjustment
can drastically change the way the boat runs.
15

1616
BALANCING THE PROPELLER
Always use a balanced prop. An unbalanced prop will
cause high levels of vibration that may be harmful to your
driveshaft and engine.
WARNING: Make sure you use a dust mask anytime you are
working on your propeller. Ingesting airborne particles from
the propeller is hazardous to your health.
Go to www.aquacraftmodels.com to learn more about
balancing your propeller.
RACING YOUR RIO 51
Although it is very enjoyable to run the Rio 51 by yourself
or with a buddy, the real fun and excitement of R/C
boating is experienced when you get involved in racing.
Racing against other boats is much different than running
your boat alone. The following suggestions will hopefully
provide helpful strategies when racing a model boat.
A good set-up for running alone may not be the best for
racing. Race water conditions create challenges different
from running alone and water conditions constantly
change during a race. Five or six boats racing against one
another will create rough water on the race course. To
compete successfully, it may be necessary to “tighten” the
ride characteristics. This can be accomplished by adjusting
the angle of the strut or trim plates.
Wakes caused by other boats can upset the balance and
ride characteristics of even a well trimmed model boat.
When running down the straight-aways, don’t follow in
another boat’s wake. Wakes generated by other boats
while entering and negotiating a corner are especially
dangerous. Cutting across a wake when entering a corner
can cause the boat to “hook” (spin out).
Racing other boats through a corner may be a competitor’s
greatest challenge, especially the first corner after the
start of a race. The boat entering the corner first has the
task of holding its position (often called “holding your
lane”) through the corner. The following boats must then
attempt to hold their lanes, too.
NATIONAL MODEL BOATING
ORGANIZATIONS
There are three national model boating organizations in
the United States and Canada:
APBA or American Power Boat Association
(R/C Boat Category)
www.apba-rcboating.com
IMPBA or International Model Power Boat Association
www.impba.net
NAMBA or North American Model Boat Association
www.namba.com
Each of these organizations has its own rules governing
model boat racing, sanctioned events and recognized
records. Organized model boat racing is offered at both
regional and national levels. Location of clubs, race dates and
locations, membership applications, and other information
can be obtained through their respective web sites.
Here are some more good sources of information
regarding all aspects of model boat operation:
International Waters
www.intlwaters.com
Jim’s RC Boat Dock
www.jrcbd.com
Of course, racing does not have to be an organized and
sanctioned competition to be fun. Small informal races
can be very exciting without the stress that comes with
formal events.
SUGGESTIONS FOR SETTING UP A SIMPLE RACECOURSE
• Make 2 to 4 simple and inexpensive “marker buoys”
with empty milk jugs, string, and heavy objects for
anchors, similar to the above sketch.

17
• Placethe buoyssimilartotheabovesketch. Note:Theabove
patterns are not based official standards. You may set up
race courses any way you desire, using your imagination to
make the races more interesting. Usually, smaller courses
will provide more action and excitement.
• The length of the races can be determined by a set
number of laps around the buoys (for example, the first
boat to complete 6 laps is the winner); or by time (for
example, whoever is leading at the end of two minutes
is the winner.
Good Luck and Great Boating!

18
Order # Description
AQUB6207 Cowl – Blue
AQUB6208 Cowl – Yellow
AQUB6209 Cowl – Red
AQUB6323 Decal Sheet
AQUB6420 Cable Oiler Collar
AQUB6504 Iso Engine Mount
AQUB6905 Fuel Tank w/Cap
AQUB6906 Oil Tank w/Cap
AQUB6907 Oil line Clip
AQUB7767 Prop Nut
AQUB7872 1/4" Flex Cable Propshaft
AQUB7893 1/4" Engine Cable Coupler
AQUB8608 Radio Box
AQUB8609 Radio Box Spring Wire
AQUB8715 Rudder Linkage
AQUB8716 Rudder Throttle Ball Stud
AQUB8717 Rudder Blade
AQUB8718 Rudder Hinge Pin
AQUB8719 Rudder Bracket
AQUB8720 Rudder Arm
AQUB8721 Rudder Transom Bracket
AQUB8722 Rudder Mount Bolt / Nuts
AQUB8804 Strut Thrust Washers
AQUB8806 Strut Housing
AQUB8807 Inner Strut Assembly
AQUB8809 Strut Mounting Brackets
AQUB8851 Switch Mounting Plate
AQUB9000 Throttle Cable Bracket
AQUB9001 Throttle Cable
AQUB9050 Tuned Pipe w/O-rings
AQUB9051 Tuned Pipe Water O-rings
AQUB9250 Water Pick Up Assembly
AQUB9251 Water Pick Up Tube
AQUB9252 Water Pick Up Bracket
AQUB9270 Tank Bungee Cord
AQUB9275 Transom Hardwood Mounting Plates
AQUB9523 Rear View Mirrors
AQUB9524 1/4" Drive Dog
AQUB9525 Water Cooled Manifold 26 to 28cc
AQUB9526 Turn Fin Transom Large
AQUB9527 Turn Fin Mounting Bracket
AQUB9528 Trim Plate SS Large
AQUG5102 Fuji-Imvac BT-28M Exhaust Header
AQUB9785 GrimRacer 65 x 100 2-Blade
Metal Prop (Stock)
AQUZ1004 Instruction Manual
Upgrade Components for the Rio 51:
Order # Description
AQUB9787 GrimRacer 67 x 105 3-Blade Metal Prop
FUTM4350 Receiver Switch
DTXM2011 5-cell Receiver Pack (1400mAh 2 on 3 hump)
DXTP4086 Receiver Pack Charger
To order replacement parts for the AquaCraft Rio 51, use the order numbers in the Replacement Parts List that follows.
Replacement parts are available only as listed and can be purchased from hobby shops or mail order/Internet order
firms. Hardware items (screws, nuts, bolts) are also available from these outlets. If you need assistance locating a dealer
to purchase parts, visit www.hobbico.com and click on “Where to buy.” If this kit is missing parts, contact Hobbico
Product Support.
REPLACEMENT PARTS LIST
18
ORDERING REPLACEMENT PARTS

CYLINDER/PISTON/CRANKSHAFT PARTS LIST
Key # Description Stock #
1 Spark Plug NGK CMR6A FJIG7475
2 Cylinder Set FJIG4382
3 Hex Bolt 5x18mm/S (4) FJIG8290
4 Cylinder Gasket FJIG4291
5 Piston Ring (2) FJIG6651
6 Piston Set FJIG6362
7 Piston Pin FJIG3446
8 Piston Pin Retainer (2) FJIG6509
9 Water Jacket Complete FJIG8721
10 Screw 3x8mm FJIG7160
11 Crankshaft Complete FJIG4091
12 Needle Bearing F-910 1.4x8.5mm FJIG6149
13 Woodruff Key 3x13x4.5mm FJIG7660
14 O-ring G45 FJIG6251
15 Spark Plug Cap Assembly FJIG7500
16 O-ring G30 FJIG6252
20 Ignition Coil Complete FJIG7313
28 Hex Bolt 4x18mm/WS (2) FJIG8220
19
REPLACEMENT PARTS
To order replacement parts for the Fuji-Imvac BT-28M, use the order numbers in the Replacement Parts Lists that follow.
Replacement parts are available only as listed. Replacement parts are not available from Product Support, but can be
purchased from hobby shops or mail order/Internet order firms. If you need assistance locating a dealer to purchase
parts, visit www.greatplanes.com and click on “Where to Buy.”
CRANKCASE PARTS LIST
Key # Description Stock #
14 Crankcase Assembly BT-28 FJIG3881
15 Oil Seal TB 12227 (2) FJIG6300
16 Ball Bearing 6001 CE (2) FJIG3080
17 Crankcase Gasket FJIG3921
18 Shim 0.2 FJIG7350
18 Shim 0.3 FJIG7380
24 Magneto Rotor 60mm FJIG5720
25 Washer 8mm FJIG8680
26 Hex Nut 8mm FJIG8520
32 Hex Bolt 5x18mm/S (3) FJIG8290
55 Starter Pulley Assembly FJIG7139
56 Starter Pawl FJIG7141
57 Starter Pawl Spring FJIG7142
FUJI-IMVAC BT-28 MARINE ENGINE EXPLODED VIEWS

ENGINE PARTS LIST
Key # Description Stock #
1 Inlet Manifold Gasket FJIG5481
2 Carburetor Insulator Set FJIG5501
3 Hex Bolt 4x18mm/WS (2) FJIG8220
5 Carburetor Gasket FJIG3111
6 Hex Bolt 5x45mm (2) FJIG8325
7 Small Washer 5mm (2) FJIG8605
9 Carburetor Set WT822 FJIG3286
10 Funnel Complete FJIG7640
RECOIL STARTER PARTS LIST
Key # Description Stock #
0 Recoil Starter Assembly FJIG7149
2 Starter Handle FJIG7143
3 Rope Guide FJIG7144
4 Recoil Starter Body FJIG7145
5 Recoil Spring FJIG7146
6 Rope 3.5x90mm FJIG7147
7 Starter Rope Reel FJIG7148
8 Rope Reel Washer FJIG4721
9 Set Screw FJIG8608
16 Hex Bolt 4x18mm/PS (4) FJIG8221
20
Table of contents
Popular Boat manuals by other brands

Katalyst Marine
Katalyst Marine Katalyst Blokart Edition manual

Green Yahts
Green Yahts Aquaglide owner's manual

CORRECT CRAFT
CORRECT CRAFT Sport Nautique 216 user guide

BENETEAU
BENETEAU SWIFT TRAWLER 42 owner's manual

YAMARIN
YAMARIN 42 Side Console user manual

Wellcraft
Wellcraft Fisherman 180 owner's manual

Yamaha
Yamaha SUPER JET SJ650Q 1991 Service manual

MasterCraft
MasterCraft Pro Star owner's manual

Ship Harbor Yacht Charters
Ship Harbor Yacht Charters RESPITE Operation manual

Yamaha
Yamaha 4 STROKE owner's manual

NorthStar
NorthStar 265 WA - manual

Cobalt Digital Inc
Cobalt Digital Inc 250 BOWRIDER owner's manual